

If you’ve just picked up your Cooper pattern and want to make straps for the messenger bag or backpack, but have never worked with webbing before, this step-by-step tutorial will guide you through the process of creating adjustable straps.
You can use this technique for any type of adjustable strap with a slider… even bras!
To make these straps, you will need some cotton webbing (you can also use nylon, or make your own straps in self fabric) and two slides for each strap. The messenger bag (version 1) needs 2 slides, and the backpack needs 4 slides.
We’ll walk through the process of creating a strap together. For the backpack, you’d just need to repeat the process for the second strap.
For clarity, we’ll refer to the slides as “slide 1” and “slide 2”.

Step 1: Cut a 56″ long piece of cotton webbing for the messenger bag (Version 1), or two 36″ long pieces of cotton webbing for the backpack (Version 2).

Step 2: Slip one end of the webbing over the middle bar of slide 1, pulling 3½” of the webbing through.
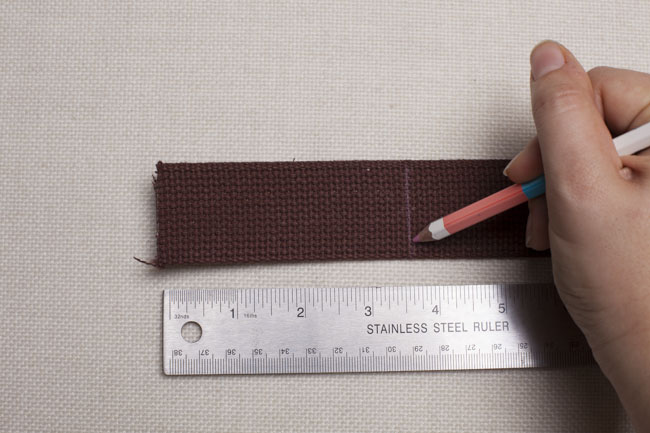
Tip: Mark a line at 3 1/2″ in chalk or pen on both the right side and wrong side of the webbing. This will help you align the slides properly with less fiddling.

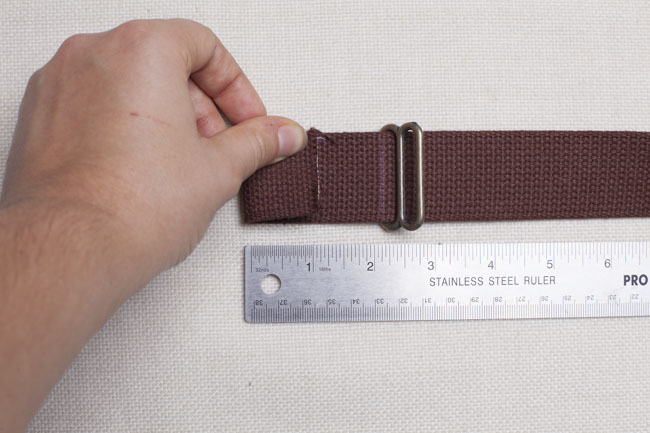
Step 3: Turn strap and slide 1 over. Fold the first inch of the 3½” length over as shown. Press.
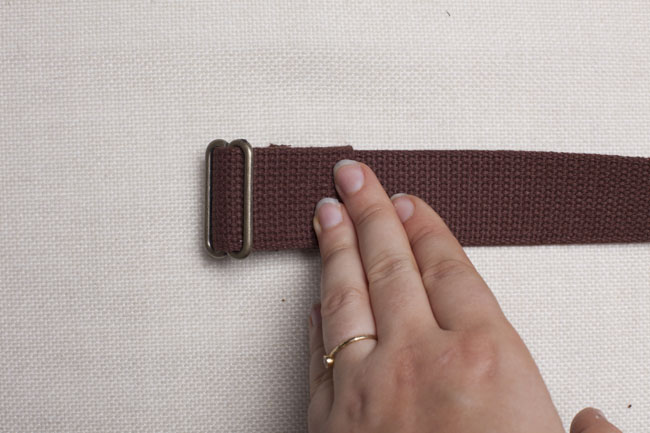
Step 4: Take the folded end and run it over the middle bar and under the outer bar of slide 1.
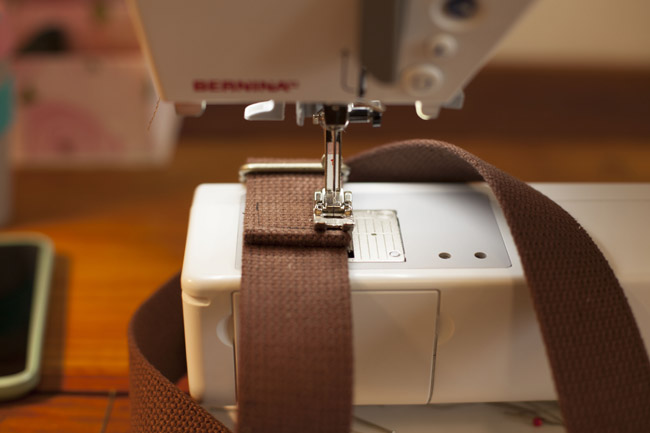
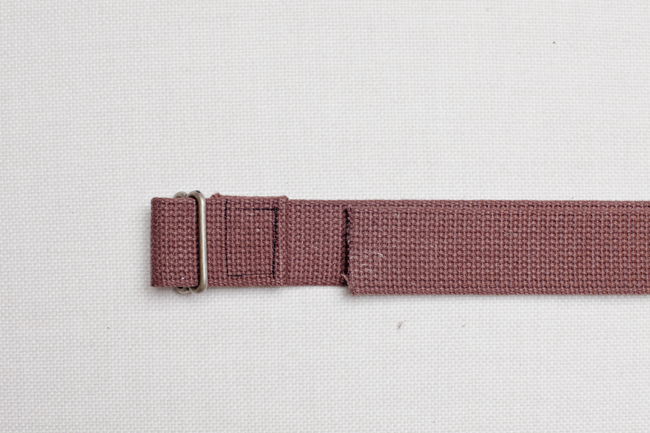
Step 5: Secure the webbing by stitching a 1″ wide rectangle at the folded edge through all layers.

Step 6: Cut a 6″ long piece of cotton webbing for the messenger bag (Version 1), and a 3″ long piece of cotton webbing for the backpack (Version 2). This will be the short end of the strap.
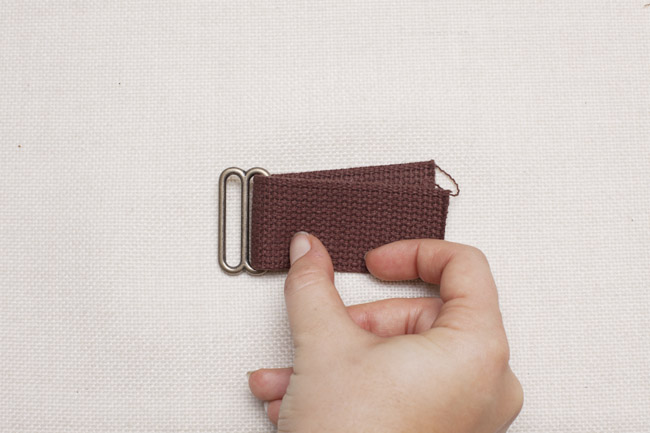
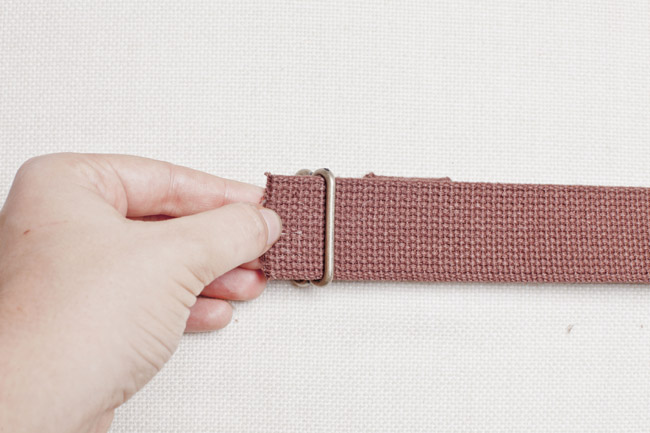
Step 7: Slip the webbing around one of the outer bars of slide 2, aligning the raw edges of the webbing evenly.
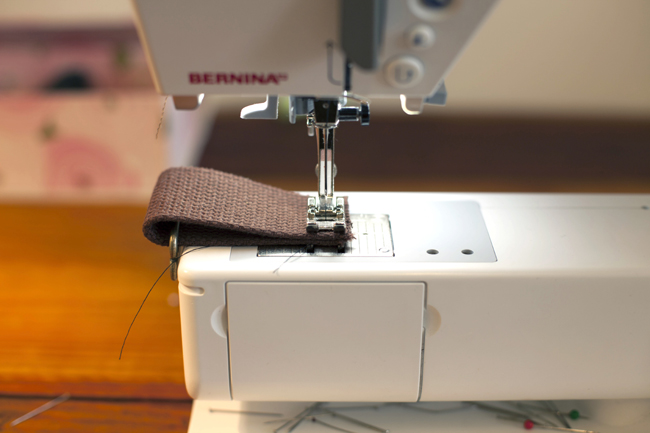
Step 8: Baste the ends of the webbing together.
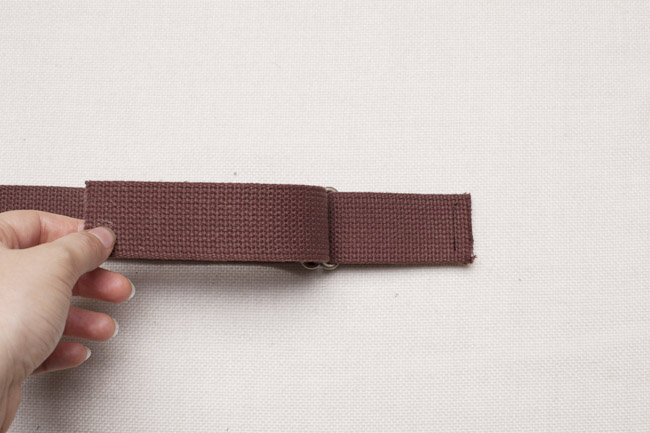
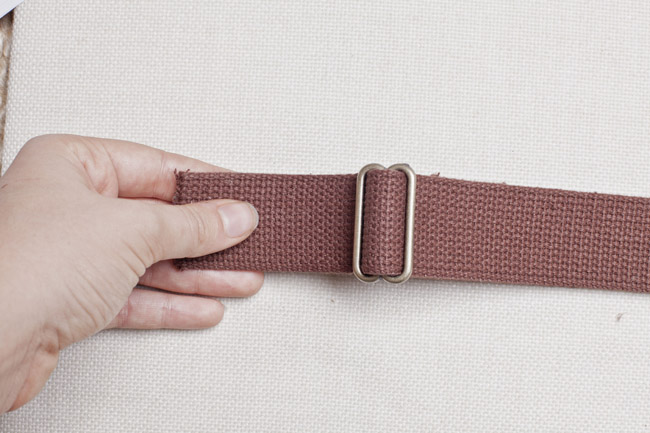
Step 9: Lay both strap pieces completely flat (the folded edge of the longer webbing piece should be facing upward). Slide the raw end of the longer webbing piece under the empty outer bar of slide 2.
Step 10: Fold the raw edge back over itself, toward slide 1.
Step 12: Slip the raw edge under the closest outer bar of slide 1, then over the middle bar and under the second outer bar.
Step 13: If making the backpack (Version 2) repeat steps 1 – 12 for a second adjustable strap.
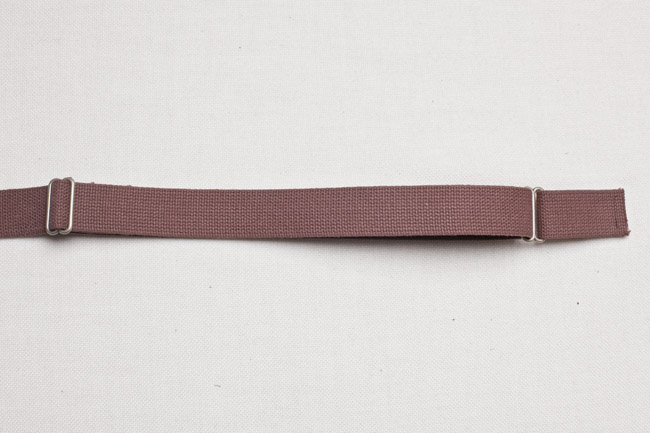
Your straps are complete!