

Today we’ll be going over some techniques for sewing knit fabrics, choosing a size, fitting, and cutting out your pattern pieces.
Sewing with Knits
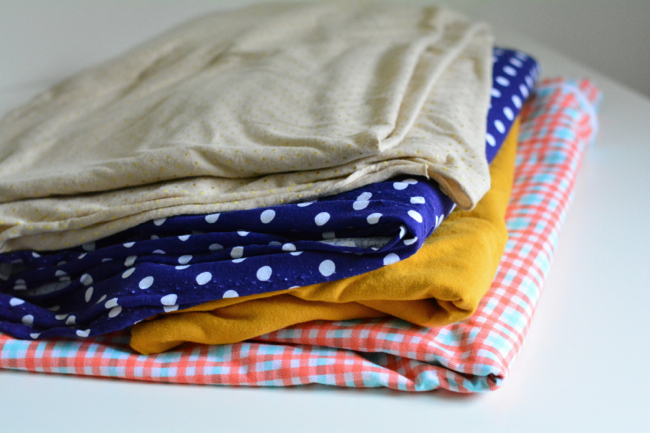
You can make the Moneta using a serger or a home machine. Highlighted below are some important factors to consider when working with knits.
(Sarai also posted a Primer on Sewing with Knit Fabrics over on the Mabel sewalong, so be sure to reference that if you’d like to read up a bit more.)
Stitch choice
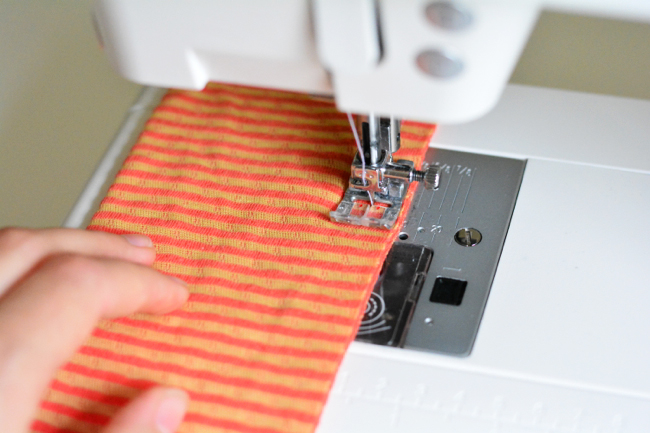
Stitch choice is important when sewing knits. Because the fabric will be stretching as you wear your garment, the seams need to be able to stretch along with it. If they don’t, the thread will break. We certainly don’t want our dresses falling apart as we’re wearing them.
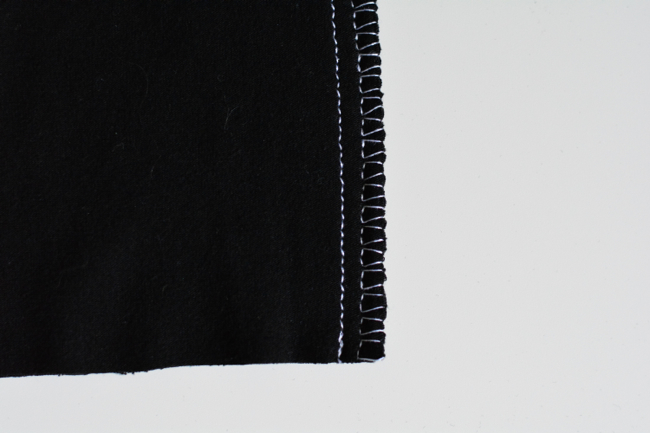
If you’re using a serger, there is automatically stretch built into the seam. The serger will attach, trim and finish every seam as it sews it. Pretty nifty!
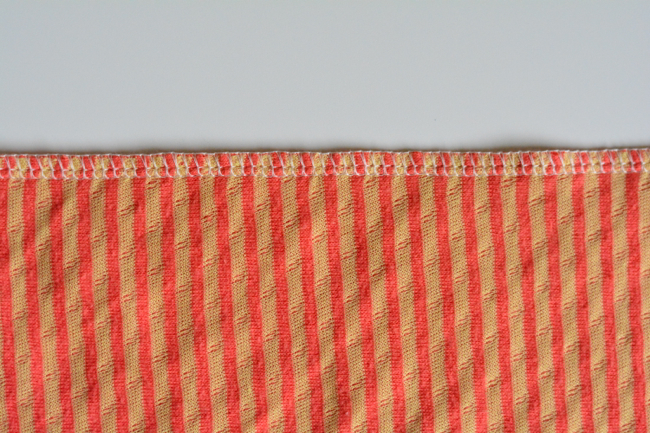
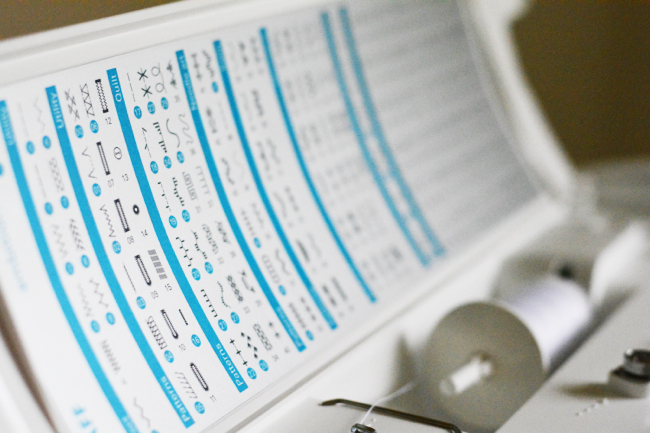
If you’re using a home machine, you can use a zig zag stitch with a narrow width (0.5) and a medium length (2.5 on most machines). This will give the seam enough stretch to expand with the fabric. To make everything look neat and tidy you’ll also want to finish the raw edge of the seam with a separate stitch, like a mock overlock stitch or 3-step zig zag.
Your machine might also have some specific stretch stitches, like a reinforced straight stitch. Consult your manual if you aren’t sure.
Needle Choice
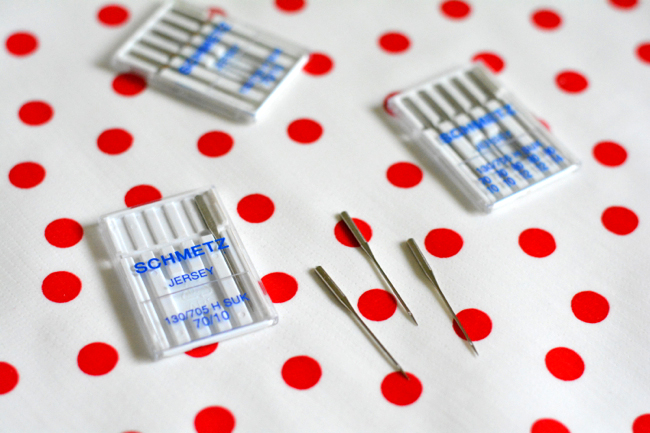
When sewing knits, you should use a ballpoint needle. They are designed to push the threads aside instead of piercing them, which helps prevent runs and skipped stitches. They’re often labeled “jersey needles.” If you see needles labeled “stretch,” these are actually intended more for highly elastic materials (think swimwear).
Schmetz Needles has a great page with lots of needle types and explanations listed. I find it to a be pretty useful reference.
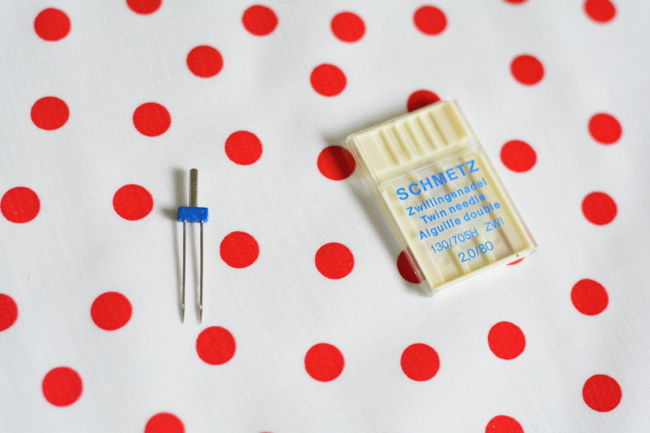
Unless you have a coverstitch machine, you will need to use your standard machine for hemming. A twin needle is a great hemming option. Look for one that’s a little wider (4mm or 6mm) to give you the coverstitch look you’re used to seeing on knit garments. You’ll actually thread two separate threads through your machine, one through each needle point. You can buy ball point twin needles, but if your fabric store only has universal that will work too.
For more info on hemming with a twin needle check out this tutorial on The Coletterie.
Seam allowances
As most overlock machines are designed to sew at 3/8”, the seam allowances on knit patterns may be smaller than the 5/8″ you’re used to on woven patterns. The seam allowance for the Moneta is 3/8”. Be sure to keep this in mind while sewing.
Serger Tips

If you are new to the world of serging, welcome! Sergers can be a little more daunting than a standard machine, so here are some tips to help your serging go more smoothly:
Follow the manual when threading. It is very important to thread a serger correctly. The separate threads must be threaded in the right sequence for everything to work properly. Many newer machines have color coding and diagrams on the inside to help you. When in doubt, refer to your manual. If you don’t have your manual you can try to find a PDF online.
Test it out. Test sewing is important when serging, as all fabrics behave a little differently as they move through the machine. Do your test sewing on the same fabric you’re using for your project. I always save some of my scraps from cutting out the pattern. Before I start serging the seams on my garment, I run a doubled over scrap through the serger to make sure the differential is set properly. Your serged seams should lay flat, and not be wavy or scrunched.
Don’t sew over your pins. While you shouldn’t do this on a standard machine either, you definitely shouldn’t do it while serging. It can wreck your serger blade, and pieces of pin can get stuck in the machine. Ouch!
Standard Machine Tips
One of the trickier parts of sewing knits on a standard machine is getting the fabric to feed through the machine properly. If you find that the fabric is getting caught up you can:
Use a walking foot. If you have a walking foot for your machine, that can help the stretchy fabric feed through more evenly.
Lower your presser foot pressure. If you machine has an adjustable presser foot pressure, try putting it on a lower setting. This means the presser foot won’t be pressing down on the fabric as hard. Sometimes this allows the fabric to move through the machine more easily.
Test it out. Save some of your cutting scraps to use as test swatches. I always test every different stitch I’m using on a knit garment to make sure the settings are good to go on that particular fabric.
If you’d like some more in-depth info, check out The Colette Guide to Sewing Knits. I personally have this book, and there is a ton of good stuff in it.
CHOOSING YOUR SIZE
Base your size choice off the size measurements listed on the back of the pattern. Don’t worry that some of the finished garment measurements are smaller than your body size. Knit garments are often designed with negative ease, meaning the finished garment is smaller than your body because the fabric will stretch to fit.
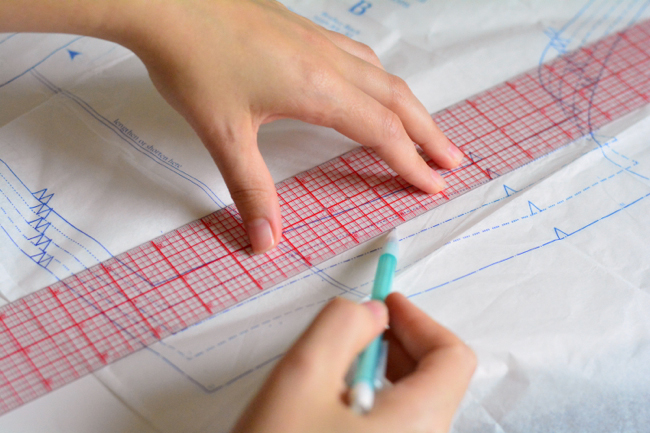
If you are falling into different sizes in the bust and waist, you can cut between sizes by blending the size lines. Just use a ruler to connect the cutting line for one size at the bust to another at the waist.
There is quite a bit of ease in the skirt (check out the finished garment measurements), so even if you are a different size in the hips you probably don’t need to do any adjusting. But if you’d like to, you can cut a different size skirt without doing any pattern alterations, because the skirt will be gathered to fit the bodice. Just make sure you cut the same size in both the front and back skirt.
If you’re in between sizes and unsure of which one to choose, I’d recommend choosing the larger size. Instead of making a muslin we’ll be fitting as we go (more on that below), and it’s much easier to take something in than conjure up extra fabric to let something out.
FITTING A KNIT PATTERN
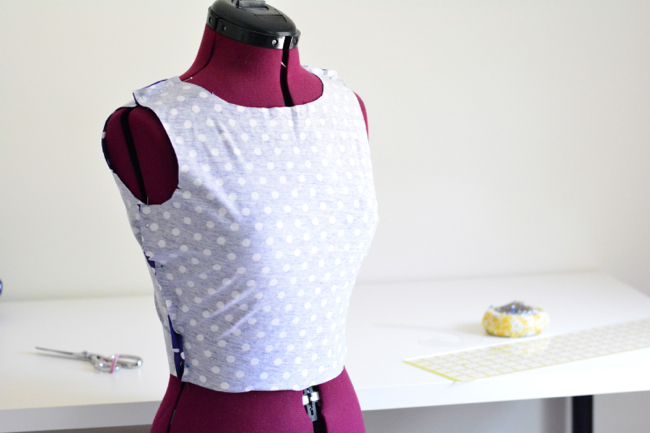
Unlike making a woven pattern, when sewing knits you don’t often make a muslin. This is because each type of knit fabric behaves very differently. The differences can really affect the fit of the finished garment, so making a test garment out of a fabric other than your fashion fabric isn’t nearly as helpful.
Generally, you’ll just fit as you go. As you assemble the bodice, you can do quick checks to make sure the fit is shaping up the way you’d like.
If you absolutely want to make a muslin, you’ll need to buy double the amount of fabric so that you can make a practice dress before the real one.
CUTTING YOUR PATTERN
Once your fabric is prewashed and your paper pattern pieces are cut out, it’s time to cut your fabric.
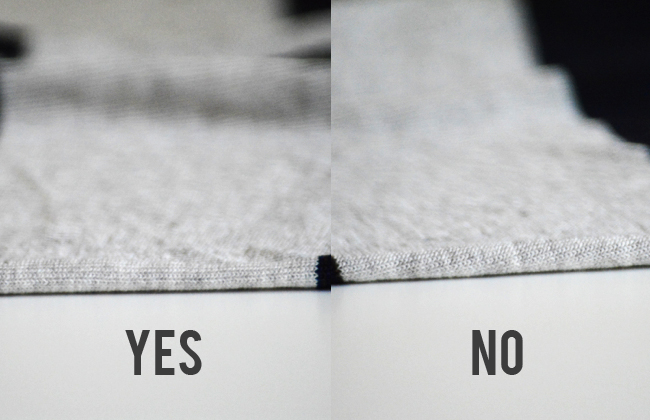
Fold your fabric in half and line up your selvages, making sure that you’re folding on grain. Your fabric should lay smooth along the fold, and not have any diagonal ripples. The fabric’s visible rows of knit stitches (think a sweater but on a much smaller scale) should should be running parallel to the fold.
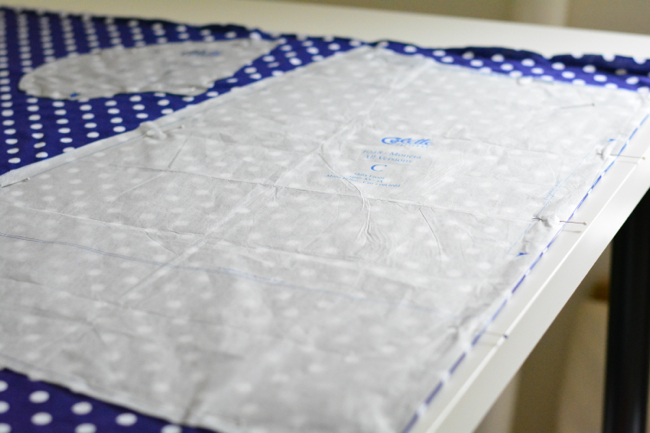
Then you can either pin your pieces in place or use weights to hold them down, using the pattern’s cutting diagram for guidance, and cut them out with your fabric scissors or rotary cutter.
If your fabric has a directional print, make sure you cut all pieces in the same direction. This might mean pinning some pieces to the fabric with the unprinted side facing up.
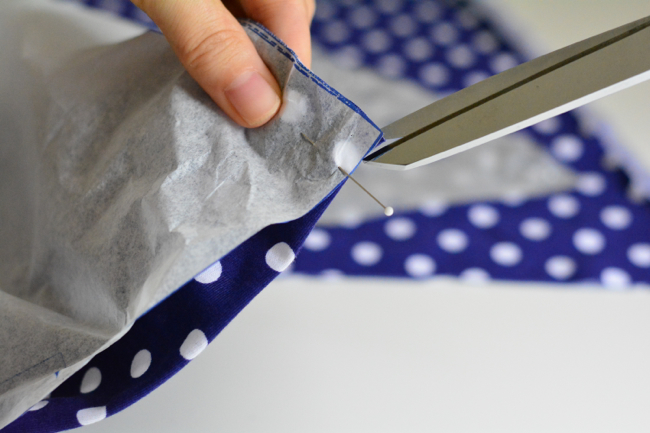
After cutting, snip out all notches. Since our seam allowance is only 3/8”, make sure you cut shallow notches.
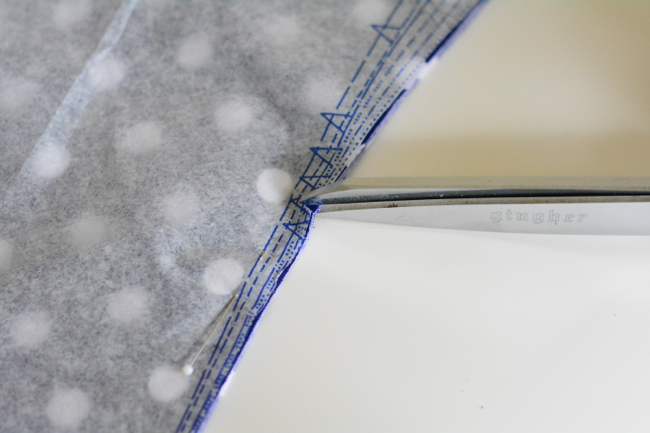
I also find it helpful to snip the top edge of the skirt pieces right on the fold to mark the center. This will be useful when we attach our elastic. Again, make shallow snips.
You will also want to transfer all the dot marks to your pattern pieces. To do this, you can stick a pin straight through all layers then mark its place on the fabric.
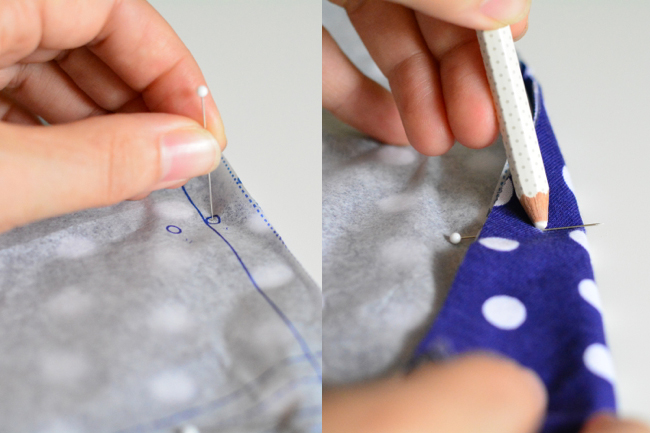
If you are using a fabric with very similar or identical right and wrong sides (like a solid color), I’d recommend marking a small ‘x’ on the wrong sides of all the pieces as you cut them. You’ll thank yourself later!
You can refer to the Cutting your Fabric post in the Mabel sewalong for additional fabric cutting info and pictures.
I hope this was all helpful for you! If you have any questions, please leave a comment and let me know. Next time we’ll start sewing!
Comments
Cool tips! Thanks!
Typically when I sew a Colette Pattern, I need to cut a size 12 in the shoulders and then adjust out to a 16 for bust, waist and hips (and then make a hefty FBA). When I made a Moneta a couple weeks ago, I cut a straight XL (16-18). I ended up with a pucker of fabric from about the location of an arm-hole princess seam that extended down for about two inches — I could pinch out about four inches of fabric at the arm hole. The dress fit nicely across my bust and while a little loose in the upper back, still wearable. I recognize each knit fabric is unique but is this evidence that I should cut a smaller size through the shoulder?
For reference, my upper bust measures 39 inches and full bust is 46 inches.
Yes, it sounds like it’s too big for you in the shoulders, especially if you normally cut 2 sizes smaller there. Based on the way the pattern is nested, you can blend to a smaller size at the bottom curve of the armhole then follow that line for cutting the shoulder. Even though that will change the length of the armhole, as long as your knit has enough stretch in it I think it should be fine without having to do anything to the sleeve.
Another thing you might consider doing is a Narrow Shoulder Adjustment. This will help snug up the dress in the shoulders without changing the bust. Here is a tutorial from the Hawthorne sewalong: /hawthorn/hawthorn-wide-or-narrow-shoulder-adjustment
Thank you! This was an eye opening response. I had never considered the adjusting the size cut in the shoulder reduces the length of the arm hole curve — possibly explaining why I have a terrible time getting sleeves to fit right. I will definitely be considering a narrow shoulder adjustment!
What is the best way to determine how much to take out or add?
Unfortunately you’ll be much better informed after you make your first version…you could start by measuring from the center front out to the finished edge of the shoulder, then compare that measurement on your body.
But I actually thought of something that might be even better for you, which I should have thought of right away…a full bust adjustment. Have you ever done that with wovens? Based on the difference between your upper and full bust, I think this will help you a lot. Usually it’s pretty straightforward with the darts on a woven pattern, but since there are no darts in the Moneta it’s a little different. I found this great tutorial by someone who did one on the Refrew top: http://vickikatemakes.wordpress.com/2012/03/30/sewaholic-renfrew-top-how-i-did-my-fba/
Hi Devon,
Thank you so much for all these links to the tutorials. I’d like to do a 4 inches FBA following the tutorial for the renfrew top you mentioned. But I’m a medium size and I’m afraid that the waist is then going to be too large.
Do you have any suggestions ?
Thank you so much, I’m looking forward to start sewing !
Marie
Hi Marie!
You can always redraw the side seam after you finish the FBA if you’d like it to come in a bit more.
You can also try on the bodice once the shoulder seams are sewn and pin the side seams. If they’re too big you can take them in them.
well done lady :) so happy you’re leading us along and of course the post is clearly written and brilliantly photographed! xoxo
awww thank you!! :] :]
Thanks so much for posting the link to the shoulder adjustment!! I’ve had problems fitting a basic bodice for two years, not knowing that I needed this adjustment. I have a petite frame and small bust, with the exception of my broader shoulders, so I never understood why I had pulling underneath my arms and across the top of my chest and back. I just recently tried a basic shoulder adjustment I learned in a Craftsy class on fitting, which helped a lot – but I’ll have to compare it to the one that was posted for the Hawthorne sewalong. :) Thanks for the tip!!
I’m getting excited about the sewalong!! I want to make this a ‘summer of Monetas’. :)
Hooray! Figuring out fit issues is the best feeling!
Glad you mentioned checking the ease at the hips. I had planned on scaling up the skirt but with around 8 inches of ease at the hips for my measurements this us shaping up to be the first straight from envelope pattern I’ve ever done.
It’s always nice when things end up simpler than we thought! :]
Great tips here, especially things like snips at the centre front, and lowering the foot pressure. Now I’m seriously considering a walking foot! Just purchased a 4.0 twin stretch needle. And just ordered my fabric and lining. Very excited!
Oh good I’m glad they were helpful! If you get a walking foot you will love it, not just for knits but wovens too. It really helps everything move through the machine evenly.
Hello there! This is my first sew along and I really appreciate all of the tips so far! I was wondering if you had any suggestions for maintaining the fold on grain for the entire length of the fabric. I have a horizontal stripe print and thought it would be easy to line up the stripes, but find that when I adjust one area, the fabric on the other side of the fold clings and causes diagonal ripples like you mentioned above. Thanks in advance!
Knits are definitely on the temperamental side, so as a general rule I usually only try to fold a small section at a time, do my cutting, then move on to folding the next section.
What you can do to help your fabric stay in place is pin along the fold, making sure you’re following one of the visible knit lines on your fabric. Then work out from the fold, smoothing and pinning out from there.
Keep in mind that sometimes fabric is knitted off grain, meaning that the grainline might run at a slight angle in relation to the selvage, so if you truly follow a row of knit stitches to fold it, your selvages might not be lined up. Folding on grain trumps folding with selvages parallel.
And on the same note – are your stripes printed on or knitted into the fabric? If they’re knitted in, you can line them up with themselves, and even pin them together to make sure they stay together. If they’re printed on, they might be printed off grain, and in that case you don’t really want to use them as a folding reference.
Hope that helps!
Hi Devon,
I’m a bit confused about the sizes.
I measured bust 95cm / waist 84cm / hip 100 cm.
In inches: bust 37,4 / waist 33,07 / hip 39,37.
I just wonder why there is such a big difference (bust an hip could be 8 or 10 – waist 12 size). Usually I where 38 or 40.
What would you recommend?
Simone
We are all different shapes and sizes, and it’s a very common occurrence to not fit into the same size category on every single measurement! It looks like you are falling into the M at the bust and hip, and the L at the waist. So on the front and back bodice, blend the size cutting lines from the M at the bust to L at waist. Just use a ruler to draw a smooth line connecting them, like in the photo in this post (the 7th photo from the end). For the skirt you can just cut a medium skirt, and it will be gathered down to fit your bodice.
Hi Devon, I’m enjoying this sew-along a lot so far. I have a walking foot but when I sew at anything other than at the slowest speed, the thread balls up on the bottom. At the slowest speed, it stitches perfect though.
Any suggestions? Thanks.
Things that could help:
1. Rethread everything.
2. Make sure that when you thread your bobbin, the thread is making it into the tension hook.
3. Make sure you’re using a ball point needle and that it’s fresh, sharp and not bent.
4. On rare occasions I’ve found that a walking foot actually makes things worse, so try it without.
5. Lengthen your stitch length slightly.
6. Make sure you’re using good thread.
7. If you can, lower your presser foot pressure. This setting is often on the left side of the machine, on top of the machine above where the needle is, or just inside where the light is [if you can open the side of your machine.]
Hopefully some of these things will help!
Thanks Devon, one more question about sizes. I need to make it xs at the top and medium in the middle and small at the bottom. You wrote “cut between sizes by blending the size lines.” Will blending all the way from a xs to a med work or will it mess up the proportions (being that it’s a 2 size difference)? She is 33 1/2 top and 29 waist.
Thanks
Jim
That should work!
Hi Devon,
Thanks for all the helpful tips so far. I am a new to sewing knits, so have a complete newbie question.
I was making a practice Moneta today and I noticed on the pattern that it doesn’t say whether you need to backstitch when sewing seams (I’m using a standard machine, not a serger). Do we need to backstitch?
Also, I can’t find clear elastic anywhere in my area, so is there going to be any real problem if I use woven elastic in the skirt?
Thanks for your help.
Hi Sarah,
Whenever you are sewing anything, you always want to backstitch at the beginning and end of your construction seams, unless it is something you will be taking out later.
Woven elastic should work just fine, it will just be a little bit bulkier.
Hope that helps! :]
Hi Devon, thanks for running this sew-a-long. I’ve just been reading about stabilising shoulder seams to prevent “droop” when using knits. Do you recommend this on the Moneta?
I don’t think it is absolutely necessary since the neckline is quite wide and the shoulders won’t be stretched a ton, but it certainly wouldn’t hurt if you’d like to try it!
Thank you. My material is quite stretchy so I’ll give it a go.
I find it really hard to locate notches, so I’ve started cutting triangles that stick out from the seam allowance. It makes it easy to see them at a glance and also solves the problems I have with finding the balance between shallow snips and visibility. Just thought I’d share in case it helps anyone else
Hi Devon, and thanks for a very nice sew-along! I have a fitting problem with my Moneta that I can’t really figure out how to solve. There is excess fabric at the front armscye, about where you would put a bust dart. In a woven fabric a dart would probably be the correct solution, but how do I correct it with a knitted fabric? I’ve consulted a couple of books and webpages but they differ both in explanations (i.e. what the problem is) and the solution. Do you have any suggestions?
Hi Charlotta! It did the same thing on me. Here’s a tutorial for how I got rid of the gape without adding any darts:
http://www.missmake.com/2014/06/tutorial-how-to-fix-armhole-gape-in.html
Thank you so much! It’s exactly the problem I have. I can’t wait to try your method for fixing it.
I started sewing the moneta, using my serger, and I noticed that the thread from the seams that the serger makes show on the outside of the garment. I don’t know a lot about my serger, other than it is an old singer and the stitch is called a safety stitch. Is there a way to fix this?