

Version 1
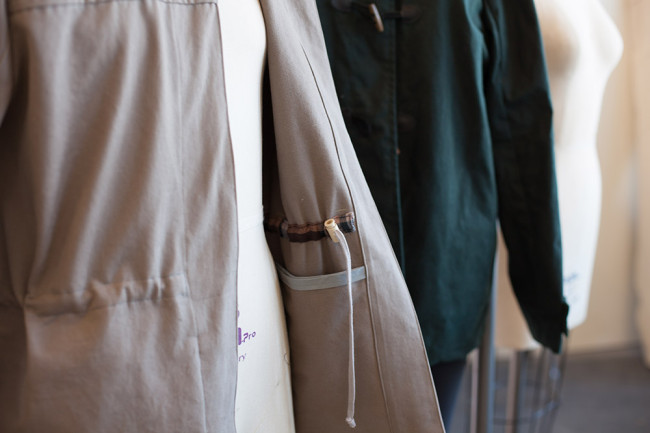
Adding a drawstring to the waist of your coat or jacket is a great way to give this straight silhouette a bit of definition.
Supplies
1 1/2 yards of cotton cording
2 adjustable drawstring closures
1 small safety pin
Marking pen or chalk
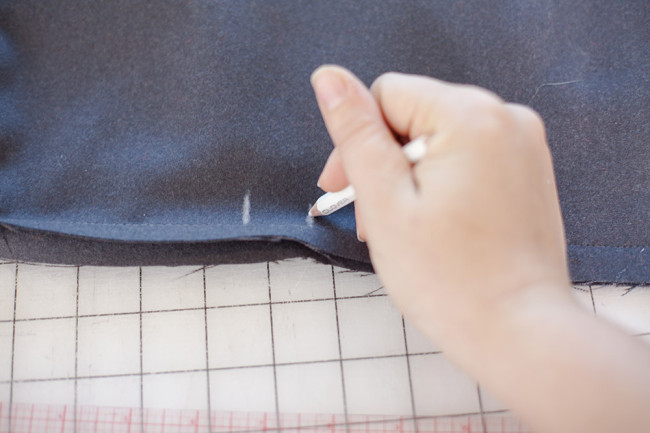
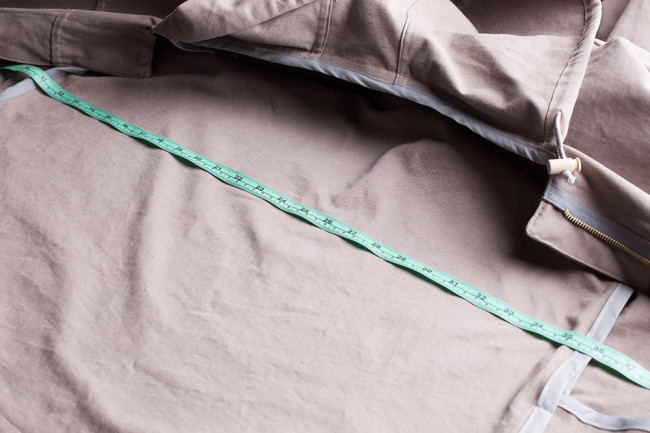
1. Locate the point where you would llike the drawstring to hit. For most people that will be at their natural waist. Measure from the hem along the side seam to the waistline and note the measurement. Measure 1” above that point and mark.

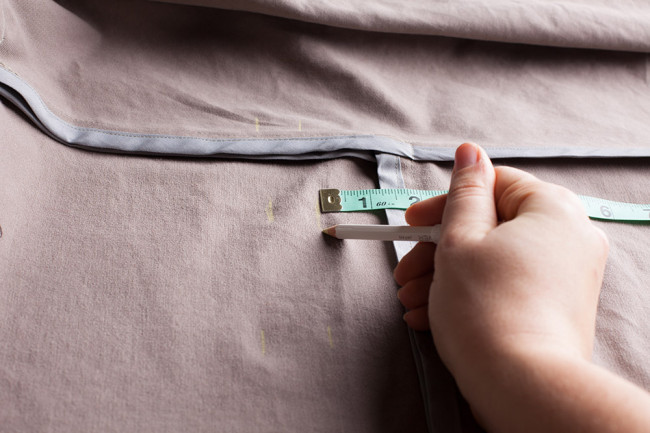
2. Measure up from the hem on the outside shell of the garment. Use a pencil or chalk to mark the two points of your waistline evenly around the entire outside of the coat. Transfer the markings to the coat lining.

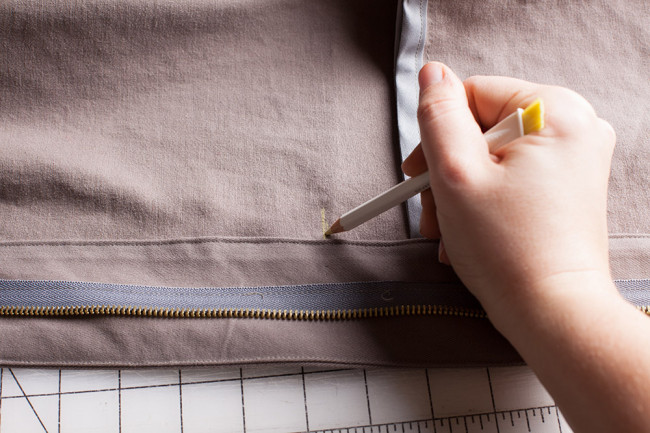
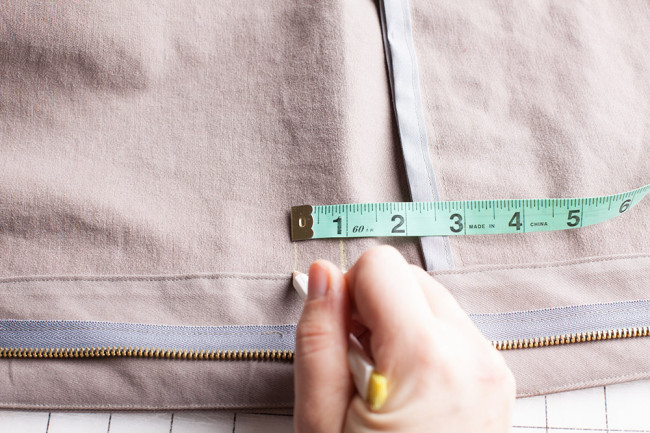
3. Sew the center front facing of the garment according to the instructions. Measure 1/4” in on the lining from the center front facing an lining seam. Make a 3/4” wide mark between the two points. Repeat for the other side of the lining.
4. Make a buttonhole at each of the points you just makred. Install the lining according to the pattern instructions.
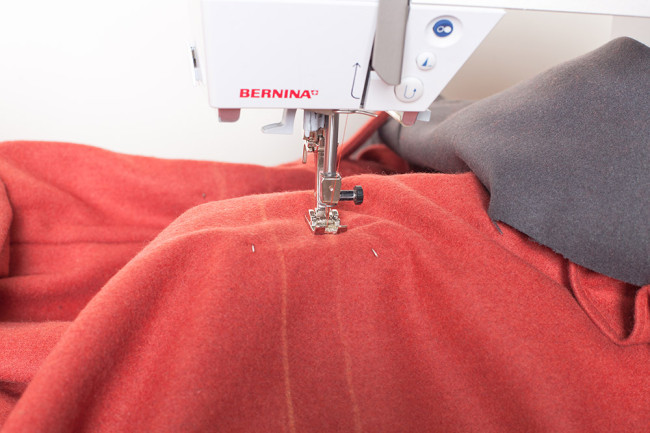
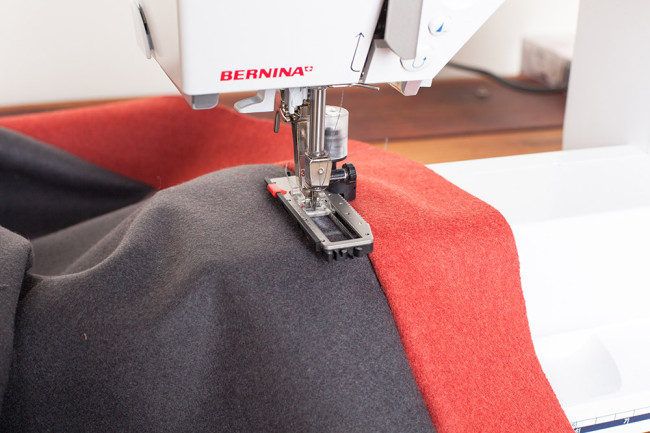
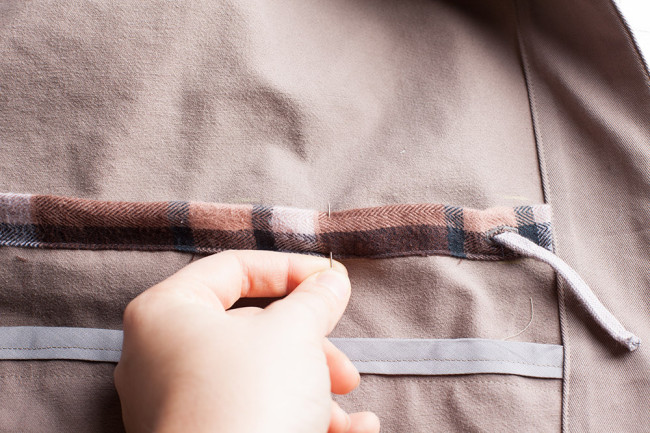
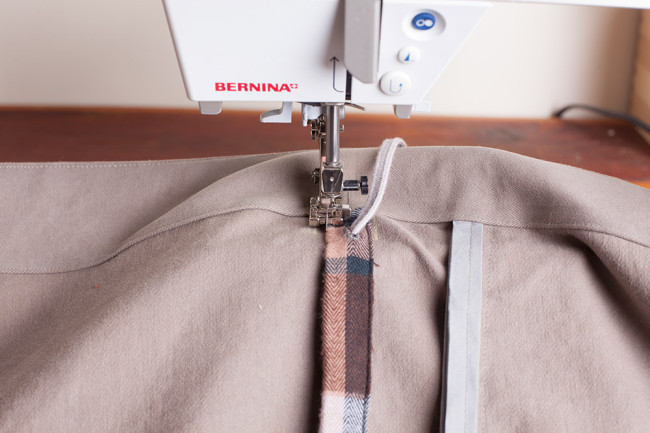
5. Topstitch along each of the lines on the outside of the shell. Make sure that the lining stays even. You may want to pin or baste the lining in place at several points.
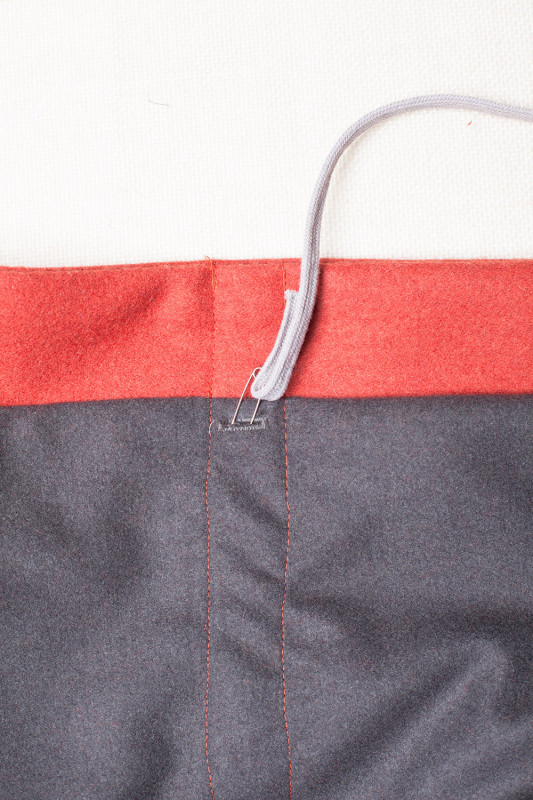
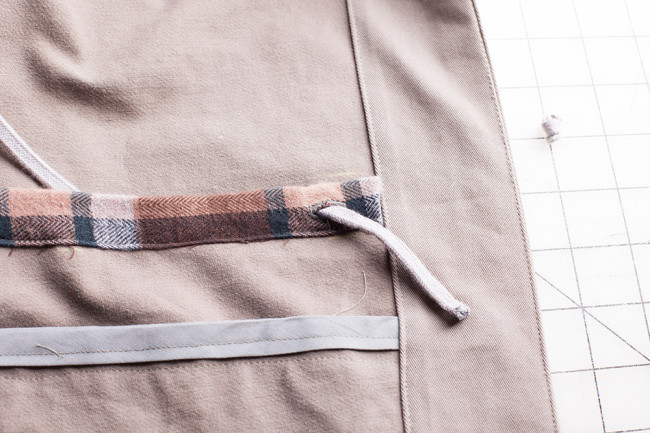
6. Pin and small safety pin to the end of the cotton cording. Insert it into one of the buttonholes between the two rows of topstitching. Work the safety pin and cording through the casing.
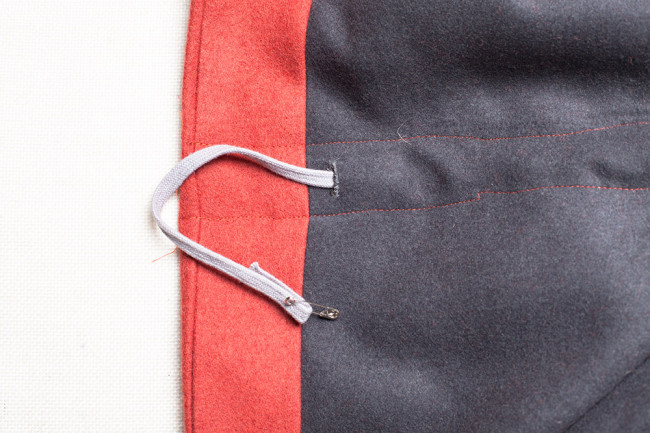
7. Pull the safety pin through the opposite buttonhole. along with a few inches of the cording.
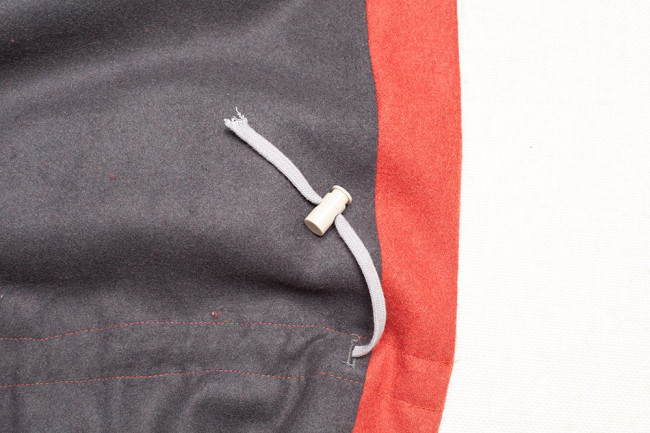
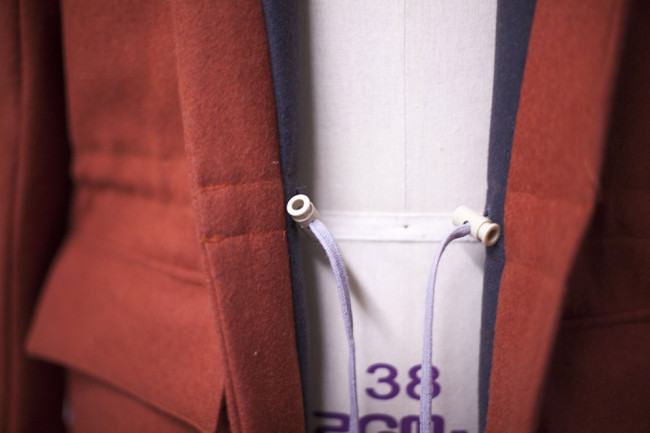
8. Place a drawstring closure on each end of the cording.
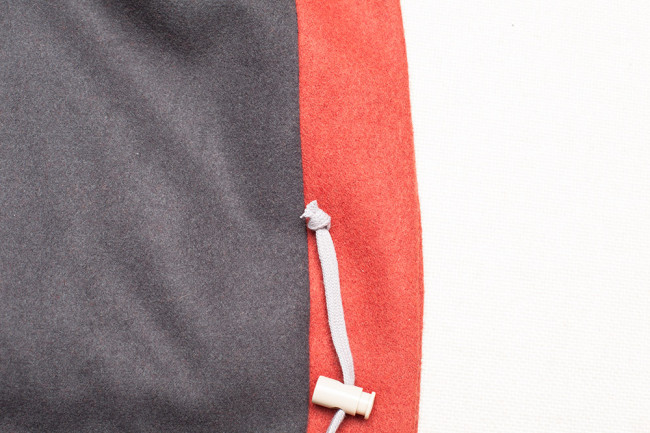
9. Tie a knot at each end of the cording. Trim off any excess from the end.
Version 2
Tip: You can use a scrap of your shell fabric to make the drawstring casing, or use a contrasting color or pattern to brighten up the inside of your jacket.
Supplies
1 1/2 yards of cotton cording
X yards of scrap shell fabric
2 adjustable drawstring closures
1 small safety pin
Marking pen or chalk

1. Locate the point on the outside of your jacket where you would like the drawstring to hit.
2. Transfer the markings to the inside of the jacket with a marking pen or chalk.
3. Measure 1” up from the point you just made and and mark.
4. Measure up from the hem to the markings you’ve made and then transfer the points around the entire inside of the jacket. Your marks will form two parallel lines.
5. Measure across the inside of the jacket between the two parallel lines of markings and between the facings.
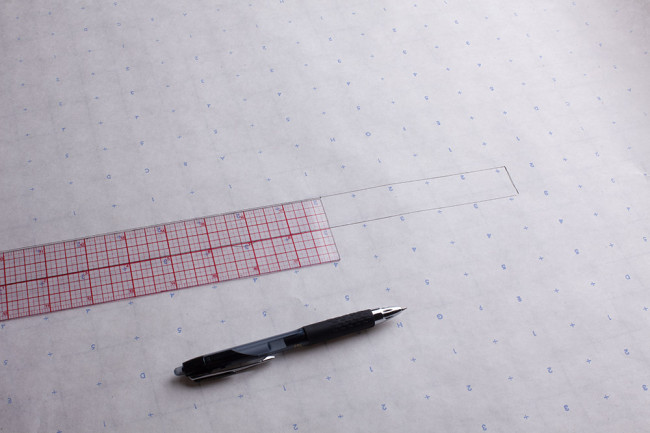
6. Take the measurement and divide it in half. Draw a rectangle that is 1” wide by your measurement. Add 5/8” seam allowance to both of the long sides and one short side.
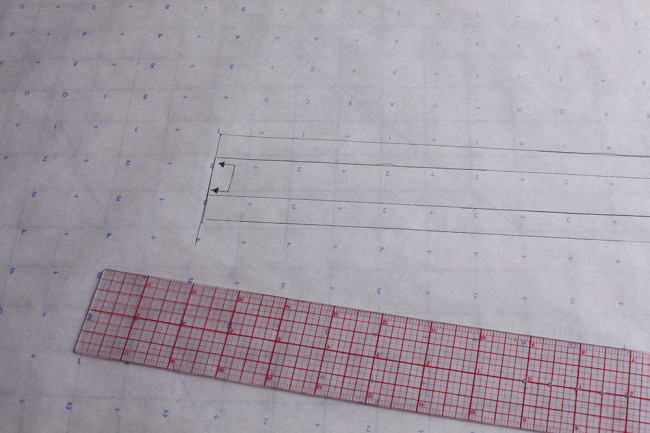
7. Add 5/8” seam allowance to both of the long sides and one short side.

8. Cut out the pattern piece.

9. Place the pattern piece on the fold of the fabric and cut.
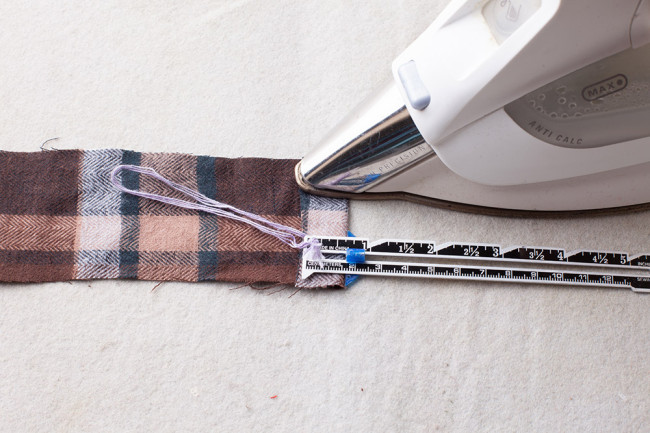
10. Turn under each short end of the fabric 5/8”. Press.

11. Turn under each long end of the fabric 5/8”. Press.
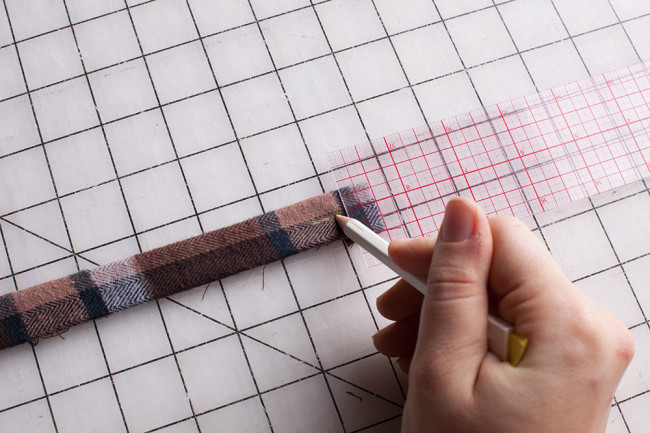
12. Measure in 1/2” from each short end. Mark a 1/2” buttonhole in the center of the drawstring casing.
13. Make a buttonhole at the markings on each end of the drawstring casing.
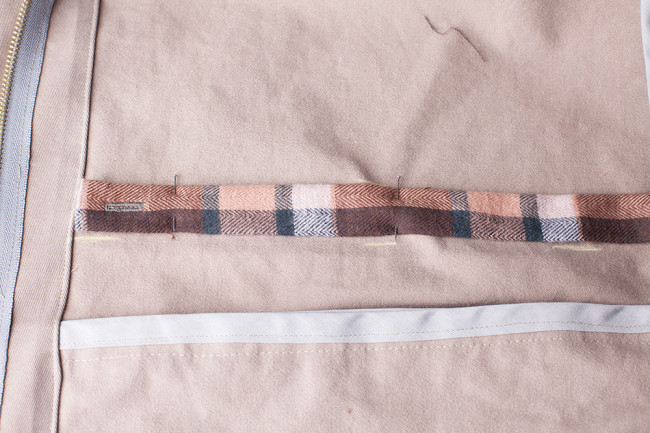
14. With wrong sides together, place the casing between the two parallel rows of markings you made on the inside of the jacket. Pin.
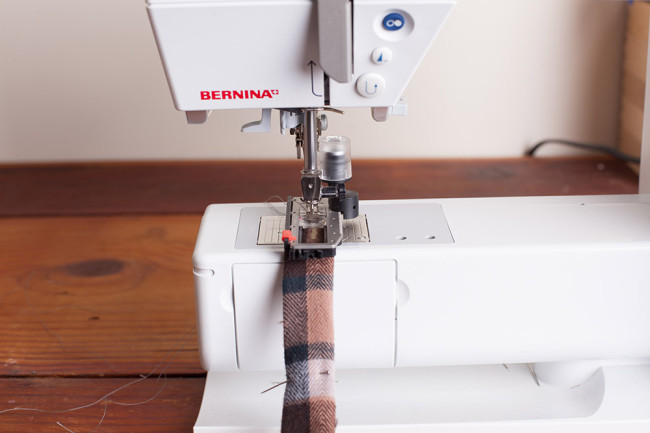
15. Edgestitch along the bottom edge of the drawstring tunnel.
16. Take the drawstring and pull it through the buttonhole to the right side of the casing. Repeat for the other end of the drawstring.
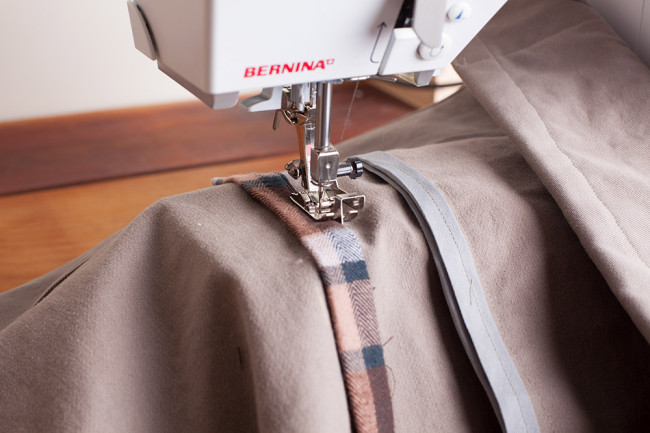
17. Pin the drawstring channel over the draw string. Make sure the drawstring remains even throughout the drawstring channel and not twisted.
18. Edgestitch along each short end of the casing and the top long edge.
Comments
I decided last minute to add a drawstring waist, and I’ve been researching adjustable drawstring closures and can’t find them anywhere! Any tips on where to find them? Every time I search online I land on a page of backpacks. I live in the Portland area, so if you have a local suggestion, that would be helpful to me! Thanks!
Kristen says she got some of them at Mill End, and some at Bolt on Alberta.
Thank you!
I’m having similar trouble finding the closures!! Any idea if I could find them in Boston? Are there any online retailers for them? Thanks!