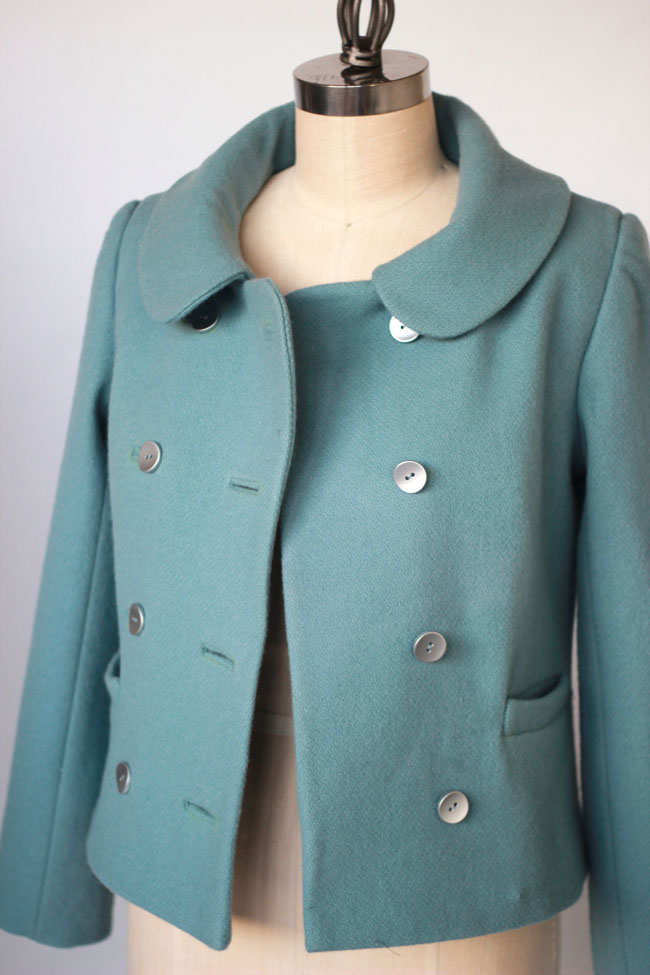
I was thinking about calling this tutorial “bound buttonholes in just 20 easy steps,” but I thought that sounded a bit snarky.
Yep, there’s no getting around it, bound buttonholes are involved. They are just one of those things that always take a bit longer than you imagined going into it.
But for all the many steps in the process, they remain irresistible. They give any garment that extra tailored, polished look.
I’m going to show you how to create them, including a simple technique for finishing the inside (the facing). I’ll be showing the process on the Anise jacket, and the step by step is from The Anise Companion. But you can use these same steps on any other garment.
Remember, you almost always want to create your bound buttonholes before you stitch your garment together.
Now, there are several different ways to make bound buttonholes. I’ve chosen this one because I think it’s easy to understand and pretty straightforward. Since bound buttonholes can get a bit fiddly, straightforward is a good thing!
I’ll have you create some templates to make measuring and marking a bit more clear. You can certainly go without them if you prefer, but I find they actually speed things up.
Mark the buttonholes

First, we’ll create two templates. You can cut these from paper, but card stock or another sturdy paper is best. You can even use manila envelopes or old cereal boxes.
Both templates should be 1/4″ high.
Make the first template 3/8″ longer than your button and label this template 1.
Make the second template 1/4″ longer than your button and label this template 2.
For the jacket here, I’m using 1″ buttons. So for my example, template 1 is 1 3/8″ by 1/4″. Template 2 is 1 1/4″ by 1/4″.
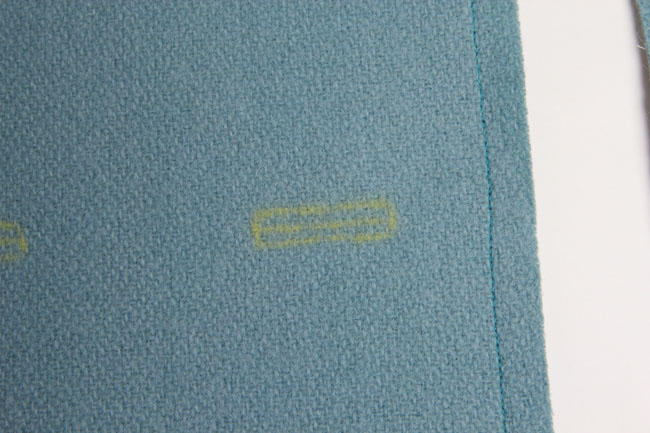
Using template 1, mark the buttonholes carefully on the right side of your jacket. Draw a line down the center of each buttonhole lengthwise.
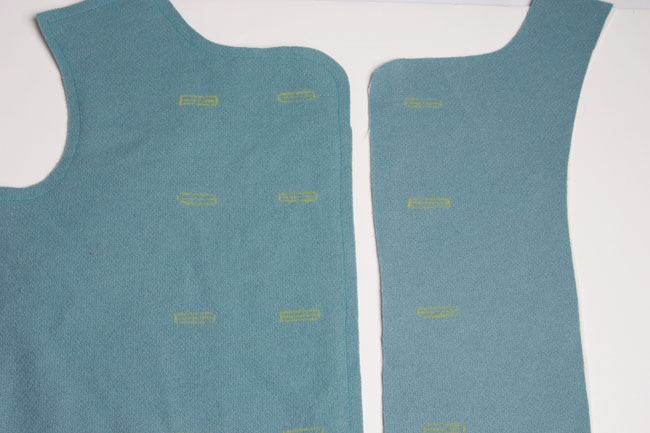
While you’re at it, draw the same boxes in exactly the same locations on the right side of the front facing piece that goes with this side of your jacket. We’ll get to the facing later, but it’s easiest to mark the buttonholes all at once.
Put aside the facing for now. We’ll come back to it later.
Create the buttonholes
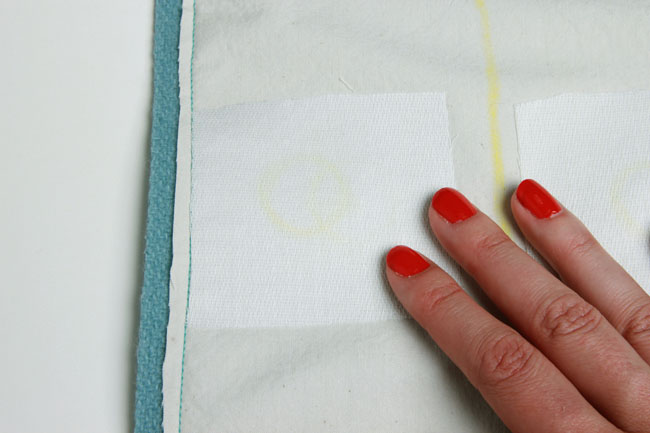
Cut a rectangle of interfacing and apply it to the wrong side of your buttonhole on your front piece in order to reinforce the area.

Cut a rectangle of fabric on the bias for each buttonhole, about 2 ½” by 3”.

Press each rectangle, pulling it as you press to remove all stretch. Cutting these on the bias and then pressing to remove the stretch helps bulky fabrics to lay better.

Again using template 1, draw a buttonhole on the wrong side of each rectangle. Draw a line down the center of each.

With right sides together, pin the rectangle to the right side of your fabric, aligning the line with the buttonhole marking.

Stitch on top of the drawn rectangle. Start in the top center and stitch around the box, pivoting at the corners. When you get back to the top center, stitch directly over the first few stitches.
Slash the buttonhole through both layers, stopping 1/8” from each end. Clip diagonally toward each corner, taking care not to cut through the stitching.

Turn the rectangle through the slash to the wrong side and press.

To form the top lip, first fold the top down.

Then fold the lip back up so that half of the opening is covered.

Do the same for the bottom lip and press.

Fold the fabric back at one side, revealing the small triangle. Using a zipper foot, stitch the triangle to the buttonhole lips fabric, backstitching a few times to secure. Do this on each side.

With the zipper foot, stitch the seam allowance of the top lip to the seam allowance of the slashed opening, stitching directly over the first line of stitching. Do the same on the bottom lip.

Trim any excess fabric and press. Baste the lips closed with silk thread. Leave the silk basting in place to keep the lips closed while you sew the rest of the jacket.
Buttonhole facings
Now, once the garment is completed, the wrong side of the buttonholes will be covered by the facing on the inside of the garment. So we need to create windows in the facing for the buttons to go through.

Cut a rectangle of fusible interfacing to cover each buttonhole, allowing at least an extra inch on each side. Be sure to choose an interfacing that won’t ravel or tear easily. Using template 2, draw a buttonhole on each piece of interfacing, on the adhesive side. Draw a line down the center of each buttonhole.

Pin to the right side of the facing, with the buttonholes aligned. The adhesive side of the interfacing should be facing up, toward you. The non-adhesive side should face the jacket. Because template 2 is slightly smaller than template 1, the buttonhole drawn on the interfacing should sit just inside the one drawn on the facing.

Starting at the center top of the buttonhole square, stitch around the box with a short stitch length (1.2 to 1.5), pivoting at each corner. When you reach the beginning, continue stitching over the first few stitches for about 1/4 inch.

Cut through the facing the same way you did when creating the buttonholes, slashing along the center and then diagonally toward each corner.

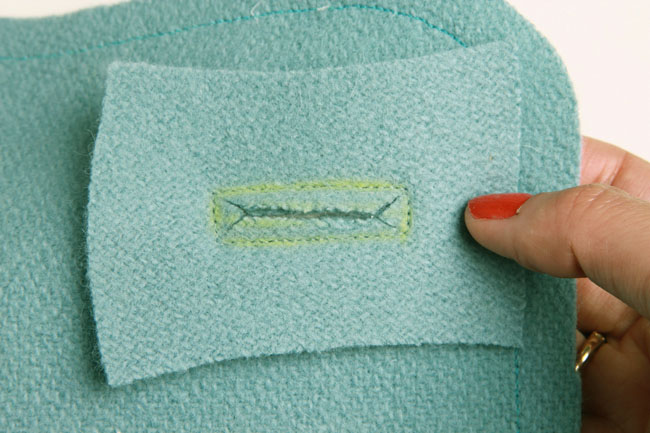
Turn the interfacing through the slash to the wrong side. Press to adhere the interfacing in place and finish the window.
Your buttonholes are now complete, and your facing has little windows to match up with them!
Once you’ve put your garment together and the facing is sewn in place, hand stitch the facing windows to each buttonhole so that your buttons will be able to slide through easily.


Comments
Making them looks easy, but I am scared about this: how do I make sure that they are all in the right place? On the pattern there are no markings, only the buttons. How do you measure to get them all in one line? And how do I make sure that they are on the SAME spot on the facing?
The buttonholes aren’t marked only because, since the placement of the buttons varies with size, it would have made the pattern incredibly difficult to read. You just need to center the buttonholes within the button markings. With bound buttonholes, you’ll extend slightly past the edges (since the buttonholes need to be a little bigger than the buttons).
To insure they’re aligned exactly, you can measure and draw straight lines with a ruler. Or use another traditional method and baste lines down the front to mark the edges of the buttonholes.
To make sure they’re in the same spot on the facings, I’d pin them together, then insert a pin at the beginning and end of each buttonhole through both layers. Mark the spot where the pin emerges on the facing. Then I’d double check the placement using a seam gauge.
As for adding more interfacing, it’s really up to you. Does it seem pretty stable without adding more interfacing? Will the extra layer just add bulk? If so, I’d skip it.
Oh, and another question. I am using fusible interfacing to make the fabric thicker and warmer (instead of muslin) do I need to use a square of interfacing making the buttonholes also? Or is that one layer enough?
Oh and you didn’t interface the facings??
They are interfaced, but all the photos above show the right side of the facing. :)
the facing is interfaced – you can see it in the bottom picture around the edge. that was in the step before. i’m also using interfacing (although sew-in stuff) instead of muslin and i was going to use another square of interfacing – i think it is to further strengthen the edges of the window.
i’m also worrying about marking – i thought of lining up the facing and front on top of each other and marking the centre of the buttons in chalk then centering the middle of the template on that line. then marking the sides of each rectangle with tailors tacks.
how long do we have for this stage? i’m going to need more than 2 days to do 8 bound buttonholes (plus at least 1 test one!)
I have another post queued up for Thursday, BUT it’s an easy one. It’s basically the rest of the chapter on assembling the body, and the first step is to do the bound buttonholes. So really, you have a week to do the buttonholes and then just stitch a few darts and seams. :)
phew. thanks, i hadn’t read ahead. i managed to get all the buttonholes marked – i am using fabric with a visible weave so followed that to draw straight lines down the front to mark the middle of the buttonholes, folded the template in half and lined that up with the line i had drawn. i was struggling to do it using the pattern, especially since i have to add quite a bit of length, so i marked the top and bottom buttons in the right positions based on the original placement and spread the other 2 out in between. i have done a few test ones so it’s on to the actual fabric tonight!
Why has it never occurred to me to do the little windows in the facing? Brilliant!
I feel EXACLT the same way! lol. I just made 2 new coats with bound buttonholes in the last few weeks and so wish I’d had this technique at hand. It’s impossible to hand-stitch down facings for these that don’t look amateurish. While I actually prefer the slightly different method for making the buttonholes I already use, I feel like I want to make ANOTHER coat/jacket now just so I can use the facing technique!!
Oops – EXACTLY
Your instructions are very clear- I made my first-ever test bound buttonhole yesterday and it was a success- not perfect but clearly acceptable. I was thrilled! My questions are basically the same with Studiopoem’s above, having to do with exact marking of both the fabric and the facing for the buttonhole positions.
And another question: I will only make bound buttonholes for the functional buttons- I want to make sure they will be placed to the jacket’s right side (as you wear it), as shown in the photo.
Eep, sorry, I don’t understand what your question is…?
I mean, in which of the front panels are buttonholes placed usually: the right or the left? It seems from your photos (and I checked in some of my garments) that usually buttonholes are on the right and buttons on the left. So it’s really a naive question – I just wanted to be sure….
I would suggest making that square of fabric larger than you think it needs to be…nothing like sewing and then figuring out that there’s not enough fabric to pull through to the other side and lay flat! Also this buttonhole technique can be used for some creative variations like a pair of lips for a jean pocket. Make the lips out of faux red textured leather…..carry the leather over to the front for bias strips on the front pockets. The back and front pockets would make your pants such a great conversation starter!
Absolutely brilliant tutorial – one of the most comprehensive I’ve seen on bound buttonholes. It even makes me think I can attempt this. BTW, I love the fabric on the Anise jacket with the silver buttons. Genius!
These are lovely! Hopefully I will try them sometime. :)
Wow, this looks so easy! Thank you so much, I am not scared of bound buttonholes anymore!
Lovely tutorial as always. One question: why do we sew down the edges into ‘lips’? It seems like it would add bulk even after stretching out the bias cut fabric. What about catch stitching the edges to the underlining fabric? What would be the potential issues with that?Thanks for all the great info above!
ps- can you actually explain why we don’t do bound buttonholes through both the front and the facing? Again, I’m assuming bulk but would love to hear your take on it.
You mean why do bound buttonholes have lips at all? I think it’s a combination of a couple things. First, it looks nice and mimics welts you might see elsewhere (like welt pockets). Second, the lips help hold the button in place. With just a window with no lips, the button could slip through pretty easily.
The reason you don’t make them through both the outer layer and facing is because the facing disguises the wrong side of the buttonhole, which is not very attractive. :)
Aha! thanks for the info.
I agonized over 4 bound buttonholes only a month ago! And now here is the perfect tutorial. You made gorgeous buttonholes, and the finish on the facing is brilliant. Mine were done by hand with only a slit stitched on the facing, that put the thread in danger of catching on the fancy buttons. Wish I’d seen this tutorial 1 month ago. I may have to try some more on my next project, just to redeem myself.
Super useful tutorial, thanks so much!
I’ve wanted to try this for a while. I’m a bit intimidated. But, you’ve made it look really easy. I may have to try it out on my next project. Thanks for sharing.
Great turorial!- I love the Anise jacket! For anyone finding bound buttonholes tricky i have also done a tutorial on them on my blog here: http://sewinglondon.co.uk/bound-buttonhole-tutorial/
I find that sometimes more than one set of instructions can help answer any questions.
Happy sewing!
X
Fantastic! I’m doing a jacket much like the Anise (without a printer and coming from Europe it will take ages before receiving the pattern and it will be very pricy -unfortunately) and I have just reached the button holes. I always do them bound,;only they are fit for a nice jacket, but I have been taugth another method for the backside, which I have always hated as it is not very nice to look at, but yours are perfect and solves all the issues there!
So thank you so much for the tutorial :)
Thank you for the tutorial – it makes sense to me! I’m making a coat right now, and plan to make an Anise next month, and I know this will come in handy for both!
Thanks!!!! Finally a tutorial for bound button holes that doesn’t make me shudder at the thought of making them :-)
A possibly stupid question, apologies… why is the hole in the facing narrower than in the main fabric?
Thank you! I tried bound buttonholes once before and they looked very ‘childlike’ – I’ll be bookmarking this tutorial for all future projects.
Oh! Using fusible interfacing instead of silk organza. Ingenious and accessible.
Great tutorial! Thank you! So much easier than the I ones I did in August!
Hi Sarai
I am doing my Anise in corduroy, and my question is what would you suggest would be the best orientation for the lips (the lines on the corduroy) horizontal or vertical?
Hello Sarai
I wanted to let you know I used your method to make my first bound buttonholes and they came out just perfect! Thank you so much!
Sorry I’m old BUT FOUND THIS ARTICLE BRILLIANT. Thank you so much I shall try to follow it. Blessings be upon you.
Sorry I’m old BUT FOUND THIS ARTICLE BRILLIANT. Thank you so much I shall try to follow it. Blessings be upon you.
I have never been on this kind of website before! So I cannot have already said it!
I love them and they are intense, and I think you’re the first i’ve seen to explain about the facing windows so nicely… what do you think about putting bound b’holes in a cotton blouse : pros and cons?
What do you call the kind of pockets that look like bound buttonholes?
Hi Sarai,
Can you email me. I would like your permission to use your technique in my classes at Jo-Ann’s. I teach in Columbia, MD. I already do a lot of ‘technique’ classes, but rather than re-invent the wheel I would love to show your work to my students.
Your bound buttonhole method is terrific!
Laura
Thank you, this was very helpful – my daughter is doing a fashion course and this is one of the practical assessments she found very difficult. The instructions in her course material are very complicated with poor picture references – this was a breath of fresh air that was very coherent and easy to understand. Thank you you are a life saver!!!!!
Quick question: am I correct that there are only four functional bound buttonholes on the Anise, and the other four are simply for show, i.e. the buttons are simply sewn onto them looking as though they are functional, but they are not?
Yep, that is correct.
Just made a coat with these instructions. Turned out better than I expected for a first run. Thank you for the easy instructions and the brilliant idea with the window in the facing.
Hello! Thank you for the tutorial. I removed the buttons from a jacket and I don’t want it to have buttons at all. How do I cover the buttonholes? Should I sew them?
This was just the tutorial I was looking for. Very concise with nicely detailed photos. Thank you!