

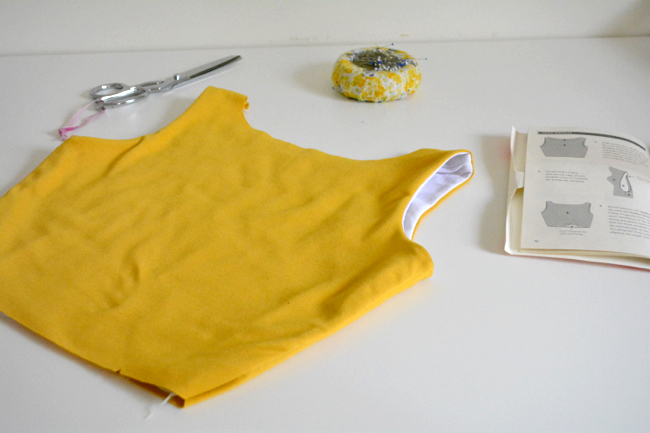
Today we’ll get things rolling by working on our bodices. I’ll be simultaneously making one dress to demonstrate Version 1 and another to demonstrate Versions 2/3. I’ve chosen to do the longer sleeves (V3) but the process will be the same if you’re doing short sleeves (V2).
I’ll be demonstrating most of the steps using a serger, but you can use your regular machine with a zig zag stitch or a stretch stitch like we talked about last week.
PREP
Before you start on your project, use some of your scraps and test out the stitch you plan on using.
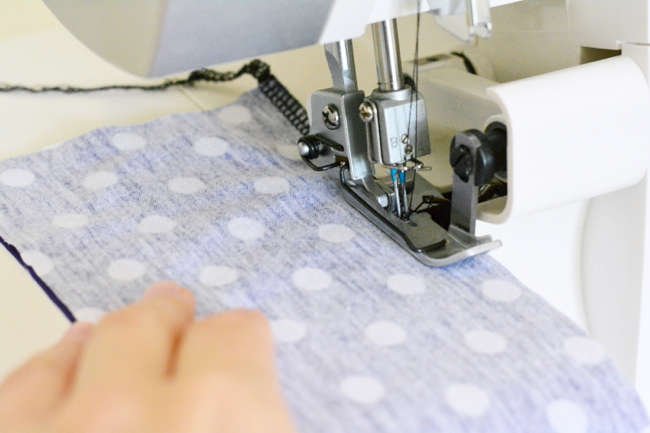
You want to make sure everything is laying nice and flat and going through the machine properly.
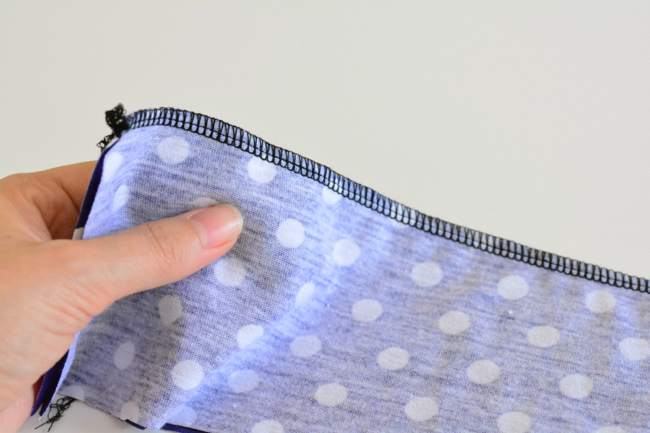
Make sure you look at it from the right side too. Give it a little stretch test to make sure the threads don’t pop.
VERSION 1
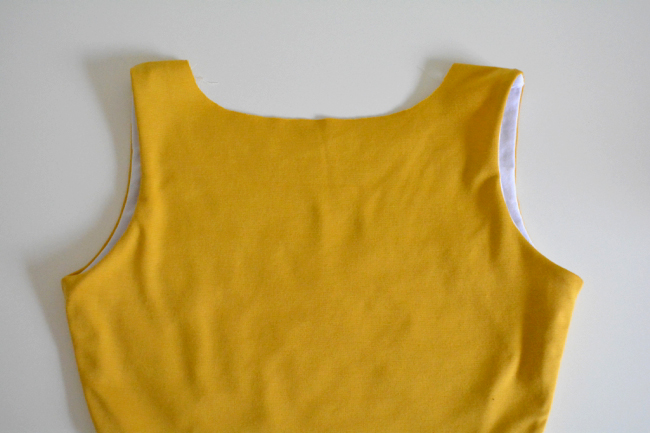
Assemble the Bodices
1) Trim the bodice lining. Trim 1/8” from the neckline and armhole edges of both front and back bodice lining pieces. (Trimming the lining will help it to roll to the inside of the dress and stay put instead of peeking out.)
2) Sew the bodice lining shoulder seams. With fabric right sides together, align the shoulder seams of the front and back bodice linings and pin. Stitch along shoulder seams.
3) Sew the bodice lining side seams. With fabric right sides together, align the side seams of the front and back bodice linings, matching notches, and pin. Stitch along side seams.
4) Sew bodice shell. Repeat steps 2 and 3 with front and back bodice shell.
After you sew the bodice shell shoulder seams, you can drape it over your shoulders and have a friend pin the side seams to check the fit. As tempting as it is, don’t try on the bodice after you’ve sewn the side seams, as you may irreversibly overstretch the raw bottom edge.
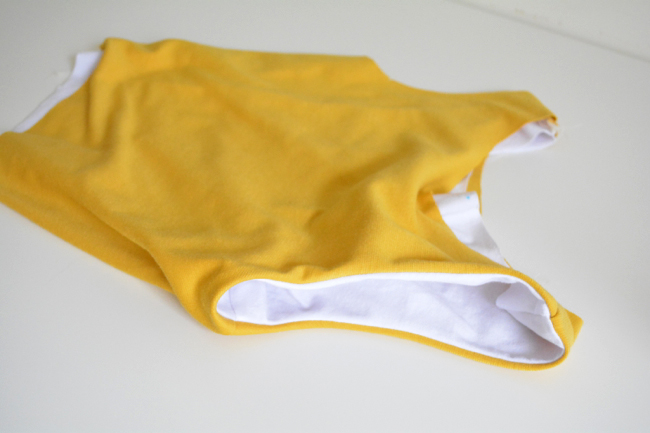
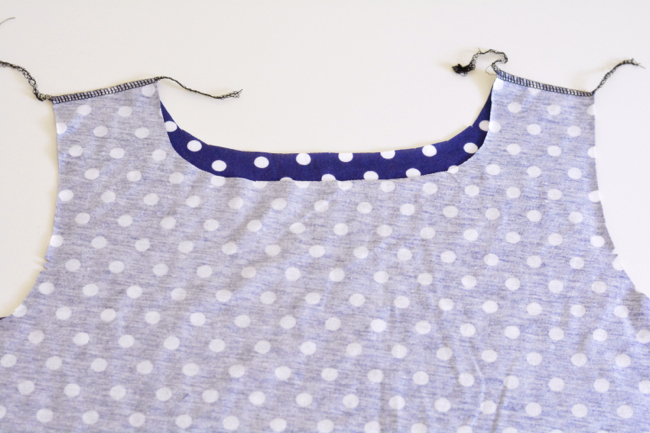
FINISH ARMHOLES
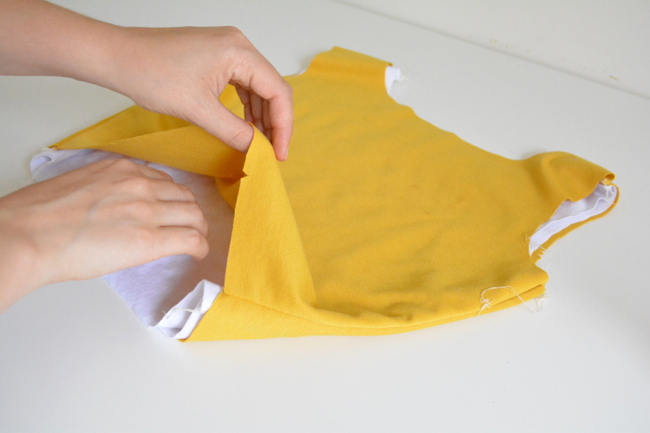
5) Insert lining. Turn bodice lining wrong side out. Stuff bodice lining inside bodice shell so that wrong sides are together. Align shoulder seams, notches and raw edges of neckline and armholes.

Wherever you line up seam allowances, point them in opposite directions to reduce bulk.
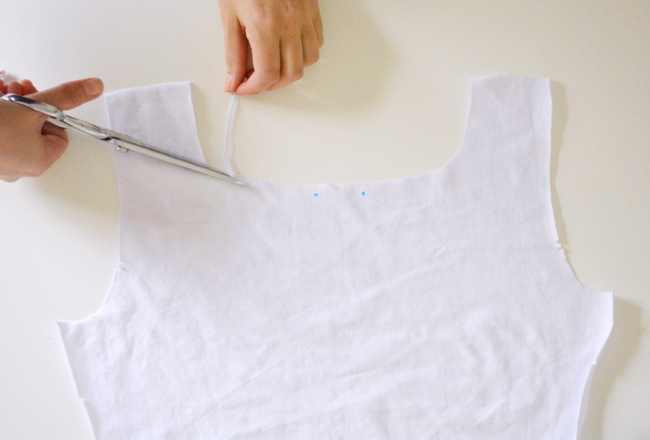
6) Press armholes. At the armholes, turn the raw edges of the shell and lining pieces 3/8” towards their wrong sides and press. You don’t have to meticulously do the entire armhole, a section of each on the front and back should do it.
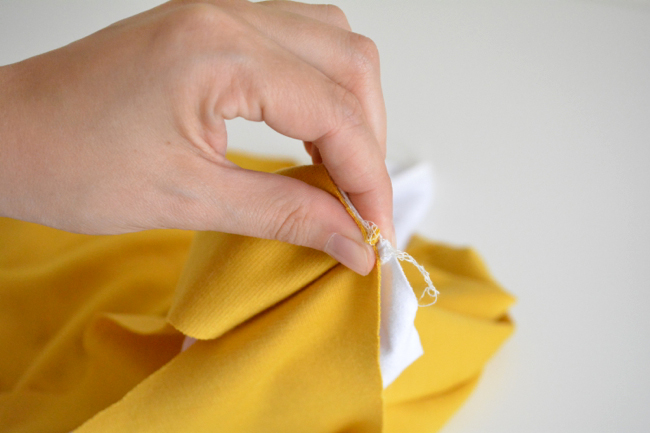
7) Sew front armhole. On the front of the bodice, reach in between the shell and lining.
Grab the pressed-under seam allowances of an armhole, pinch them, and pull them out.

Line up the raw edges from shoulder seam to side seam and pin.
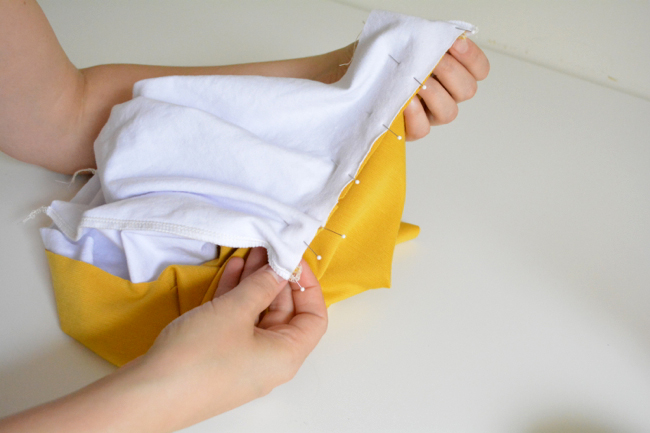
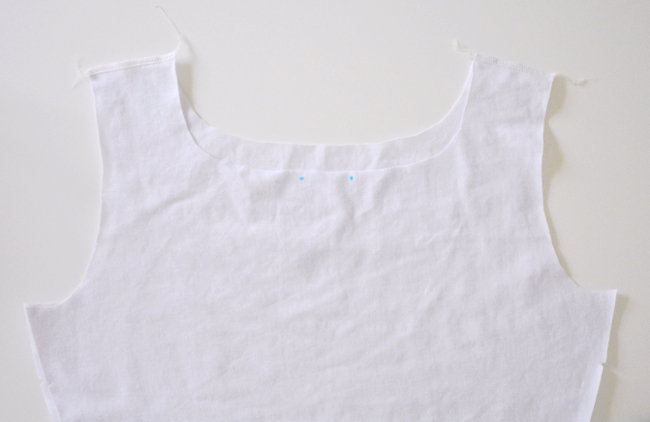
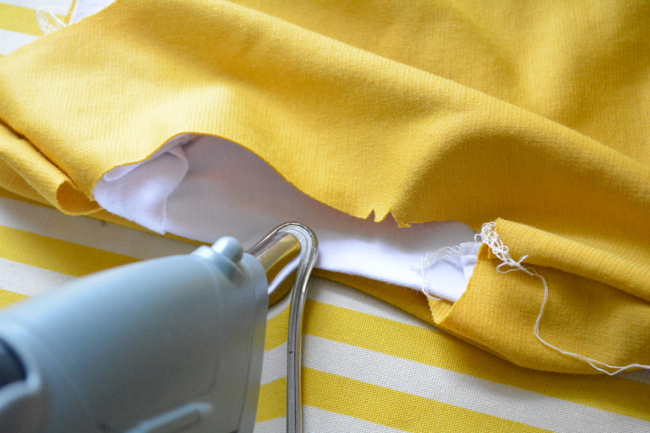
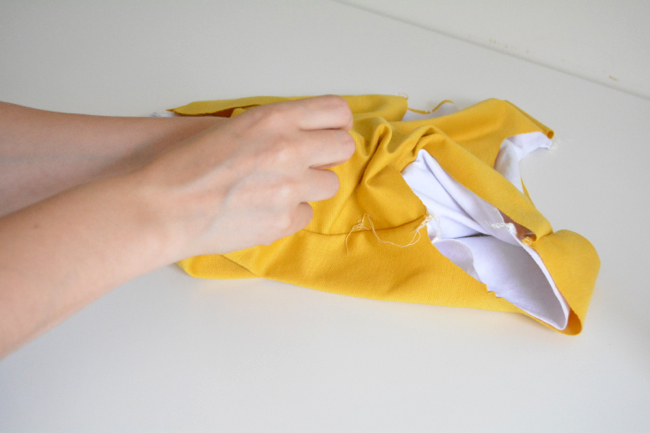
Stitch together from shoulder seam to side seam and turn everything right side out.
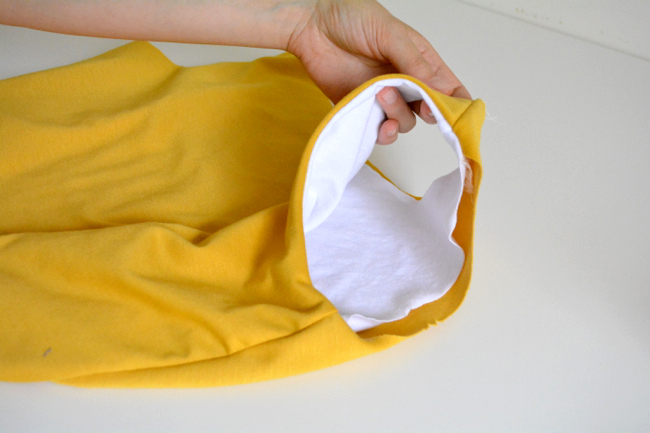
Repeat from the back of the bodice for the same armhole to stitch together the other half.
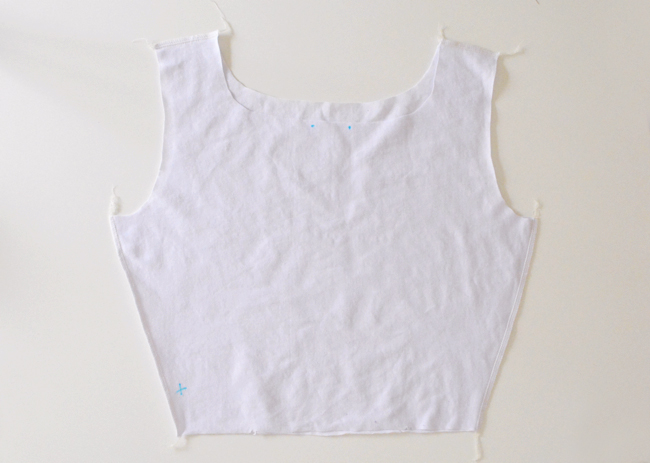
Repeat the whole process for the other armhole.
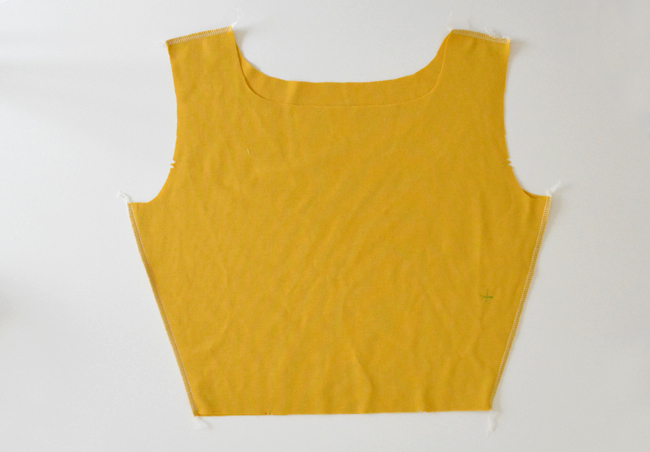
If you’d like more help with the armhole process, check out this video tutorial posted on the Coletterie.
VERSION 2/3
1) Sew the shoulder seams. With fabric right sides together, align the shoulder seams of the front and back bodices and pin. Stitch along shoulder seams.
After you sew the bodice shoulder seams, you can drape it over your shoulders and have a friend pin the side seams to check the fit.
That will do it for today! Version 2/3, I know you didn’t see much action today, but don’t worry, we’ll make up for it with the next post. See you all back on Wednesday!
Comments
Hi, sorry if I’ve missed where it explains this, but if I want to make a version with short sleeves and a collar do I use version 1 or 2? Thanks!
Since that is combining versions, you’ll have to create your own hybrid. If your fabric has enough structure you can just follow version 2 instructions, but then add the collar instead of hemming the neckline. I’d recommend stabilizing the neckline with strips of knit interfacing.
Or, if your fabric is thin and you’d like to have a lined bodice, the easiest thing to do would be to treat the bodice and lining as one and attach the sleeves to both at once, following the instructions for version 2/3 [posting Wednesday] and the collar instructions for version 1 [also posting Wednesday].
Thank you for your answer, sounds a bit complicated, maybe for my first one (and first time sewing with knit) I should stick with version 2 with short sleeves. I’m looking forward to it!
As a matter of interest, can you explain why the collar doesn’t need interfacing if the bodice is lined, but you’d recommend interfacing with version 2?
I was recommending using interfacing to reinforce the neckline of the dress if it isn’t lined [or clear elastic, or fusible tape] to help it support the weight of the collar, not interfacing the collar itself.
Ah! I understand now- ooh I may still try version 2 with a collar after all! However I don’t have any knit interface, I do have interface for wovens, would that do? Or would it be better to use clear elastic? Thanks for your help.
Doh!! Thanks for the clarification. I can see why now :blush:
Zoe – You wouldn’t want to use the woven interfacing in this case, as it won’t stretch enough in relation to the fabric. So clear elastic would be better, or knit interfacing if you can get your hands on that.
Carol – No worries! Sorry I wasn’t clearer originally! :]
Hi, I loved the video link it is really helpful. When not using a surger I assume you have to sew each seam and then finish the raw edge of every seam as well. Correct? Also, when you pin the side seams to check the fit would you mark where the pins were and unpin it (so that you don’t overstretch the raw bottom edge)? Or can you leave it pinned when taking it off?
Thanks
Jim
I would only worry about finishing the edges of the exposed seams. The armholes will be all sealed up inside so there’s really no need to finish them.
Technically on knits you can leave all the edges raw, because knit fabrics don’t fray. But finishing the exposed edges will make it look much more professional and will help the garment last longer.
Once you pin to check for the fit, yes you would want to unpin before taking it off.
I plan to make version 1 so I will be following your thorough instructions here. Thank you for adding the video, seeing it done visually helped me understand the written instructions.
I have a question: if I wanted to make version 2 or 3 with a lined bodice and unlined sleeves, would I still sew the lining to the shell at each armhole? I have some fabric that I would love to use for my next Moneta but I would like to have extra coverage around the bust area.
If it were me, here’s what I would do:
Trim 1/8″ from lining pieces on neckline only.
Sew shoulder seams of lining and bodice.
Pin lining and shell right sides together around neckline and sew all the way around.
Flip lining to inside so that wrong sides of shell and lining are together. Baste layers together around side seams and arm holes.
From that point on just follow the directions for version 2/3 and treat the bodice/lining as one layer. Sewing the neckline first gives you a nice finished edge without having to deal with hemming two layers of fabric.
You would not want to sew the armholes as they are sewn in V1 if you are going to attach sleeves to them.
Hope that all made sense!!
Thanks for the tips! That made perfect sense and I’ll have to remember this when I start on the second moneta.
Hi Devon,
I tried this (as I am also making a v2 with a lined bodice) and it worked well. I’ve ended up with a nice clean finished neckline. Do I still need to hem around the neckline with the twin needle? (I would think you do – but I’m completely new to knits!) Thanks for answering all my newbie questions. :)
You don’t need to because that edge is already finished with the neckline seam. The only reason you would is if you want the aesthetic of topstitching there.
Thank you
So happy to come across this because I was totally stumped on how to proceed!
Hi
I’ve made a few Burda pattern tops in the past and they often say to stabilise shoulder / back neck / armhole seams with Vilene bias tape. Is any stabiliser advisable for this dress? I am planning on making v. 1
Cheers.
I haven’t found it necessary, but you can certainly stabilize the shoulder seams and neckline if you would like, especially if you fabric is on the thinner and stretchier side.
Devon, I have a newbie question about using the clear elastic as a shoulder stabilizer. Well, maybe more than one question. #1 If using the stabilizer while making version 1, which piece would you attach it to ~ the lining or the actual bodice, front or back of the shoulder? Where do you sew it ~ ON the seam line or just inside the seam allowance side? I’ve tried sewing ON the seam line and it seems to create bulk plus it doesn’t like being ironed. Maybe I should use some kind of knit fusible there instead?
You would want the clear elastic to end up in the seam allowance so that it’s not extra bulky in the seam line. You can also use fusible stay tape or cotton twill tape.
Thanks so much for the speedy reply. I hope to get some sewing time in this week-end.
Hi!
I am making a v. 1 and find that my armholes gape slightly but I would rather not add darts. Do you have any suggestions for how to correct this when using a knit fabric?
You can pinch out the dart that wants to form at the armhole, mark it, then transfer it to the pattern piece. Redraw the armscye so that the pinched out section is removed.
Devon,
I have the same issue, plus I’ve got extra fabric just at the neckline, but at the bust I’m okay. Would I just pinch it out there as one pinch at the center of the front neckline or maybe spread it out to two areas equally spaced. I’ve posted pictures on the Facebook sew along page.
Yep you can just pinch out at the neckline, then redraw the center front line at an angle to account for the pinched out fabric. Just make sure that you’re subtracting half the amount that is pinched, because since it’s on the fold the amount that you subtract from the pattern piece will be doubled when the fabric is cut.
Hey Devon! Thanks so much for all the thorough instructions here, I’ve learned a lot so far just by following along. I have a question, which is sort of related to Cindy’s question, above.
If I were to make a collar-less V1 (similar to Sarai’s tie dye version), would you recommend sewing the bodice neck to lining neck opening in one big circle, then complete the armholes as shown in the video? Didn’t know if that would cause any twisting along the way… (or if I should proceed with the neck opening the same way I would the arm holes).
I was looking at the schedule last night – I can’t believe we’ll be done next week! I’m making 2 versions (a collar-less V1 and a V2), and can’t wait to see how they both turn out. :)
Yes that’s exactly what you can do! Sew the neckline first right sides together, then flip around and follow the video. Then all your bodice edges have nice clean finishes.
I can’t wait to see everyone’s dresses!! :]
Oops, I got a little ahead of myself and just finished my second Moneta already! I learned the hard way not to try on the bodice after the side seams are sewn, though. On my first version, the waist stretched so much, and I had to improvise the fit quite a bit… whoops. I love both my versions, though, and I can’t wait to make more!
It’s hard to resist trying it on! But now you know not to. :] Glad you like your dresses!
Hi Devon,
thanks for the advice about the size. I think I’ve got it now.
I choose Version 1 and had the idea of using a bias tape but it didn’t work (it was bending outwards) Does Jersey work with bias tape at all?
It looks much better now with the linging.
Simone
If you want to finish a knit edge with bias tape, you will have to make it out of knit fabric, not use the woven stuff. Here’s a tutorial for that:
http://www.made-by-rae.com/2014/02/knit-necklines-part-ii-bias-bound/
Hi Devon,
I have just tried my outer on and it is a bit snug. Also I have a very long torso and the bodice is a full 4 inches above my belly button. I am going to sew the seams of the side on a shorter seam allowance, but do you think the length thing is ok.
Thanks,
Marianne
Hi Marianne! Your side seam plan sounds great. Not a whole lot you can do about the length. If you have enough fabric, you can lengthen the bodice pattern pieces by the desired amount and then cut a new bodice. You could also add a band of fabric around the bottom of the bodice and call it a style choice. Or, maybe just call this Moneta your babydoll Moneta!
Ah ok, I was hoping you would say it was supposed to be like that. I like the band ideas, I will muse on that. I now have one crappy armhole and one perfect armhole! It is all about the learning curve so I am very pleased they aren’t both crappy.
Hi Devon, you said on your personal blog about this Moneta : “When I finished that dress, I was getting some major armhole gape, which is a common problem for me. So I hacked off the bodice, did a few pattern adjustments and made a new one.”
I always get armhole gap in sleeveless dresses, so I would like to alter my bodice before I complete this sewalong. Will you share what adjustments you made so that the bodice now fits better?
I am really appreciating your excellent instructions.
Thanks, Jean
Hi Jean!
While wearing the dress, I pinched out the armhole gape as a little dart, pinned and marked it, then transferred the dart to the pattern piece. I cut out the dart and brought the edges together to close it, blended the edges then used that to redraw the armscye. I’ll be posting a tutorial on my blog soon in case you need more help!
Thanks so much! The instructions re the dart, and recutting the pattern make sense, and I can certainly work with it. But I will probably wait for the tutorial on your blog so that I get it right. Your extra expertise is really appreciated.
Cheers, Jean
Hi Devon, I finished my Moneta today and I resolved the armhole gaping issue by transferring the fullness to a bust dart, using these instructions http://www.burdastyle.com/techniques/get-rid-of-a-gaping-armhole . I think that for someone who has any kind of a bust at all, and I am not really all that busty, fit is always improved with a dart, even with knit fabrics. I love the fit of my altered Moneta, and now I can sew a whole bunch of them!
Thanks.
P.S. There are pics on my blog at http://whenyouloveblue.blogspot.ca/2014/06/completed-moneta-dress.html
I’m so glad you figured out a solution! If you’d like to check it out for future reference, I’ve posted the tutorial for how I got rid of the armhole gape:
http://www.missmake.com/2014/06/tutorial-how-to-fix-armhole-gape-in.html
Loved your tutorial.
Making a dress with a little modification to suit what I am sewing for my little girl.
Have linked back your post
http://colorsofourrainbow.blogspot.ae/2015/01/diy-girls-frock-story-of-purple-dress.html
Thank you for such a detailed and precise tutorial.