

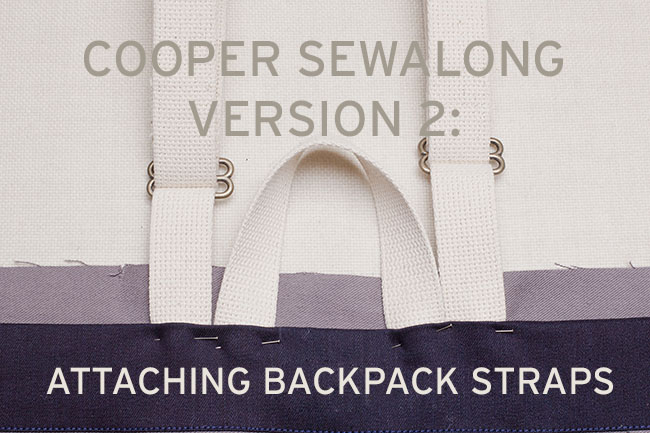
Today is for those of you working on the backpack version of Cooper.
If you’re doing the messenger or satchel, hang tight. We’ll return to those on Friday, giving you the weekend to sew. If you’re working on the messenger, you might also want to check out today’s tutorial on assembling adjustable straps. We’ll be doing that on the messenger next week, but feel free to review the tutorial ahead of time.
But back to the backpackers. Today, we’re going to work on putting the straps together and attaching them to the backpack.
Attach Back Top Panel
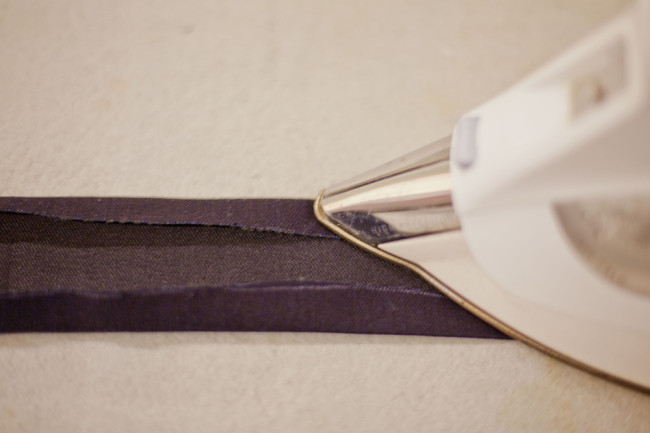
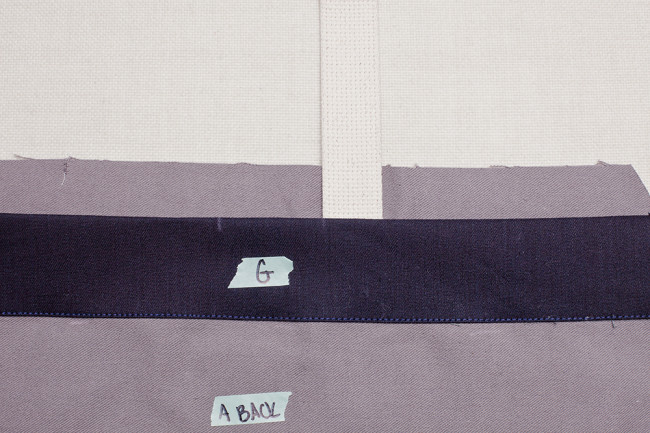
1. Press the two long edges of back top panel (G) under 5/8″, pressing the edges to the wrong side.
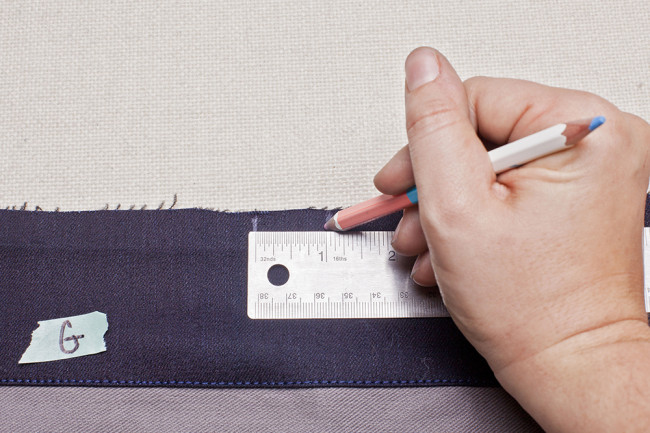
2. Find the center of back top panel (G). Measure 1” in each direction from the center and mark with chalk or a marking pen. This will mark your hang loop placement later.
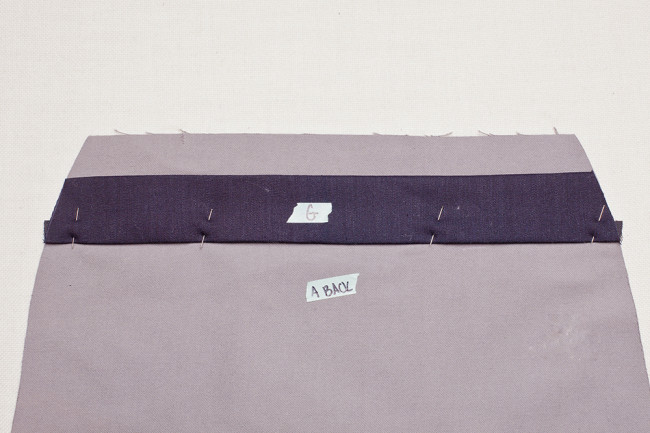
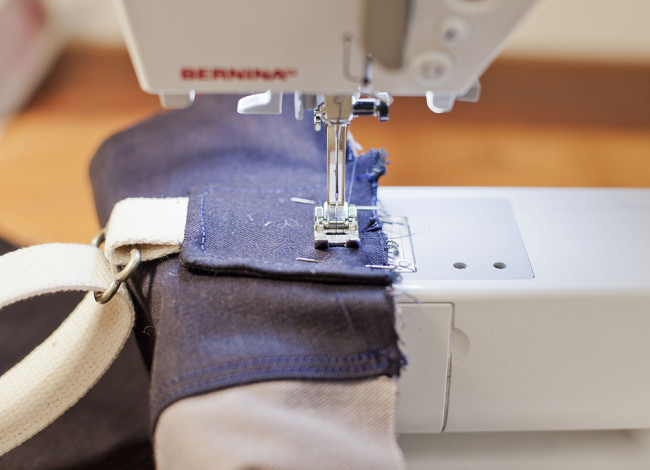
3. Place the back top panel (G) between the dotted back top placement lines at the top of the body (A).
4. Edgestitch along the bottom edge of back top panel (G). Leave the top unstitched for now.
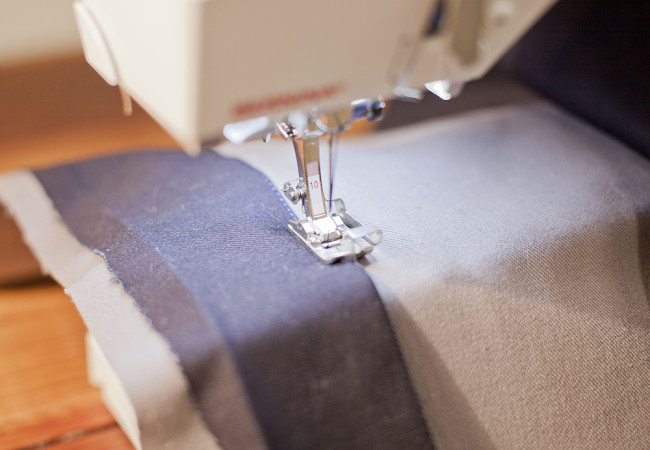
Assemble Backpack Straps
Follow the instructions in the How to create adjustable straps post to create two matching backpack straps.
Assemble Strap Attachment
Next up, we’ll be creating the tabs that attach the bottom (short end) of each backpack strap to the sides of your bag.
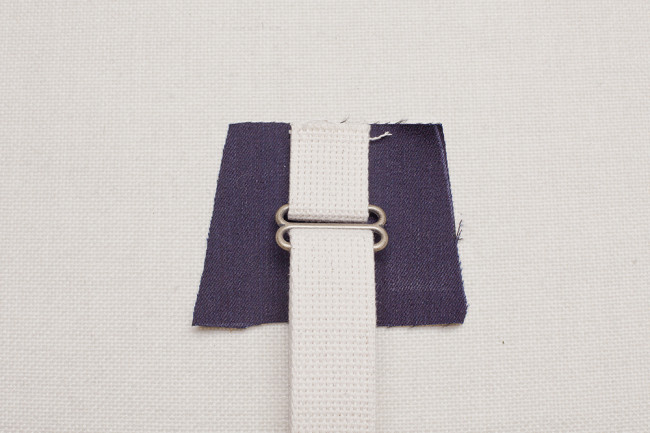
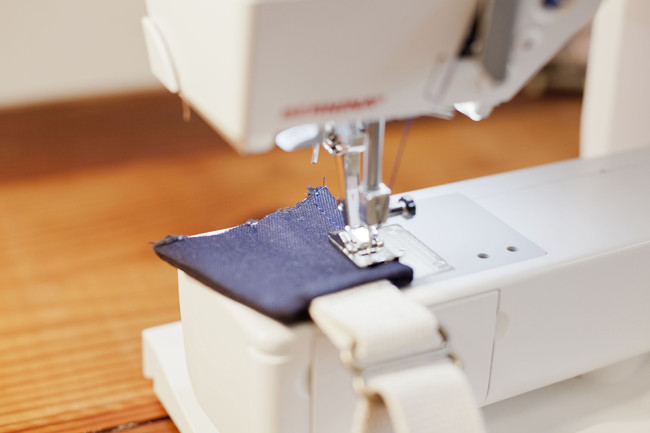
1. Lay one strap tab (J) piece right side up. Using the backpack strap you just created, take the short end of the webbing sticking out of slide 2 and place it on top of the strap tab (J), as shown. Align the raw edges with the short end of the strap tab (J).
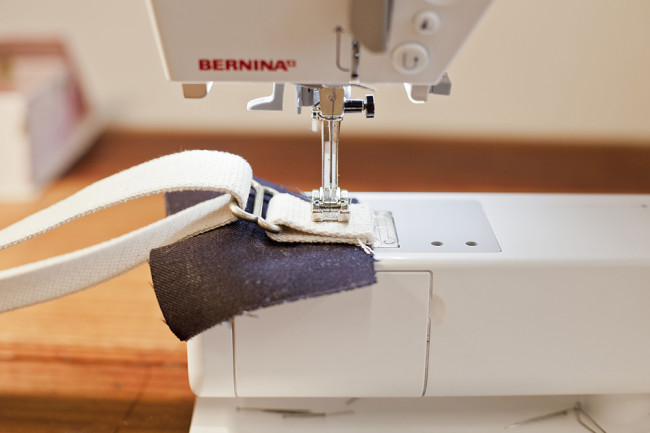
2. Baste in place.
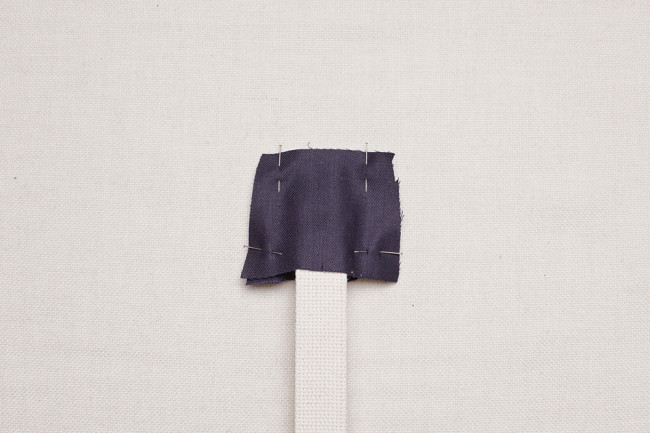
3. Place a second strap tab (J) piece on top of the first one, right sides together. The webbing will be sandwiched between the two tab pieces.
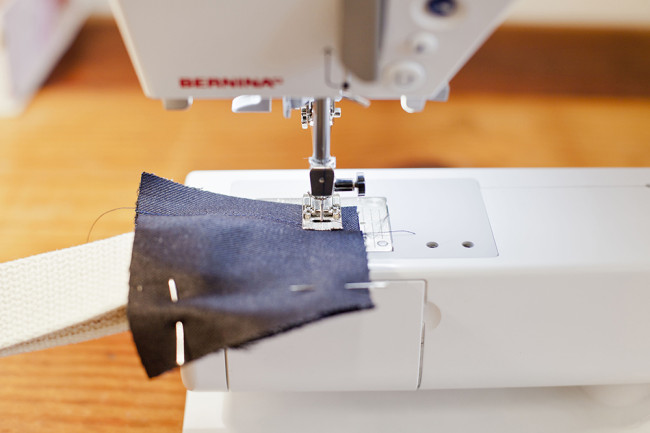
4. Stitch around the sides and top short edge of the strap tab (J), as shown.

5. Trim the seam allowance, and clip the corners.
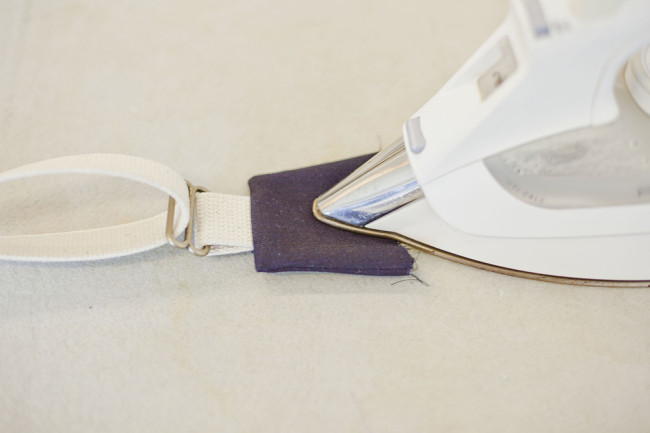
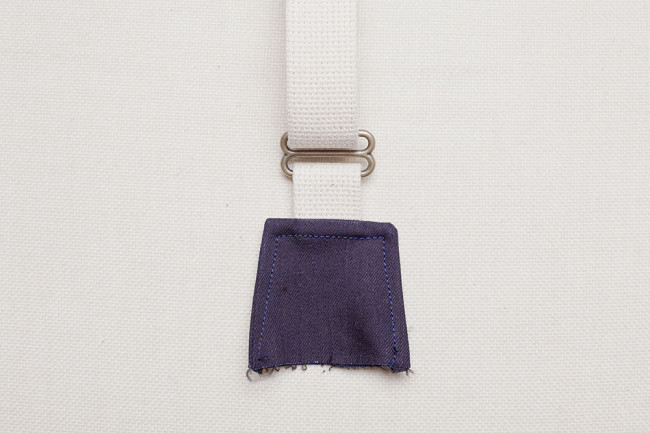
6. Turn strap tab (J) right side out. Press.
7. Topstitch around the three sewn sides of strap tab (J), stitching ¼” from the edge.
8. Repeat for the second strap and strap tab.
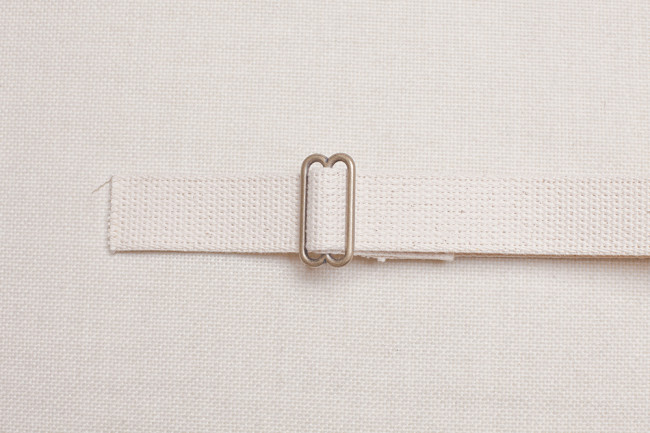
Attach Hanging Loop
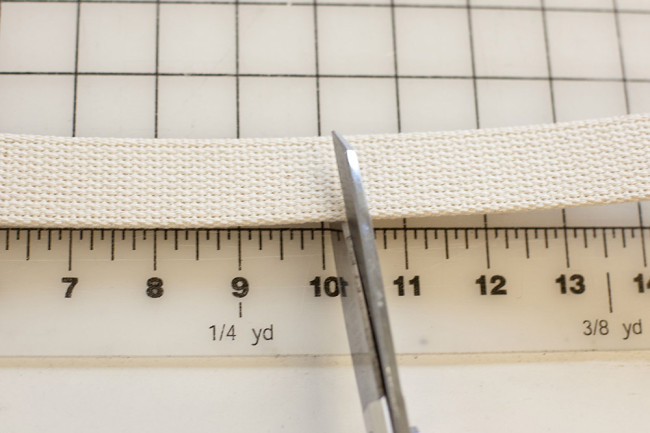
1. Cut a 10” long piece of cotton webbing.
2. Find the two marks you made at the top of back top panel (G). Align the inside edge of one end of the webbing with the mark on the right side of the bag. Tuck webbing down 5/8“ between the back top panel (G) and body (A). Pin.
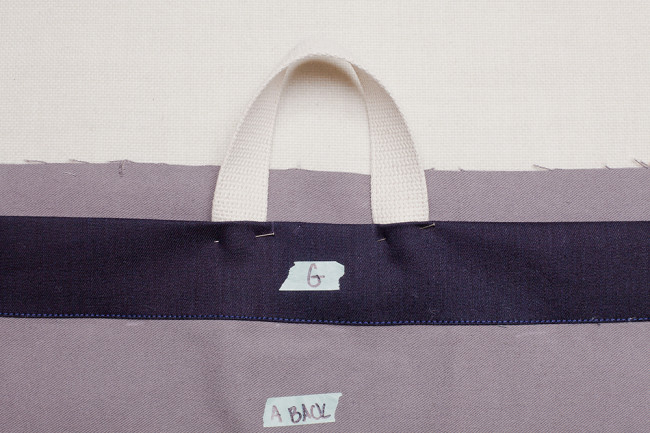
3. Being careful not to twist the webbing, align the inside edge of the other end of the hanging loop with the mark on the left side of the back top panel (G). Tuck webbing down 5/8“ between the back top panel (G) and body (A). Pin.
There should be a 2” gap between the inside edges of the webbing and the hanging loop should be centered.
Attach Backpack Straps
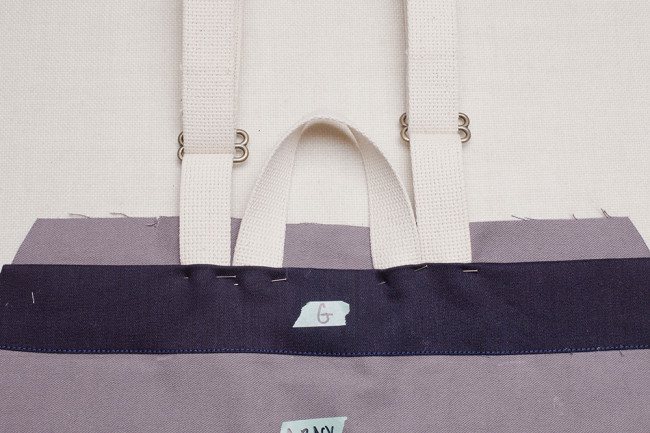
1. Lay the body (A) completely flat in front of you with the two straps flat and fully extended above the bag. The undersides of the straps should be facing up. Slide 5/8“ of the raw edge of the strap beneath back top panel (G), right next to the hanging loop. Pin in place. Repeat for the second strap.
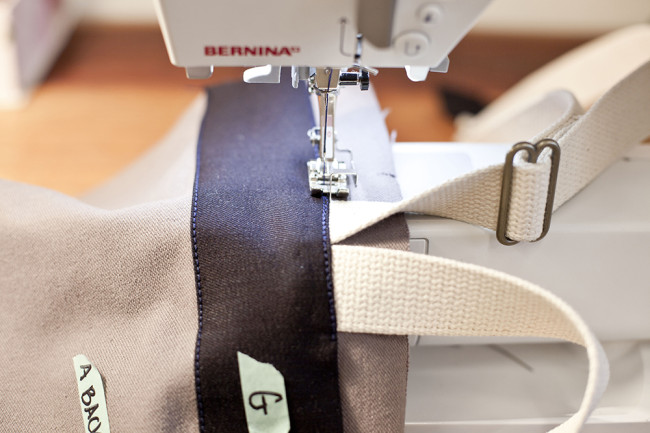
2. Edgestitch along the top edge of back top panel (G). Backstitch over the two straps and hanging loop to reinforce the webbing.
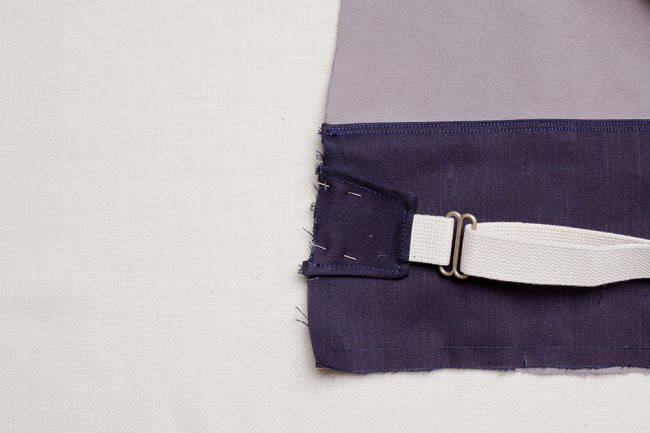
3. Being careful not to twist the strap, align strap tab (J) with the side of back bottom panel (E), matching notches.
4. Baste strap tab (J) in place. Repeat for the second strap.
Backpack straps are now attached!
The next step for the backpack will be finishing up the body on Monday.
Comments
This bag is really stylish and cute, but i do not see it very practical. :(
I have always had problems with straps attached with a single seamline. The seam in the stress point tends to break in few months of everyday use (would not want that to happen to self made bag, i’ve put a lot of work into), because there is laptop, books, groceries and other heavies that find their way into a backpack. I would like to hear some ideas for alternative, stronger, more durable strap attachment, that would distribute the stress more evenly over the whole construction.
I haven’t had this issue myself, so maybe someone else can chime in. I’m having trouble thinking of alternate constructions that don’t involve sewing straps into a seamline.
The only thing I can think of is extending the straps so they go all the way down the back of the bag and are sewn into the back bottom panel, plus the top panel in two places. This is how the handle on the satchel is sewn, for example.
Perhaps, within the seam line, stitch the strap to the material in an elongated X fashion, then around the edges of the x, making a rectangle around the X, thus securing the strap very strongly to the material. Other option would be to do a close-set zig-zag inside the seam line; again giving extra strength to this stress point. I was thinking of this when I saw how the hanging loop was attached, as my son currently has a daypack where the loop came loose on one side. It’s an easy repair, but for a purchased daypack, I wouldn’t have expected this issue.
I’m having trouble sewing through all the layers of webbing when they’re folded. I’ve broken three of my heavy duty needles and it doesn’t really fit under my sewing machine foot… the rest of my beautiful bag was going swimmingly! Any tips appreciated! I was wondering if a tailor might help me to do it or just think I was weird! Haha.
That’s an option, but here are a few other ideas:
– Look for a different cotton webbing, because some are DEFINITELY thicker than others.
– Try a nylon webbing instead of cotton. This is a lot thinner and very sturdy.
– Make your own straps out of fabric to replace the webbing! It’s super easy. You could use your self fabric or choose a contrasting one that you know you’ll be able to sew through easily.