

As you may have noticed in our Full Bust Adjustment tutorial yesterday, adding ease inside the dart prevents the addition of width in the waistline, but it can also lead to an excess of dart pick-up. Dart pick-up is the fabric that gets encased inside of the legs of the dart. More dart pick-up means more fullness at the tip of the dart.
I’m not a huge fan of those floppy triangles of fabric inside my bodice, so I try to minimize them when I can. One trick is to split the bust dart into two, thus dividing the dart pick-up in half.
Splitting the bust dart also helps create a more rounded look in the bust. By adding a second apex point you will get a less pointy shape at the full part of the bust. This is very helpful for those with curvy figures.
Here is how:
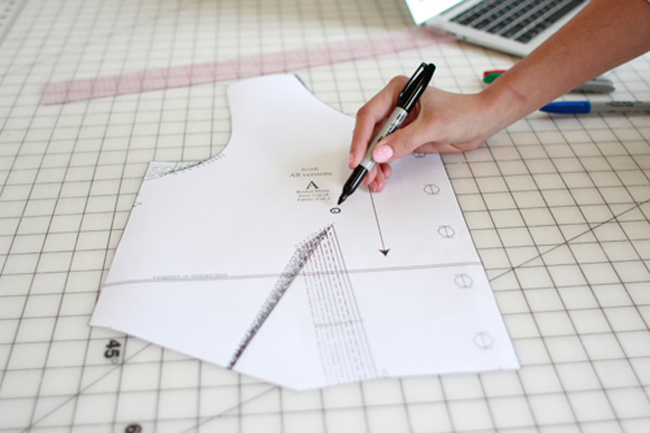
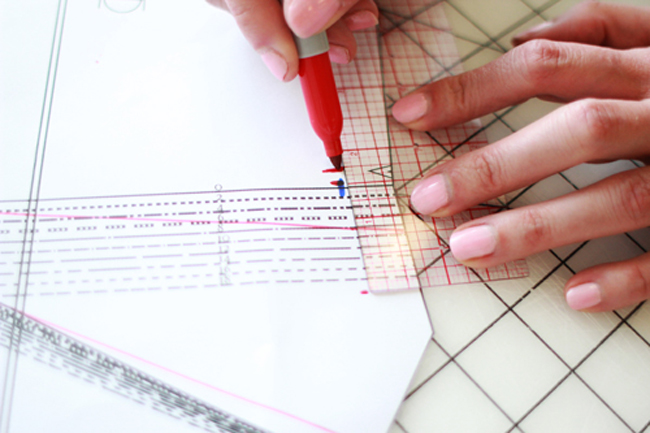
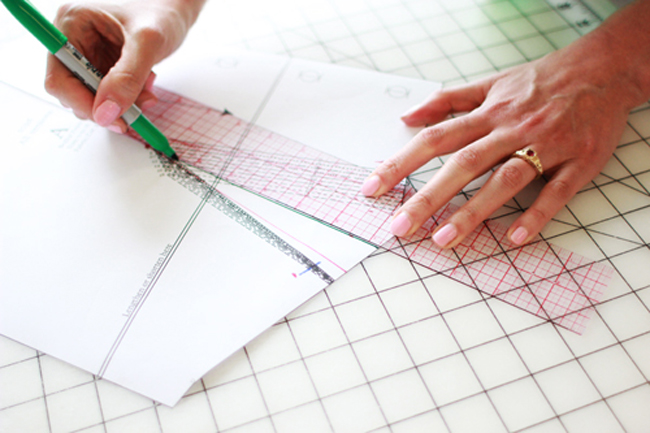
Step 1: Draw in your bust apex. If you did an FBA already, you’ll already have it marked. The apex is typically about 1 inch from the tip of the dart.
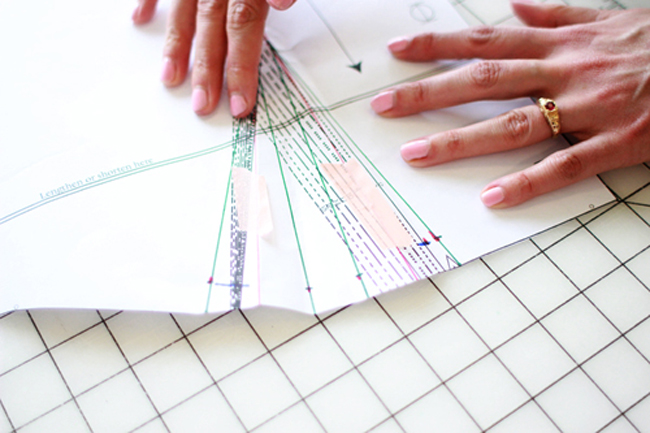
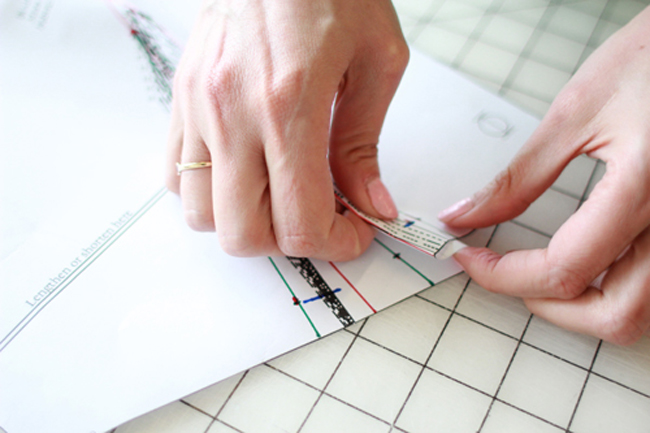
Step 2: Mark ⅝” seam allowance on both dart legs, shown here in blue.
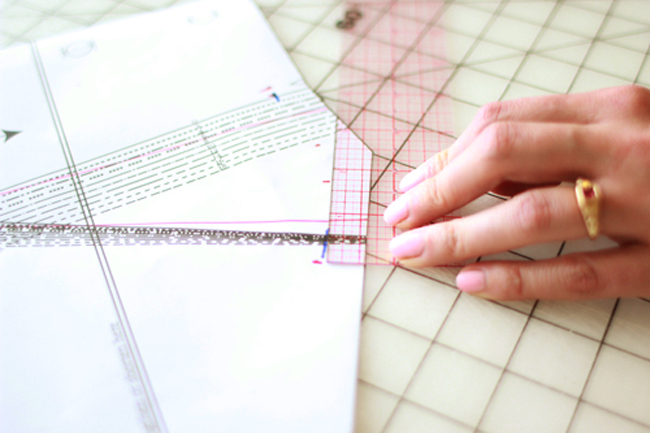
Step 3: Measure the distance between the two dart legs, so that you can divide the dart pick up.
Note: We did our adjustment on a size 0 pattern, which has a dart pick-up of 3 ⅜
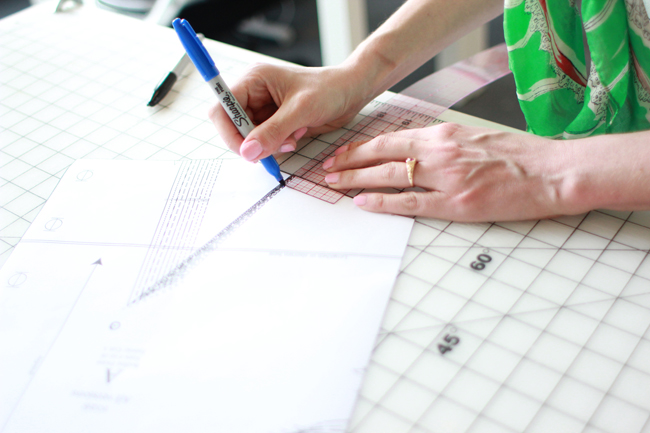
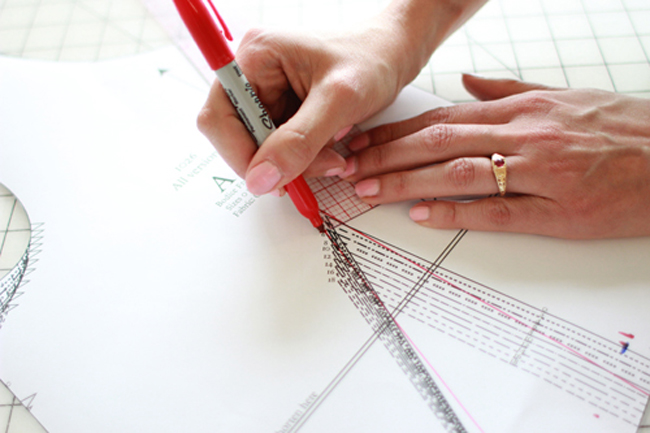
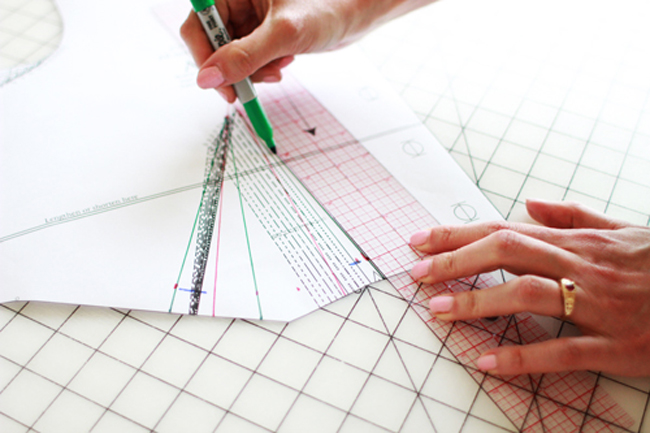
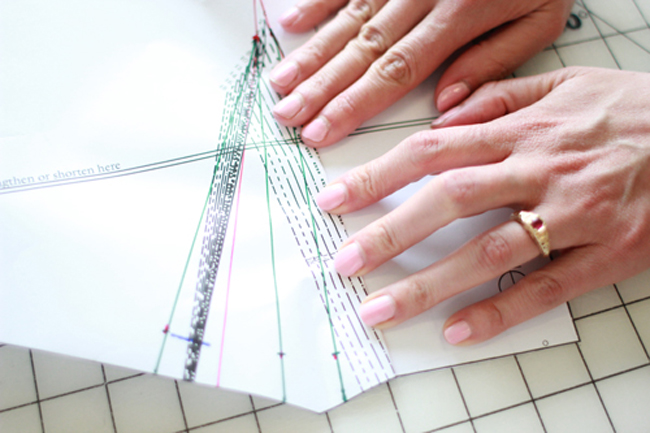
Step 4: Draw the center lines of your new darts (shown in red) placing them far enough apart that the darts won’t collide with one another. Just inside of the original dart legs should be fine.
Step 5: Divide your original dart pick-up in half to get the amount of pick-up you’ll want for each of your two new darts. Divide that number in half, and you can measure out your new dart legs from the center lines.
Note: Our two new darts needed to be 1 11/16 inch each. Rounding to the nearest 1/32 inch, from there we measured 7/8 on either side of the center lines.
 Step 6: Draw new dart tips 1” below apex point.
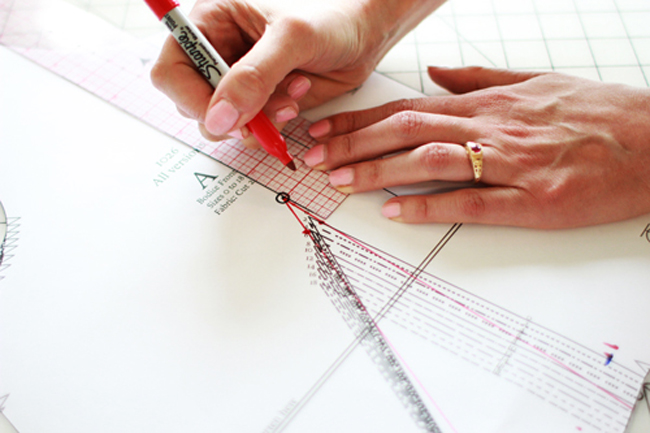
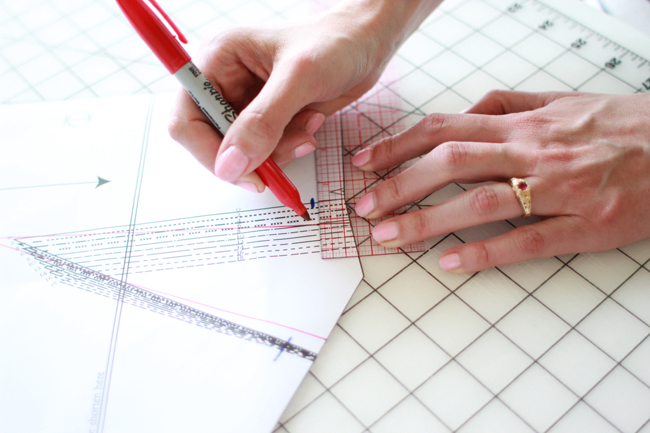
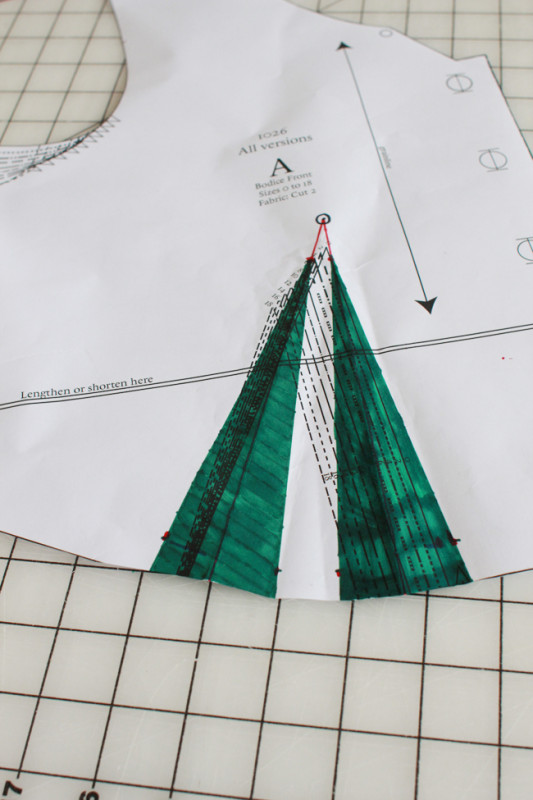
Step 7: Draw in new dart legs (shown in green).
 Here is what you should end up with:
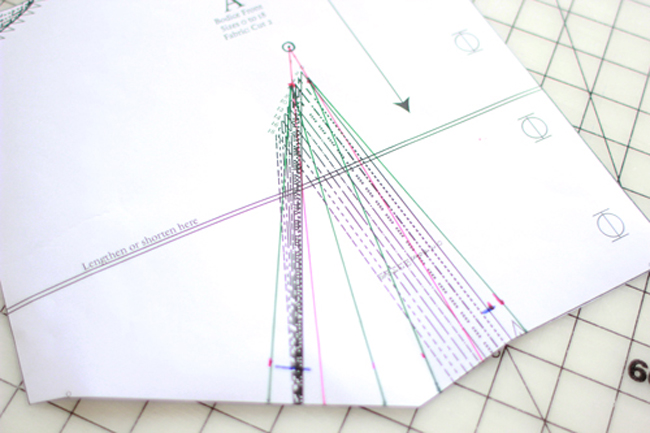
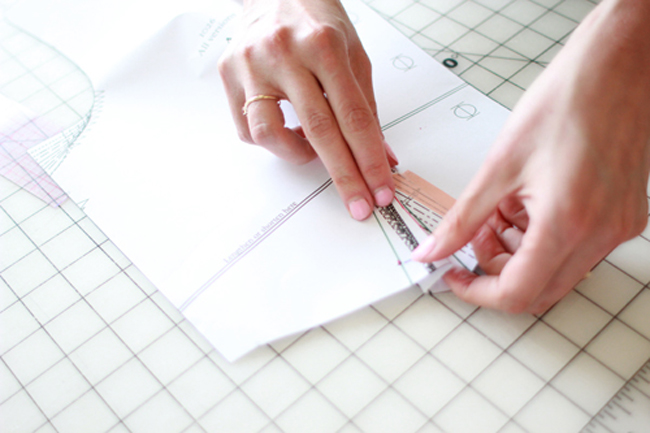
Now we just need to clean up the line at the waist, since we no longer need that extreme point as the center of our dart pick-up.
Step 8: Fold along center line of one dart, matching up the lags as you would when sewing the dart.
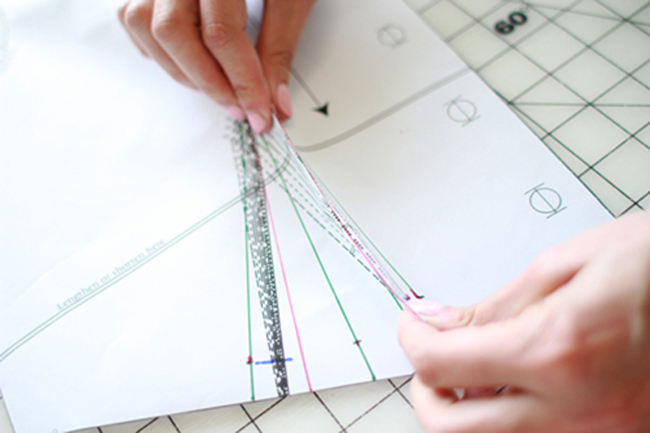
Step 9: Fold the dart pick-up over toward the center and tape down.
Step 10: Repeat steps 8 and 9 on the other dart.

Step 11: Cut straight across from one outer dart leg to the other.
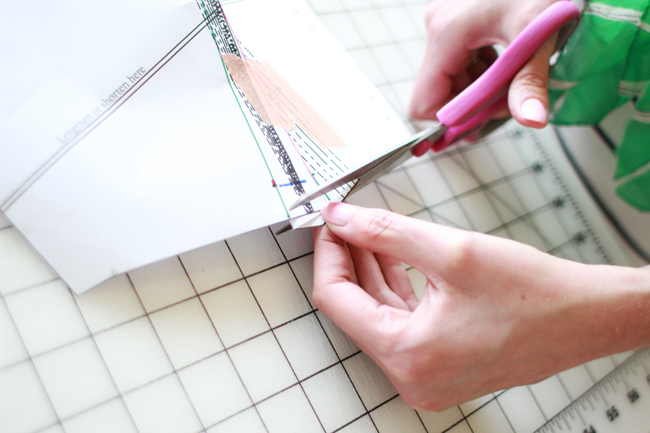
Step 12: Remove tape and unfold the darts.
You now have two darts! Below you’ll see I’ve filled them in with green marker to better distinguish them from the other lines.
I especially like this adjustment for Hawthorn because there is no corresponding waistline dart in the skirt to match them up to. If there were, you would simply need to be aware of this when drawing your center lines in step 4 and decide where you wanted your darts to fall in relation to the skirt dart.
Comments
This is great! Thanks. It’ll make sewing my darts so much easier.
This is awesome! Thanks for sharing!
I really like this as well; these past two posts on adjustments are so easy to understand! I finally ‘get’ the spreading and separation of the bodice. Thank you!
Thank you very much for this tip – and for once again showing how to adjust for FBA!
When splitting a dart like this I usually lower the apexs a bit more so that the interior dart legs will be parallel to each other instead of diminishing.
Great tutorials! I always love to see Full Bust Adjustments done for new patterns.
This is great and just the stuff I need! I am going to buy this pattern (first Colette!) And try it.
However, any reason for two under bust darts rather than one at the side and one under bust?
Thanks :)
Thank you, thank you very much. I was able to buy a pattern from SewSquirrel here is Australia so I can almost sew along. And I need two, maybe three darts!!!
I am so happy to know how to do this! I’m always looking for ways to minimize my overly generous bustline and this is wonderful information to have. I’m wondering – could the width of the single dart even be split among three darts instead of two, to soften the look even more? And do you think released tucks would work as well as darts? I think I’d really like the look of tucks but wonder if there’s some technical reason why it wouldn’t work.
Thank you for your great work!
Thank you! But after a lot of measuring en then just putting the scissors in a piece of fabric I figured out that my bust fits perfectly in the pattern….Apparently the way we measure busts in Europe is different to your way of measuring.