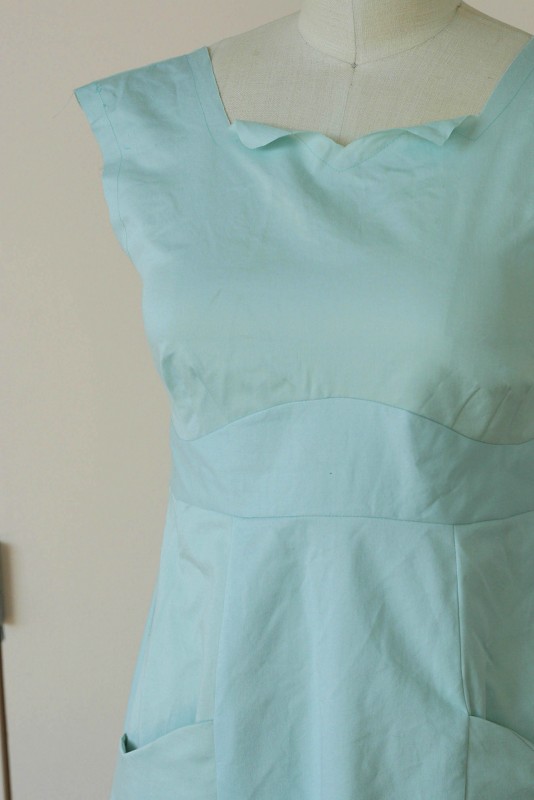
Let’s talk muslins.
A lot of sewists are hesitant to make muslins because it takes time. It seems like you’re making the same garment two, three, maybe even four times.
But really, muslins are way faster than real garments. You can omit facings and closures, and that alone saves a ton of time. You don’t need to hem them. And when it comes time to make your real garment, you’ll move much faster through all the steps.
That said, muslins present a little problem for writing a sewalong. We haven’t yet gone through all the steps to construct the dress, so making the muslin might be a bit tricky. I want to focus this post on getting your muslin ready for fitting, rather than going through the whole dress construction.
Since you don’t need to do facings and closures, putting your muslin together following the pattern instructions should be pretty easy. The two things that might trip you up are (1) darts, (2) the curved seam of the midriff, and (3) the pocket construction. So here’s what I have to say about that:
- Use this handy guide for sewing the darts.
- When sewing the midriff seam, use plenty of pins and sew slowly.
-
If the midriff seam puckers a bit, don’t worry too much. We’re focusing on fit at this stage, not aesthetics.
- Try using your pattern pieces to visualize the pocket construction before you try sewing it.
- If you don’t think you’ll have trouble with the fit in the hips, you can do a muslin of just the bodice. The hips are not super fitted, so unless you are pear shaped, you may not need to mess with the skirt at this stage.
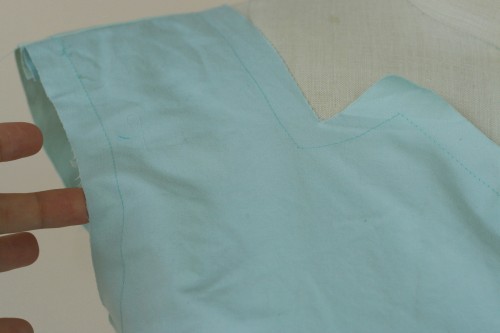
As you’re assembling your muslin, you might find it helpful to stitch along the raw edges with a 5/8″ seam allowance, as shown above. Because you’re not doing any facings at this stage, those stitching lines will show you where the edges of your garment will really be!
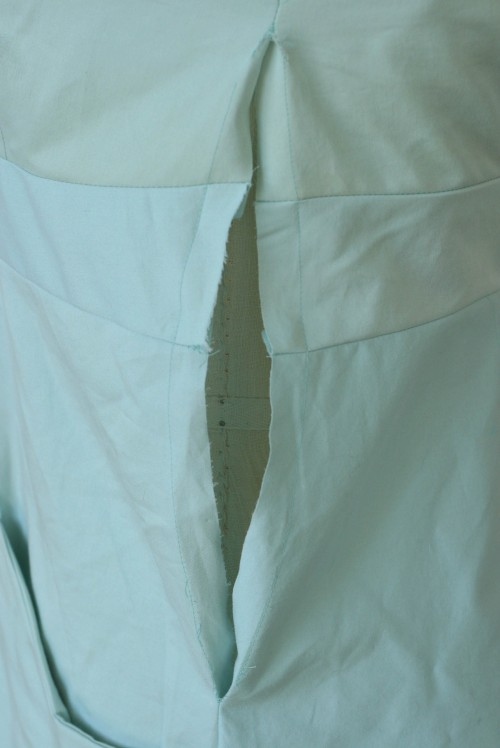
And since you’re leaving out the zipper, you should also stitch 5/8″ along each edge of the zipper opening.
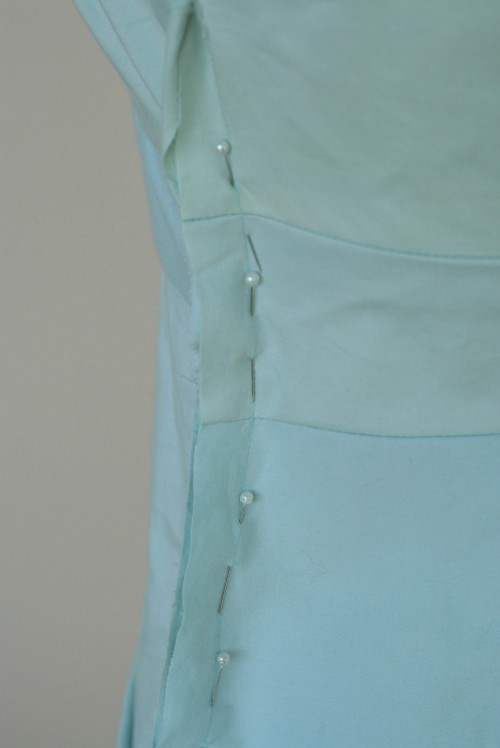
Then, when you try on your muslin, pin it closed by inserting your pins right into the stitching lines along the opening. This will make sure you’re not accidentally pinning the dress too loose or too tight.
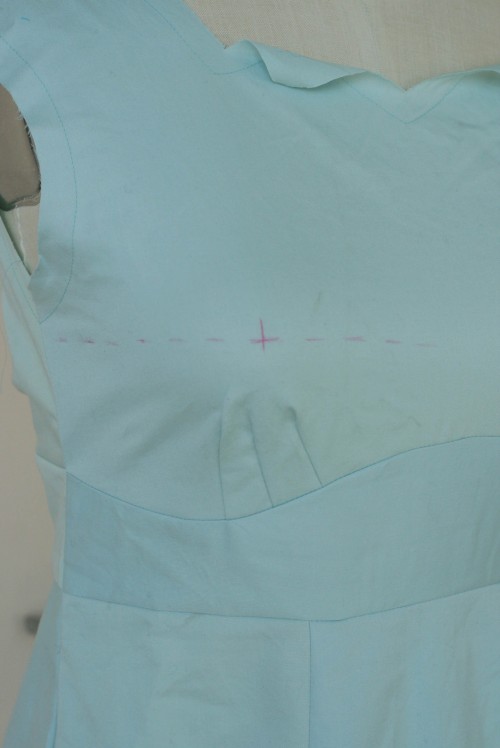
Once you have the dress on, we’re going to make a few marks so we know where the dress hits on our bodies. Start by marking the apex of your bust on the dress. I used a cross mark here.
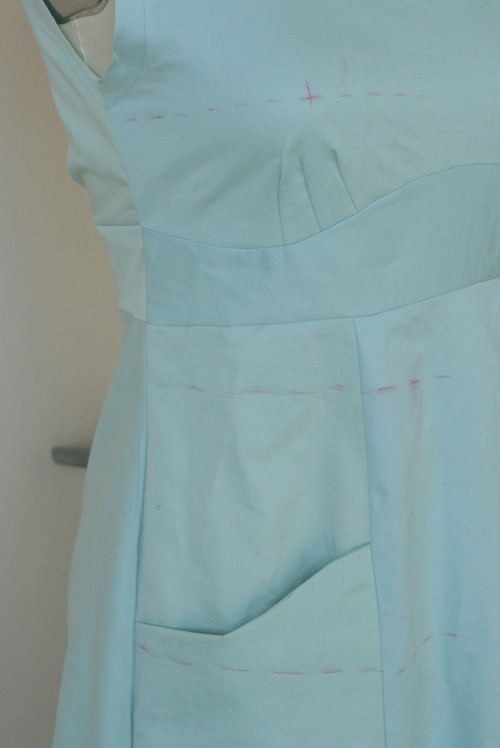
Next, mark the bust, waist and hip lines for your body.
You’ll notice that your natural waist on this dress is actually on the skirt, not at the waistline seam! The midriff sits higher than the natural waist, so this is to be expected.
Now we’re ready to make adjustments. Take a really good look at the fit. Does the dress seem to be straining anywhere? Is it bulging, or producing loose wrinkles and folds of fabric?
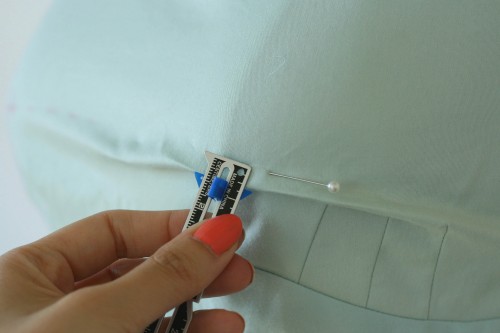
If it seems too big in any one spot, pinch out the excess fullness and pin it. Use a seam gauge and measure how much you need to remove from the pattern in that area.
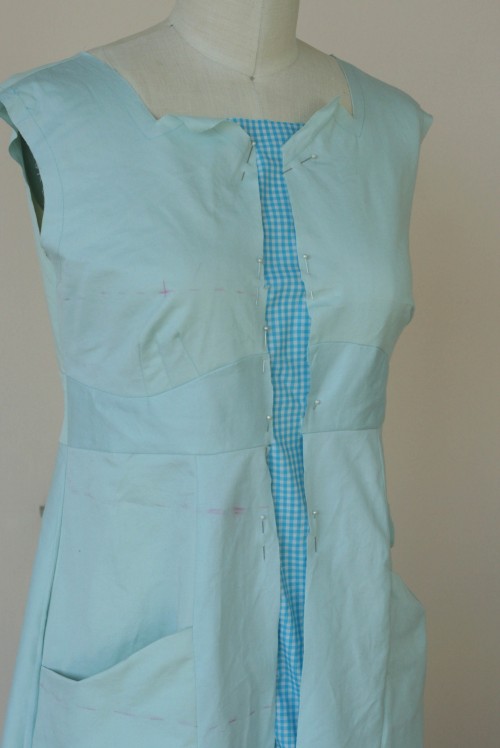
If it seems too small in any particular area, slash the muslin! Pin some extra fabric behind the slash, and once you have it the way you want, measure the gap you’ve created.
But what if you need to add room in one area but not another? For example, what if you need more room around the bust, but not the rest of the dress?
No problem. You still just slash the dress as shown above. Measure the gap you made at the bust to see how much you need to add there. You can then do a full bust adjustment using that measurement. We’ll cover the full bust adjustment tomorrow, but essentially, it allows you to add fullness at the bust without adding width elsewhere.
Now, once you have your muslin pinned to perfection, it’s time to transfer those changes to your pattern. This can be relatively simple, or pretty complex. We’re going to cover some of the most common ones.
We’re going to cover three major pattern adjustments tomorrow: full bust adjustment, small bust adjustment, and grading the pattern for large hips. Stay tuned!


Comments
Thanks for this post. I’ll be working on my muslin this week so the timing is perfect!
Awesome! Just to clarify the timeline (for everyone), we’ll be doing muslins at the beginning of the week (today and tomorrow). Then on Friday we’ll start the sewing posts, so you guys can sew over the weekend if you want!
Useful post – I’ve always wondered how you translate the adjustments that are made on a muslin into adjustments on the actual pattern as I’ve never made a muslin before. Looking forward to the following posts.
It’s usually quite easy! Normally you are either (1) pinching out a horizontal or vertical fold of fabric, (2) slashing and adding fabric as shown above, or (3) adding or removing fabric by taking in or letting out a seam.
So to adjust the pattern for (1) or (2), you would measure where the fold or slash is, then do the same to the pattern! To adjust for (3), you add or remove from the pattern along the seam, then redraw the edge of the pattern piece.
Again, we’ll cover some of the more complex examples tomorrow though. :)
This is an excellent post. I love how detailed and specific your sew along is!
Thanks Melanie, I’m glad!
This is best description about muslin fittings I have come across. I usually skip it because then it just seems so frustrating, but then just end struggling with the fit on a the final garment. This is dangerous- I have ruined really nice fabric at the final stages (probably should have made a muslin!).
I am going to make a muslin for this dress! I have an unusually long midriff and am worried about it hitting correctly.
When altering pattern pieces–should we actually work on the original tissue pieces? Do people usually trace the pattern piece off onto regular paper and then cut up/alter those? I’m worried that I need to revert back to that original pattern piece at some point, like if I make this dress again in the future and I want to make a different size.
Nicole, it’s best to trace the pieces onto new paper if you’re going to make alterations. Not just for the reason you mention, but also in case you make a big mistake or want to try something different.
Any wide paper will do for tracing, even wrapping paper!
I finished my muslin this morning! Jut put it on and came down to find this post. I laughed because the hardest parts for me were the back darts, sewing the curved midriff piece and the pockets. ahem.
Mine fits pretty good. I think the only adjustment I’ll want to make is taking in the skirt a bit on both sides, as it’s flaring out a little bit for me.
I would also love a little more help with piping. I piped one of the pocket edges on my muslin and it’s a bit sloppy. Not terrible, but it could be tighter. Also I found the back darts to be confusing. Mine don’t lie flat, so I think I should elongate them a bit to make that happen.
Yay!
xo
kittee
FWIW I often do make the closures and edge finishes on muslins, because as a beginner I need all the practice I can get making those details come out really right.
Would a light corduroy work for this dress? I am new to making clothes and picking out the right fabrics. I am excited though once I pick something! I need to try the muslin too. I must admit I do not usually take the time to make something first in muslin, but I know I should!!
I made my muslin last weekend and was very happy to see that the pattern requires only little changes for me. The made the darts on the back a bit longer and the skirt a bit more fitted but that’s about it. Can’t wait to work on the real thing that coming weekend.
Has anyone done Roo with a sleeve? If so does it work with the design?
I’ve wondered the same thing. I picked out some cotton for a summer version but I’m toying with the idea of a fall/winter version made of wool suiting and adding a sleeve. I’d also like more ideas on how to line this dress so I don’t need to wear a slip.
Ok. I”m a bit of a dork and very new to sewing. I have tested patterns with muslin and I line my hats and lounge pants using it sometimes. Heck… I made salwar kameeze pants out of old muslin curtains when I was desperate and drafting my own pattern. My wife is an awesome sewist.But sometimes hates to answer my dorky questions. Ok. Call me names if you must but are Muslins good for making cloths out of? I loved my muslin slawar pants made from muslin. But since they were old curtains they turned to dust in a month. Can I make another pair? Is there something that’s as soft and maybe in colors? ;0)
This looks great but all photos pas the first one are not showing (not available / 404 error) :-(
Thanks for letting us know! It’s fixed now.
Hi… I just found your sew along but I think I’m too late to join!
Am I? When is your next one so I can cat h it from the start please?
Thanks,
Stella