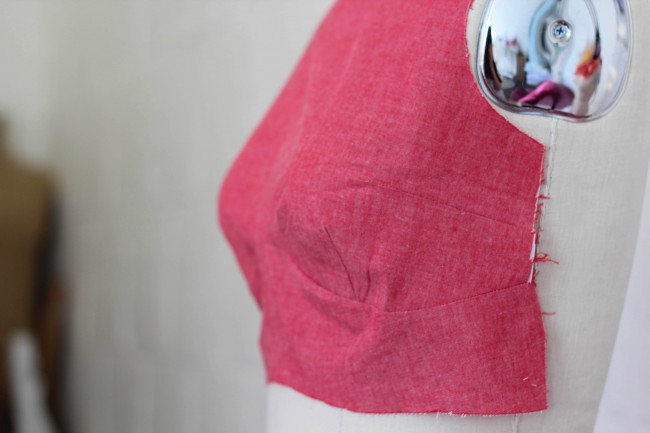
It’s time to get sewing on our Rooibos! I timed this for a Friday, so that you have the weekend to cut your fabric and get started.
Today, we’re going to be putting our bodice together. I’ll show you a trick for dealing with the fussy curved seams of the midriff, and we’ll talk a bit about finishing the seams.
First, you’ll want to cut out your fabric, interfacing, and contrast fabric. If you are going to be making your own piping, you can follow our piping tutorial to do that as well.
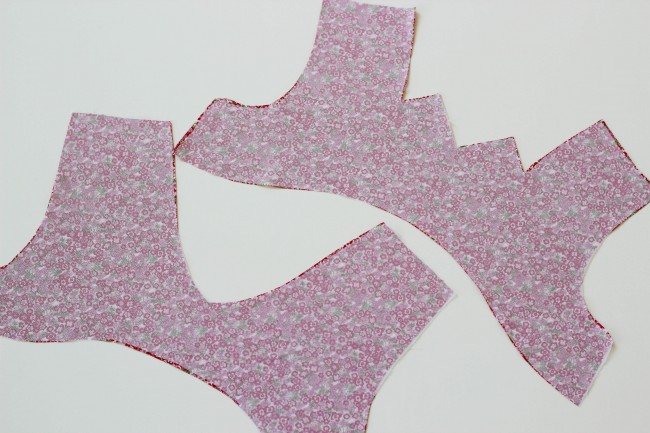
1. First, fuse your interfacing to the facing pieces.
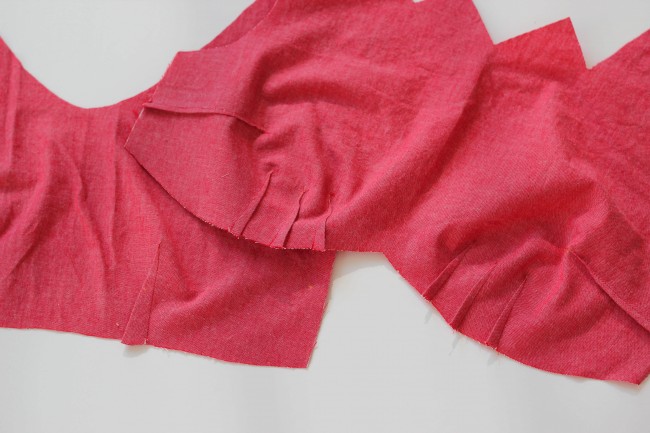
2. Next, follow the instructions and sew the darts on the front and back bodice. You can use our tutorial on how to sew darts if you need a refresher.
You can see that I’ve added a side dart. That’s because I did a full bust adjustment; I’m a 34D and needed just a little more fullness.
3. Press the darts toward the center. It’s a good idea to use a tailor’s ham for pressing the tips of the curves. This dress has some serious curves!
Ok. Now we’re ready for some fun tricks!
It’s time to sew the front midriff to the front bodice. You’ll notice that this seam is very curvy, and you might find it challenging to fit the two curved edges together without puckering. Let me show you how I did it.
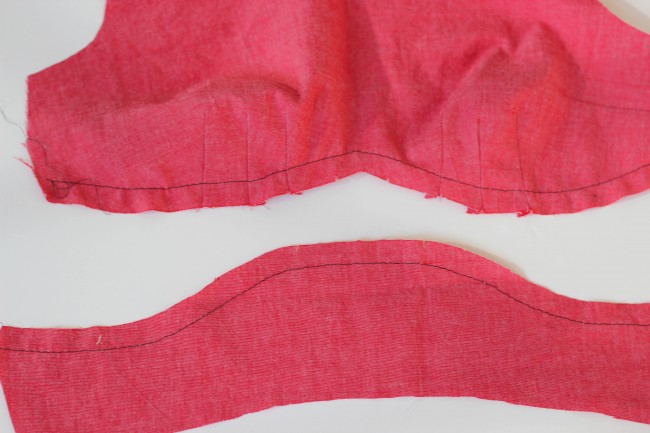
4. First, use a long stitch length and sew a line of basting 5/8″ from the edge on the lower edge of the bodice front and the upper edge of the midriff front. You can see above that I used black thread, so that you could see it. You don’t need to use a contrasting color.
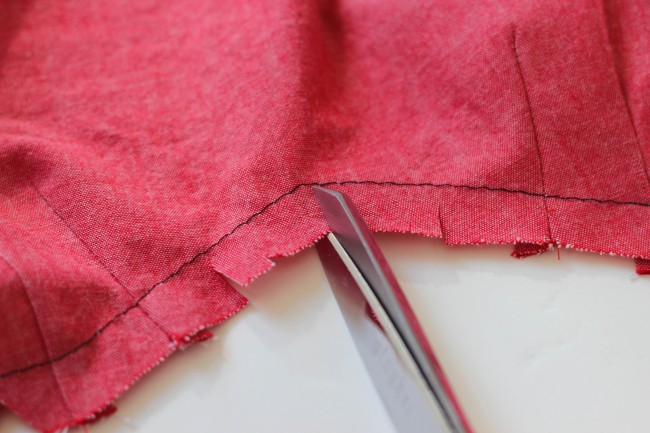
What we’re going to do now is notch and clip the seam allowance on these pieces before sewing. Doing this will make it easier to put the two pieces together without a lot of puckering and pulling.
5. Use the tip of your shears to clip into the inner curves on both of these edges. Your basting stitches will tell you where the seam will be, so don’t clip too close to the stitching. Up to about 1/8″ from the stitching is fine.
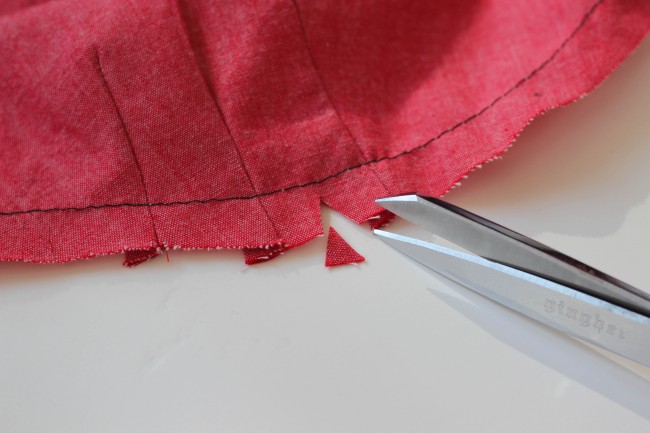
6. Now notch the outer curves along these two edges. Again, keep the tip of the notches about 1/8″ from the stitching line.
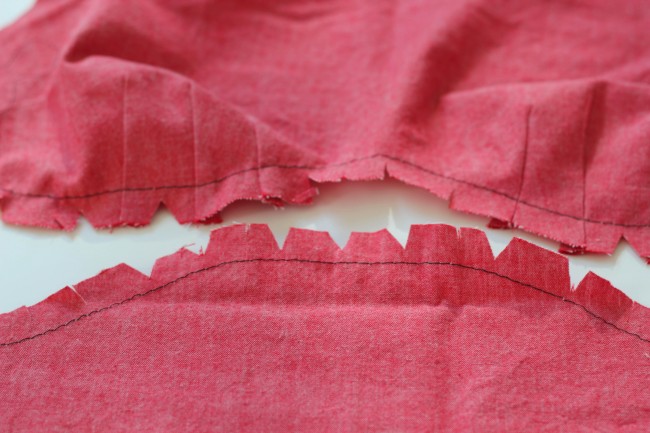
Here’s what the two edges will look like now.
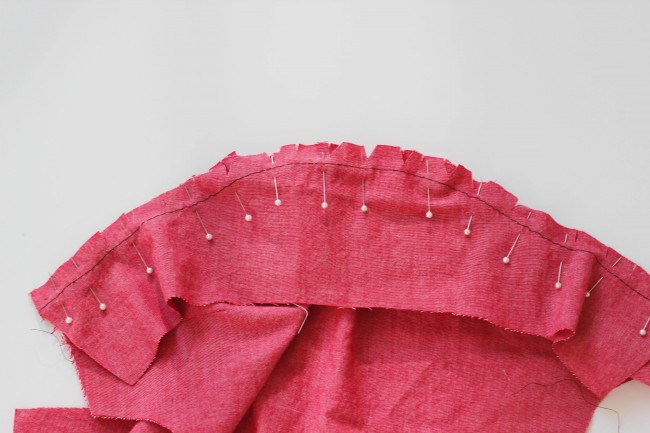
7. With right sides together, pin the midriff front to the bodice front. Try to align the two basting lines together as you pin, and use plenty of pins. I normally don’t use tons of pins while sewing, unless it’s a curved seam like this.
8. Once your pieces are securely pinned together, you can remove the basting stitches.
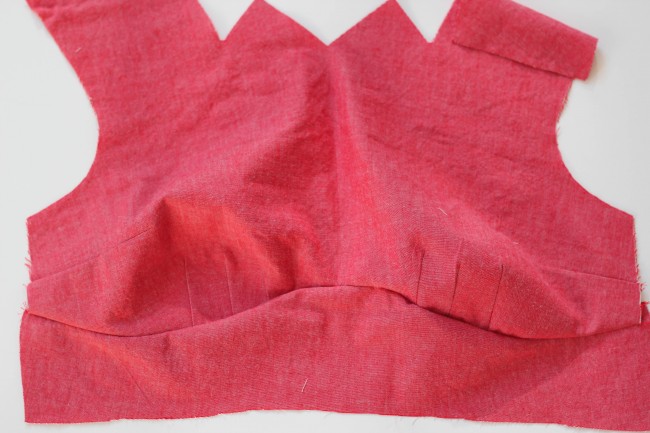
9. Now sew your two pieces together! Stitch slowly, and try to keep your fabric from bunching up as you go. The notches/clips will help tremendously with this.
You can see the seam completed above, but it isn’t pressed yet. That’s because we’re going to finish the seam before we press.
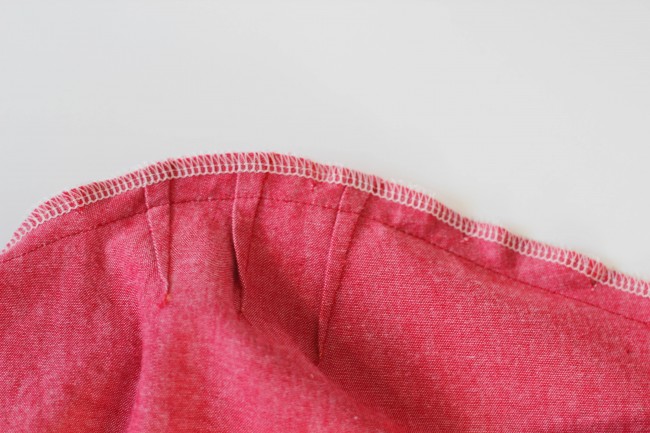
10. Finish the seam. You have a few choices for finishing the seams of your Rooibos.
I chose to serge the seams. Serging is great because it’s durable and works with many different types of fabrics. But not everyone has a serger.
For most fabrics you’d be using for Rooibos, pinking the seams with pinking shears is a fast and easy approach. It works well for this because you are likely using a tightly woven fabric.
Another option is to zigzag stitch over the edges, which can have an effect similar to serging. If your sewing machine has an overlock stitch, you could use that as well. This will take a fair amount of thread, though.
Please feel free to chime in if you have other seam finishing ideas!
11. Once you’ve finished the seam, press it downwards, toward the midriff.
So that’s it for curved seams and seam finishing. Let’s just do a couple more things to get ready for our next sewalong installment on Tuesday.
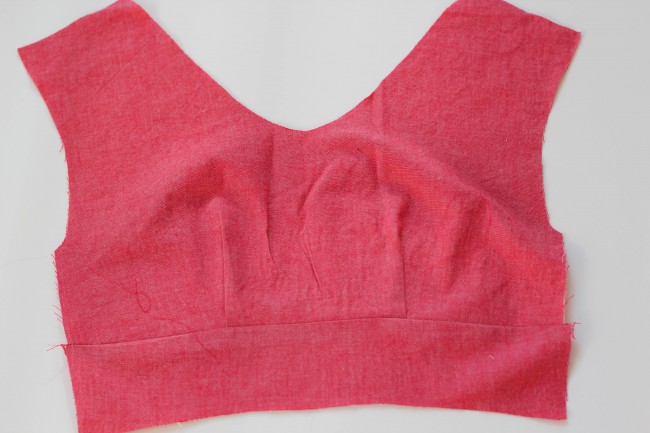
12. With right sides together, stitch the back bodice to the back midriff.
13. Finish the seam and press downward.
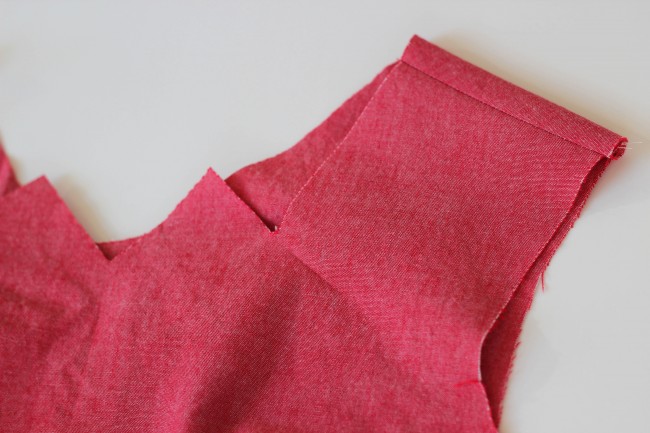
14. With right sides together, stitch the front and back bodice together at the shoulders.
15. Finish the seams and press.
Thanks for following along! On Tuesday, we’re going to move onto the next steps, which will include adding the piping (optional) and the all-in-one facing.


Comments
I didn’t *get* the notch/clip bit but the photo and explanation clears it up so much for me. Thanks!
I really like your fabric. The dress will look in that color!
Thanks for these helpful tips. I had some trouble with the curved seam in the muslin, but didn’t fuss too much about it then. I also had trouble with my pieces not lining up correctly (i.e. one being longer than the other), but that was probably due to the darts not being quite right. I’ll be more careful with my final version.
Sarai!
I made two Rooibus this week and then last night I turned my muslin into another! I love it. I figured out the piping too. I feel like my sewing skills just grew x 100, but the back darts all came out a little too darty on my and I STILL HATE INVISIBLE ZIPPERS.
xo
kittee
Sarai – Thanks so much for taking the time to run this sew-along! I’m going to get started with my muslin this weekend (I know, I’m behind!). So I just got back from purchasing my fabric during my lunch break work. I’ve picked a medium weight wool gabardine in a hot magenta and I love it. My question is, do I need to line this baby? The fabric is not see through but Caitlin mentioned on her post that wool can be itchy even if it feels soft. If lining is recommended, will you do a post on how to do this? I’ve never lined any garments I’ve made so have no clue how to do about doing this. Thanks!
Andrea, I think it depends on the fabric and how sensitive your skin is. Try cutting a swatch and rubbing it gently against a sensitive area of skin (I think the neck works well). I find that many gabardines are pretty soft.
I know it doesn’t help you right now, but my book will have info on lining a garment! I also recommend this guide to sewing linings.
I’m very excited to sew this dress! I was wondering, though, about the curved seam… (and this may be a very silly question/idea — I’ve never taken a sewing class or anything and I’m very much self-taught, from books & blogs & things)
I just finished sewing Negroni the other day, and the sleeves were set in using a curved felled seam. I loved the instructions/technique because I didn’t have any trouble lining up the curves AND the finished seam was so very neat. Would that technique work for this curved midriff seam? Or am I better following this tutorial and then just zigzagging the seam? (I don’t have a serger or an overlock stitch, and I hate pinking.)
I wouldn’t recommend that flat felling technique for this, only because this seam is very curved, which will make it much harder. The sleeve seam on the Negroni is not quite as curvy.
That said, if anyone gives it a shot with this and has luck, I’d love to know!
Ohhh okay, that makes sense. I admit I haven’t cut the pattern yet, so I didn’t realize how curved the seam is — I’ll give this clips¬ches method a try when I do my muslin, and hopefully I’ll get the hang of it before I sew the real version!
Thanks for your help!
I’m disappointed! I ordered the pattern the day you announced the sewalong but as yet still have NOT received it. How can I possibly ‘sew along’ without it.
Now I’ve got that off my chest… I think from what I can understand of the provious posts I will enjoy sewing this dress but first I have one question: what fabric do you use for a muslin? I’ve never made one before but I believe you use a fabric called ‘muslin’. Can you tell me what the equivalent is in Australia.
Hi Shelly,
In NZ/Australia/The UK, we call muslin “calico”. Hope this helps!
Hi Shelly… We do our best to send things out promptly, but it does take a while for packages to reach Australia. There isn’t much we can do to control how long it takes once it leaves the US.
I’ll try to give more advance notice next time, but the posts will still be here for you to follow along.
Hello! Thank you so much for this!
Please pleeeease could you do a video tutorial/photo step-by-step of the part where you pull the bodice through the shoulders after sewing the facing and shoulder seams?? :):) I made this dress last summer and no matter how many times I re-read the instructions and unpicked and re-sewed I just couldn’t do it! I ended up unpicking the shoulder seams and then redoing them after it was the right way round (which looks rubbish!)
Thank you so much!! LOVING the new blog and very excited to order the book!! :)
p.s. when I made my bodice the back darts stick out rather than lying flat…..someone suggested making the back darts longer to fix this, but I have no idea how to do this/know how much longer to make them!
sorry for all the questions!
I made a Rooibus without the pattern. I hope I did it justice. She is my next Colette pattern to purchase :)
Hello, thanks for this nice sew along. I made a rooibos a year ago as one of my first sewing projects. It came out nice, but i’m still uncertain about my fabric choise, so i decided to make anotherone.
I really like the sew along sofar, but what i remember from the first obe is that the back darts were to short for me, they gave me little boobs at my back. When i look at the pictures of caitlins version, the darts look longer to me. On my pattern they still look really short. What do i do wrong??
Hi Anne- the back darts on my dress looked like boobs at the back too!! I know I sewed them correctly as I’m used to sewing darts, and no matter how I pressed them they still stick out!
Does anyone have any advice on how to correct this??
I think they need to be longer, but how would you do this, and how much longer would they need to be to stop the ‘back boobs’ effect? :)
Wow, the notches helped tremendously, thanks!! No bunching or redoing, turned out perfect, unlike my muslin with a bit of bunching. One to the next step:)
Hi Naomi, I lengthened the darts to 11 cm. That seems to work out fine.
I did it by drwaning a line throug the middle of the original darts in the length i wanted and then redraw the dart legs from the top of the middle line to the original lower points of the dart legs. I hope this makes sense? It’s difficult to explain but rather simple to do.
Hi Anne, thanks for reply! your instructions make sense to me, now just to transfer them to the pattern! I’m going to give it a go and hope it solves the problem, did it work for you? Thank you for your advice :)
The notching and clipping worked so well, BUT, I have to stress the importance of only using the tip of the scissors – even on thick fabric. I made that mistake today and snipped right through the basting and through the actual bodice! I had to make a whole new front bodice! With extra darts for the large bust adjustment! Crazy making! Luckily I had extra fabric. Getting ready to sew my handmade piping on now – exciting!
I have a silly question – would this technique work with sleeves? I tried to assemble a garment like this in my head (yes, I’m weird like that) but I can’t seem to figure out if it would work or not!
Thanks for this great tutorial!!!
AAHHH I meant to post this on the full facing tutorial! I’ll be sure to do that, sorry!