

Today, we’ll be sewing up our bust darts. If you’re making version 2 (long sleeves), we’ll also sew the shoulder pleats.
Shoulder pleats (version 2 only)
Fold the top pleat on one of the pleated bodice front (B) pieces in half along the fold line, wrong sides facing, matching the dashed lines on each side of the fold line. Pin.
Stitch along the dashed line on the right side of the pleated bodice front (B) piece.
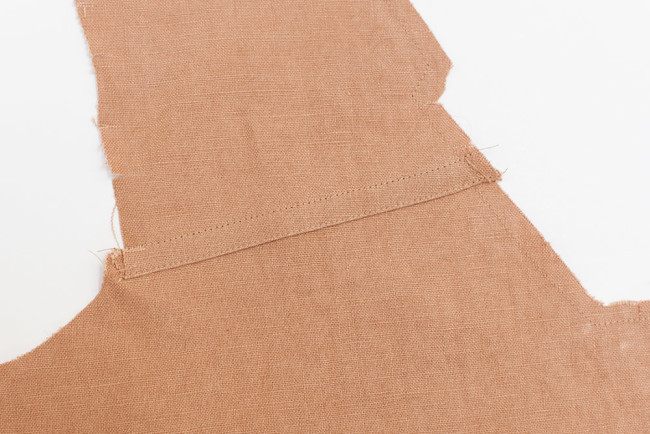
Press the pleat down.
Edgestitch along the bottom edge of the pleat.
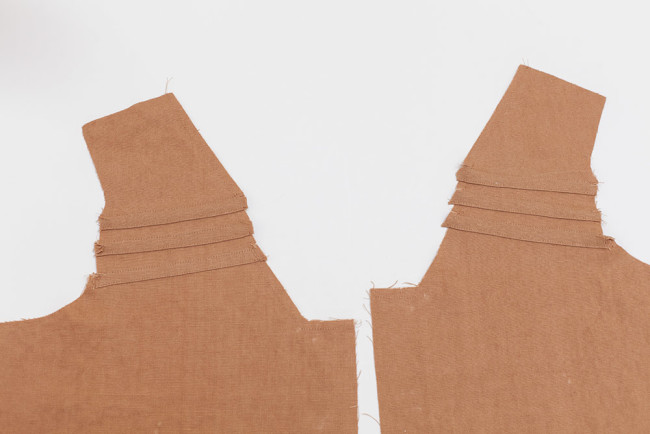
Repeat steps 1 – 4 for the remaining two pleats on the pleated bodice front (B) piece.
Repeat steps 1 – 5 for the second pleated bodice front (B).
Sew Bust Darts
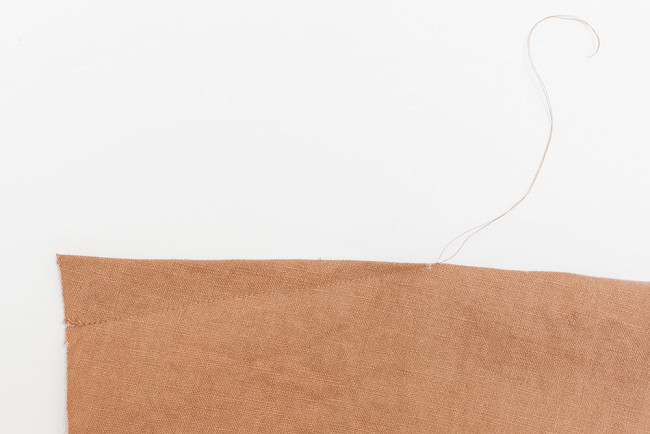
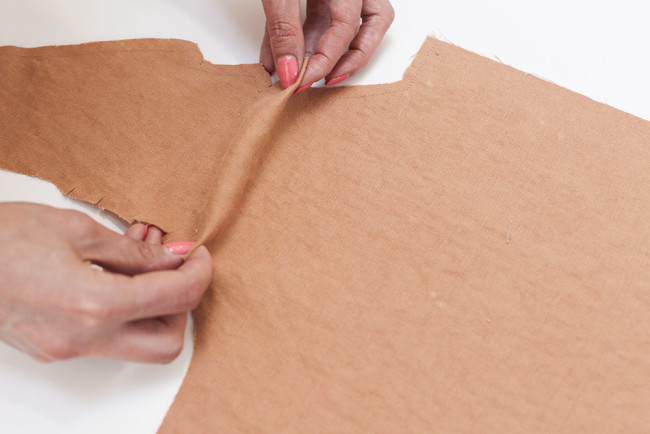
Sew the bust dart on one of the bodice front (A) or pleated bodice front (B) pieces by bringing the dart legs together with right sides facing, and stitching from the edge towards the tip.
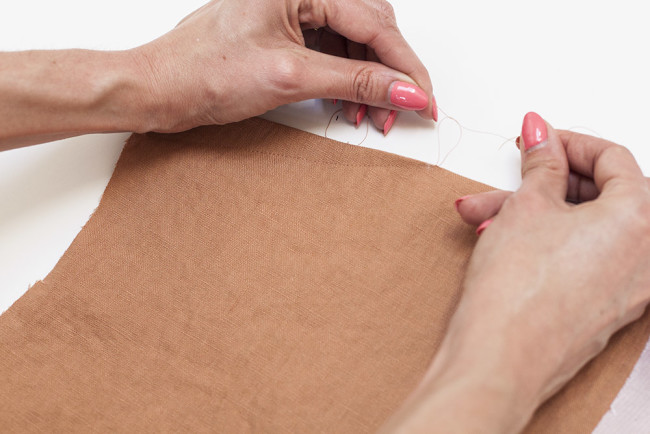
Tie the dart off at the tip by sewing just to the edge of your fabric, leaving long thread tails. Do not backstitch. Tie the tails together at the tip.
Repeat steps 1 – 2 for the dart on the second bodice front (A) or pleated bodice front (B) piece.
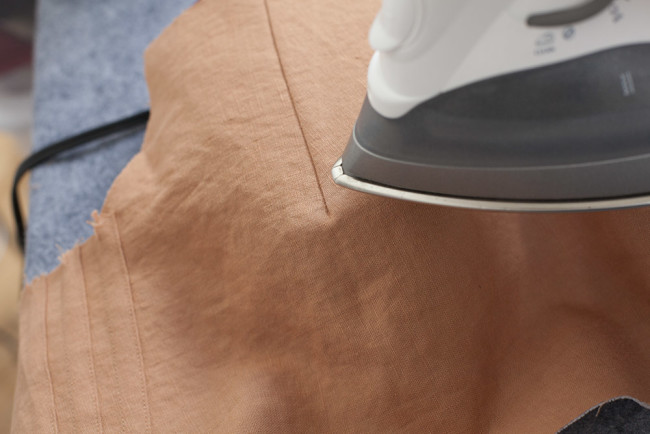
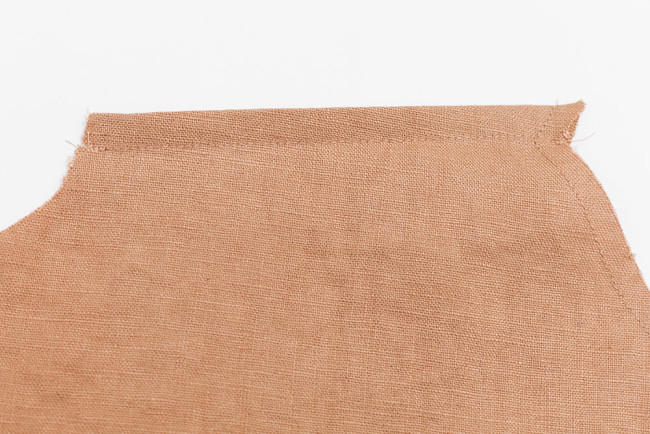
Press darts downward. If you have a tailor’s ham, this is a good time to use it. Place the ham beneath the dart, forming the tip around the curve. Press firmly. This helps mold the dart into shape.
Comments
Is there any reason you can’t cut out the fronts for the long sleeve version (with pleats) but then add the shorter sleeves? I haven’t cut my working fabric yet, just working on the muslin. Thanks!
You can do that!
Finally getting caught up. The muslin came together nicely, but I’m having a hard time figuring out which direction the sleeves should set in. Doing version 2. One edge of the sleeve has a double notch, but I can’t find a corresponding notch on the bodice. Does the double notch go in front on the armscye or in back?
Hi Alison,
That’s odd, I’ll take a look! But double notches go towards the back. :)
Thanks– that will be good to know when I’m making the real blouse. At any rate the sleeves for the muslin seem to fit fine.
Oh, help, the bust dart…should the edges match at the seam line? When I put the dart legs together, matching fabric at the seam line, I pin the center down and the dart does not lie flat. If I pin it down flat the legs do not match at the seam line. When I made the muslin I used ease to put the dart in. However, that doesn’t look neat and flat like yours.
Toni
Hi Toni! Can you tell me what size you are making? And does the problem seem to be that the dart legs are different lengths? Can I assume you didn’t alter the dart at all?
They should definitely match, the dart legs should be the same length, and the lap (the little chunk that sticks out at the raw edge) should be such that the dart will press flat downward and still match along the edge.
So, i measured and no the bottom leg is indeed longer. i did alter the dart to make the bodice petite. i altered the waistline to make it a little wider.
Oh, size ten.
Ah, ok! It sounds like you need to adjust the dart a little more so that both legs are the same length. This is what will allow it to lay flat once it’s sewn. I would retrace the piece, making the dart leg at the bottom shorter (since you mentioned easing it before, it seems like this is the option that will work). When the leg is shorter, the side seamline will be a little different, but now your dart should be easier to sew.
Thank you, i redrew the dart onto a piece of plain paper using a 6 in. ruler. I cut the triangle out and laid it on my fabric to get a much better view. I marked it with thread, the old old fashion way. i must say that my darts look much better now.
Hi! I am enjoying this sew along and learning a lot. I don’t know how to make the petite version of this but shortened at regular lines. Also, moved the shoulder seam forward to deal with my sloping shoulders and adjusted 1 inch for the bust.
So, with all that, the first bust dart was half way between my waist and bust!
I ended up moving it twice to get it right!! By the end it was just trial and error.
Any advice how to anticipate this in the future??
My favorite way of dealing with this is to measure the vertical distance between your shoulder joint and the apex of your bust. You may need a friend to help. Hold a straight object like a ruler horizontally across your bust, parallel to the floor. Then measure the distance between your shoulder joint (the top of your shoulder, where there’s a little bone) and the yardstick. You should measure straight up and down.
Now, when you adjust any pattern, you can measure from the shoulder point down to where the bust apex should sit! All darts (bust and waist) should point to this spot.
If you like, you can do the same, measuring the horizontal distance between shoulder and apex. Then you’ll know exactly where all darts should point to on any pattern, ever.