

A clean finished yoke is a beautiful thing! The technique used to create this clean finish might seem counter intuitive at first, but the results will have you impressing yourself time and time again!
Please note: The Aster pattern contains errata, which should be noted in an insert with your pattern. If you did not receive the insert, see our errata page for the details.
Sewing the Yoke: All Versions
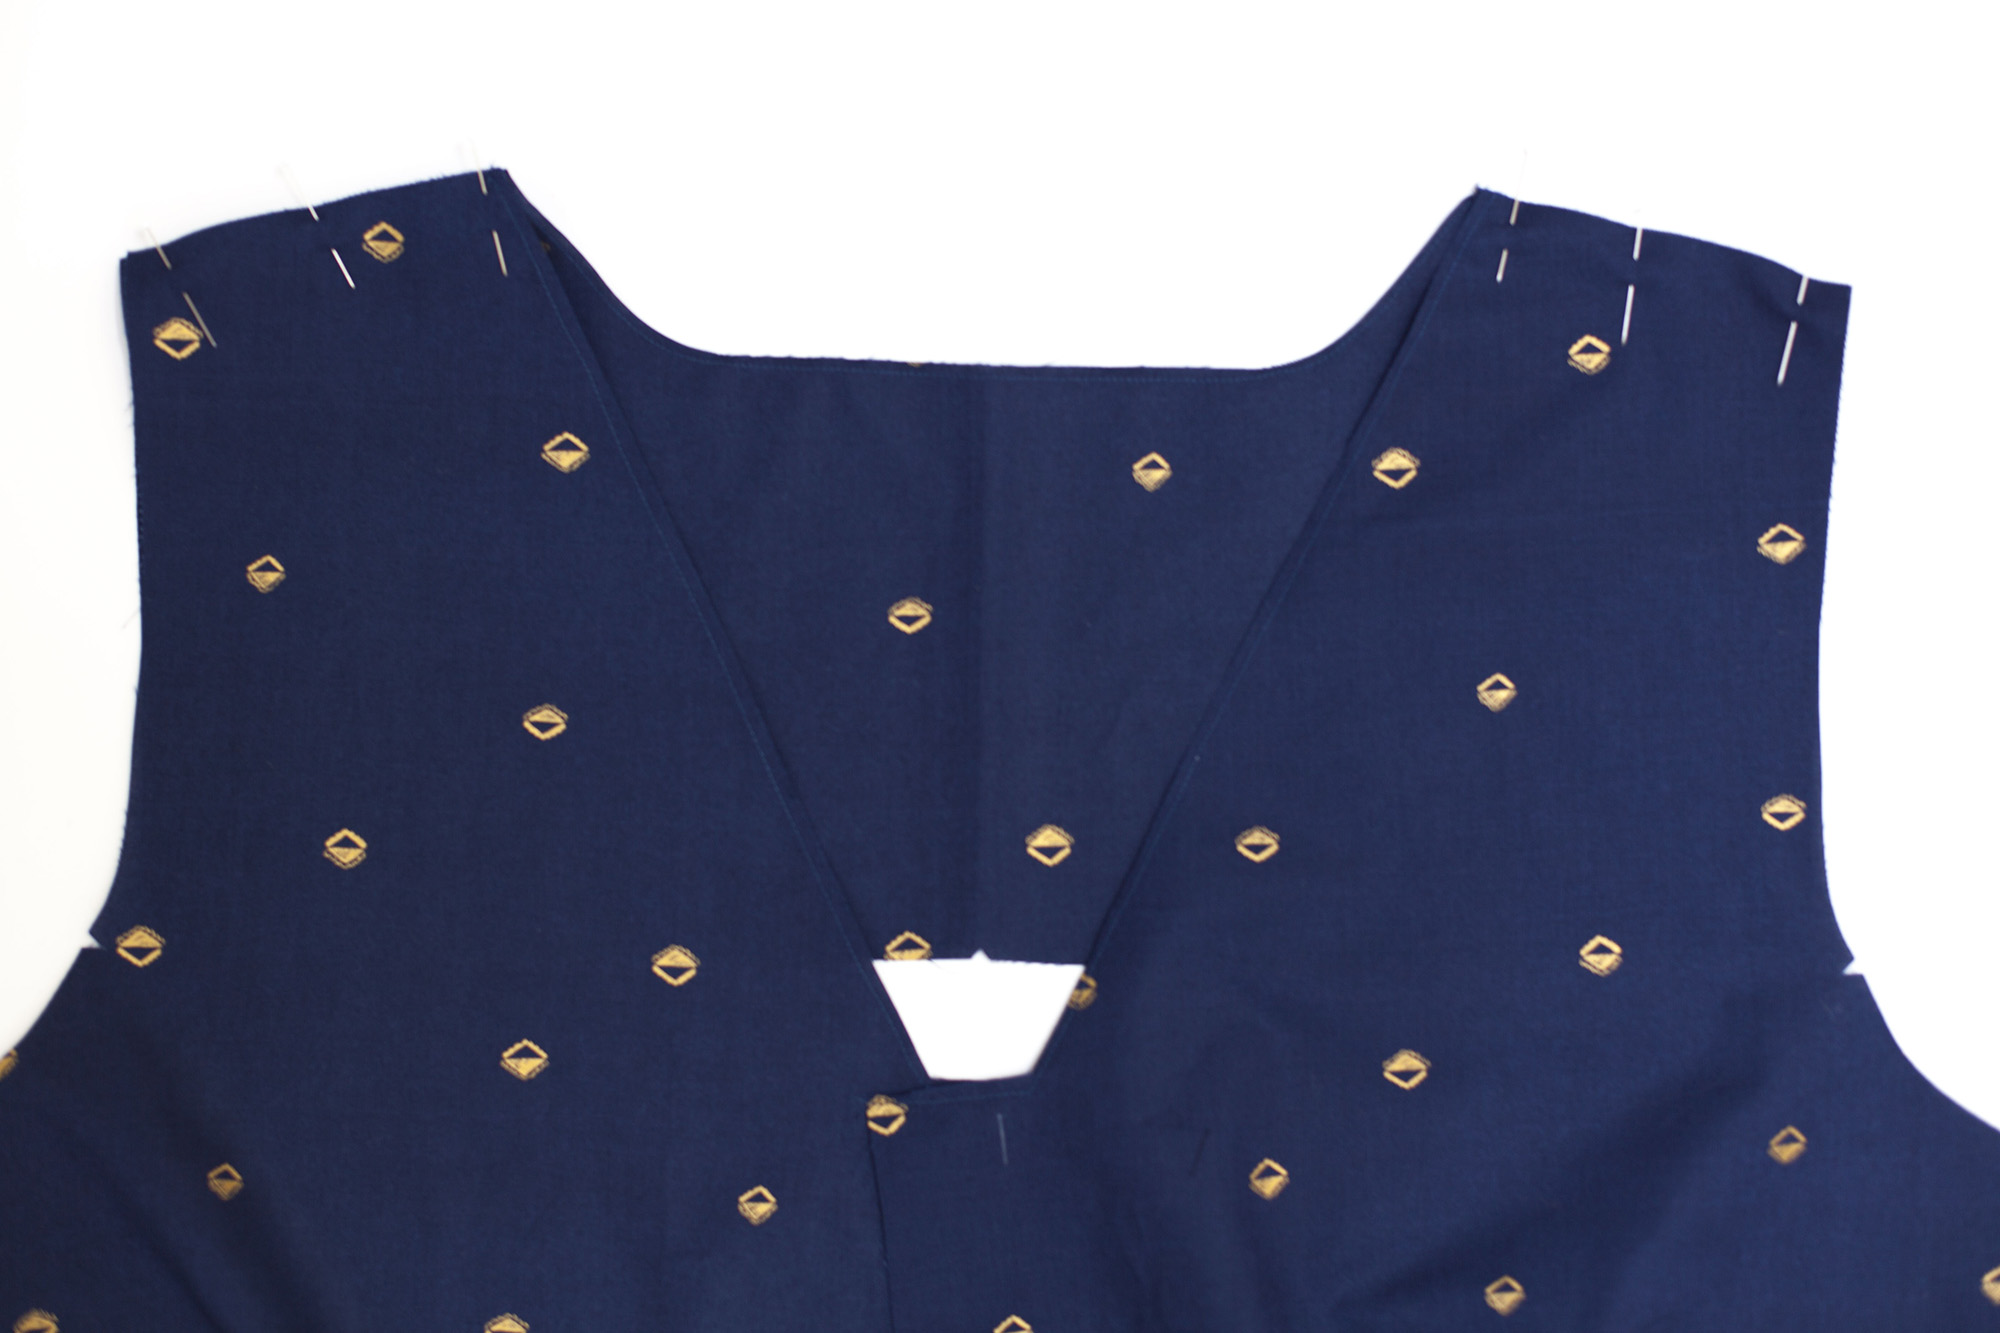
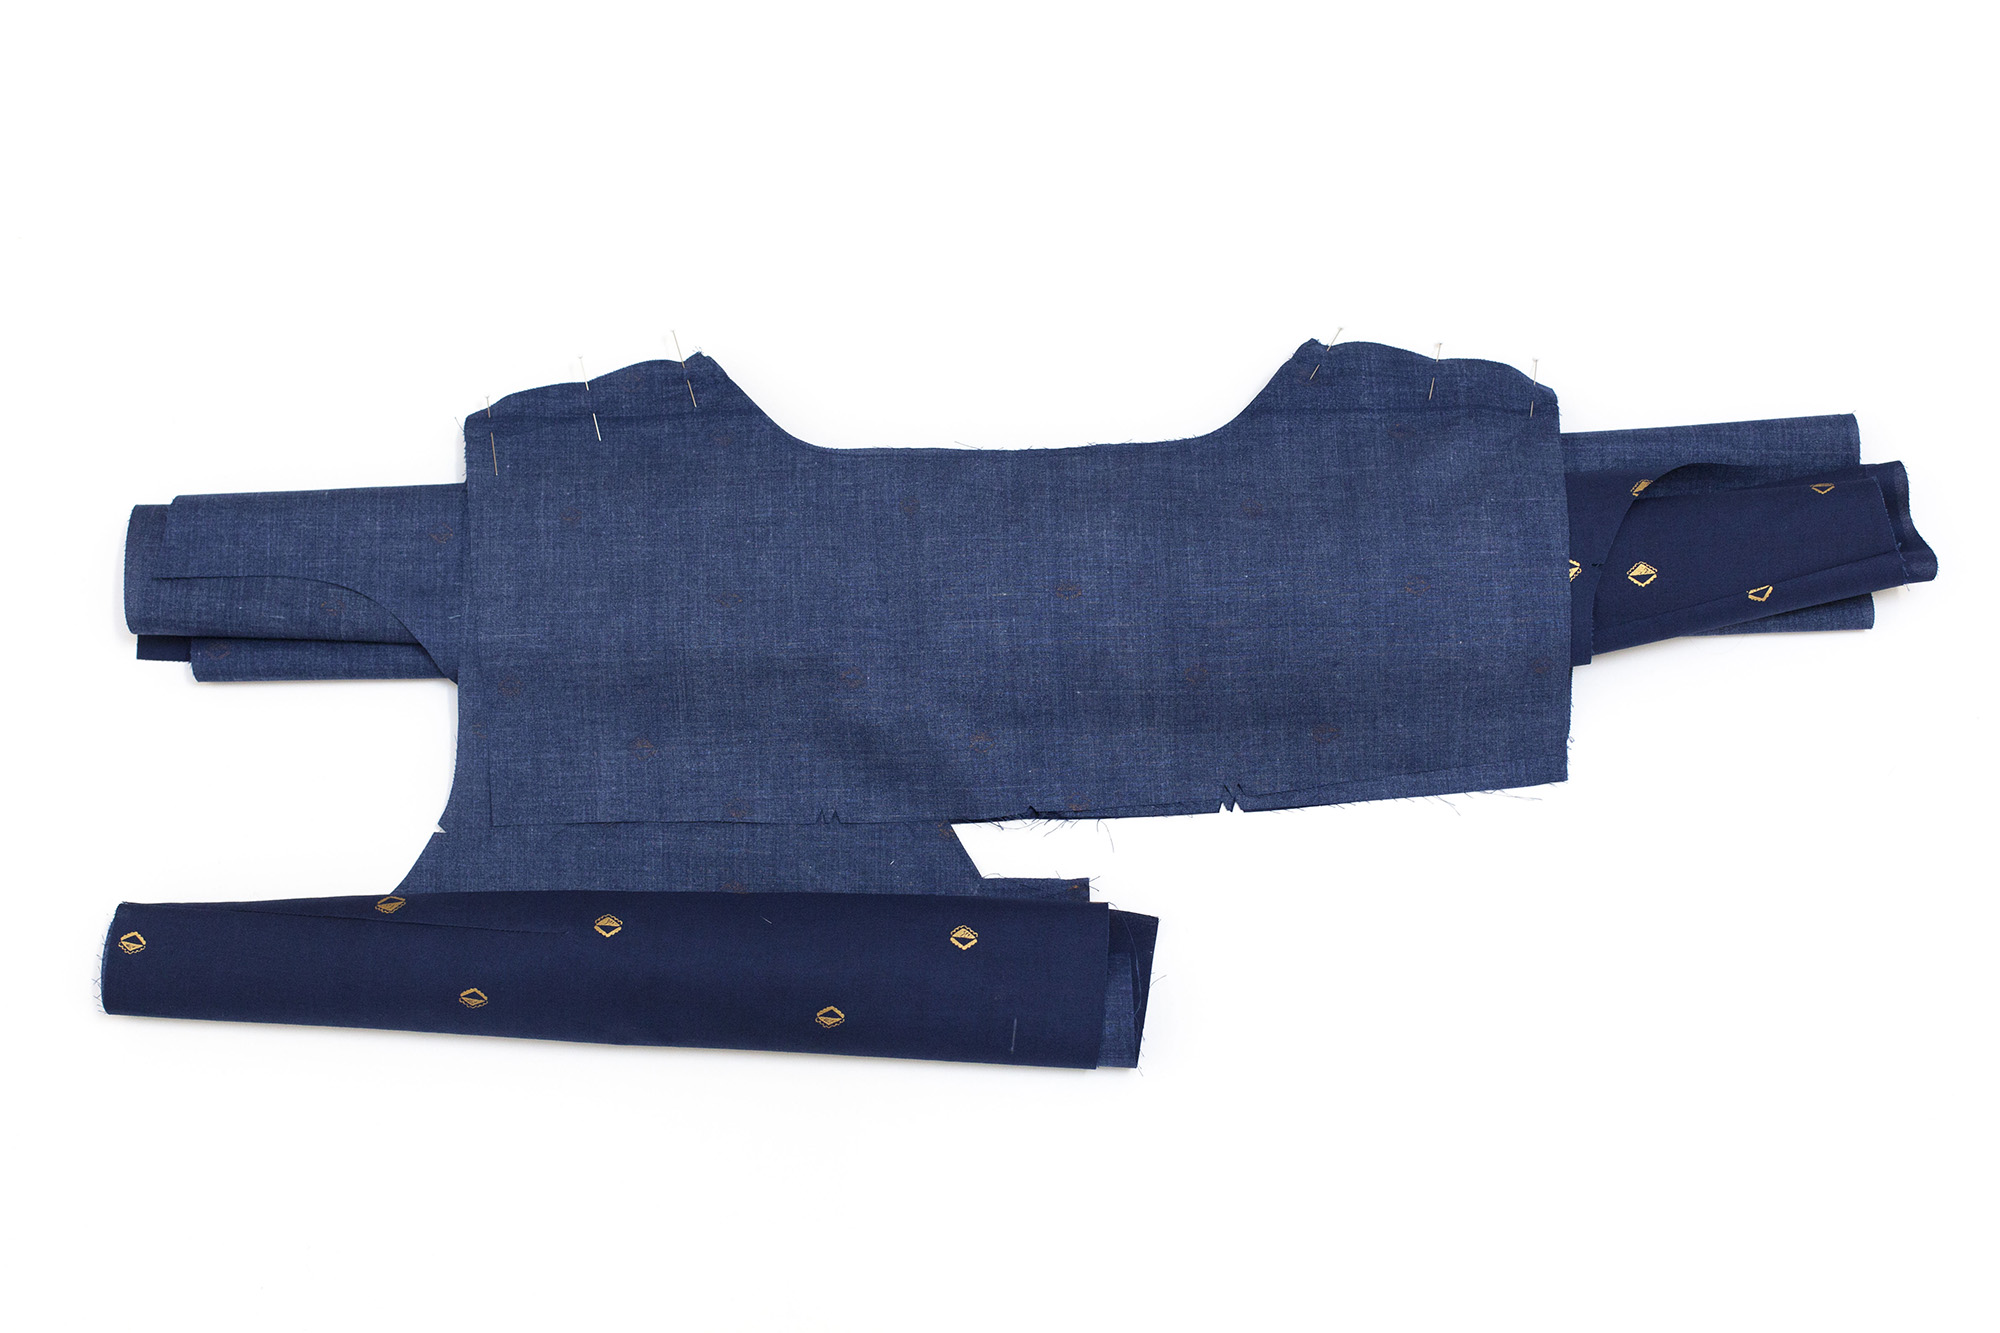
1) Place the right side of one yoke back (D) facing the wrong sides of two bodice front (A) or pleated bodice front (B) pieces. Stitch at the shoulders. This forms the inner yoke.
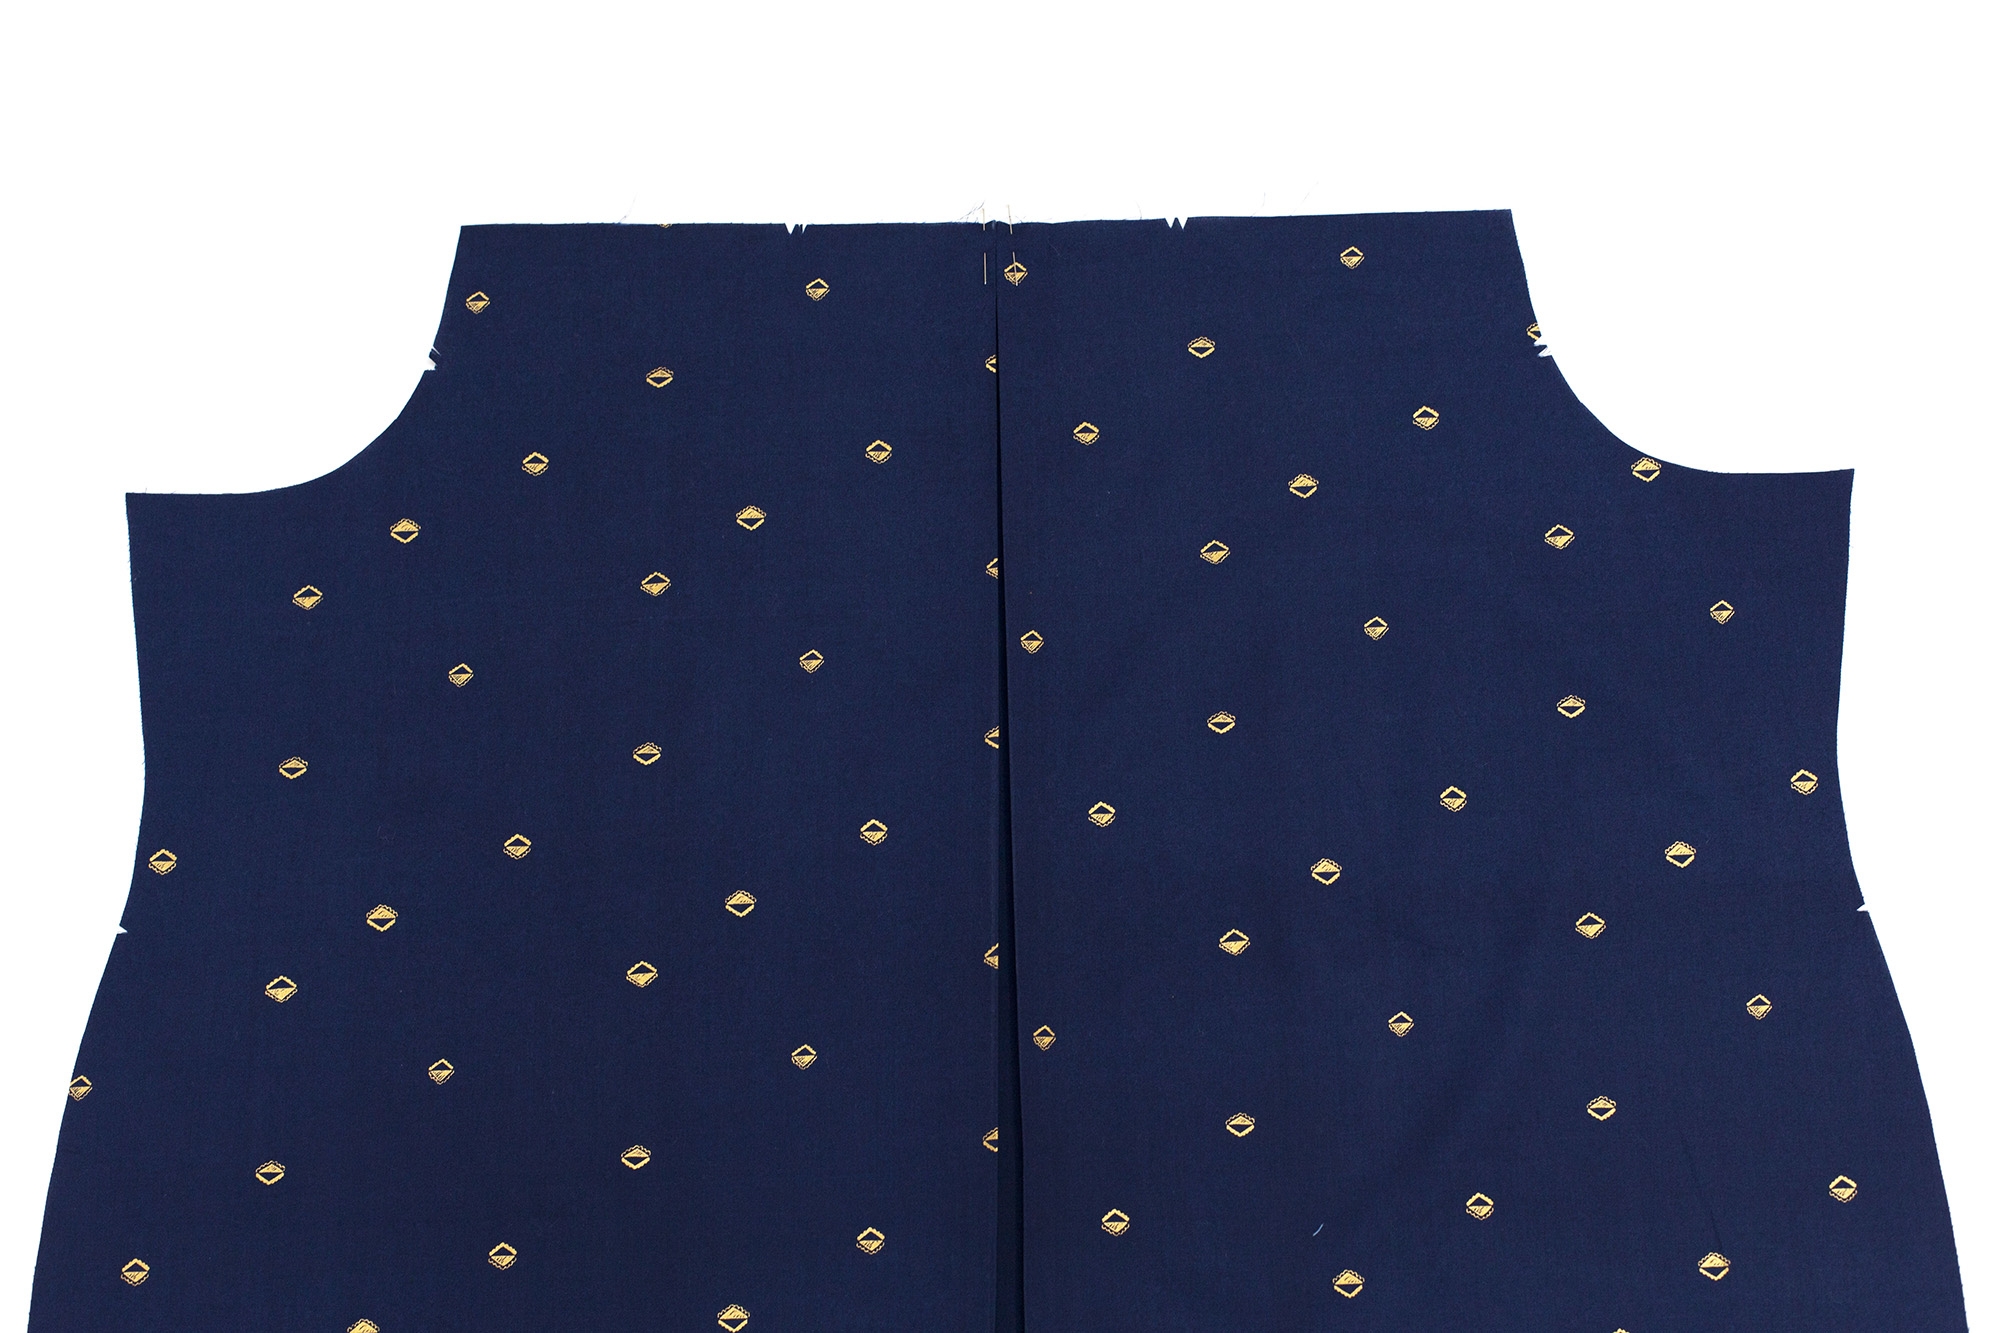
2) On the right side of the bodice back (E) fold along the solid and dashed pleat lines, bringing the two dashed edges together on the right side of the bodice. Baste the pleat in place at 5/8″.
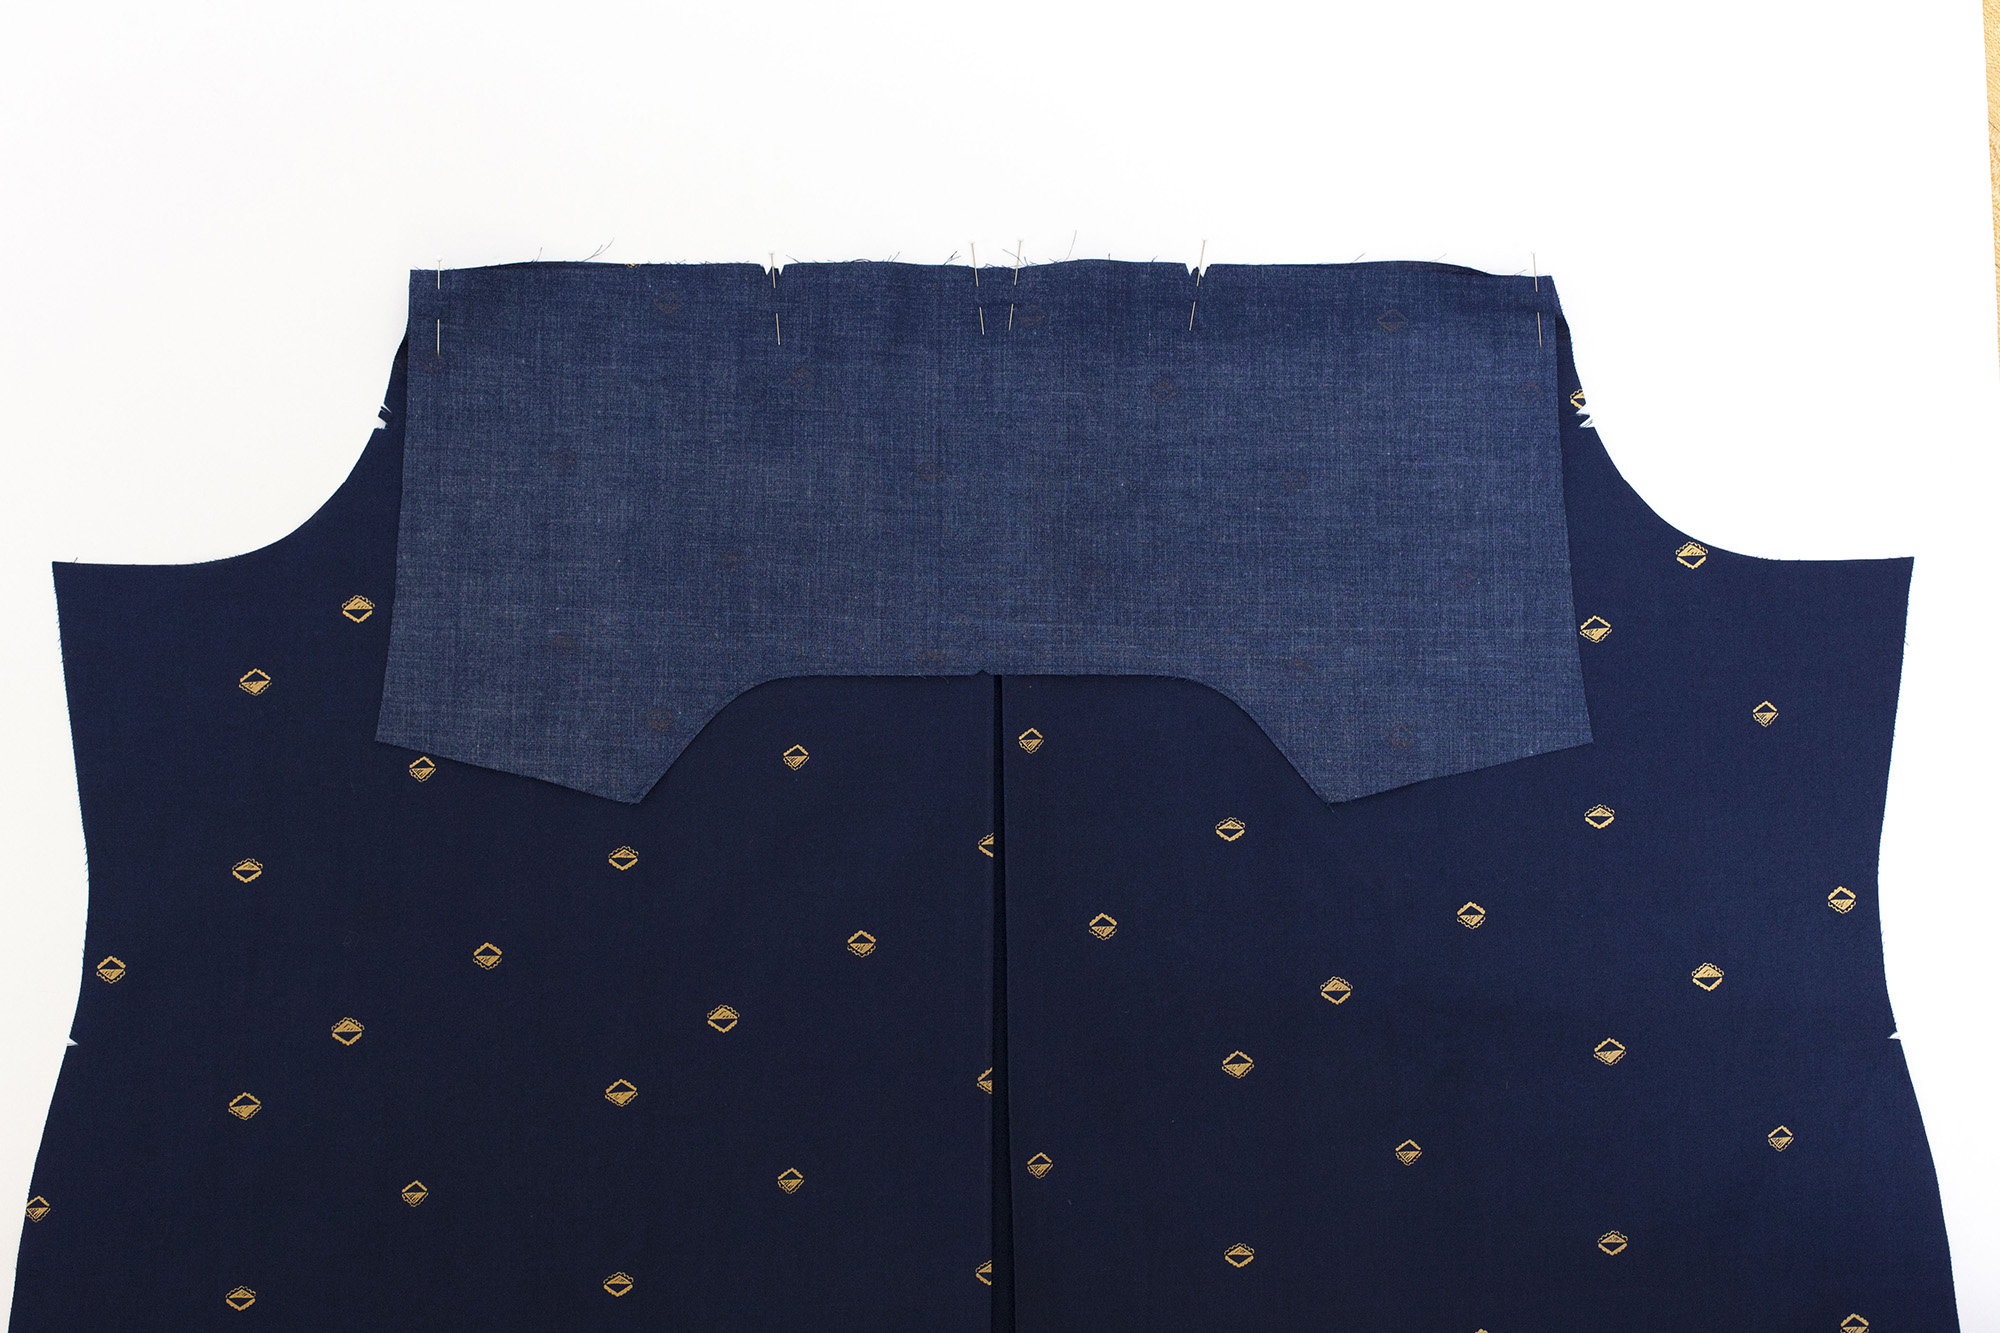
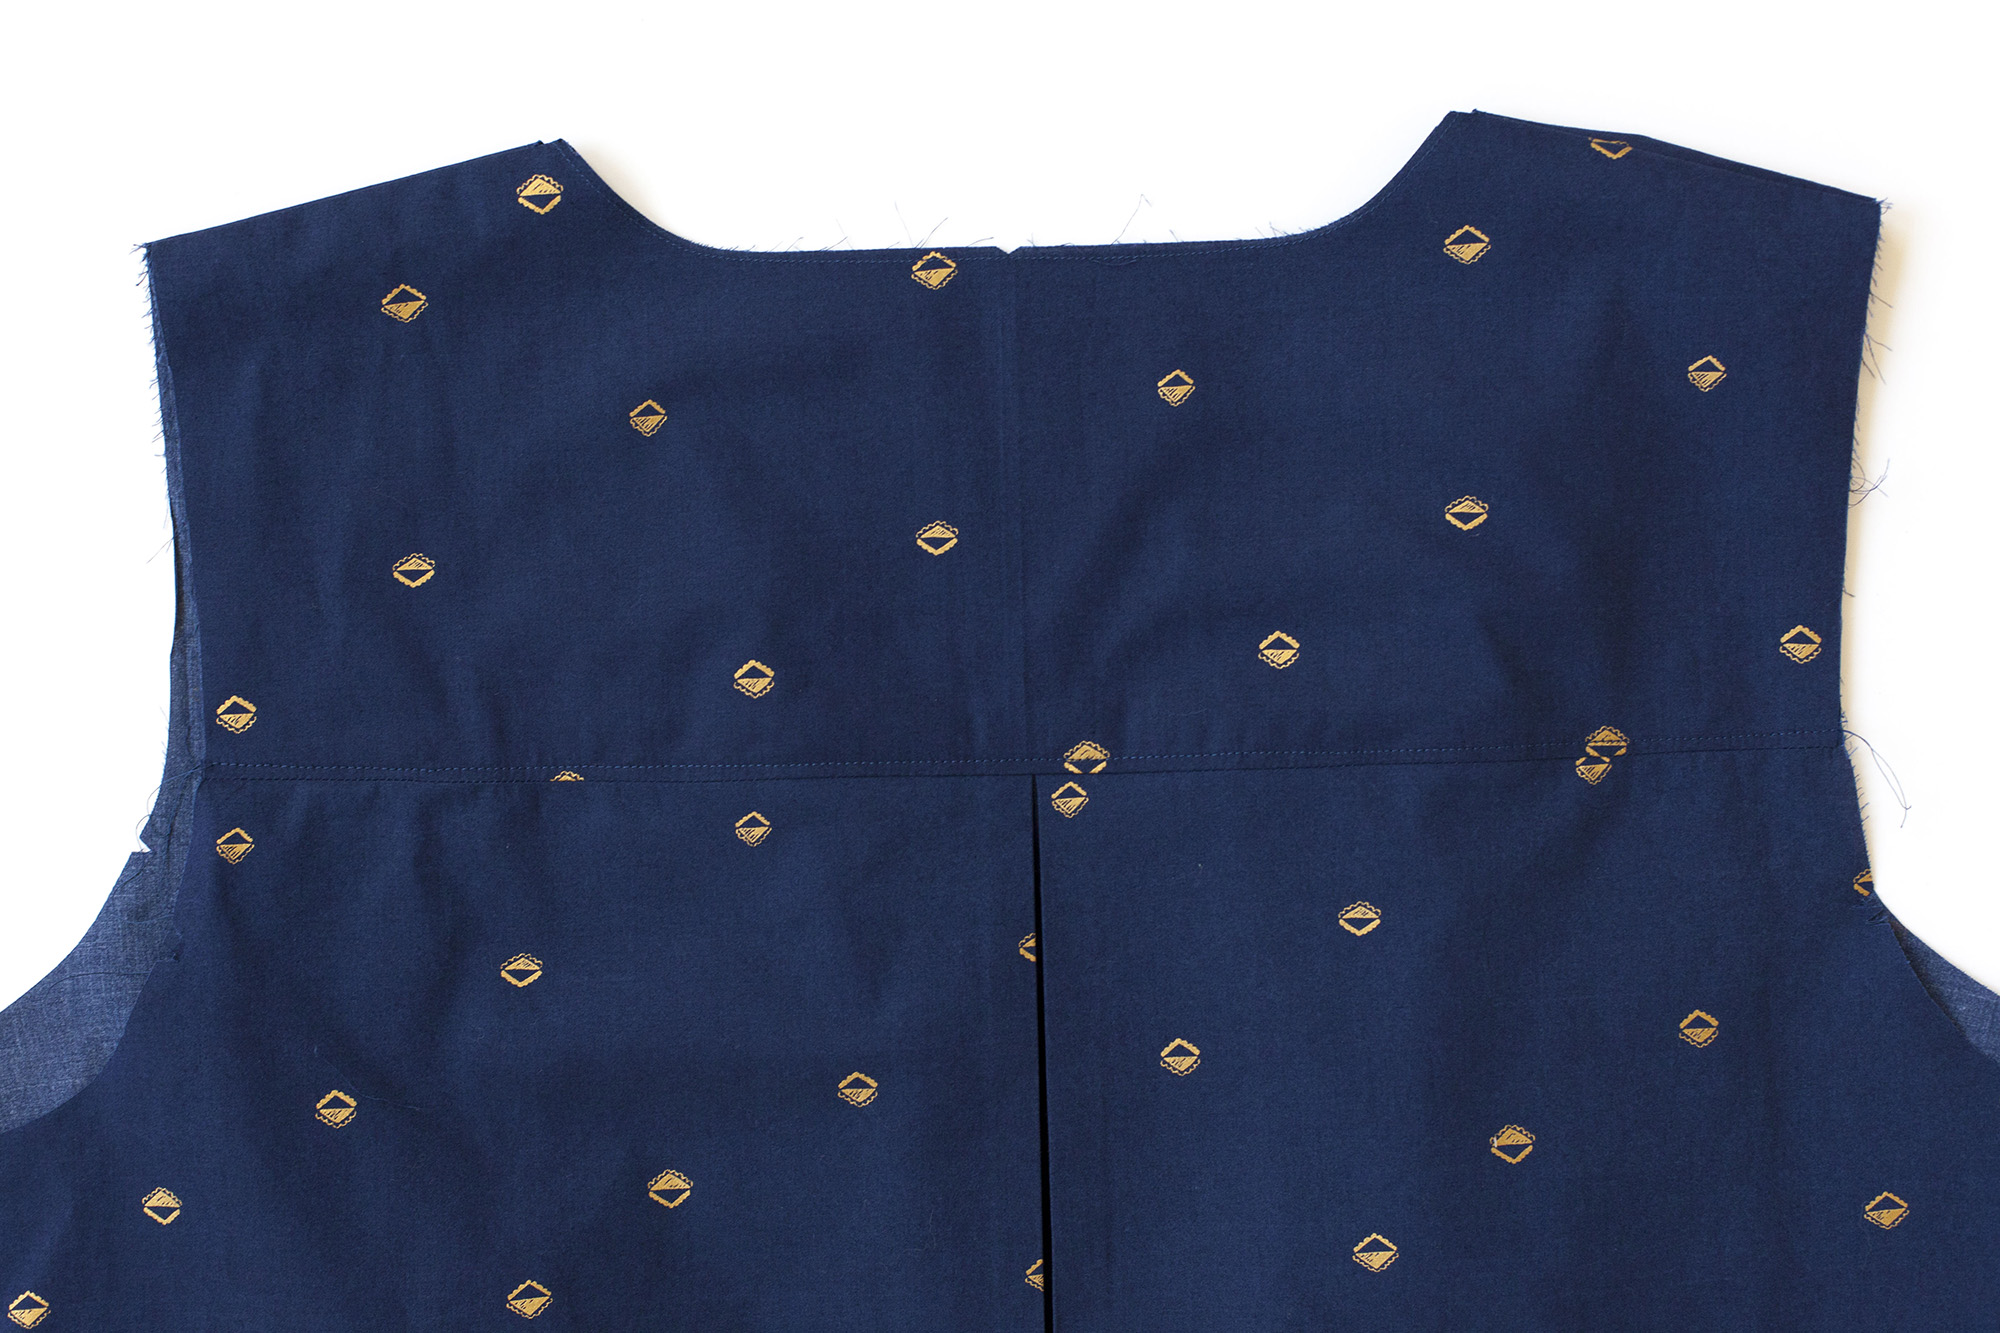
3) With right sides together and notches aligned, stitch bodice back (E) to the second yoke back (D) piece. This forms the outer yoke. Do not press.
4) Roll the bodice back (E) piece up towards the right side of the yoke seam to keep it out of the way, exposing the seam allowance as shown.
5) With right sides together, place the other yoke back (D) piece directly on top of this yoke back (D), pin at shoulders. Roll the bodice front (A) or pleated bodice front (B) pieces up out of the way, matching and pinning the bottom yoke edges.
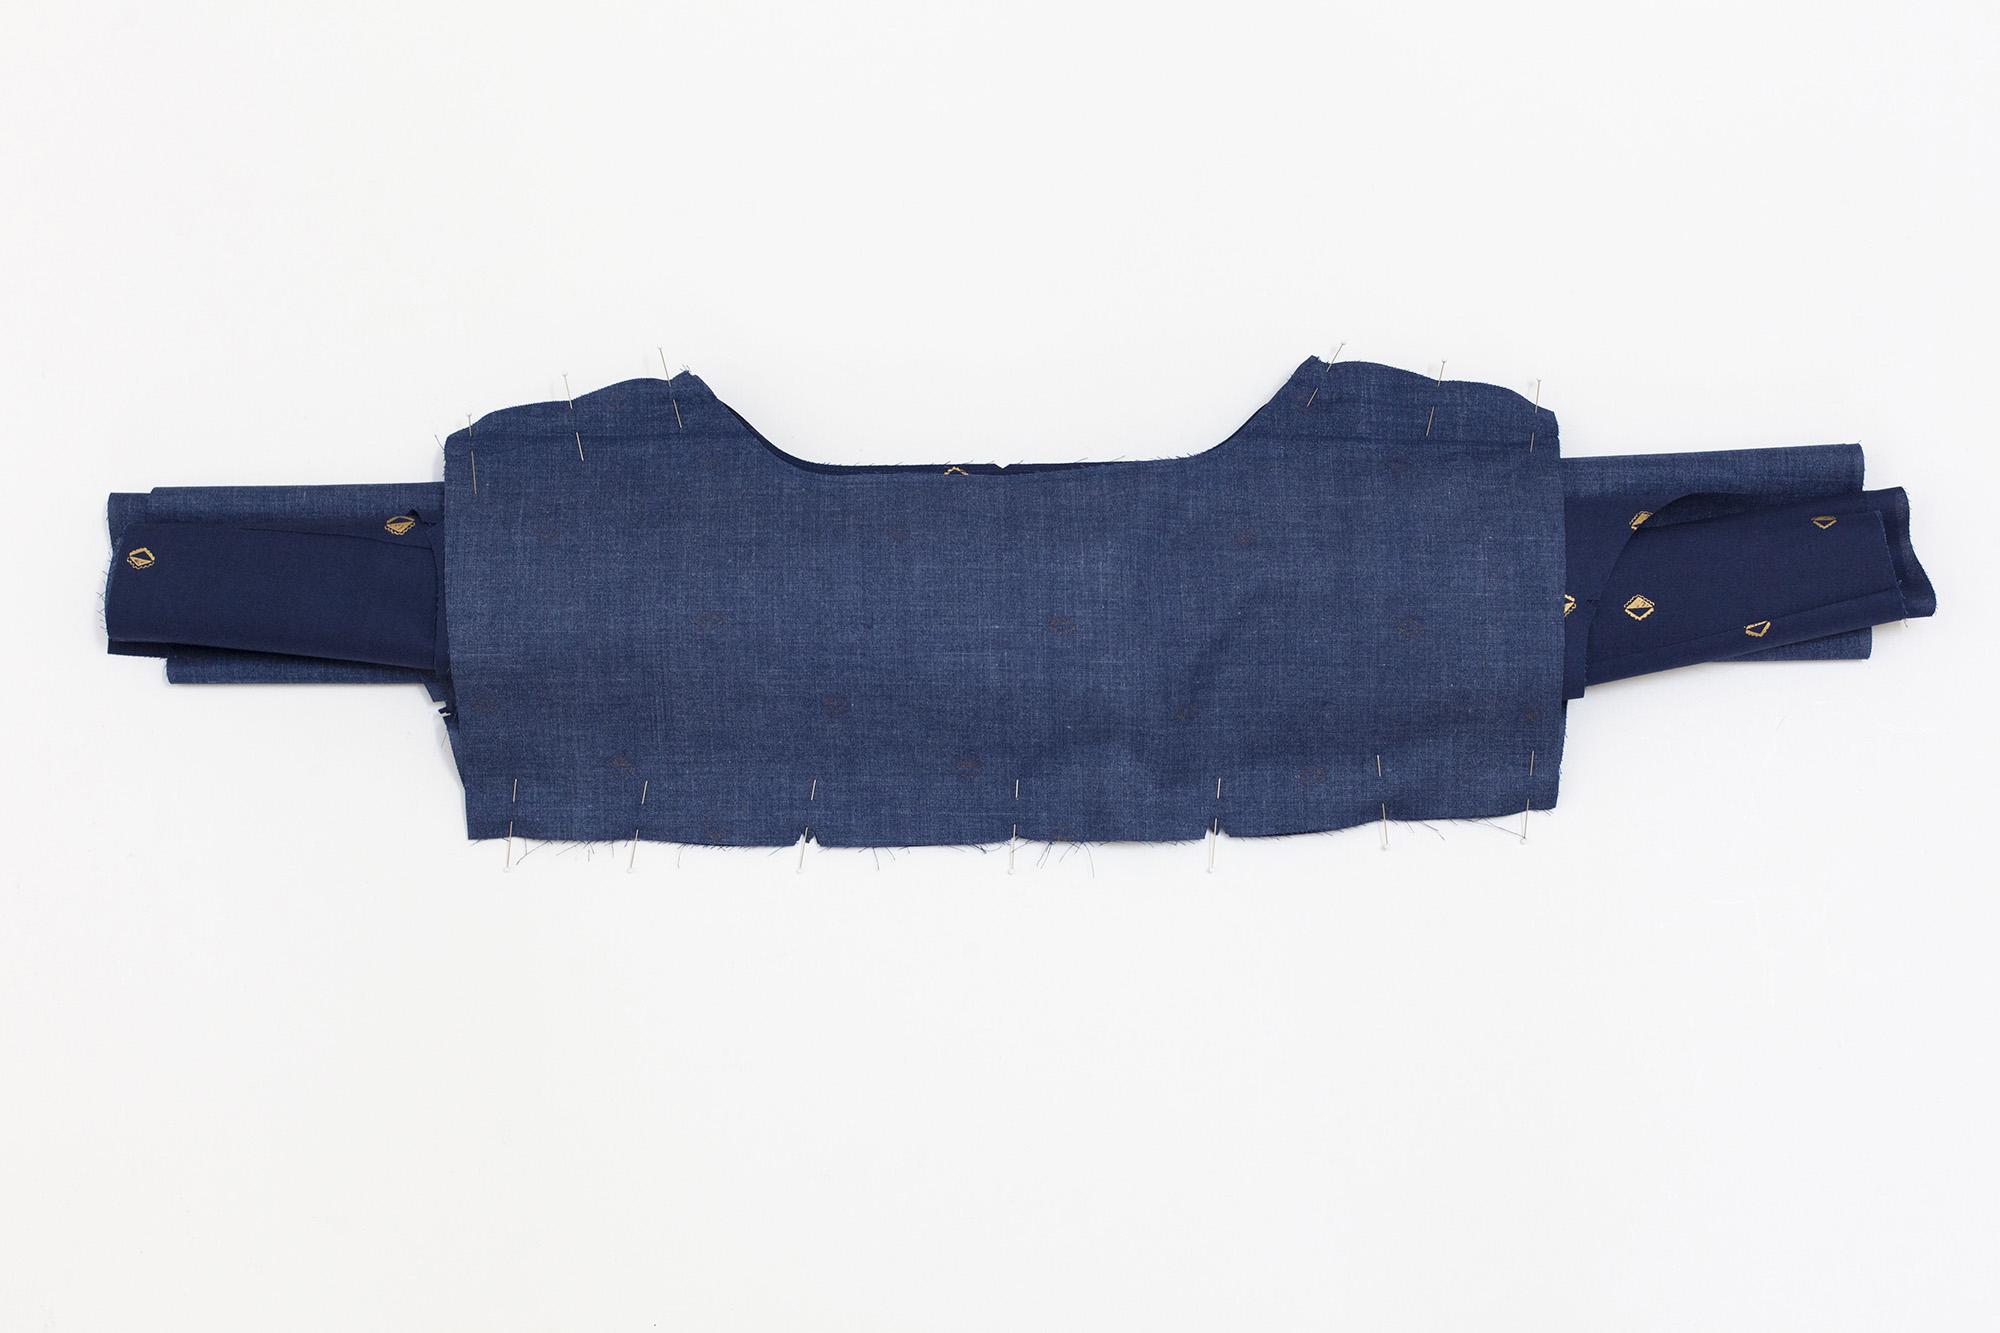
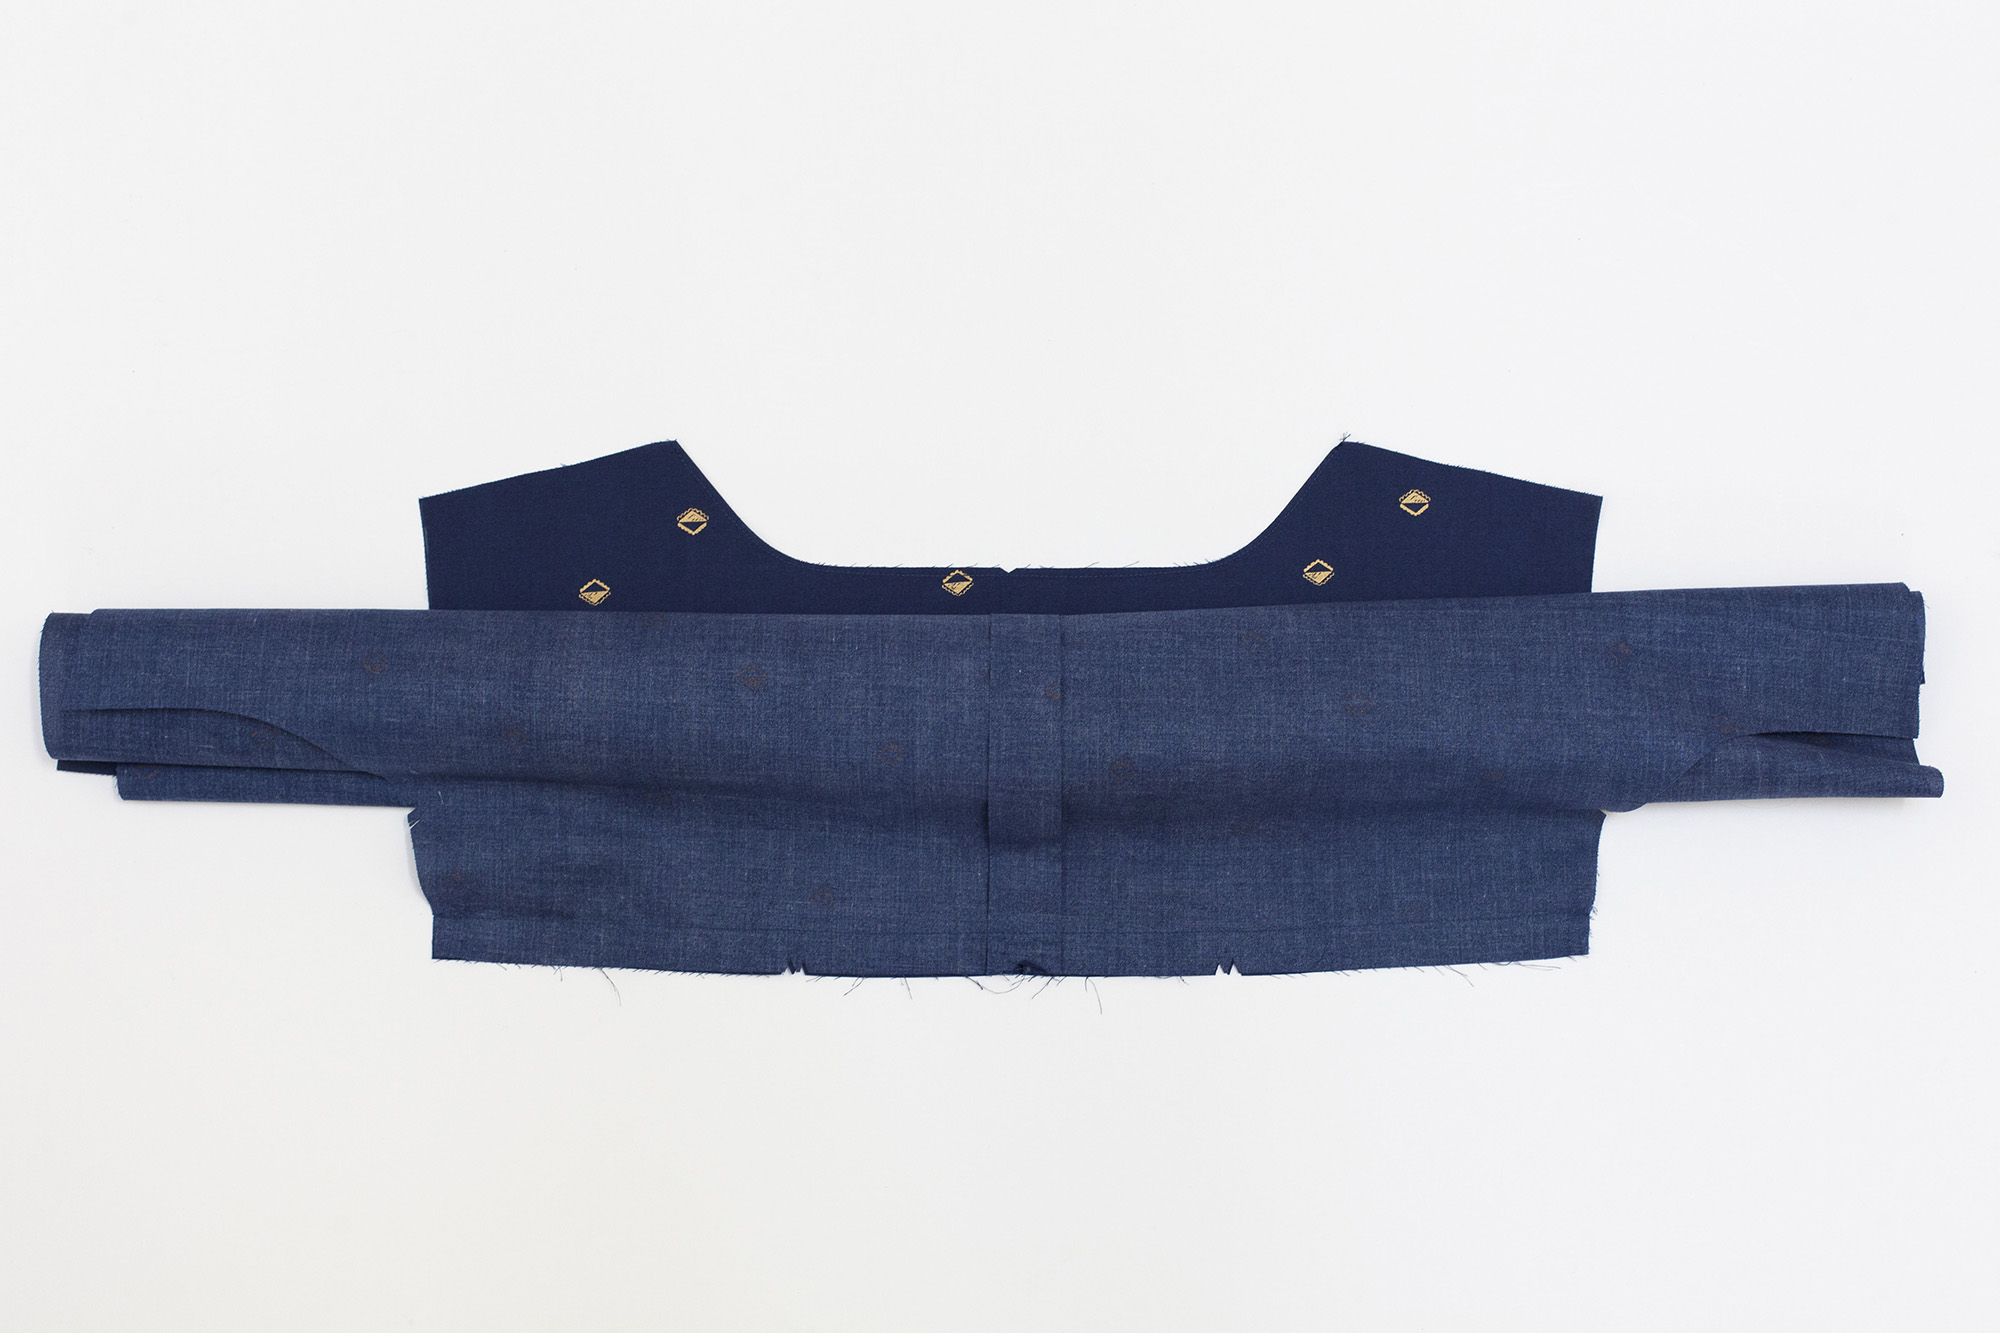
6) The bodice back (E) and bod- ice front (A) or pleated bodice front (B) will be sandwiched between the two yokes.
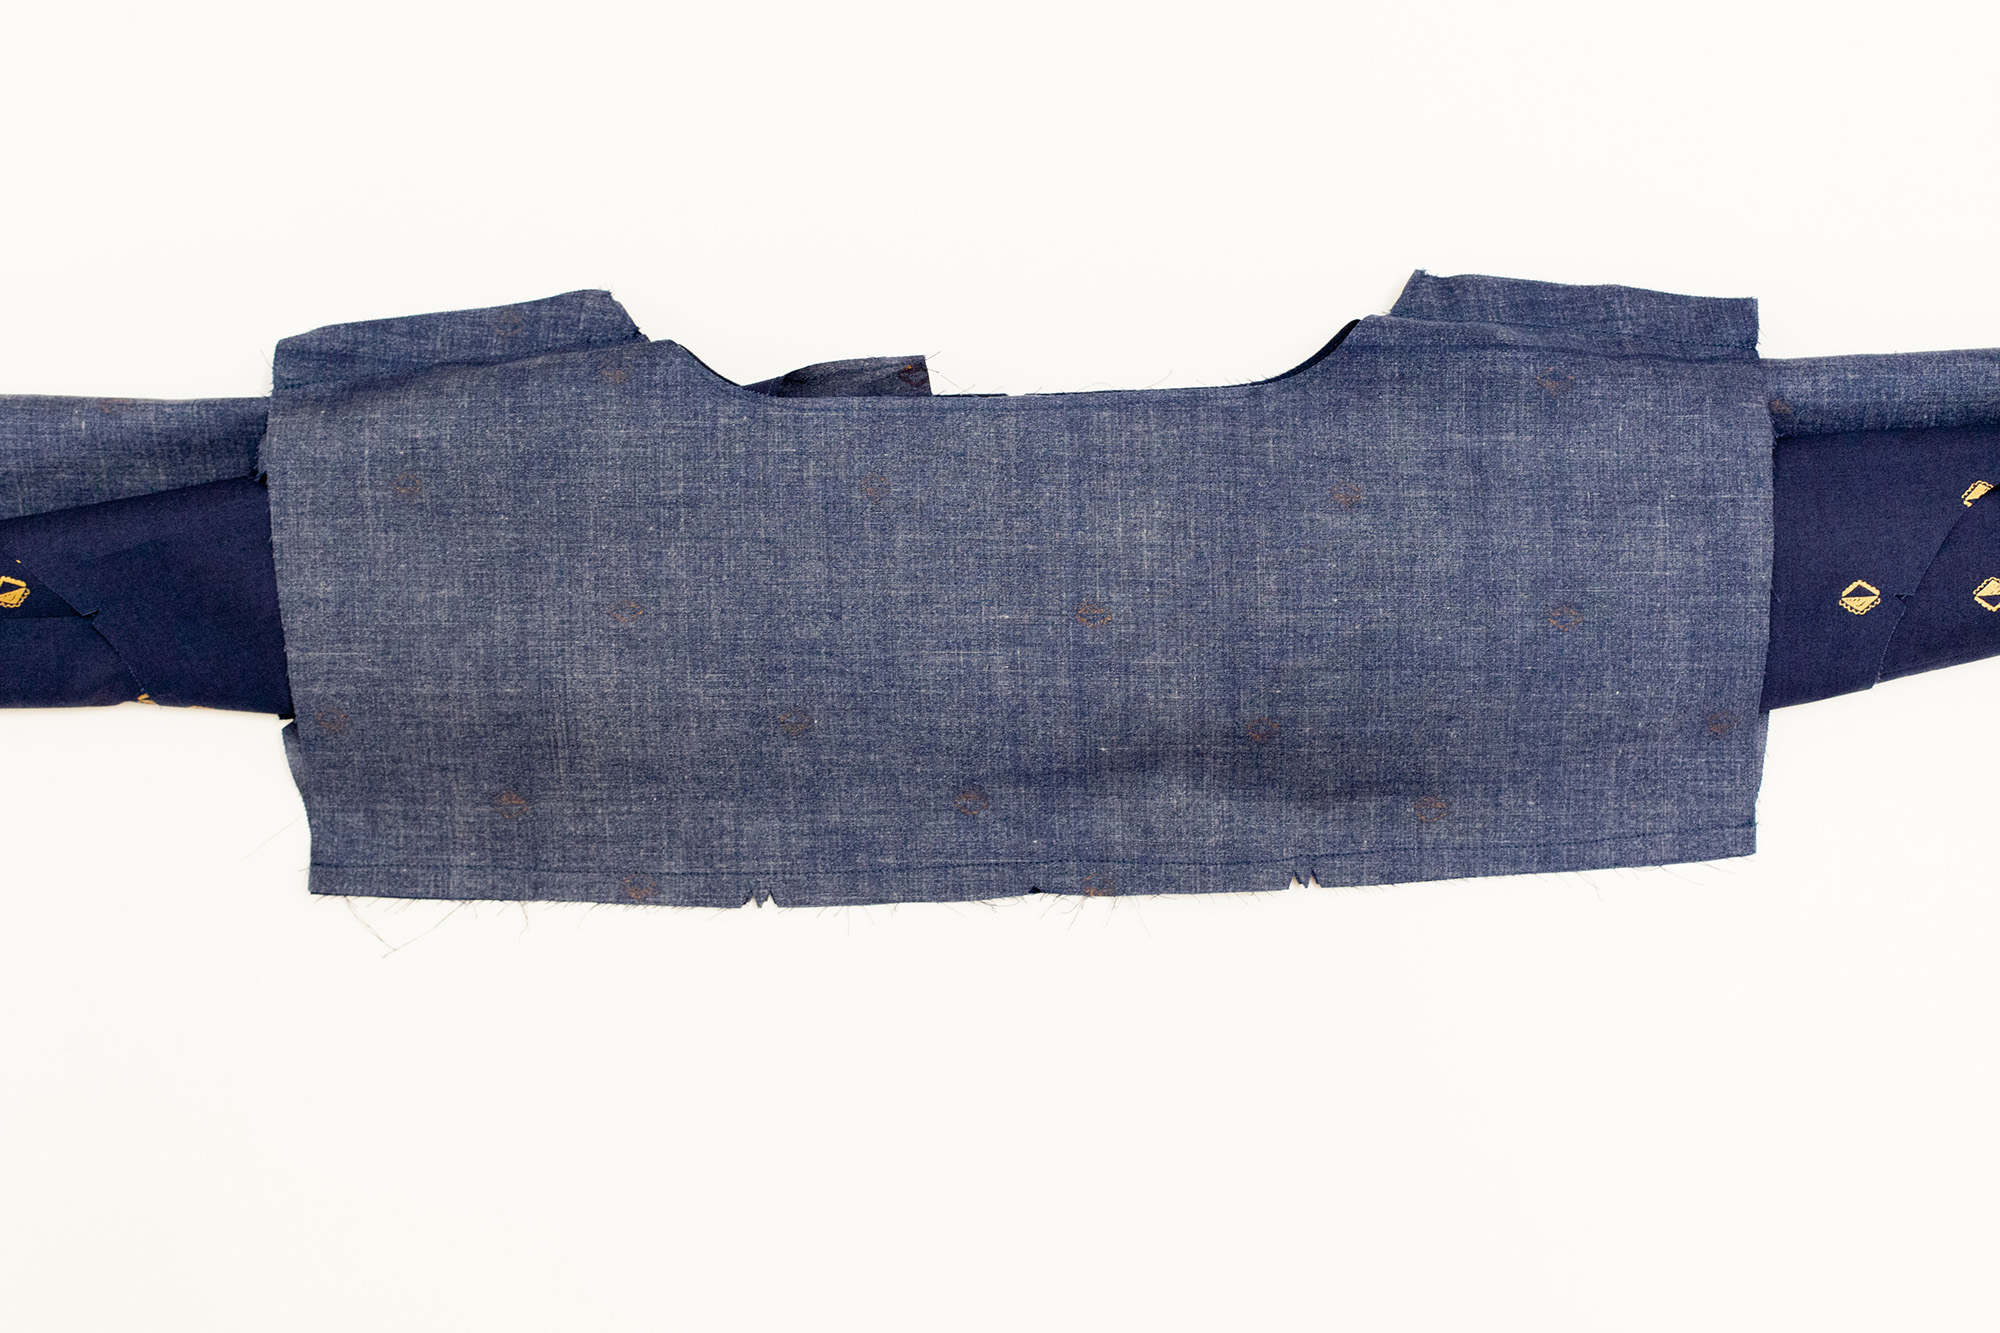
7) Stitch the two yoke back (D) pieces together at the shoulders. Using a 3/8″ seam allowance, stitch the two yoke back (D)
pieces together at the bottom edge.
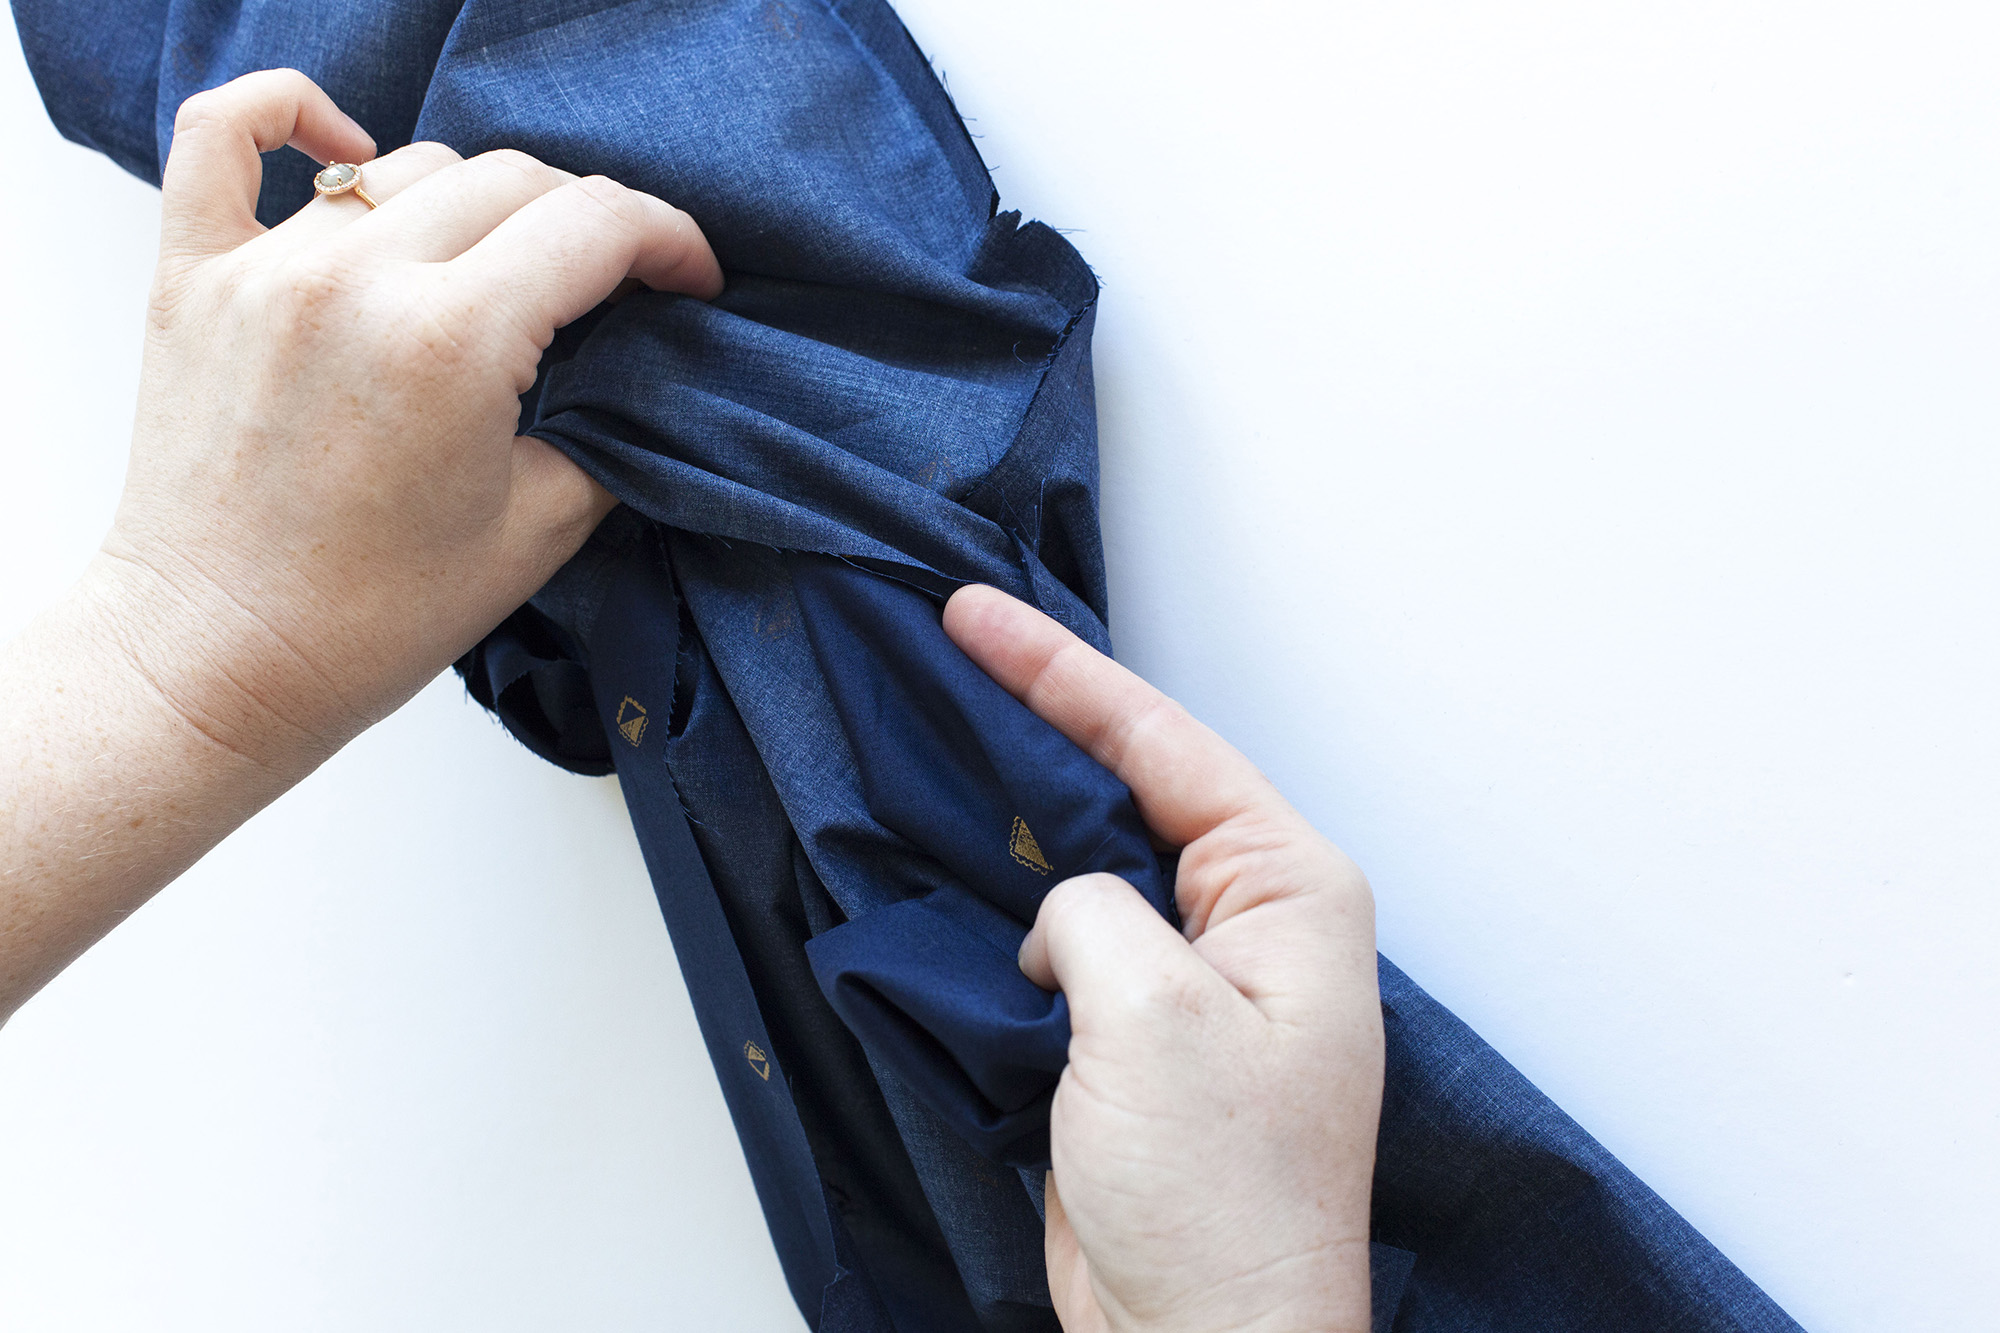
8) Reach through the middle and grab the rolled up bodice front (A) or pleated bodice front (B) and bodice back (E) and pull them through one of the openings at the side of the yoke, turning everything right side out. The yoke now has a clean finish with the yoke and shoulder seams tucked inside.
9) Press the yoke and shoulder seams. Topstitch along the bottom edge of the yoke back (D).
Comments
Thank you for the note. I tried to sew the yoke three times yesterday night and it was always wrong. I was getting mad!!
I sent you a post about my SBA because it is very hard to redraw the dart after reducing the pattern from 1 1/2”. I’m wondering whether I could sew the altered bodice without dart because of my tiny burst. Thanks
You could definitely give it a try, leaving the dart out all together may be a good option for you. I recommend sewing a muslin without a dart first just to check.
I almost tore my hair out before I realized that there was an error on it and once I seen the new instructions…all was good. My only issue with my pattern so far is it was really hard to tell where the dart was after my SBA, so I just kinda winged it. When I went to sew up the sides of my Aster, there was about 1 inch in the back that was off…so I’m assuming I should have shortened the back pattern too?
I am glad this post helped!
To redraw the dart, trace the original dart legs (I find that using a contrasting marker is helpful), the point where the two dart legs meet will become the new apex.
The side seam length is not altered in the SBA process, just the center front length, the back piece should line up still.
I’m a novice at fitting adjustments – so take my thoughts with a grain of salt! :)
I needed to do an SBA and the total length removed in the alteration was greater than could be accommodated by the dart uptake – maybe by about a difference of 1/3 inch (my SBA was a total of 1.5″, so 3/4″ in from line B).
I didn’t want to lose length in the blouse, so I had decided to lengthen the side to meet the center after doing the SBA, instead of the other way around in Haley’s post. As per Haley’s suggestion in the comments (thanks!), I knew I needed to lengthen the back bodice to match, and the total adjustment at the back necessitated that additional 1/3 inch to make up the difference of the SBA-dart-overlap.
I hope that make sense!
I’m loving sewing along with you all, thanks!
It sound like you are on the right track for fitting. Thank you for sewing along!
I started the yoke at my monthly stitch and bitch yesterday, all wrong! Luckily it came out right, somehow. I started with sandwiching the back between the 2 yokes and then doing the shoulder seams, first yoke facing right side to wrong side of fronts and then rolling the whole thing up and sewing the shoulders of the right side yoke over the previous shoulder seams. I think this might be the way I learned it 20 years ago in fashion school.
Haley, will you be talking about how to make our own bias tape at some point? I’m using a white linen and would like to make the bias tape from this fabric. If you could tell me how wide the strips need to be, I can start with that. Thank you!
Elle, I wanted to share the way i made the bias strip(es) for this top. I used the bias line on my cutting board for a guide. I folded the fabric on the bias line and creased it with my iron. Then i cut 3/8 in. strip with my rotary cutter a rotary ruler.
I then repeated the same process for a 2nd strip. It looks nice in the same fabric.
Toni
Thank you, Toni, I’ll give that a try. 3/4″ wide, then.
And there are clear instructions on pages 138-139 of The Colette Sewing Handbook. I do have the Clover 1/4″ bias taper maker, instructions say to cut strips 1/2″ (medium weight fabric) or 5/8″ (light weight fabric) wide. I’m using this medium weight linen: http://www.fabrics-store.com/first.php?goto=big_fabric&menu=f&menu=f&fabric_id=154. I’m thinking 5/8″ wide?
I definitely recommend 5/8″ for fabrics such as linen that tend to stretch significantly on the bias.
Love these lessons. Just a small suggestion: In the future, please consider using a lighter-colored fabric to make the visuals easier to see. Otherwise, this sew- along is really great.
Thanks for the suggestion, I will certainly keep it in mind. Thank you for sewing-along!
I loved the directions for how to bag a yoke. I know how to bag the lining of a jacket and didn’t realise it was the same technique. Thank-you.
Isn’t it such a nice technique? I love bagging jackets using the same method.
I’m confused.. The bodice back and second yoke is sewn tog at 5/8 in…. The two back bottom edges of yokes are sewn tog at 3/8in…Wouldn’t inner and outer yokes be different sizes, one being bigger?
The yoke lining is sewn at 3/8″ so that the stitching is within the seam allowance of the yoke seam. This helps prevent any visible stitching on the right side of the garment. that excess is then controlled through the topstitching, preventing the lining from bagging.
Thanks Haley..that works!
Hi Haley,
What about the shoulder seams: 5/8″, not 3/8″, right?
Thanks!!
I’d love to find the answer to the sewing of the shoulder seams. I sewed the 2 x fronts to the yoke at the shoulders at 5/8. On my first attempt I sewed the 2 yokes at 3/8 at the shoulders but then the front/yoke seam shows. If I redo it at 5/8 it would sit right on top of the previous seam. Would it be right to redo the front/yoke seam at 3/8 and then sew the 2 yoke pieces together at 5/8? Hope it makes sense
You can absolutely sew the front/yoke seam at 3/8″ and the 2 yoke pieces together at 5/8″.
Whew! Got it right the second try, went together quickly after I re-read the clear instructions at the very beginning. For any others who might be similarly lured into sewing wrong sides together as usual, let me draw your attention to this:
“Place the *right* side of one yoke back (D) facing the wrong sides of two bodice front (A).” [Emphasis added to *right* side of yoke back.]
My linen looks the same front and back, so I didn’t catch on to my mistake until I had it all together the first time.
In regards to the errata for Bodice A, I notice the buttonholes are higher.
Which buttonhole placement do I follow? the new version buttonholes seems a bit high to me.
I’m at a stopping point because I cannot seem to locate 1/4″ single fold bias tape anywhere. Can someone point me to some good Internet suppliers? I live in Vermont with very few on-site retail options. Thanks!
To help in the short term, this technique might help you:
http://creativelittledaisy.typepad.com/creative_little_daisy/2007/11/diy-version-of.html
Many thanks! I’m going to give this a try tonight.
Hi, I’ve followed the instructions to the letter and read and re-read them and cannot see where it tells me to stitch the curved seam of the yoke…
So I’ve got a lovely yoke that is completely unstitched at the top.
Very puzzled, please can you explain.
Thanks!
The neckline is finished with a bias finish. Check out this sewalong post for more information on how to finish the neckline.
ohhhhh! Thank you!
Hi, Thanks for hosting the sew-a-long..I am enjoying it! This is the first intermediate pattern I have tried to sew. :) I think I have the yoke right on the second try..just to double check, when sewing the front bodice pieces to the “inner” yoke, should the raw edges of the seam should be facing inside the garment, right? Then, when you sew this to the back yoke, there is a raw edge of the back yoke meeting up with the sewn seam of the front + inner yoke?
Thanks!
It sounds like you are on the right track! Thank you for sewing along!
I know I’m a little late to this party, but I finally got time to do a sew-along. While I found the FBA to be frustrating, I find this to be even more so. I have read the instructions about six times and looked at them on my iPad. I finally came into my office to see it on a bigger screen. The first color photo in this section made it somewhat clearer. I couldn’t figure out what the white triangle was. Then I realized it was the difference between the bottom of the yoke (right side to wrong side of bodices) and the bottom of the V-neckline! so much clearer now. At least I think it is.