

In this post we will be covering general pattern adjustments that can be made to the garment before sewing a muslin. These adjustments include blending between sizes, lengthening, and shortening.
Though making flat pattern adjustments can improve the over-all fit of your garment, nothing can do the job quite like a sewing a muslin. If you want a predictable outcome when it comes to fit, make always make a muslin!
Blending Sizes
Bodies are diverse, and for this reason you may often find that you fall into a different size category in your waist than in you hips. Aster is drafted to be a relaxed cut, with little definition between the hip and waist line. This adjustment is ideal for people who find that their hip falls into a larger size than their waist. Luckily this is an easy adjustment we can make to our flat pattern.
1) Start by adjusting the front bodice. The waist of Aster is marked by a notch at the side seam. You can use this notch as a starting point when blending between sizes.
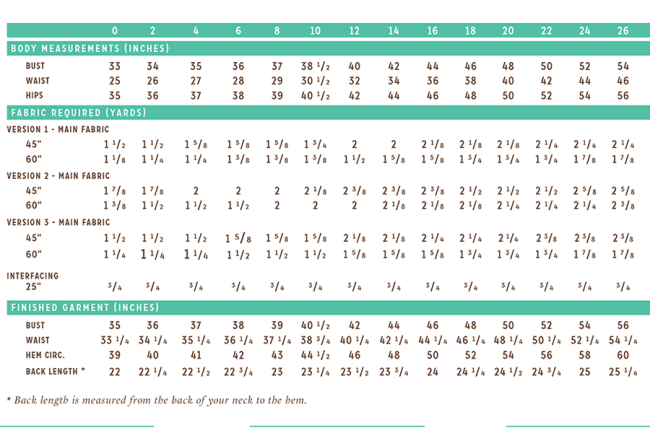
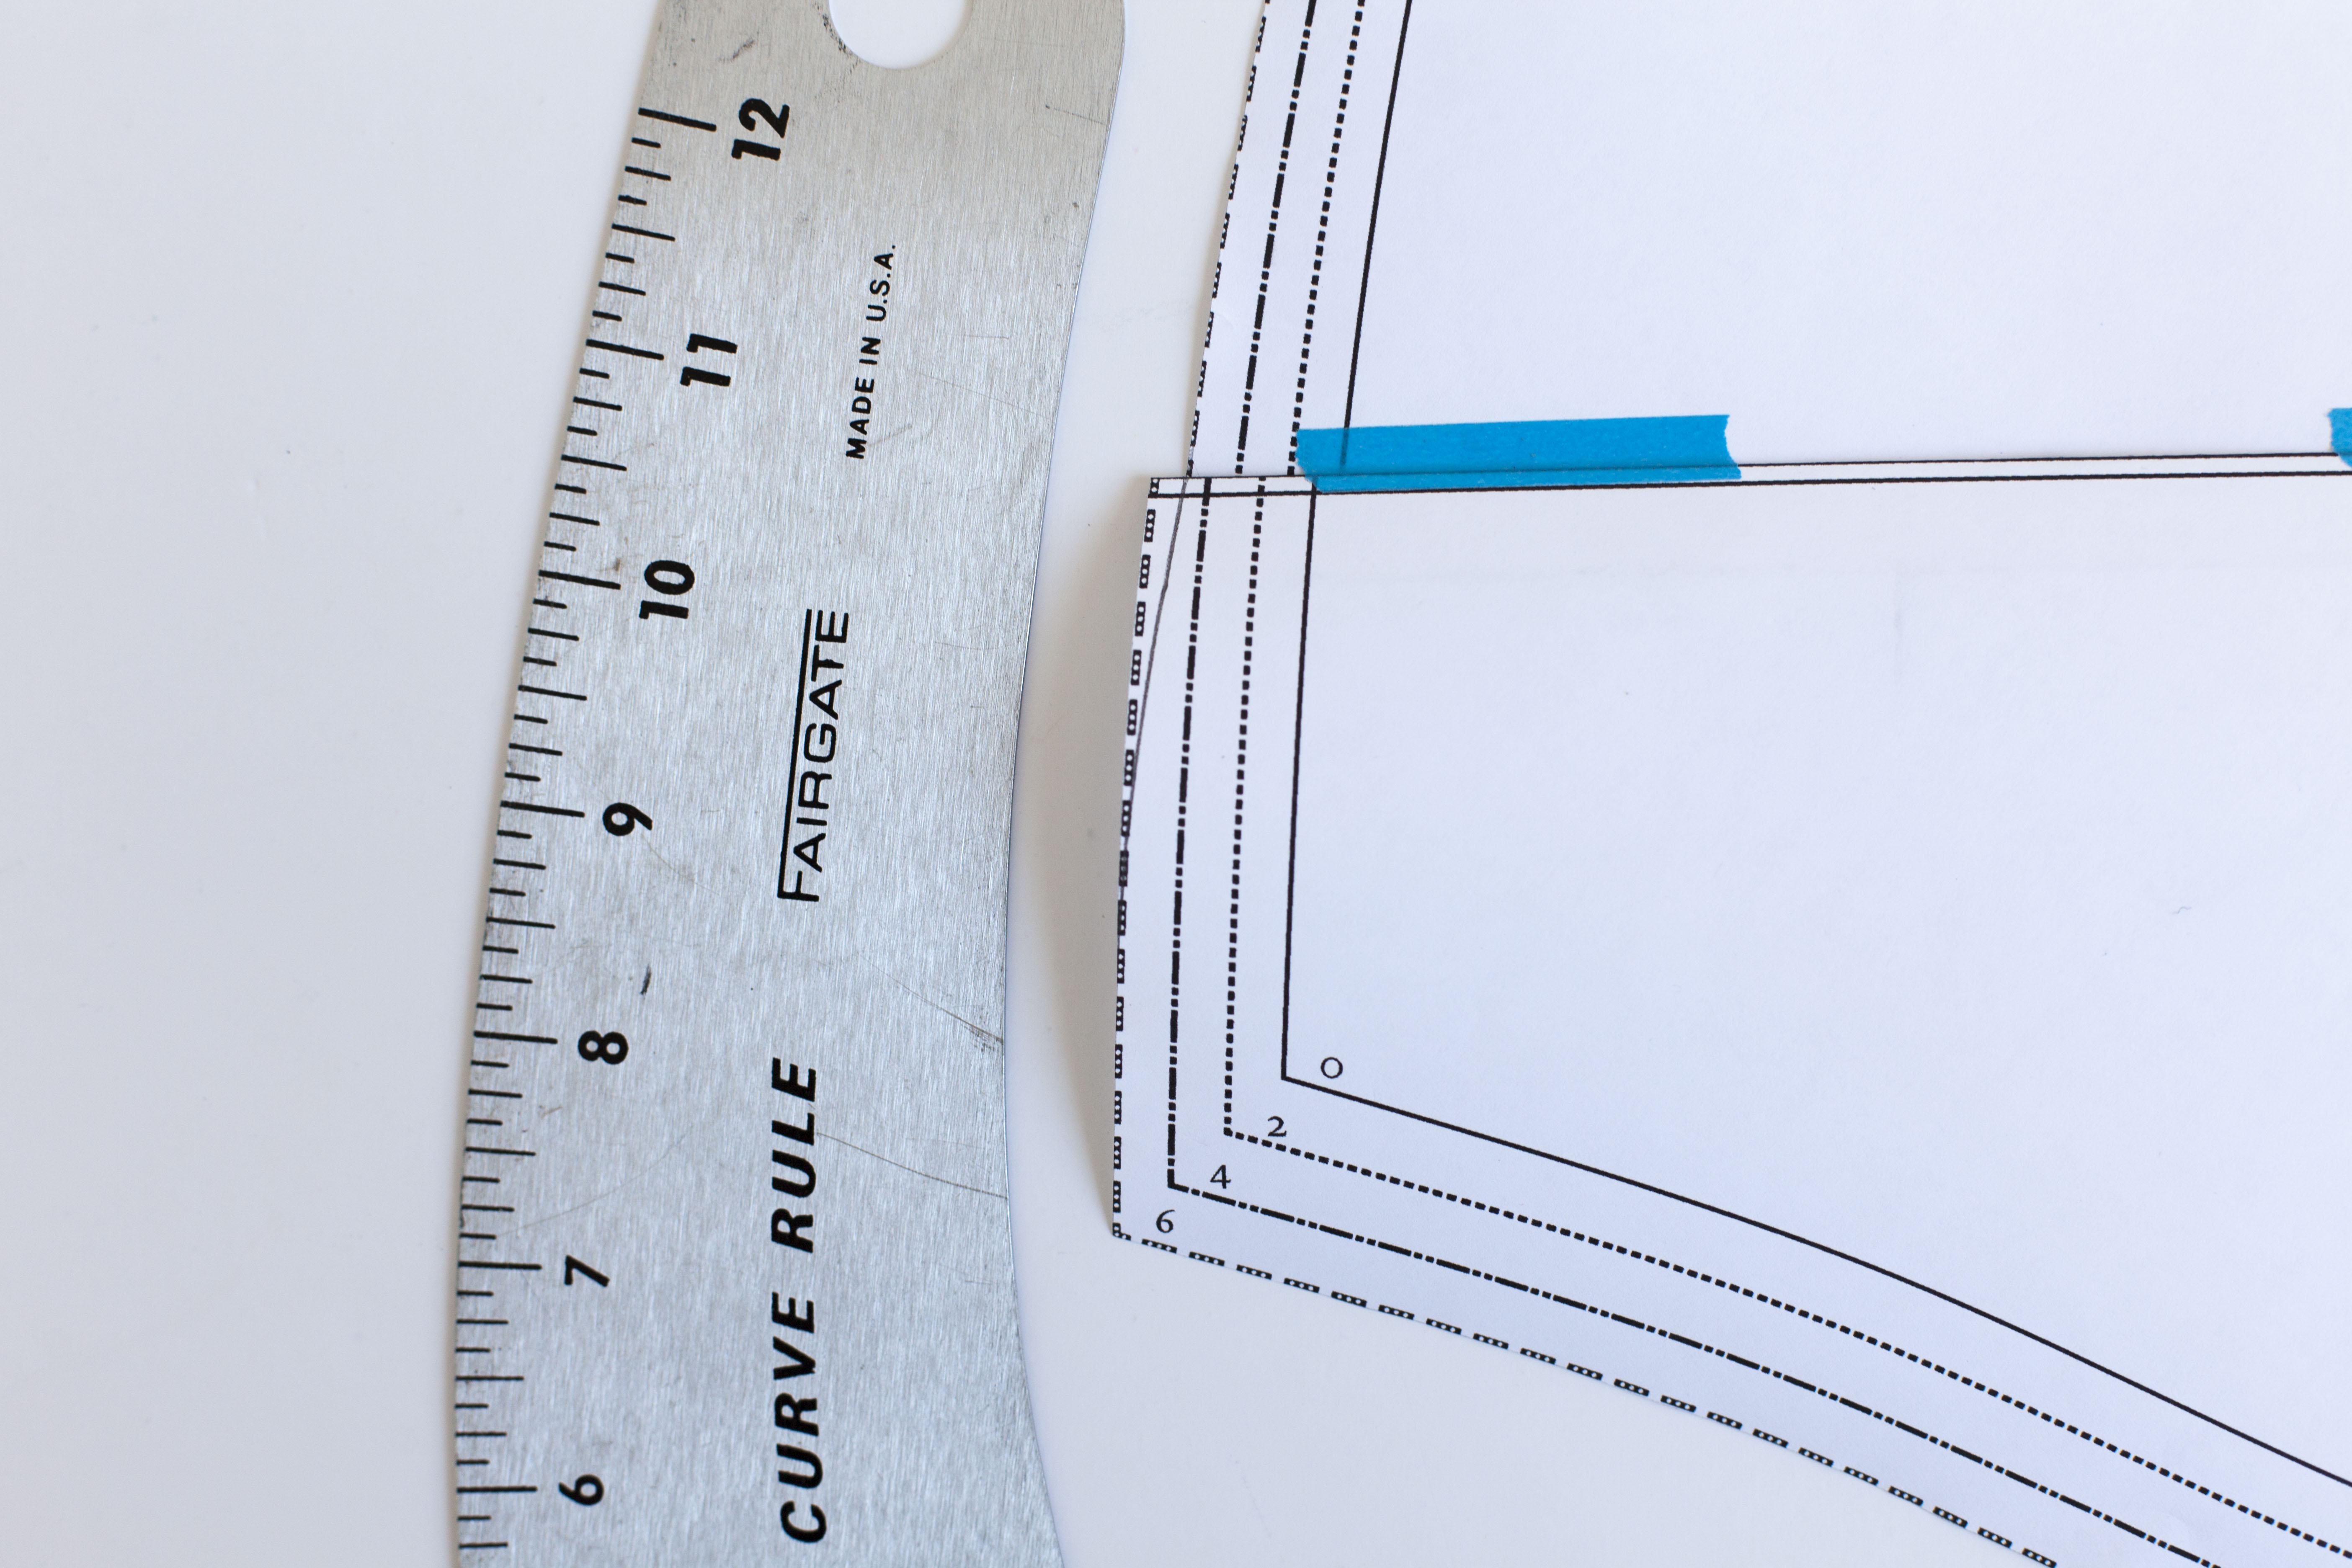
2) Determine the size you are blending to by referring back to the size chart. Use a hip curve to gently blend out to the new size line at the hips.
3) Repeat this process on the back bodice.
If you find that you are a larger size category in the waist, than in the hip, refer to the finished measurements for your size. The Aster is designed with ample ease, so you may find that the smaller size will still allow enough ease in the middle.
Shortening
If you are particularly short waisted you will want to shorten your Aster.
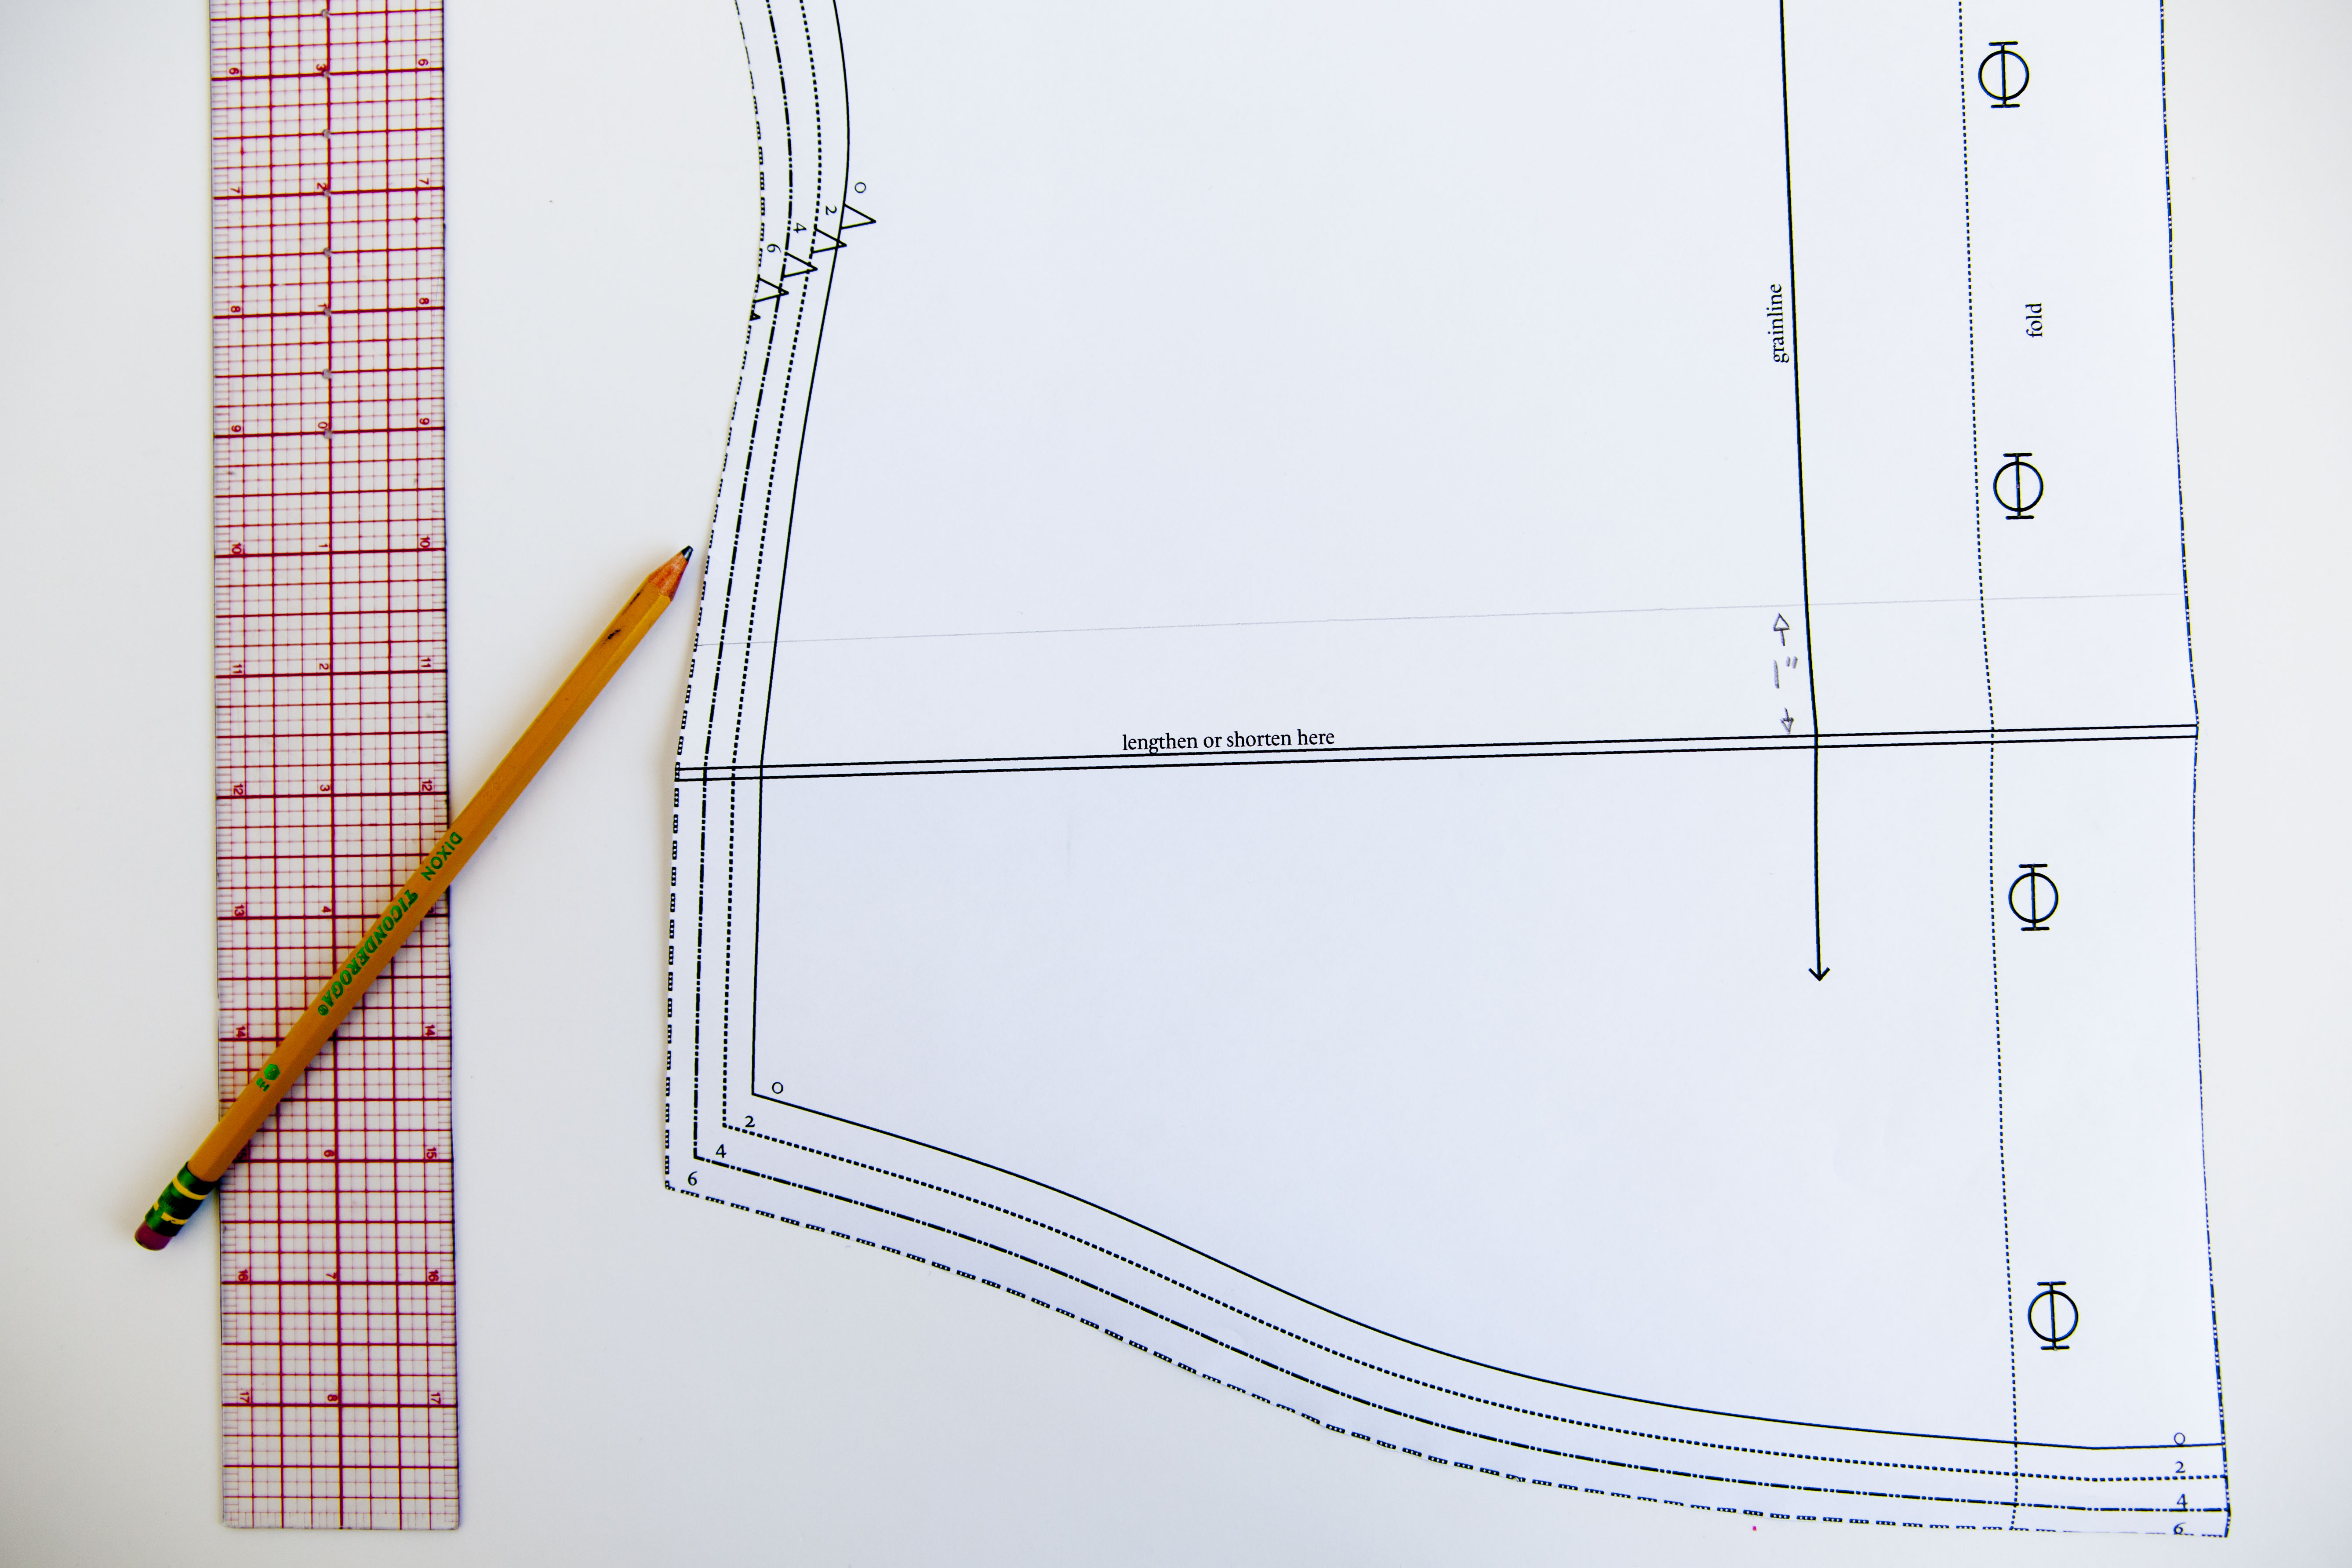
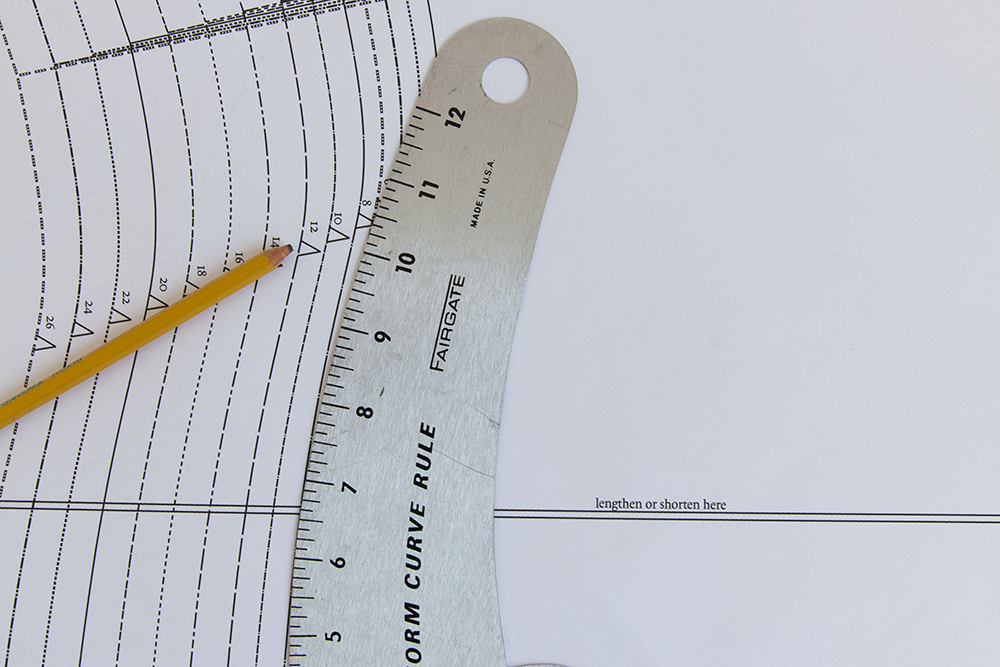
1) To shorten, draw a line above and parallel to the lengthen/shorten line, the distance between these two lines should be the amount you would like to shorten.
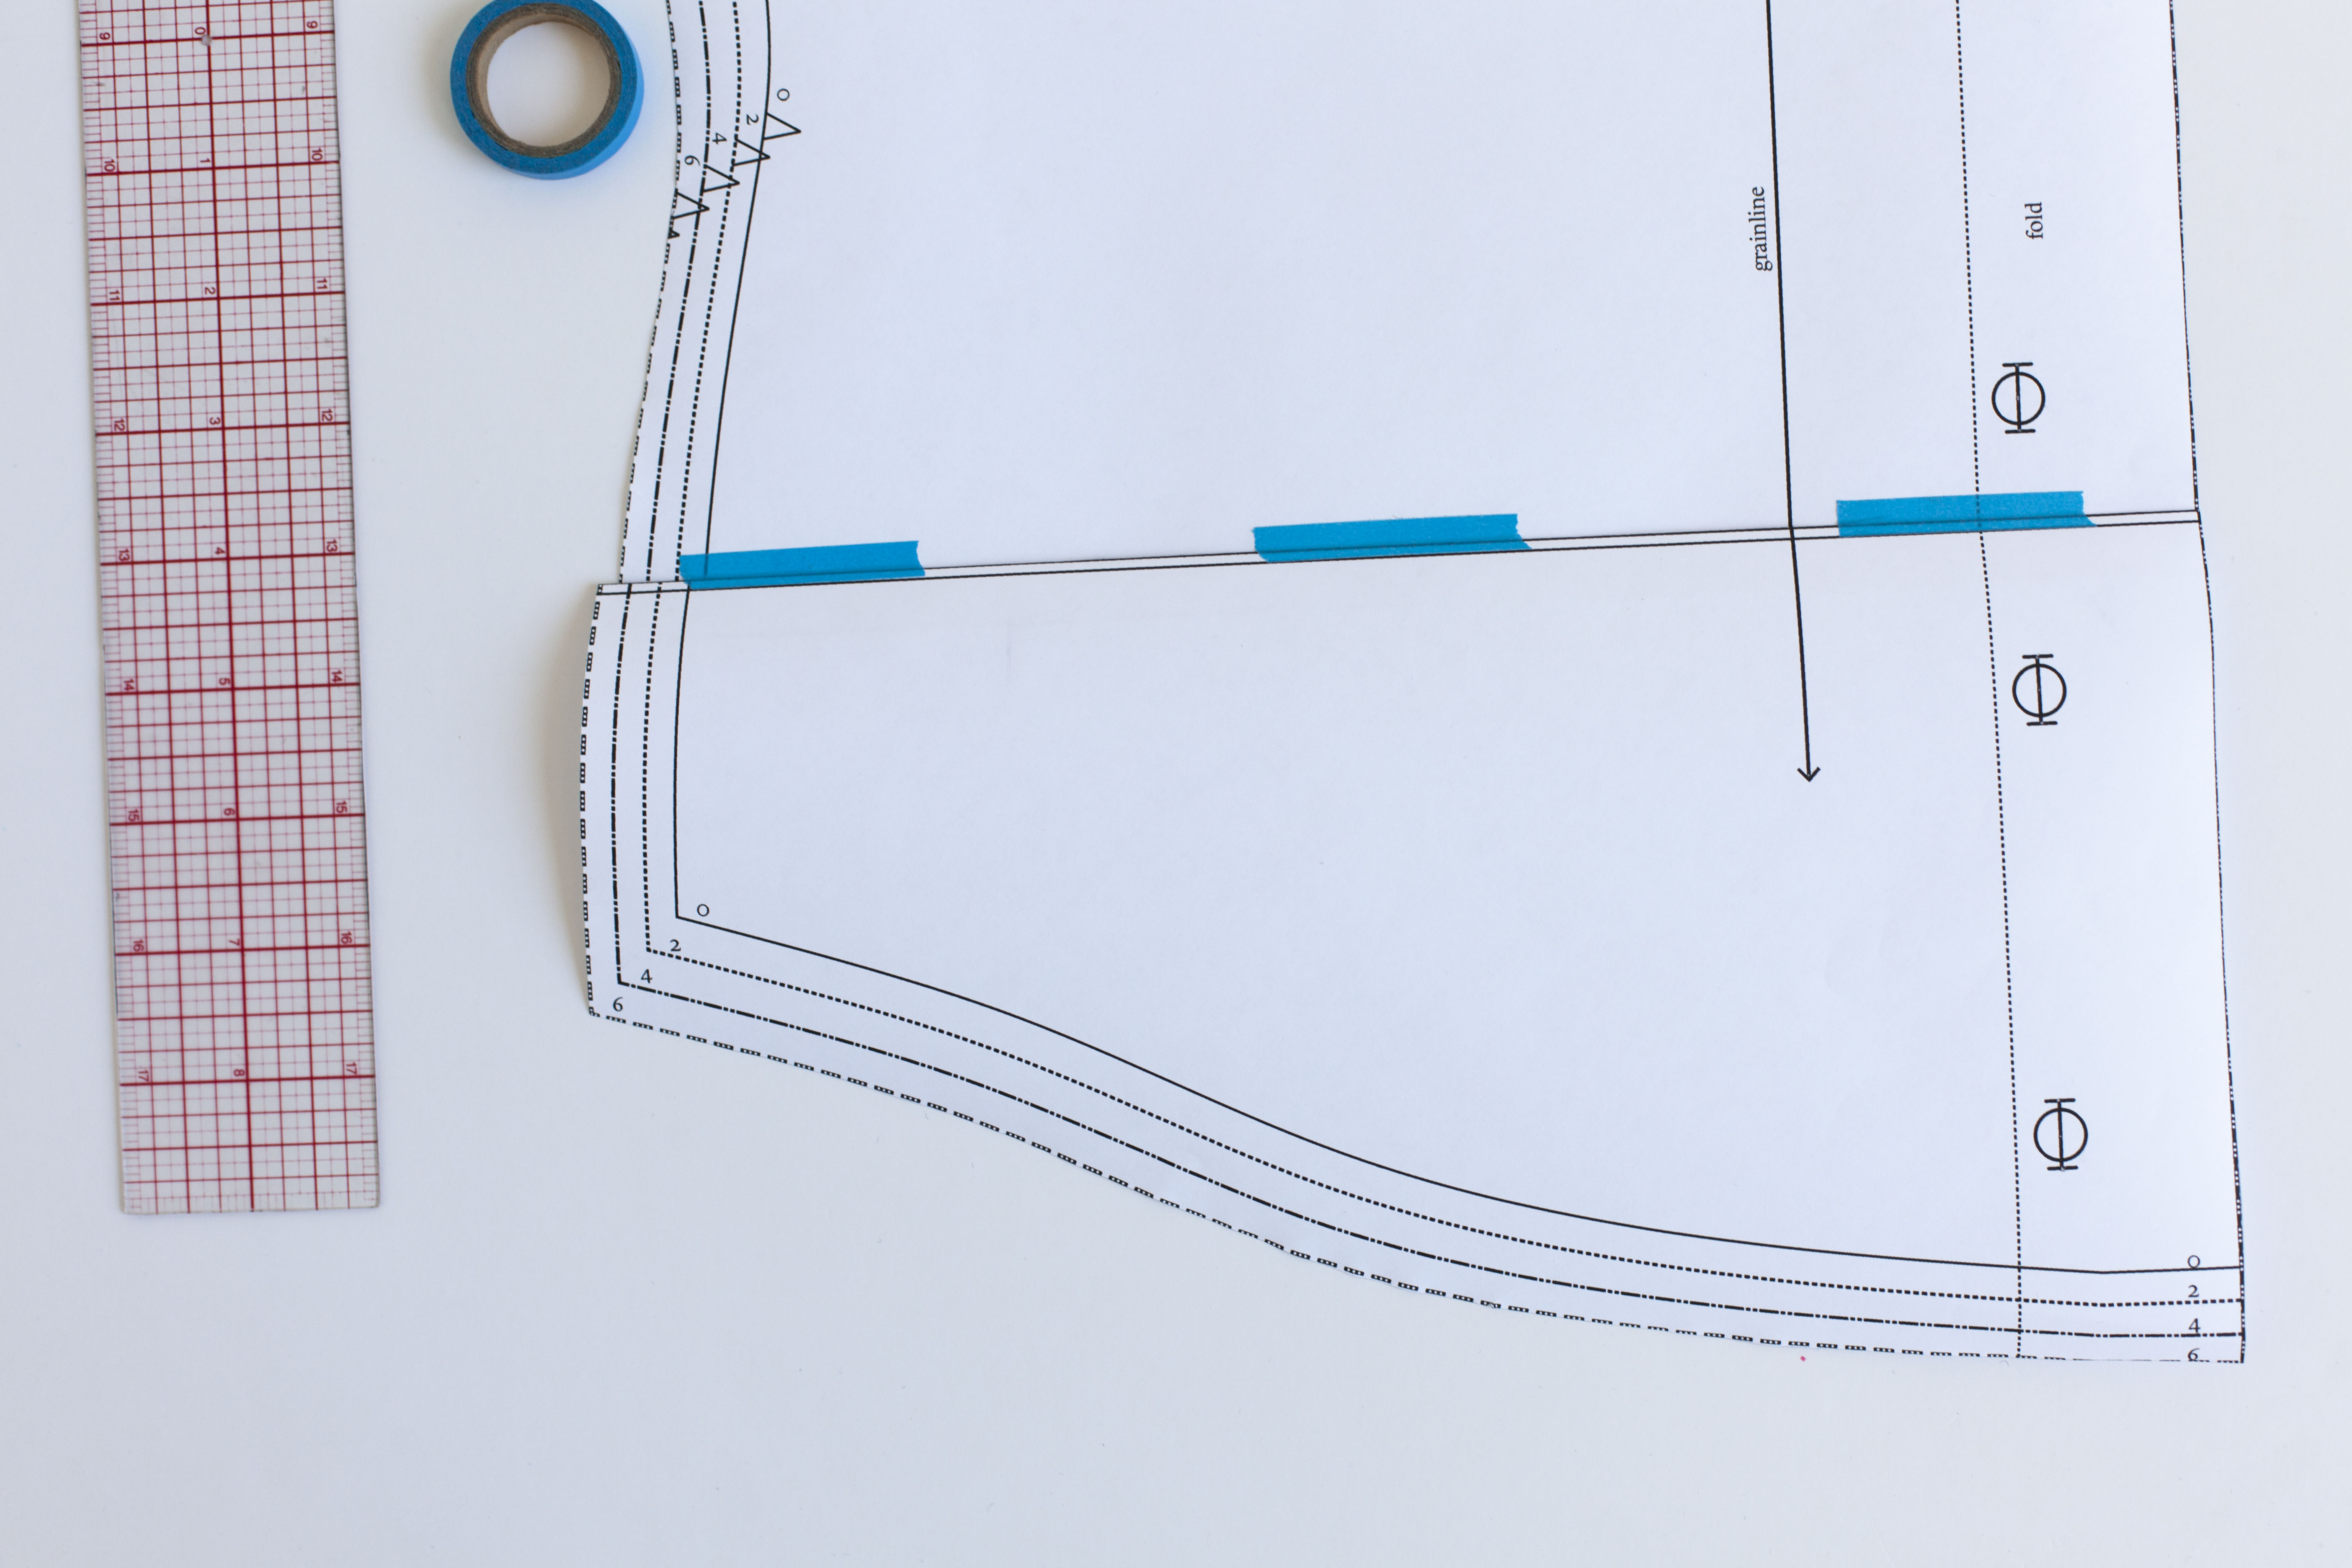
2) Crease the lengthen/shorten line and fold it to your new line.
3) Tape and blend jagged edges.
4) Reposition the last 2 button placement marks so that they are 2 3.4″ apart, consistent with the rest of the pattern. Don’t worry if you end up loosing the final button.
Lengthening
Lengthening your Aster is just as easy.
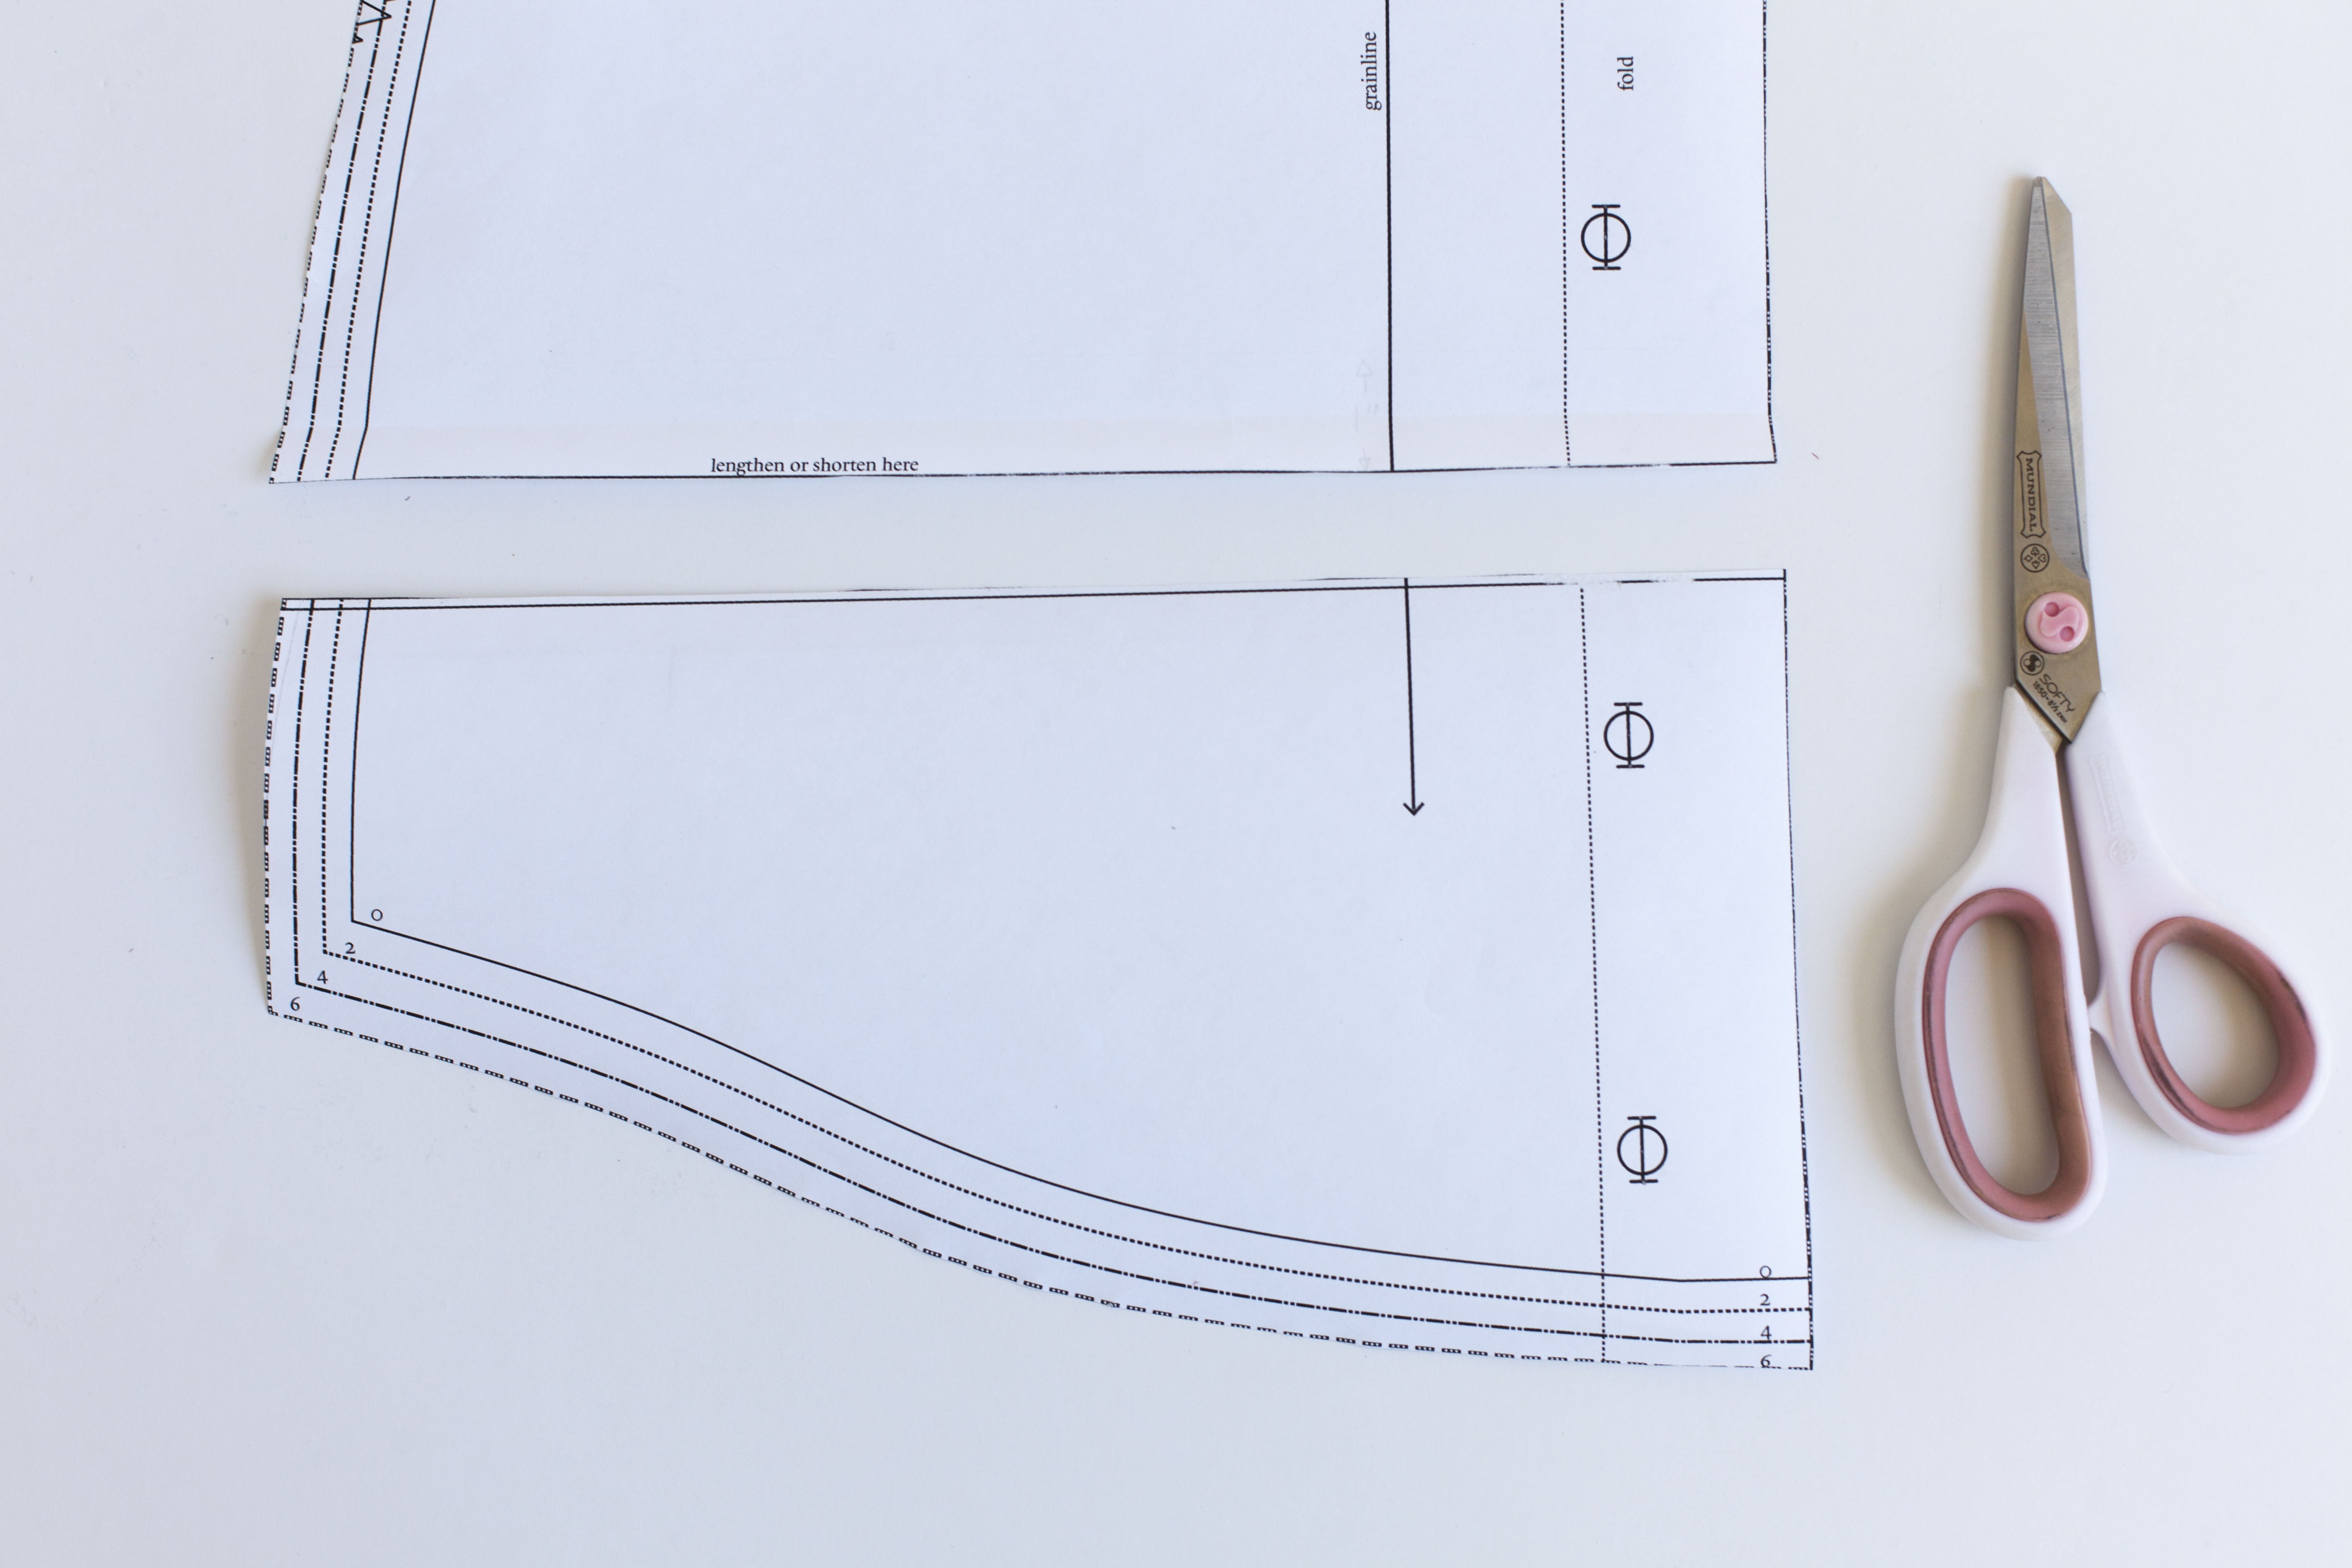
1) To lengthen a pattern piece, cut along the lengthen/shorten lines.
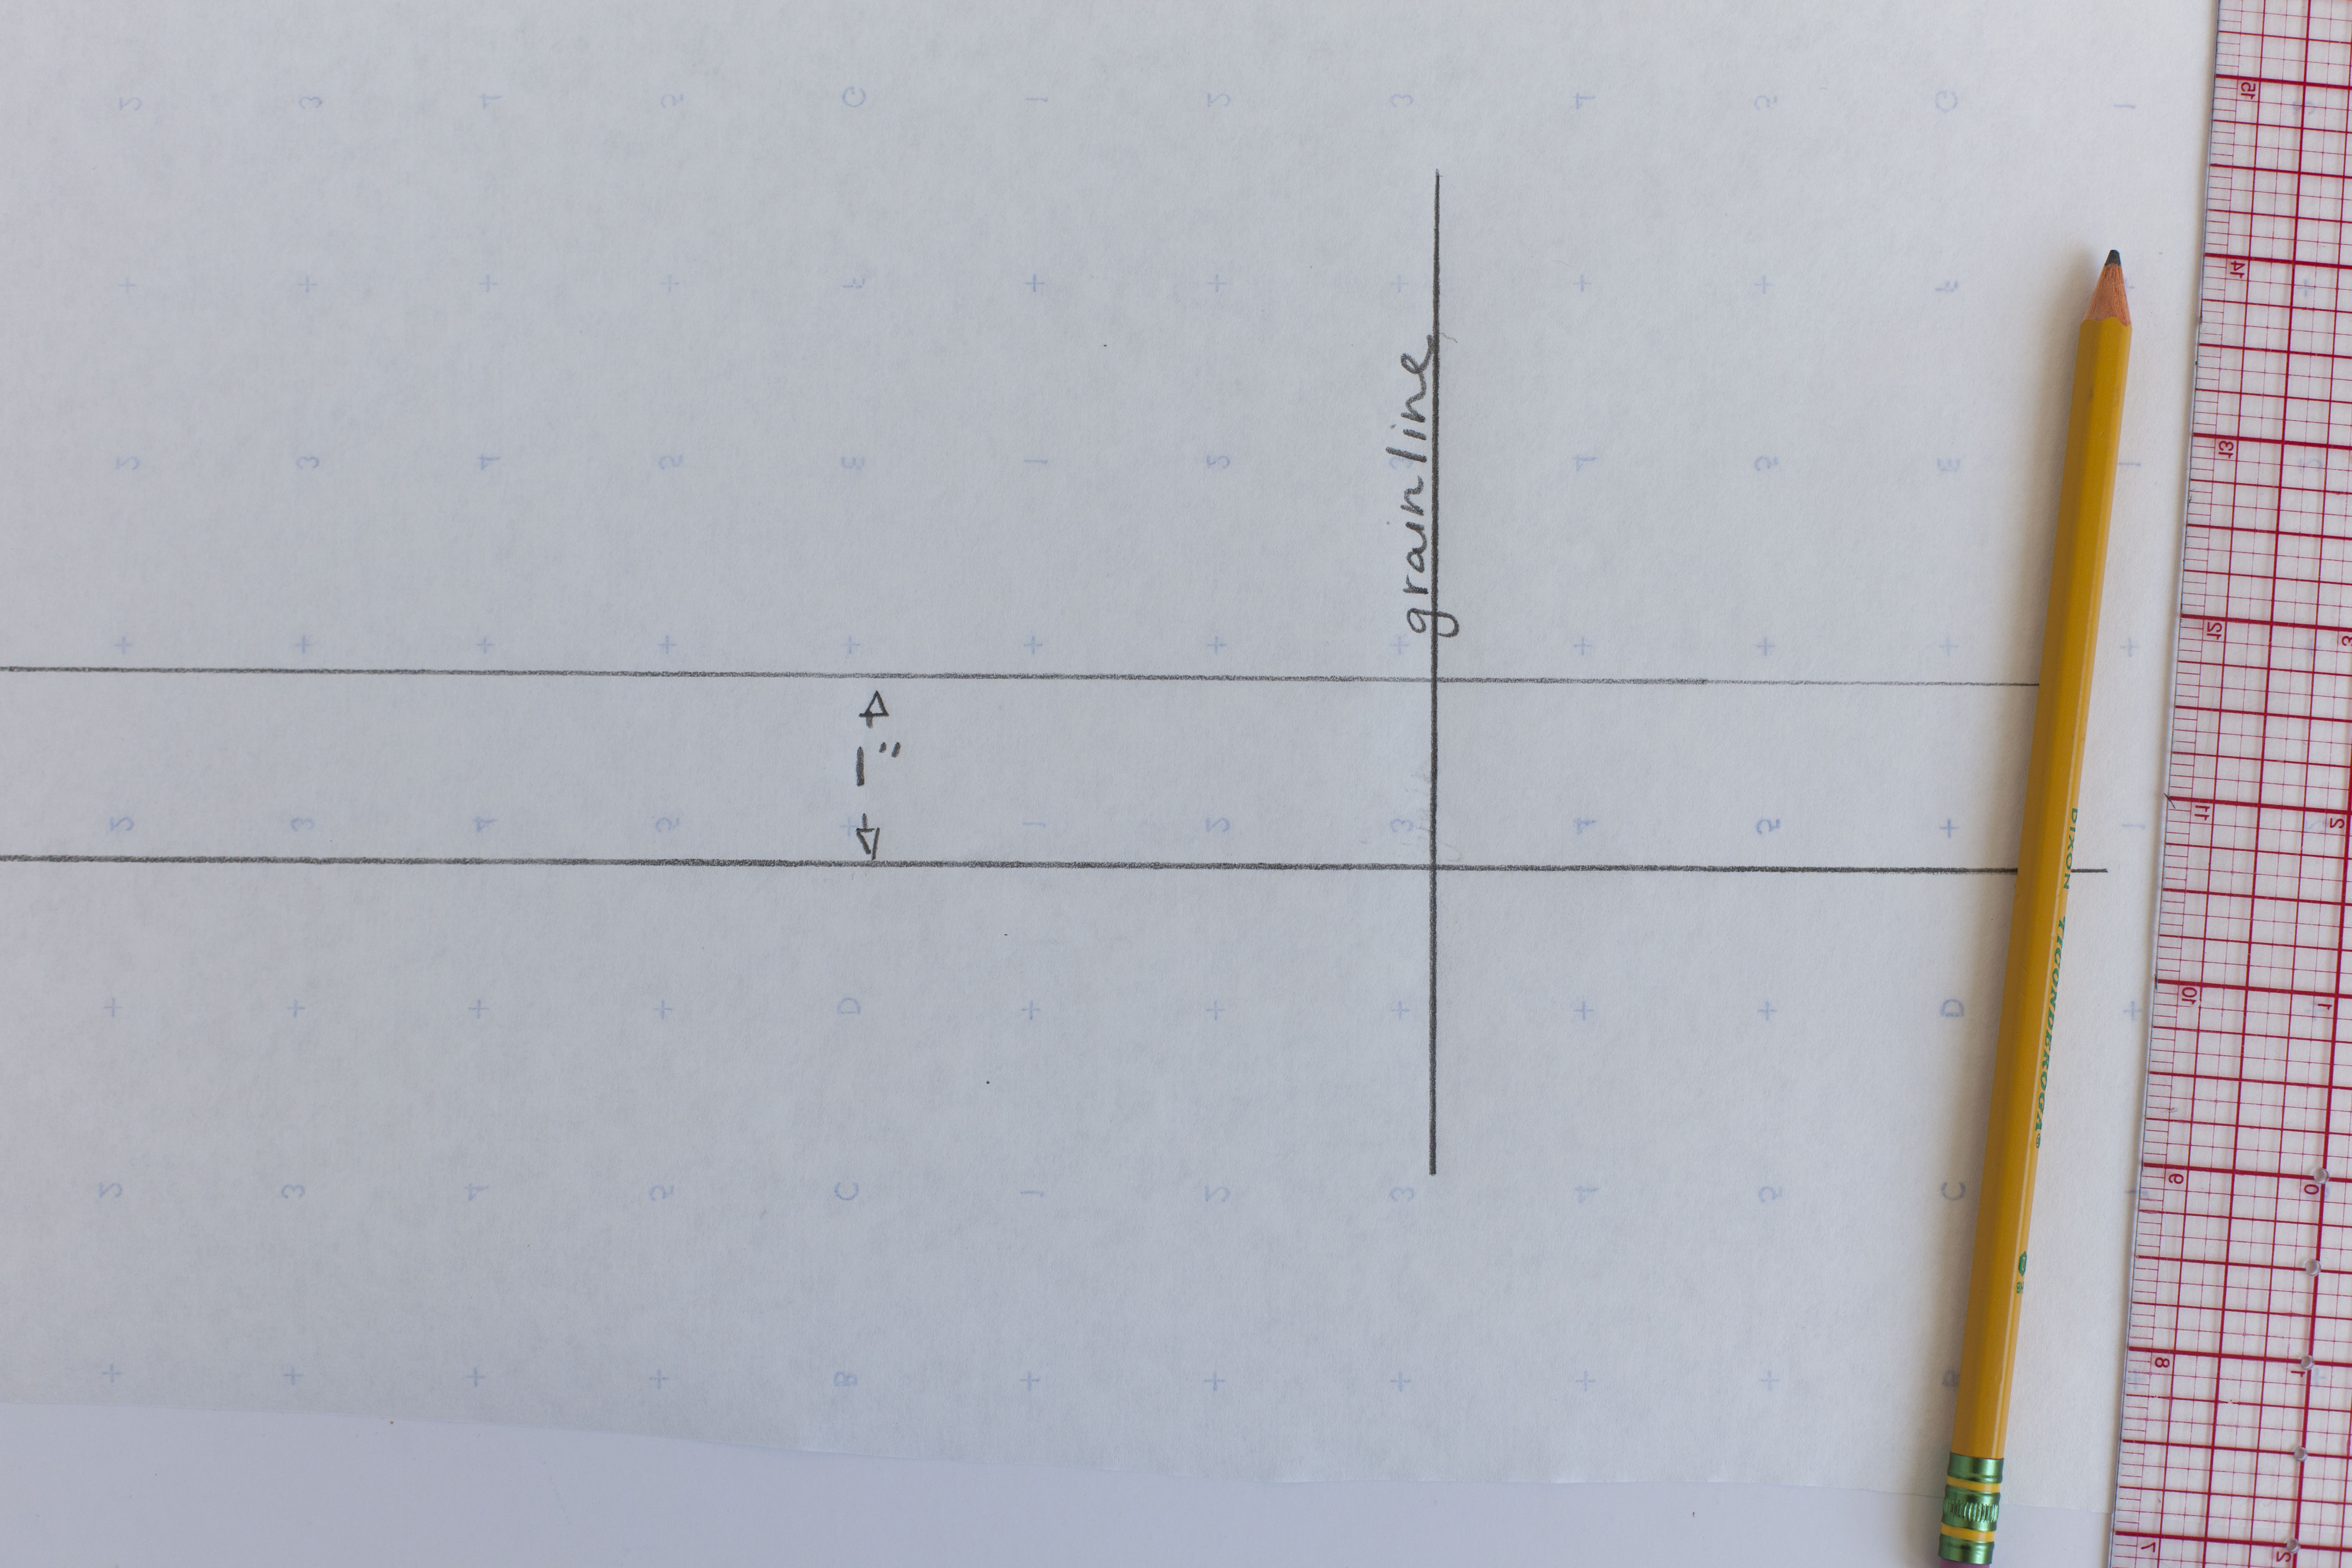
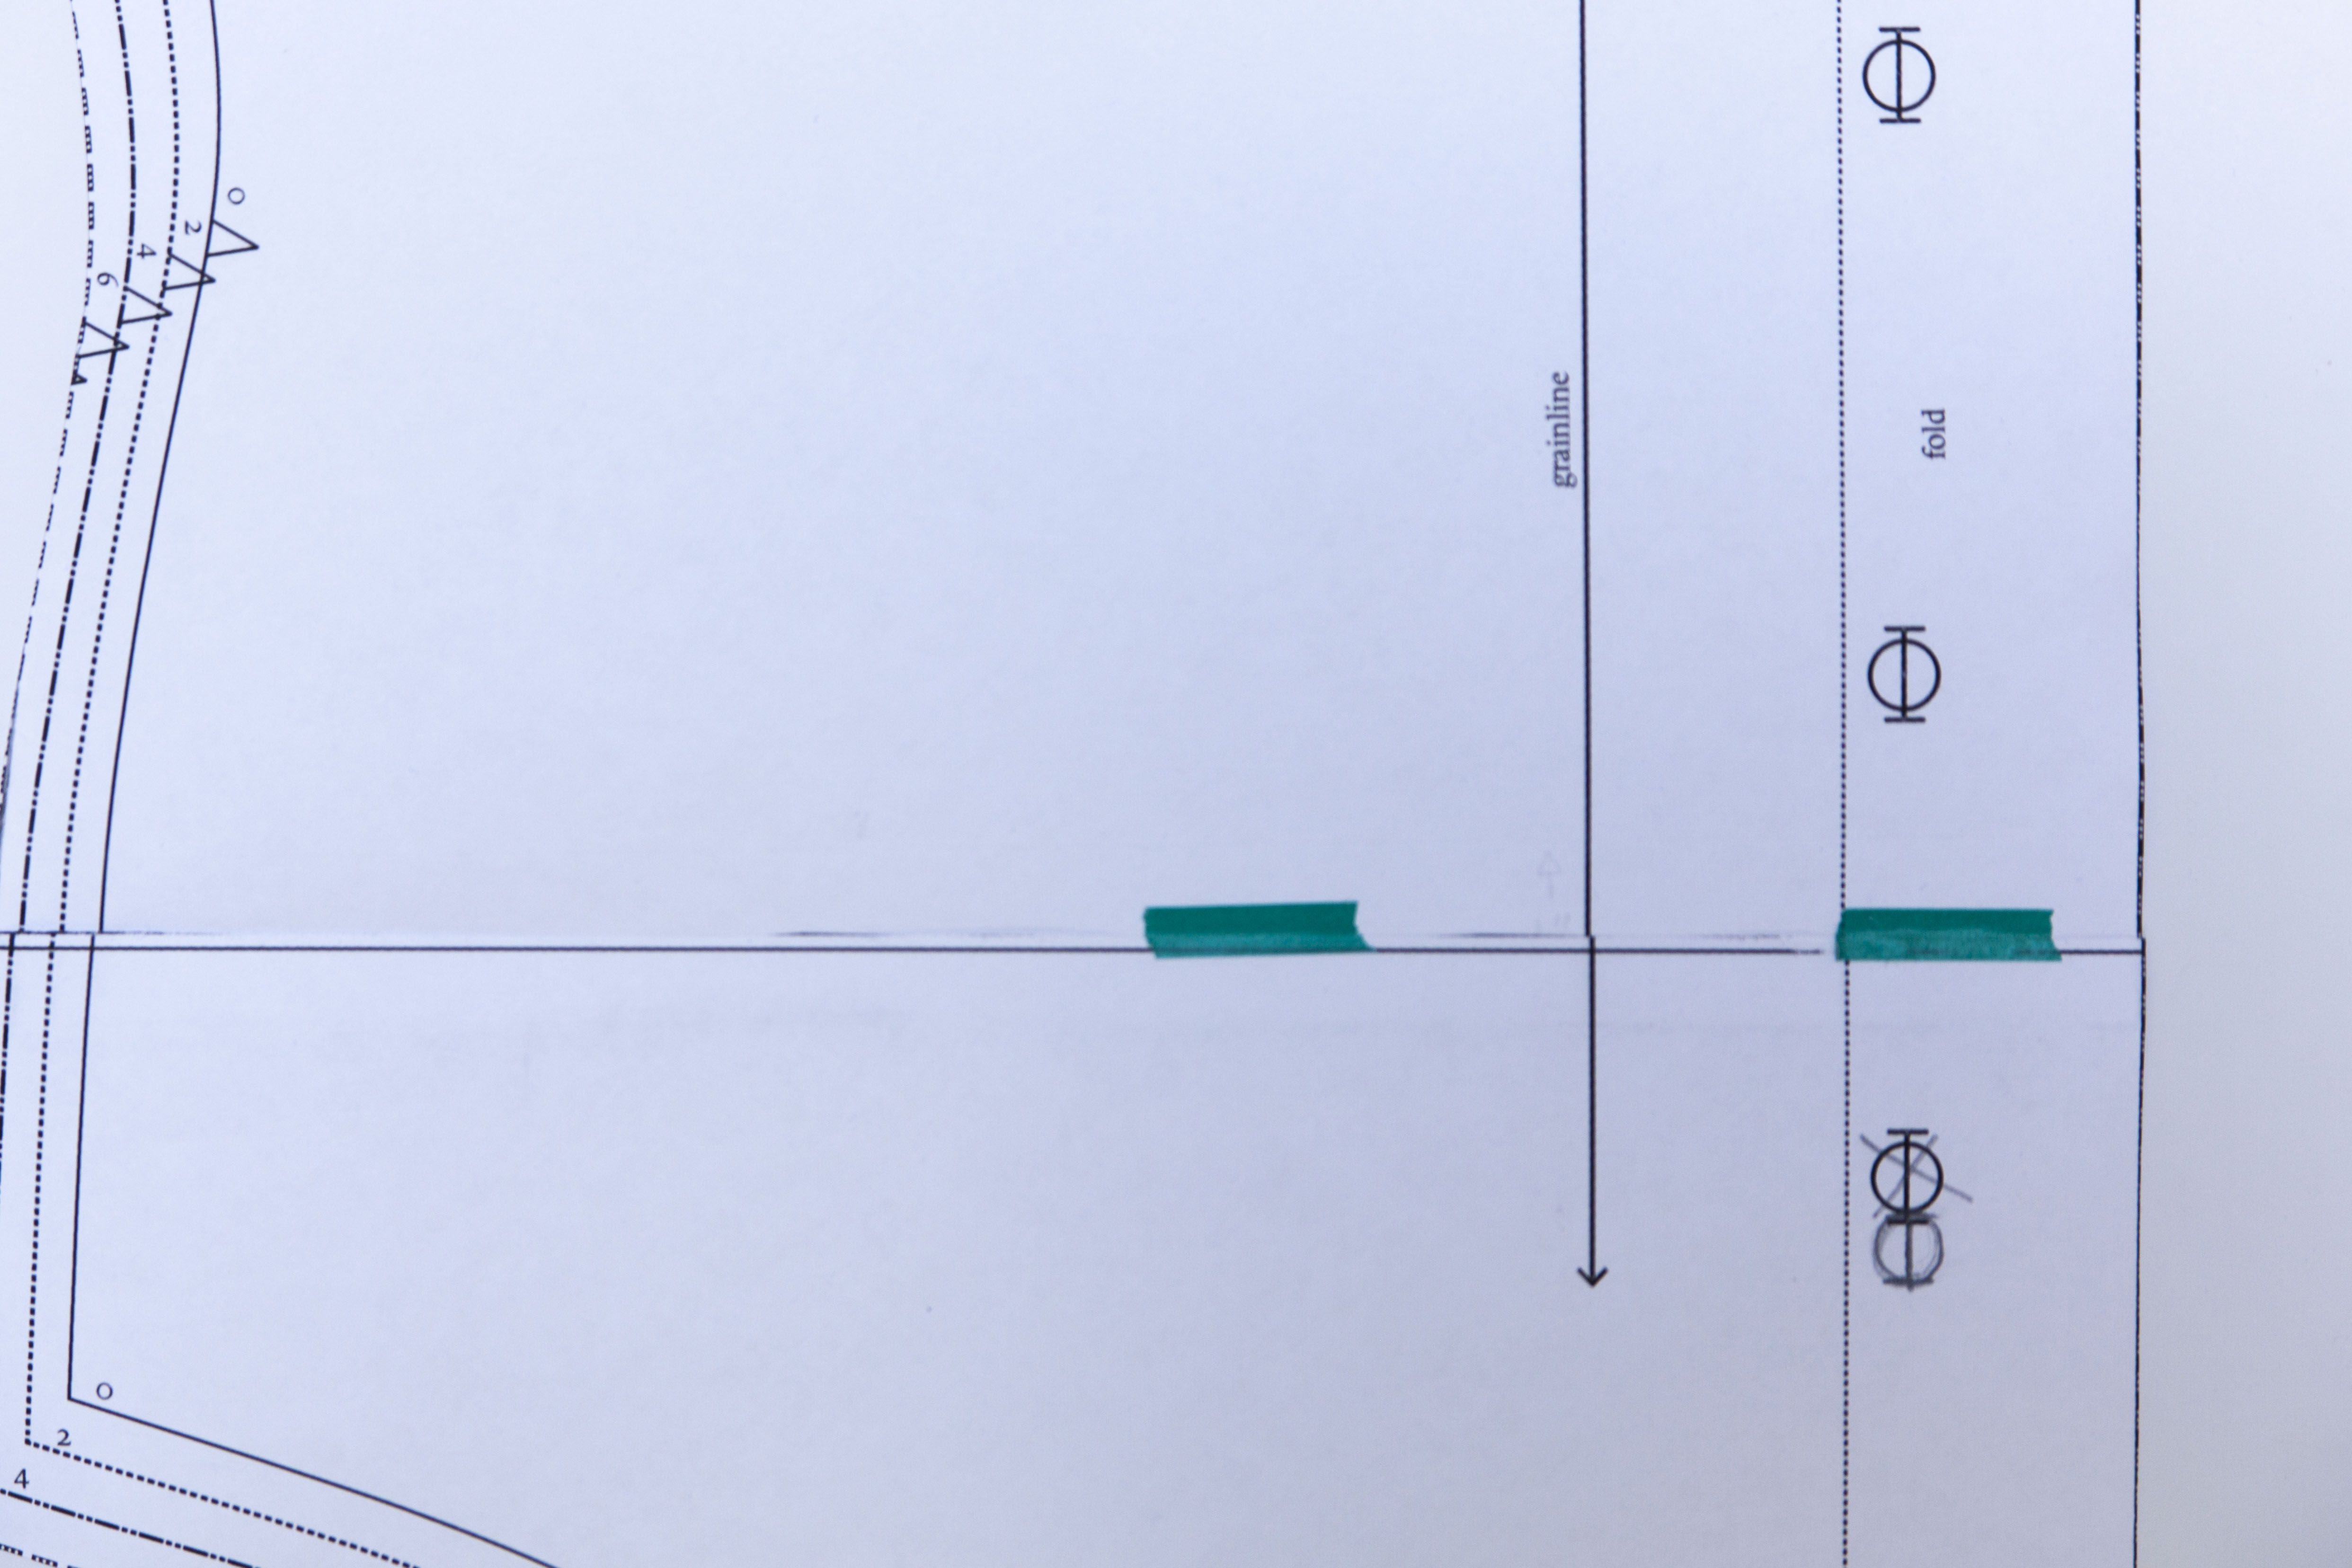
2) On a separate piece of pattern paper draw two parallel lines. The distance between these two lines should be the amount you would like to lengthen. Draw a thirde line that is perpendicular to the previous lines this will act as a continuation of your grainline.
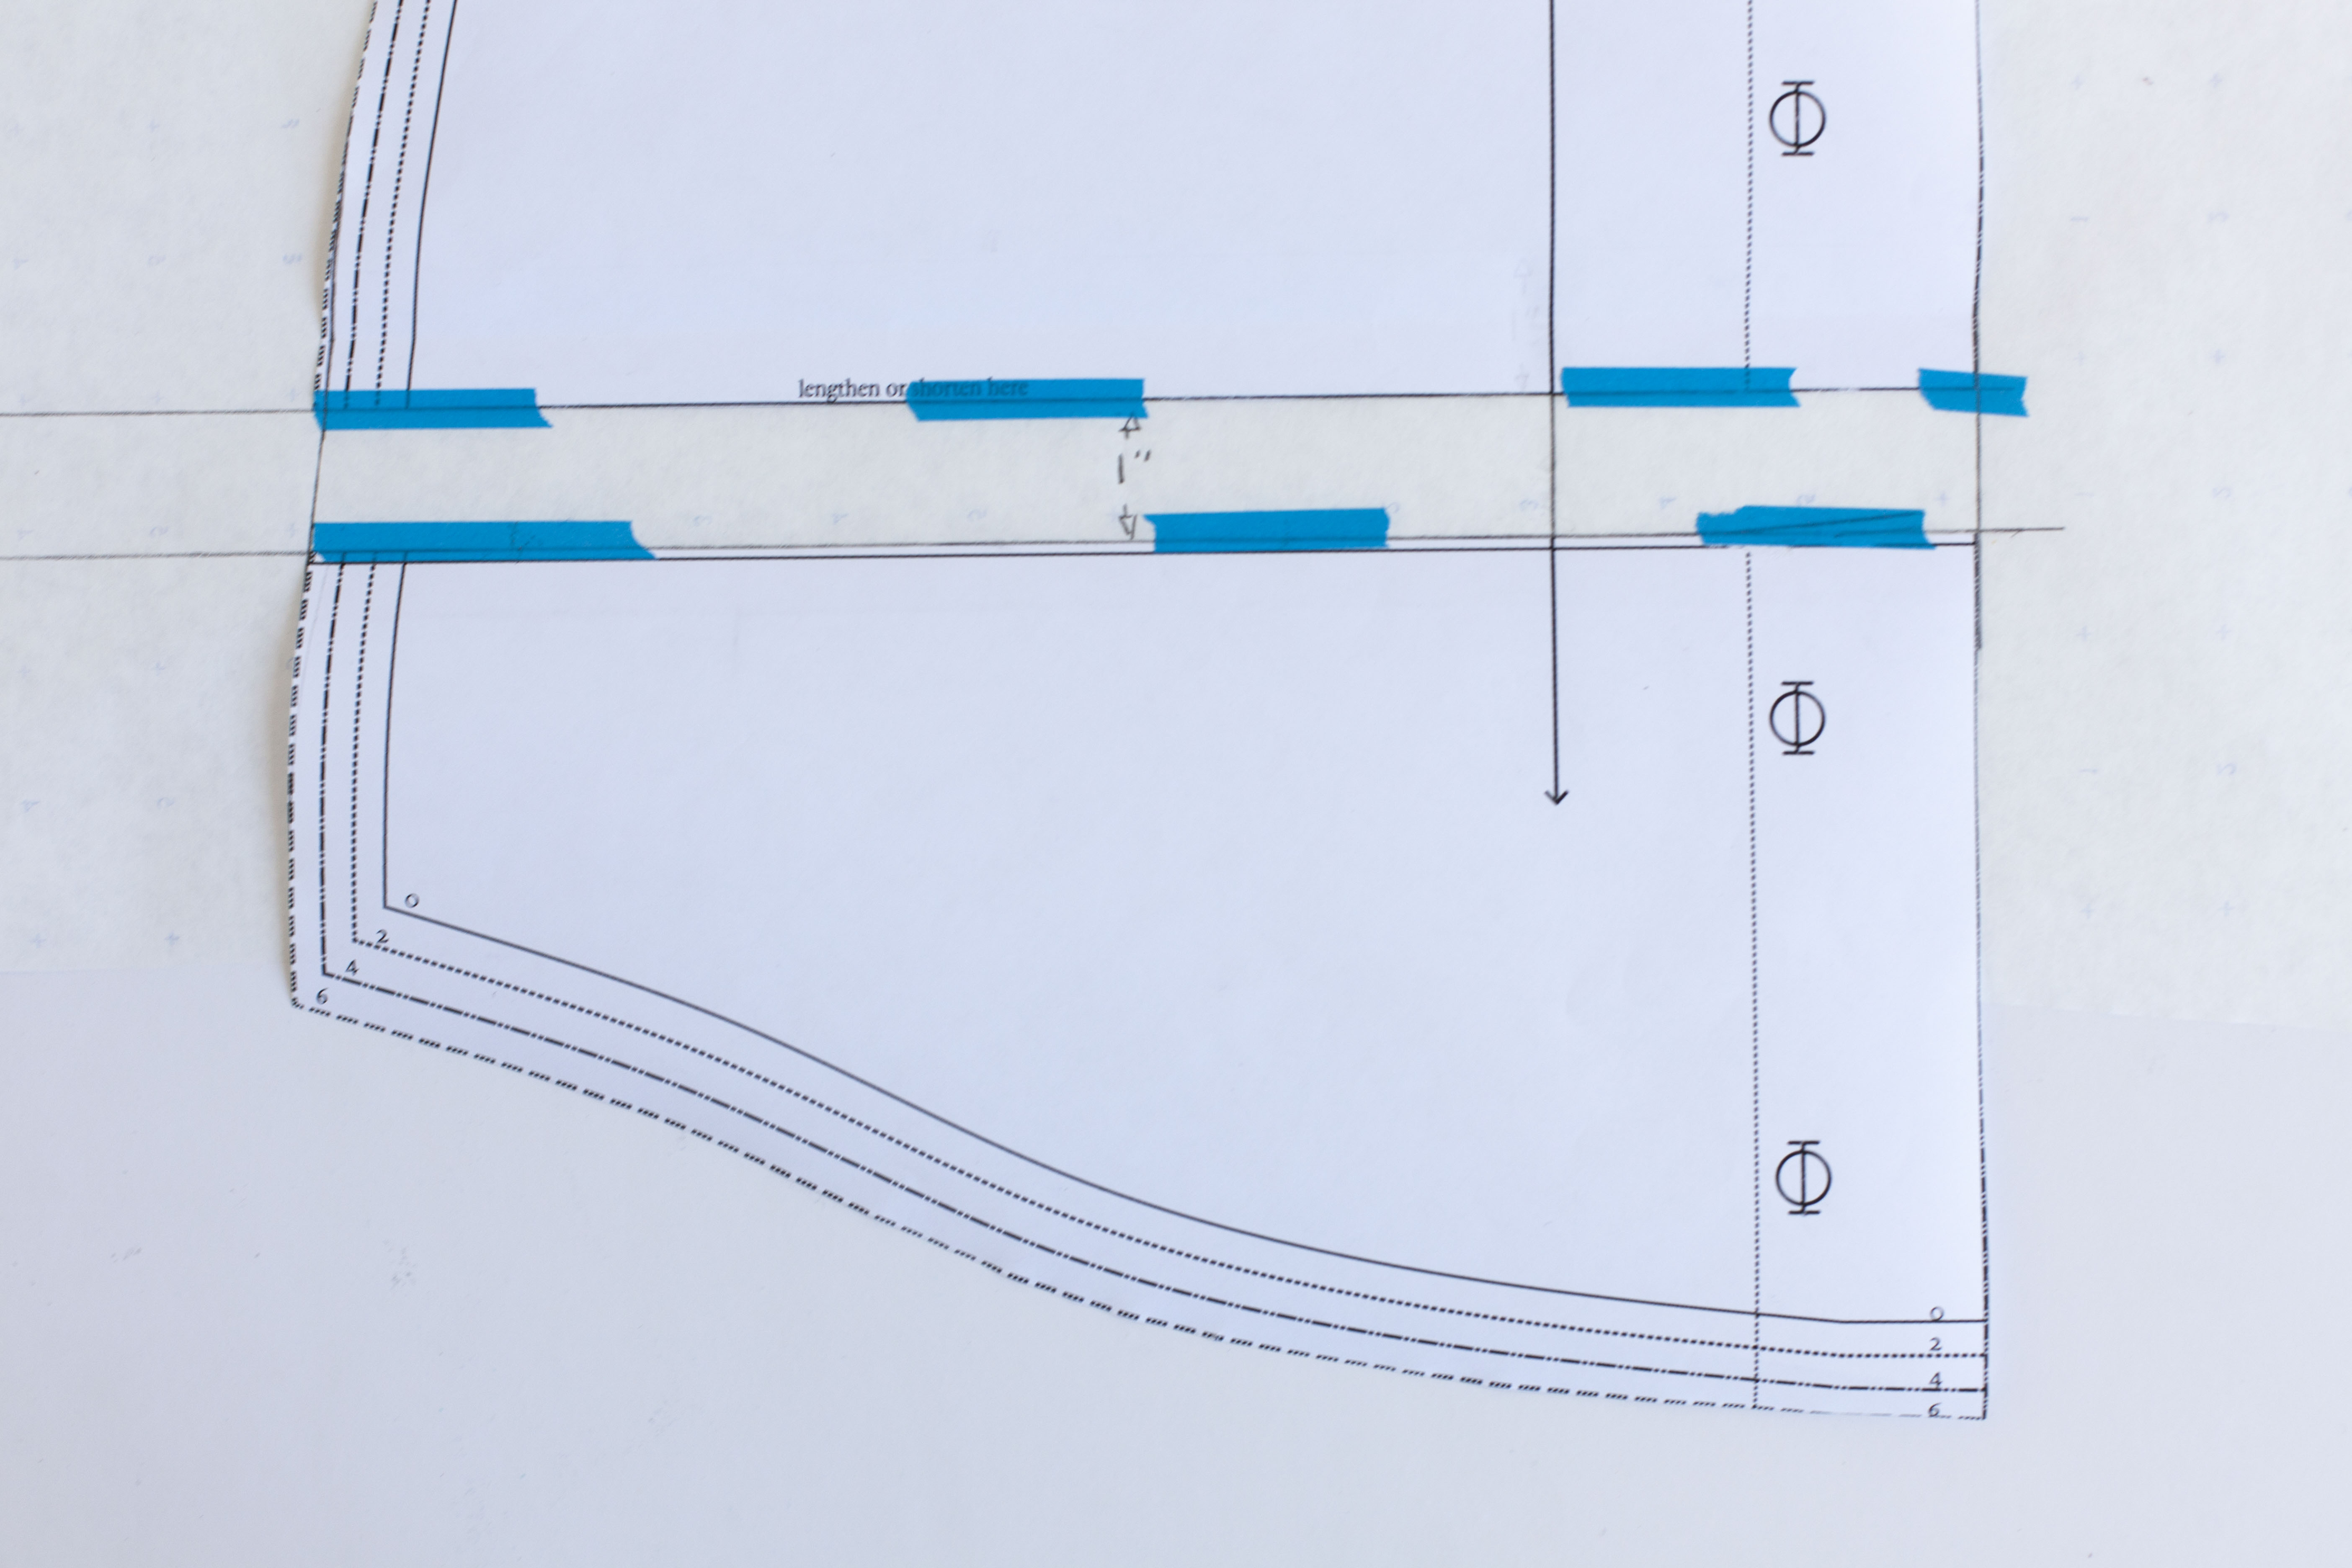
3) Align your slashed pattern pieces with your lengthening guide and grainline. Tape to secure. Blend jagged edges and trim.
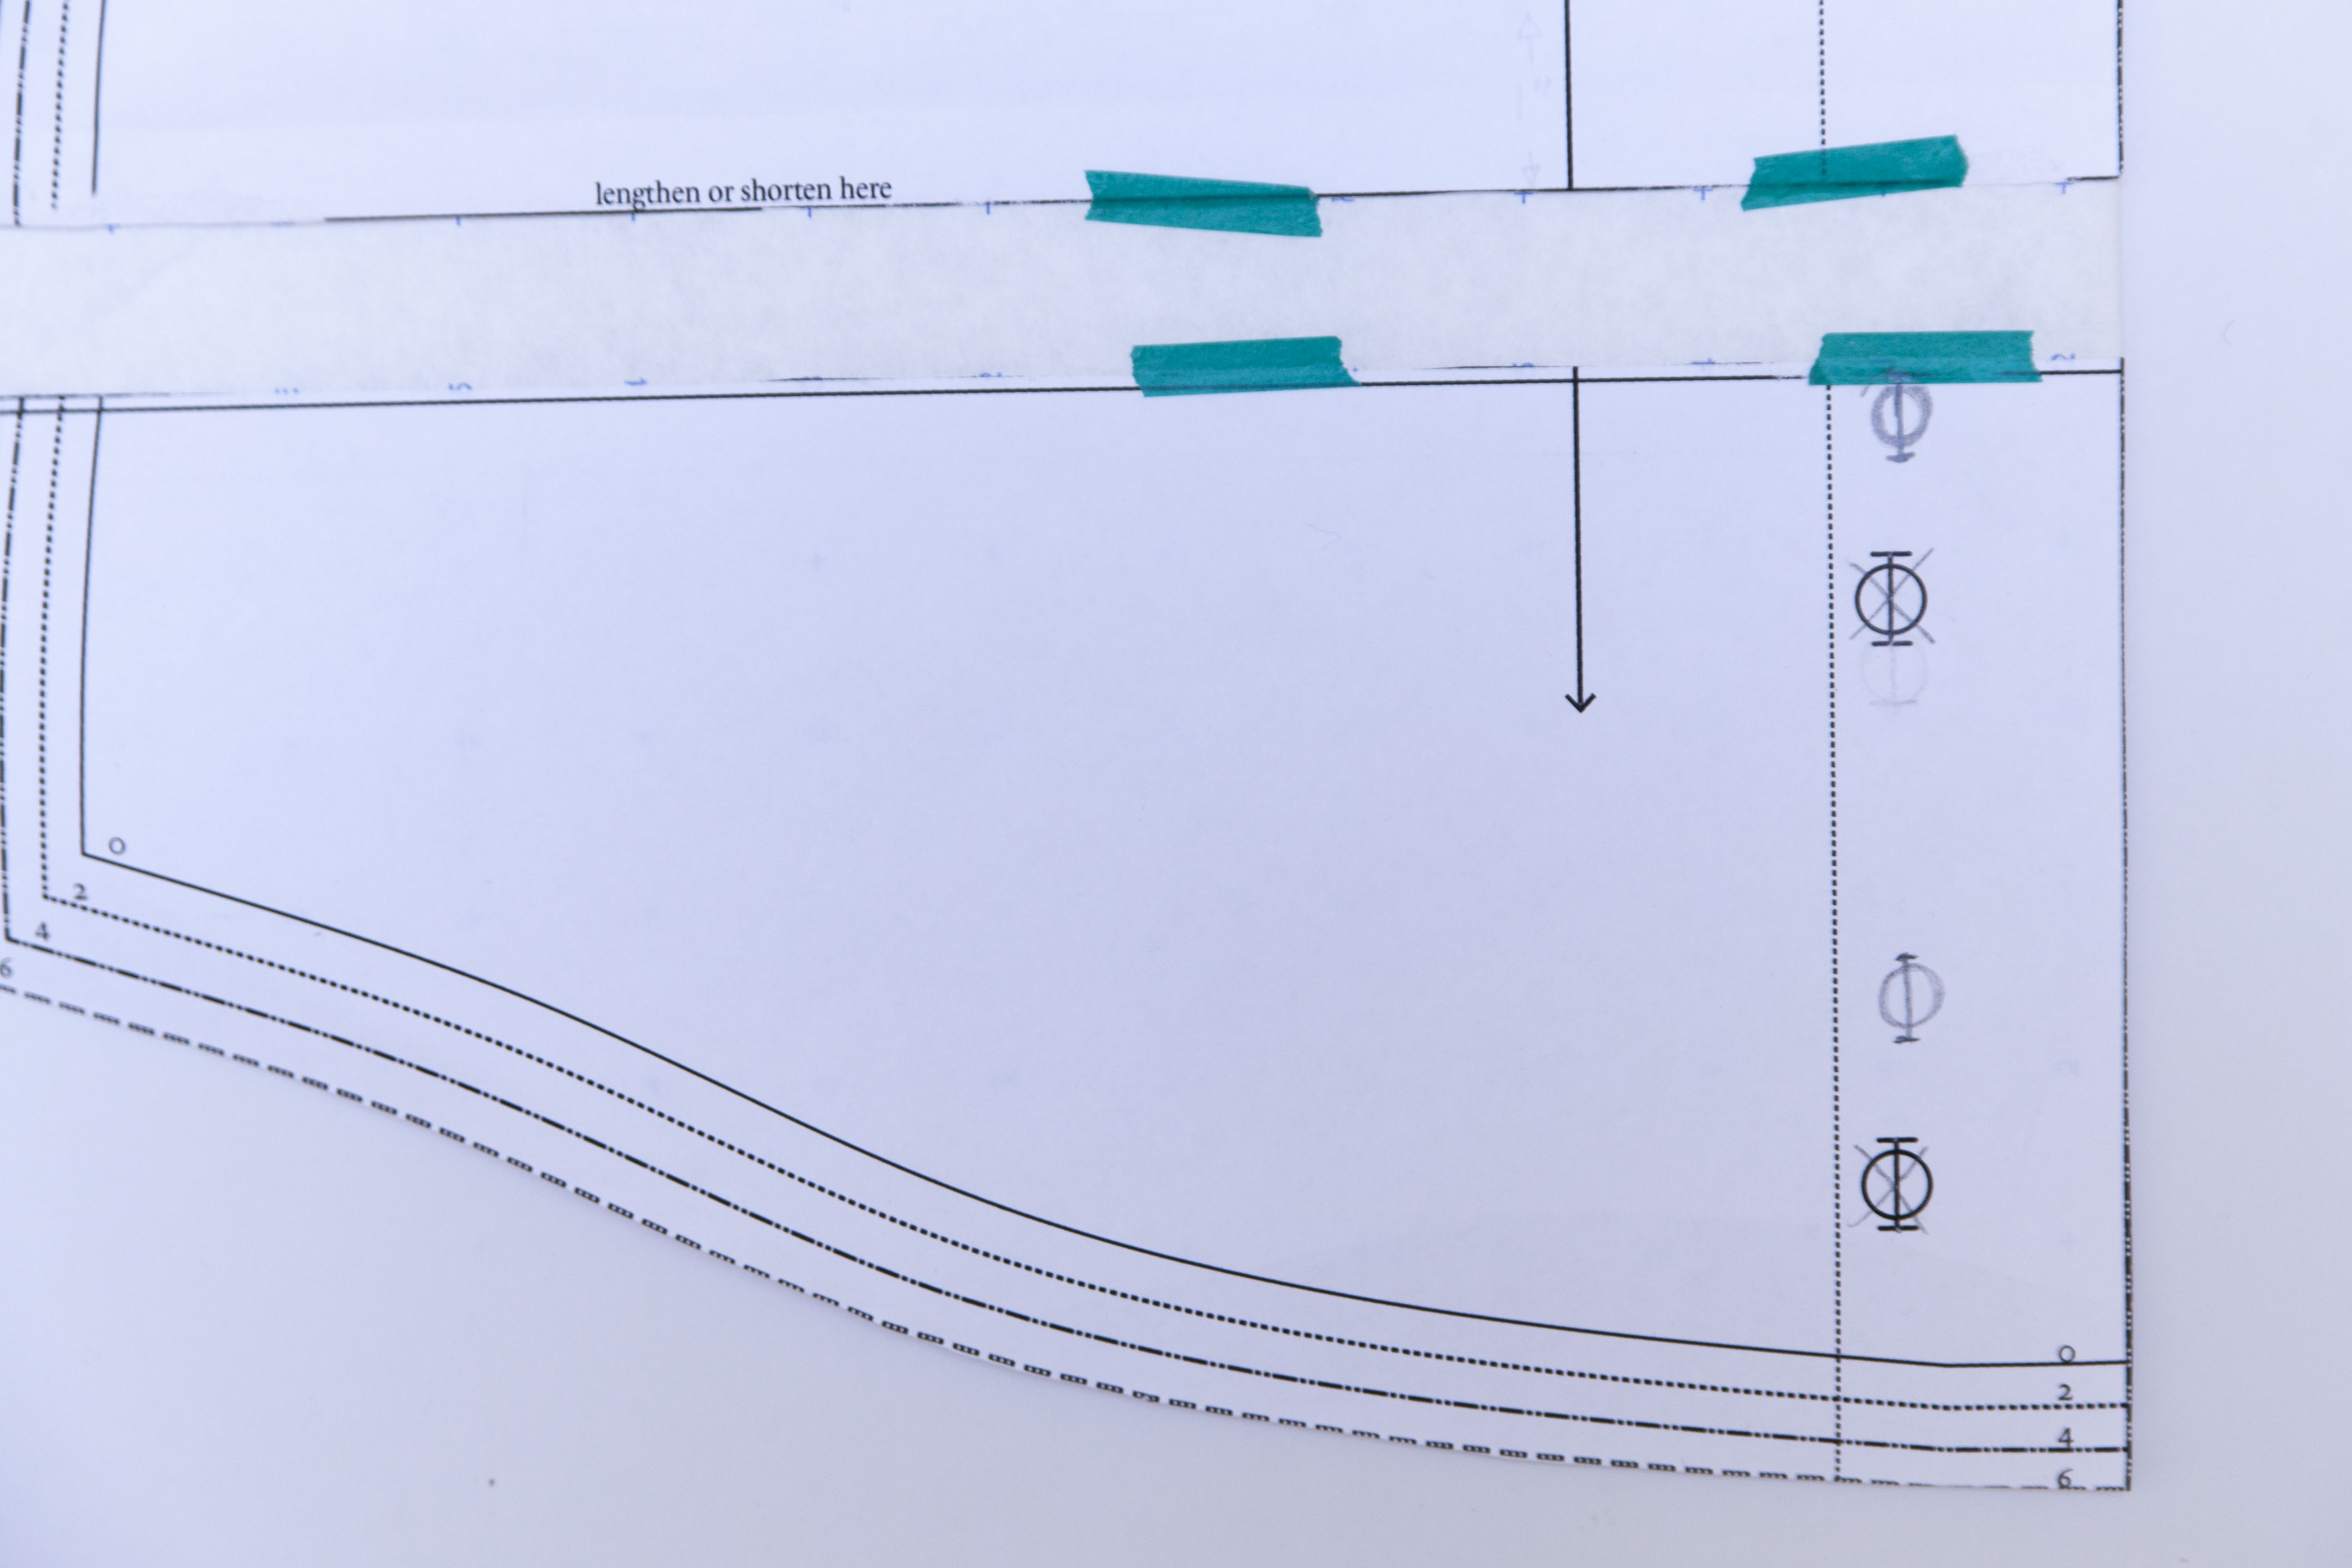
4) Reposition the last 2 button placement marks so that they are 2 3.4″ apart, consistent with the rest of the pattern.
5) Again, remember to do the adjustments on all related pieces (ex, front AND back bodice).
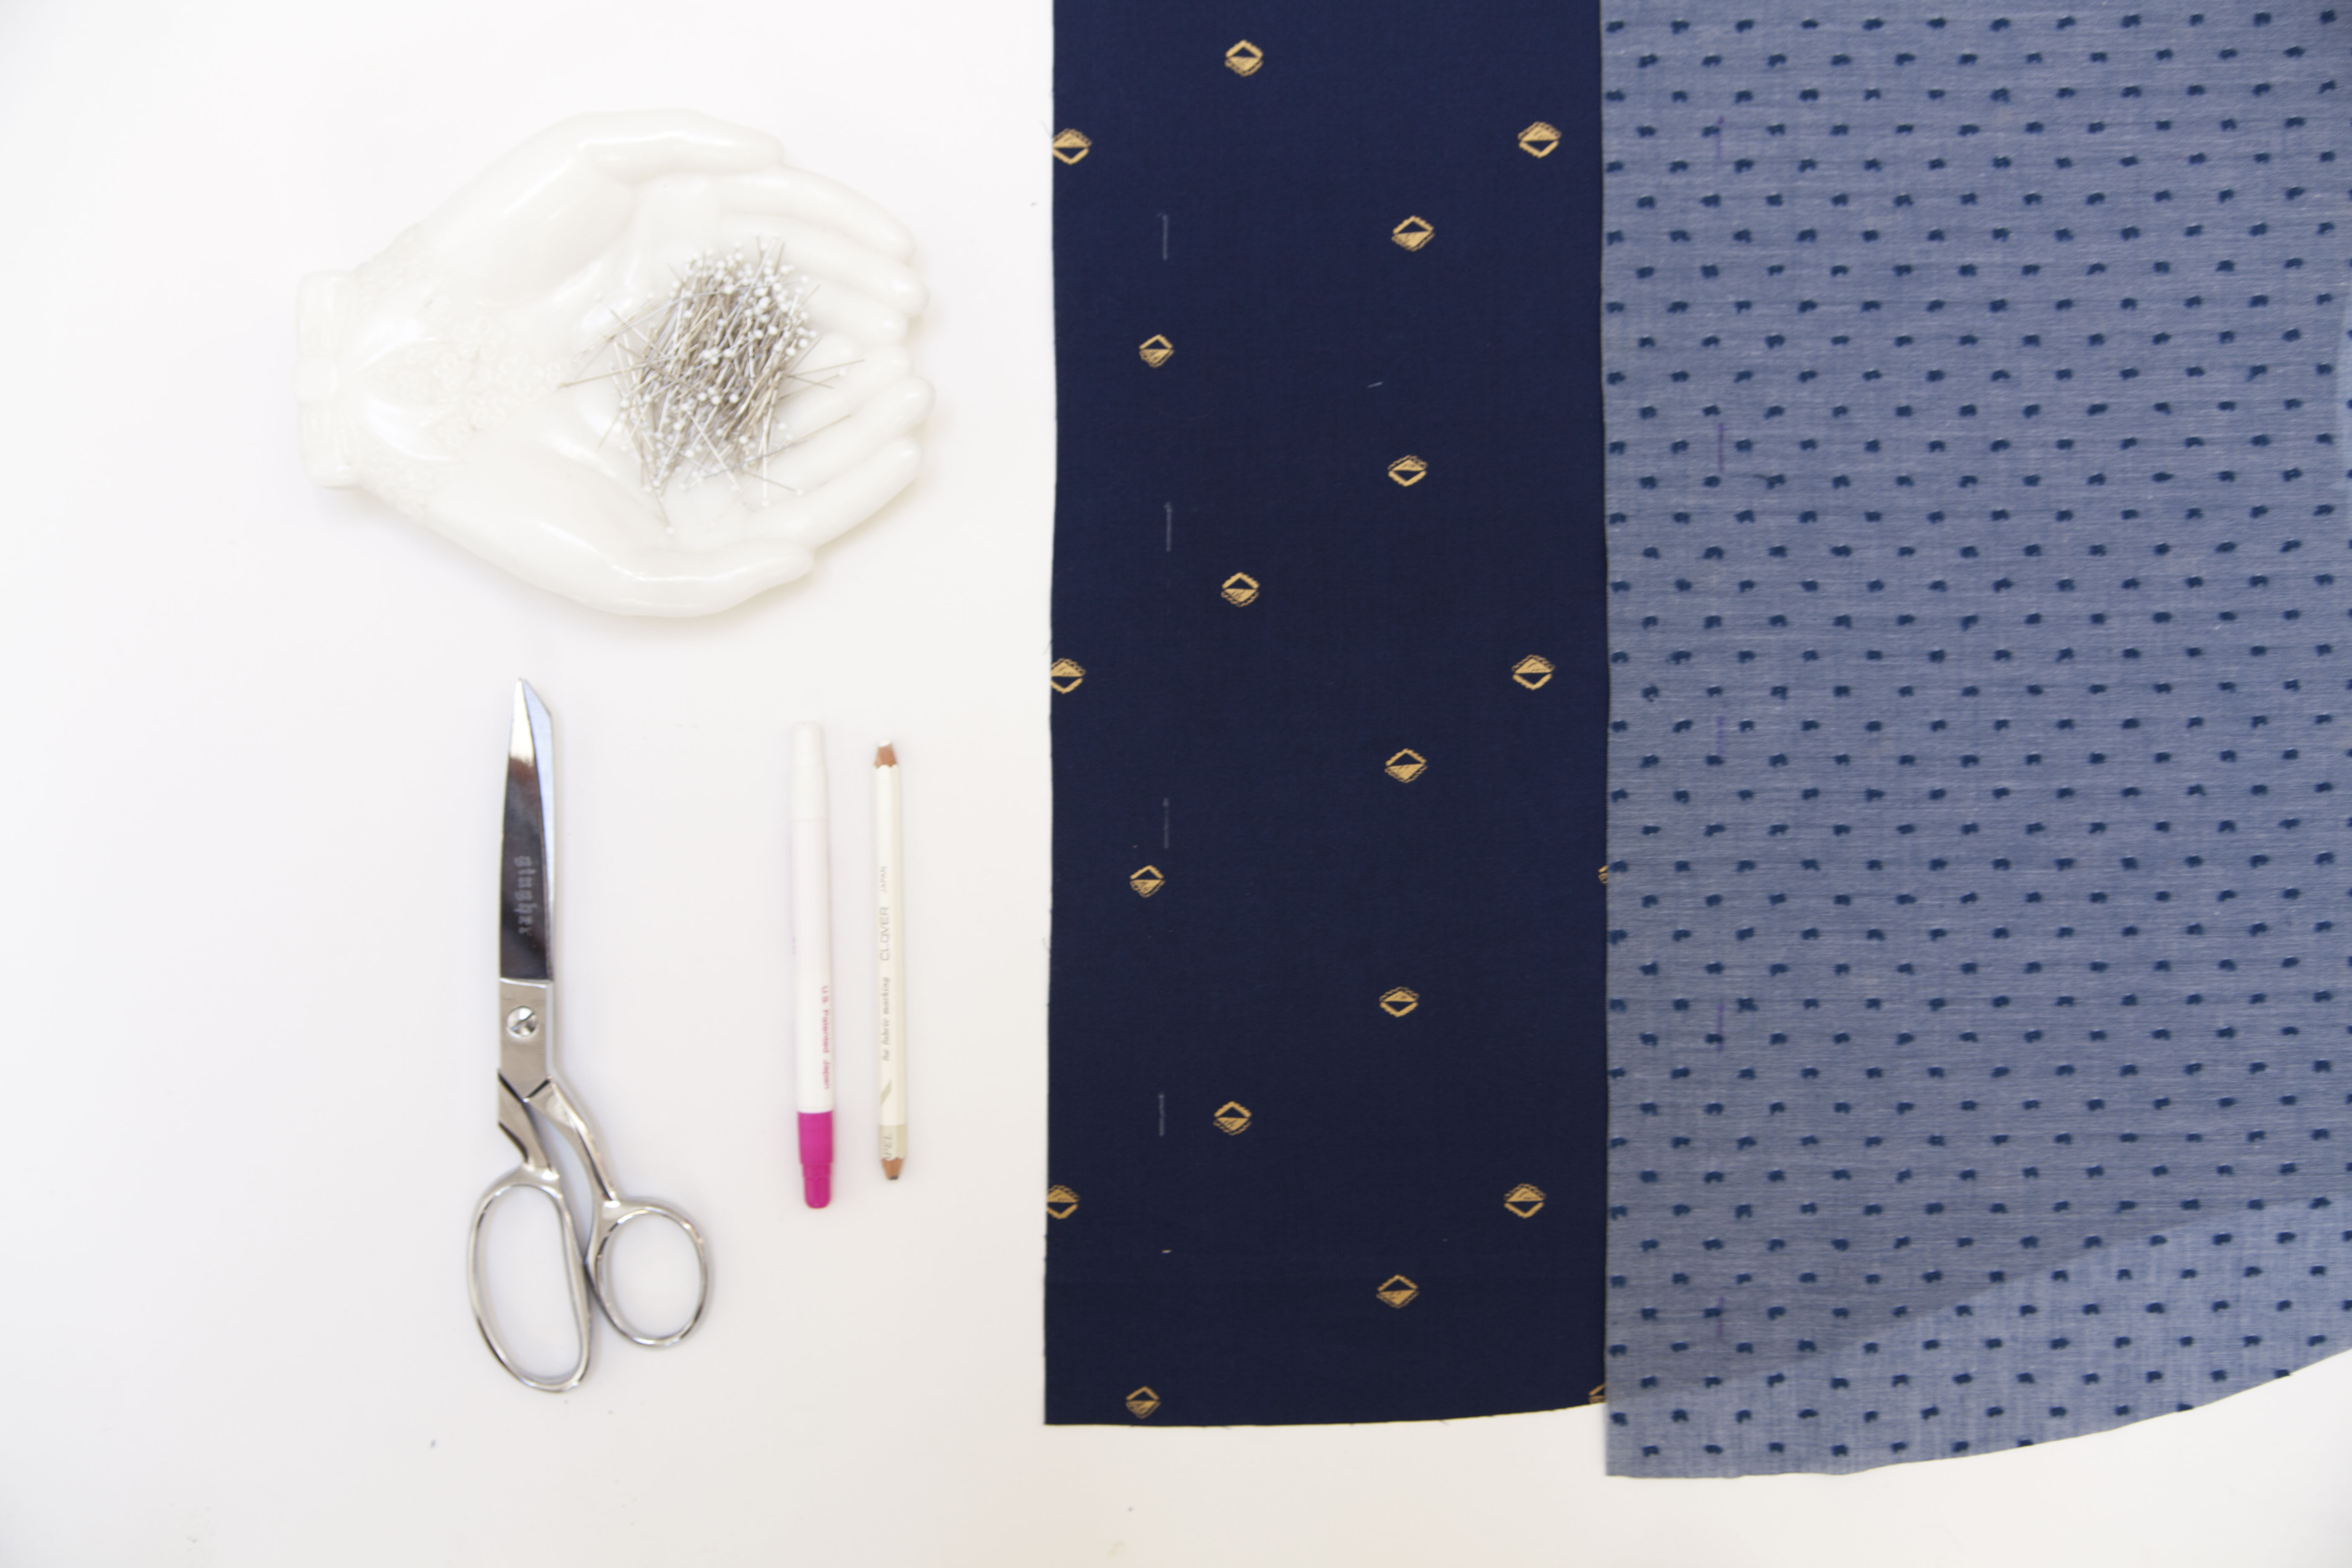
Cutting and Marking
Once you have completed you muslin and/or alterations, it’s time to cut your fabric! Refer to the cutting layout for your size and view. Once your pieces are cut, transfer all marks to the fabric.
All marks should be mad on the wrong side of your fabric except for your button and buttonhole placement, which should be marked on the right side.
If you suspect you may need a full or small bust adjustment hold off on cutting. Bust adjustment tutorials are coming up on Wednesday.
Comments
I’m going to be putting together a muslin. Eventually, I want to make all of the views, so I was thinking that for fitting purposes, it would be easiest to make a version with plain front and the long sleeves.
Barb
That is exactly what I would recommend. Thanks for sewing-along!
I’ve been sewing for a long time, but I’ve never made a muslin before. I’d like to do one for this project. Do you choose a weight that will be similar to the fabric you are going to use for the finished garment? I’m assuming that there are different weights of muslin. Do you pre-wash it too?
Your instinct is absolutely correct. Choosing a fabric that is similar in weight to you fashion fabric will always yield more accurate results. Washing your mock-up fabric is unnecessary, as shrinking is not an issue with a fit sample.
I’ll be travelling during most of the sew along, so I thought I’d bring the pieces with me and sew everything by hand, as I won’t have access to a machine. I hope it works out, since I never really sew by hand… Fingers crossed!
Laura, I’ve seen clothes by hand before and they have lasted as long if not longer than my machine made clothes. Have fun! :)
Didn’t understand how to increase at waist – do you do it the same as you would to increase the hip, just sloping out to the pattern measurement size you are?
Thanks,
I first recommend checking the finished garment measurements for the size category your bust/hips fall in. You may find that because of the amount of ease in this relaxed garment, you might not need to alter the waist. If an alteration to is necessary, just use a curved ruler to gentle blend the sizes.
I have the same question as Syne and am not sure where to start as far as what size to begin from. I’m a 34″ high bust and a 38″ full bust with a 31″ waist. If you could give me any suggestions I’d greatly appreciate it!
I would recommend making a size 10. This size would give you 2 1/2″ of ease at the bust and 7 3/8″ ease in the waist.
Are the seam allowances and hems included? I do not find information about this. Thanks
All seam allowances are 5/8″ unless otherwise noted in the instructions. The hem allowance for this pattern is also 5/8″.
This is the first time I’ve made a Colette pattern – do I have to add my own seam allowance or is it already included in the paper pattern pieces? Thanks
Seam allowances are included. They are 5/8″ unless otherwise noted in the pattern instructions.
I ordered a printed pattern. The printed measurements for the finished garment waist are different than the measurements referenced in the sew along. Waist on the pattern cover for a size 6 is 29 1/4″ versus 36 1/4″ on the web
Hi Paula, unfortunately the finished garment measurements in the first print run of Aster are incorrect. The size chart that I posted is the correct version.
Hi – I have a question about a shoulder adjustment – I know from experience that I need to made a narrow shoulder adjustment – but i don’t want to have my bra straps showing afterwards – (this is an issue with the peony i am half way through) – or would it just be easier to shave 2 cm off the arm scye – but i think that leads to fitting problems when the sleeves go in… any suggestions gratefully received….(don’t want to go down a size as that would mean a too big a fba…)
Cheers
When picking the base size to start modifying from, do I use my high or full bust measurement? I wear a G cup, so there’s a significant difference between the two.
For sizes 0-18 you can determine your base size by taking your upper bust measurement and adding 3″. For sizes 20-26 add 5″ to the upper bust measurement. I will be covering bust adjustments in tomorrow’s post.
If you are shortwaisted, wouldn’t you shorten above the waist, not at what looks like the hip?
Good question! If you are short between bust and waist, you can shorten higher up on the garment. Aster has very little waist definition, shortening at the waist would eliminate most of the waist curve. I chose to lengthen closer to the hip to preserve this line.
Thanks for asking that question. I wondered why the adjustment was made below the waist when the opening comment was “if you are short waisted.”
Thanks for all these helpful tips.
I have a couple adjustments I need to do a couple questions I wanted to ask before I started on the adjustments.
I am between 3 sizes so I have to figure out how to blend or make them work for me and in addition to this I am also short waisted as well and that also has to be figured out and included in all these adjustments.
I plan on doing a muslin since I know I have to make these adjustments and I would rather mess up on that than on my fabric.
I am a bust 10, waist 16 and hips between a 14-16 and I am also loosing weight and every few weeks losing inches. Also I know that the finished length is going to be to long for my short body so I need to figure out how to change that too.
So I guess what I would like to know is how will I know how much I need to shorten my Aster and then I think I can figure out how to blend all the different sizes so that it fits properly in the waist hip area which is where most of my weight is right now.
I have take a very basic pattern sloper class and do have a bodice sloper that actually fits so I do kind of understand the gist of adjusting a pattern but need so advice concerning this pattern since y’all are the designers and know how it is suppose to look and fit.
Any help or info or suggestions you can pass on would be greatly appreciated.
Thanks
Cindy
The garment is drafted to finish approximately 9″ below the natural waist, but definitely adjust the length to your preferences. As a petite size 12 myself, I would probably shorten about 1 1/2″ to better match my body’s proportions.
In the errata for Aster, it says to: “Place the right side of one yoke (D) back facing the wrong side of 2 bodice front (A) or pleated bodice front (B) pieces. Stitch at shoulder.”
Don’t understand why you are to sew the right side to the wrong side instead of RST.
Thanks,
I had some confusion at this point too.To make matters more complicated, my fabric didn’t have a distinct RS / WS so I had to rip it out TWICE as after I unrolled everything my darts were now on the outside of the garment!
I’ve finished my Aster already but am following along with this Sew-along just to get any pointers on this new technique of yoke/shoulder seams.
I did make some notes… more like a diagram… of the placement of the yokes and front piece to help for future makes. my “notes” read like this… as seen from above, with the shoulder seams to the top and yoke seam to the bottom, your layers should be:
1) (bottom layer) RS (right side) of inner yoke facing up.
2) (middle layer) RS of front facing up.
3) (top layer) Wrong Side of outer yoke facing up
Good luck! I hope this helps.
I did the exact same thing, had to redo. It actually does work, as instructed. Seems so counter intuitive!
I understand now — thanks for your help!
Hi !
First of all, thank you for this sewalong !
I’m 5,64 feet tall and I would like to know for which stature Colette Patterns are designed ?
Thank you very much.
Muriel
Our size 8 fit model is 5’7″. Hope this is helpful!!
Thank you Haley !
Sunny greets from France !
Is it your recommendation to choose the best size pattern, then make a muslin, then do pattern adjustments?
If this is your first time making these adjustments, make your muslin first. Once you have done this process several times, you start to get a sense of what adjustments you will always have to make.
For instance, I know without fail that I always need an FBA, so I make that adjustment before I sew my muslin, then I can focus on any other places the pattern might need modifying when I try my mock-up on.
Where can I find pattern errata? I’ve already printed the entire pdf booklet and pattern, and I’d like to know specific pages I need to reprint. Thank you.
You can find all of that information on our errata page.
I’m planning to use my own fabric for the bias tape to finish the neckline. How wide should I cut it?
Cut your bias strips to be 1/2″ in width, then fold the raw edges in by 1/8″.
Hi Haley,
I’m 5 feet 1 (1m55). How much should I shorten Aster?
I tried to take the measure from my neck (shoulder level, not hairline, right?) to the bottom of the shirt I’m currently wearing and it’s 21 1/2. Shall I take off one inch from a size 2 or 4 ?
To determine back length measure from the neck at shoulder level.
How much to shorten really depends on your bodies proportions as well as your own personal preference. I personally like to shorten in small increments, 1″ seems like a nice amount to start with.
Thank you Haley!
Just one more question. If i draw a line 1″ above the shorten line and fold so that the shorten lines falls on this new line, isn’t it an half inch shortening? To shorten by one inch shouldn’t I draw my line 2 inches above?
Thanks! :)
Drawing a line 1″ above the shorten line will reduce the bodice length by 1″. Thanks for sewing-along!
Just a reminder for folks beginning a little late . . . If you lengthen your bodice front, lengthen your interfacing by the corresponding amount before cutting . . .
Is the ratio of sleeve to armseye correctly printed in pattern with sleeve notch to be lined up with shoulder seam? I’m concerned it isn’t drafted properly. Others seam to be rotating sleeve to fit without regard to sleeve grainline. I have one of first patterns. I’m making V2 size 6.. I don’t want to cut the sleeve if there is a correction. Thanks!
Thanks for sewing along. The sleeve pattern is correct on all versions and sizes of the pattern, you are good to cut!
I have always pinned my pattern pieces to my fabric before cutting – what is the advantage of tracing around the pieces and then cutting? If it’s more accurate, then you CAN teach an old dog new tricks! Also, what method do you use to mark your fabric?
I cut in the same method as you, I use calk to mark button-placement, darts, and other markings. I actually find pinning and cutting much more accurate.
I have a problem with my neck, when I testing my toille ot stand out in the neckline. I have a picture. How do I change tje patternpiece so it lay flat to my neck
To reduce at the neckline, I recommend making to following alteration.
* Remove the seam allowance from the neckline of the pattern
* Using a ruler draw a line from neckline to the armhole.
* Cut along this line from the neckline to the armhole but stop just short of cutting the sewing pattern in two.
* Pivot the shoulder portion of the neckline to overlap with the lower section the required amount. Tape.
* Re-draw the neckline and add seam allowance.
When making my muslin, I’ve found that the sleeves (on version 1) are very loose on me at the cuff, but not at the armscye What is the recommended ease for the sleeve at the cuff? Also what is the best way to adjust the sleeves so they are not too loose? I was planning to decrease the sleeve width on the pattern at the cuff and cut on a straight line from the new cuff edge of my sleeve pattern piece to the sewing line at the armscye. Thanks!
The recommended ease for the version 1 cuff is 1″ -1.5″. I think you are on the right track for fitting the cuff, just reduce at the seam, and grading the underarm seam to match.