

Today we are going to finish constructing the bodice.
Both versions are the same from here on out, except for the very last step when we sew on buttons for V2.
Join bodice shoulder seams
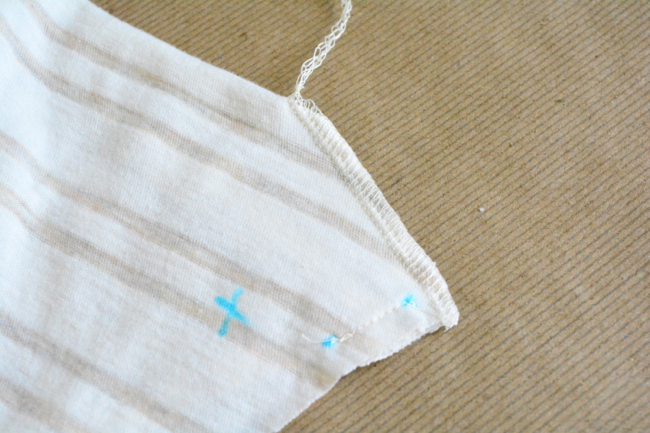
1) Fold front bodice. Fold the front bodice piece in half along the shoulder fold line, right sides together. We are focusing on the shoulder seam, which is that short little V-shaped raw edge right above the armhole. The blue ‘x’ is marking the wrong side of the fabric.

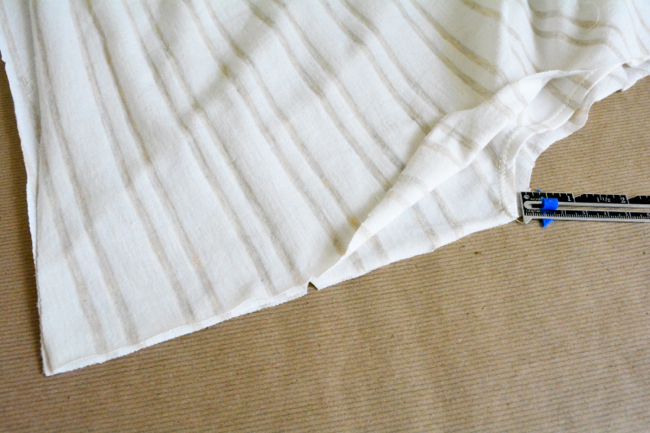
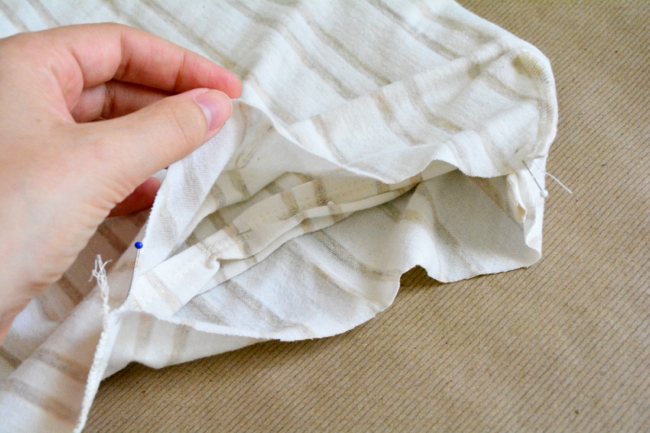
2) Pin back bodice. Sandwich a shoulder edge of the back bodice in between the shoulder edges of the folded front bodice. The edges aren’t the same length because we hemmed our back bodice. That’s ok. Position the bodice back so that the hemmed edge of the armhole is 3/8” in from the raw edge of the front armhole. The bodice back and the shell half of the front bodice should be right sides together.
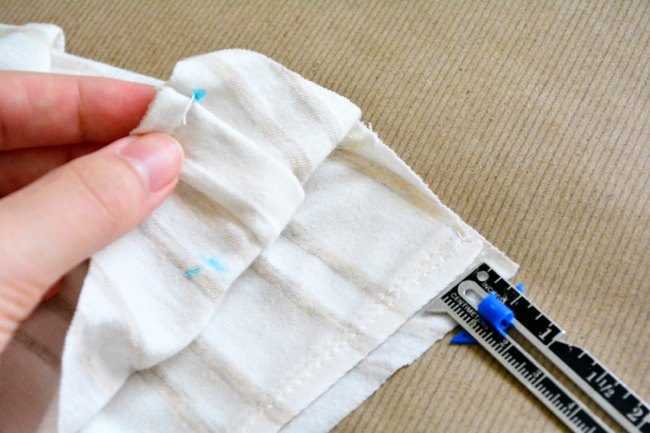
The other end of the back bodice shoulder seam should be tucked all the way into the corner of the front bodice layers. Here’s what it looks like with the front bodice completely peeled away:
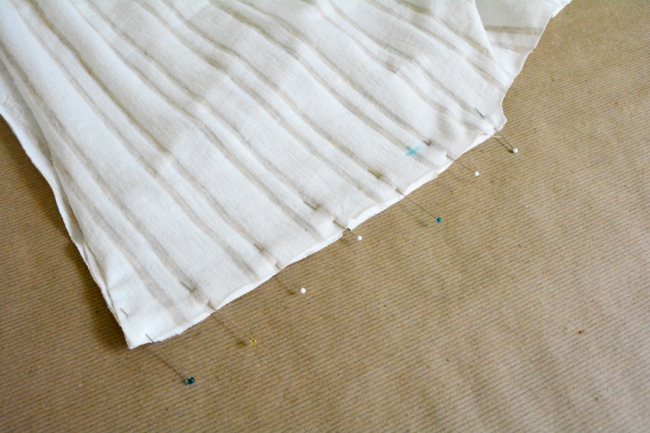
Pin the three layers together along the shoulder seam.
3) Sew shoulder seam. Stitch through all layers along the shoulder seam, making sure the sandwiched back bodice doesn’t drift. If you’re making V2, don’t let your shoulder tabs get caught in the seam (you can pin them out of the way if you want).
4) Repeat process for other shoulder seam.
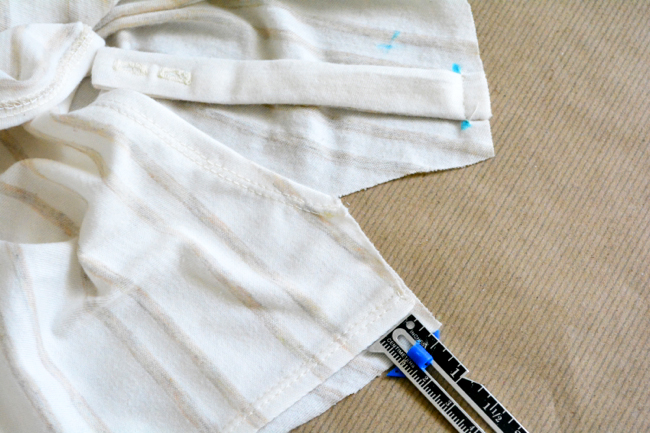
Join the Side Seams
1) Pin side seams. With notches aligned, sandwich the back bodice in between the two layers of the front bodice. The top hemmed armhole edge of the bodice back should land 3/8” away from the raw edge of the bodice front armhole. At the waist, all the layers should be lined up.
Pin along side seam edge.
2) Sew side seam. Stitch side seam edge through all layers.
3) Repeat for other side seam.
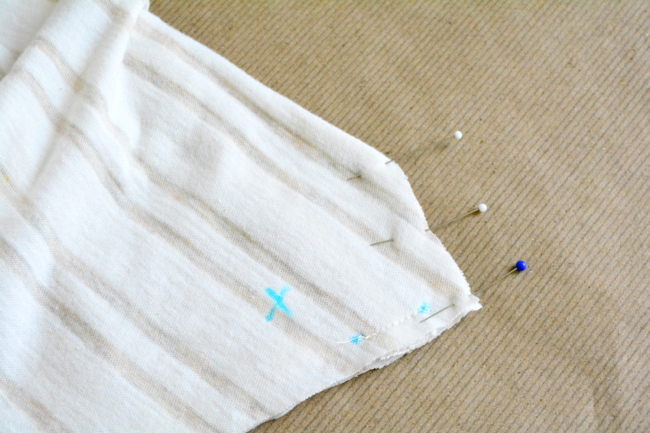
Finish front armholes
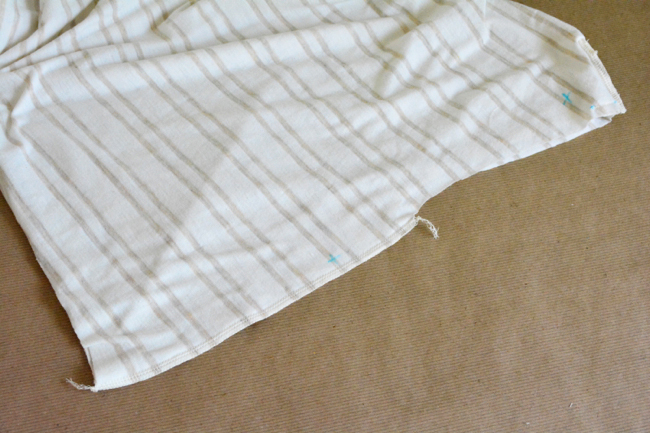
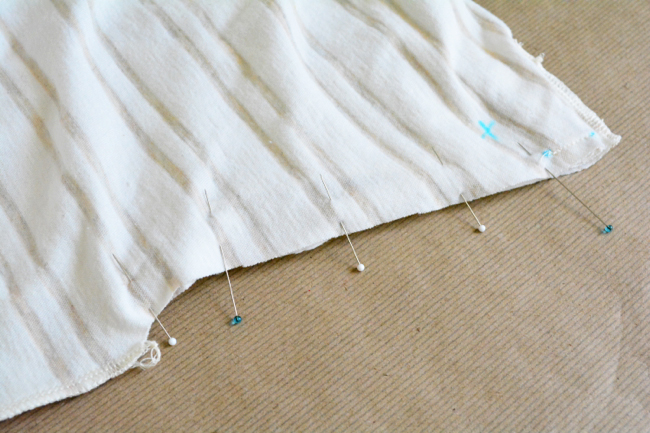
1) Pin armholes. The only layers involved in this seam are the two front bodice layers (the shell and lining). It’s helpful to scoot the back bodice away from these edges and pin it to keep it out of the way.
Pin the front bodice lining and shell together along the armhole edge, right sides together.
2) Sew armhole. Stitch along the armhole edge, being careful not to catch back bodice in seam. If you’re making V2, this is when your shoulder tabs are incorporated into the dress, so make sure they are positioned properly.
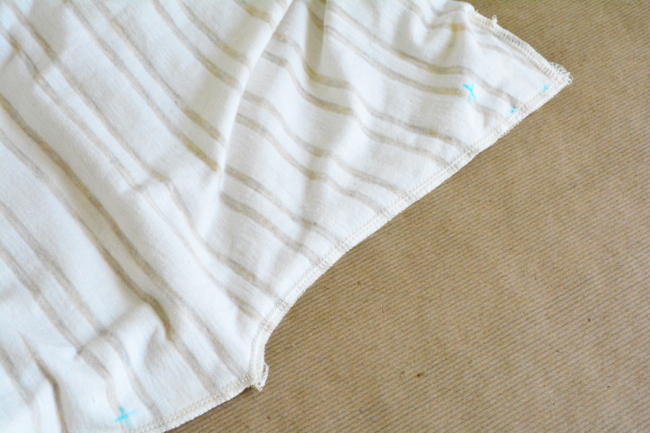
3) Repeat for other armhole.
Wovens
All the steps for today’s post are the same for woven fabrics, except that you should be using the correct stitch and seam finishing for wovens and pressing after every seam.
That will be all for today! On Friday we will start putting together the skirt.
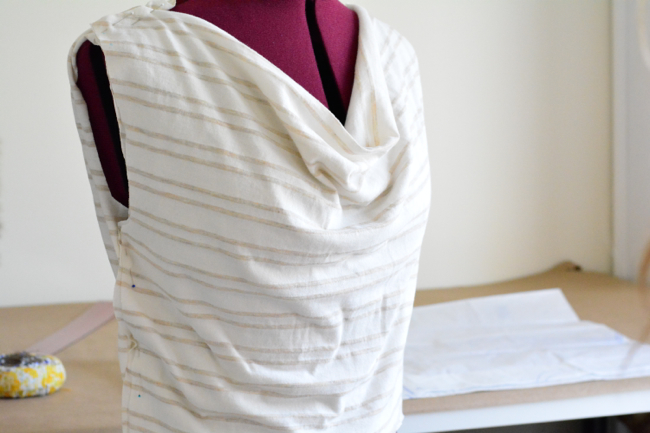
As tempting as it is, resist the urge to try on your bodice, as you might irreversibly stretch out the raw bottom edge. If you’d like to try it on for fit, turn it right side out after sewing the shoulder seams, put it on and have someone pin the side seam for you at the seam allowance.
Comments
This is the first dress I have made in 40 years, and I am having some issues with the shoulders. When I cut the dress out, I wondered if I did it accurately enough as it seemed like there wasn’t that much margin for error around the shoulders. I had already done the side seams when I realized the problem. Nerves and fabric(woven) were fraying. There was an edge on the back bodice which wasn’t catching and I had missed with the bias tape. I finally tacked it loosely by hand, then machine basted it. I had to deepen the seam. I think it is ok, but I am going to wait until tomorrow to stitch it. It actually helped that the side seams were done because it held the piece together and helped me understand the construction better. As my grandmother would say, a learning experience.
With the cowl, the fit is fairly forgiving around the neckline so I think you’ll be fine. And I think you’re smart to wait until the next day – sometimes when something isn’t going well, the best thing to do is to put it down for a little while.
Welcome back to the world of sewing! :]
I agree. As an advanced beginner, I ALWAYS sleep on it…it is amazing what comes to mind while you sleep, that you forgot by day…saves a lot of misery and material! I am late to the party, having been away, but will start/catchup tomorrow. I have a geometric rayon challis I have been saving for something just like this project…excited to start.
I have the bodice together, I think it will look ok. Question. Since I made my shoulder seams bigger, more like 5/8 than 3/8, do I need to trim them to reduce bulk? Do I need to zigzag the new raw edges since it is a woven, or will they be considered “finished” due to the construction.? Thanks
Yes, it would be a good idea to zig zag along the seam and then trim off the bulk. If something is sealed up inside a lining you don’t always need to zig zag, but if your fabric fraying is already giving you trouble then it’s definitely better to be safe than sorry!