

In this post we’ll discuss how to choose a size and some basic fit adjustments you can make to your pattern pieces.
choosing your size
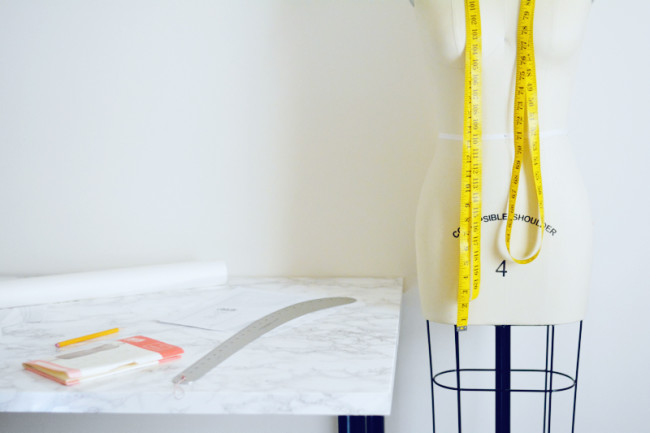
Use a tape measure to take your bust, waist and hip measurements. When taking your measurements, don’t wear bulky clothes, and be sure the tape measure is parallel to the floor and snug against your body. Wear the undergarments you plan on wearing with the finished dress.
Your bust measurement is the fullest point of your bust. Your waist measurement is the narrowest part of your torso, generally where you crease when you bend to the side. Your hip measurement is the fullest point below your waist.
If you are falling into very different sizes in the bust and waist – like more than two sizes apart – you might be a candidate for a bust adjustment. In that case, take your high bust measurement, which is under your armpits and across the flat part of your chest. Sizes 0-16 are drafted for a C cup, meaning there is a 3″ different between high and full bust. Sizes 18-26 are drafted for a DD cup, meaning there is a 5″ difference between high and full bust.
If your own cup size is significantly different, then choose a bust size that would make sense for your high bust, remembering to think about the pattern’s cup size. So if your high bust is 33″, the pattern thinks your full bust will be 36″. Even if yours is only, say, 34″, you’d still want to cut a size 6 (36″ bust), and then do a Small Bust Adjustment, which will be covered Thursday.
blending sizes
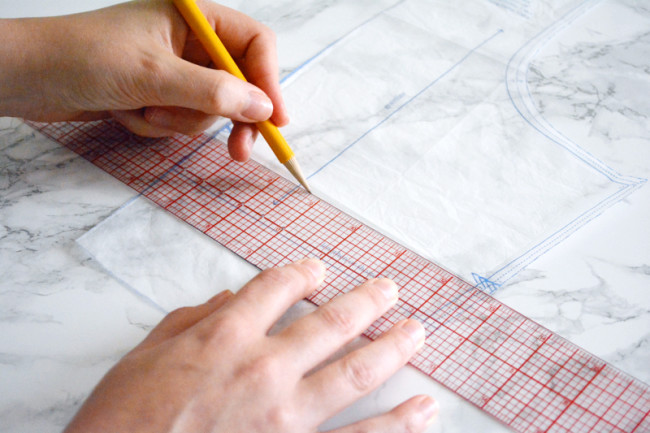
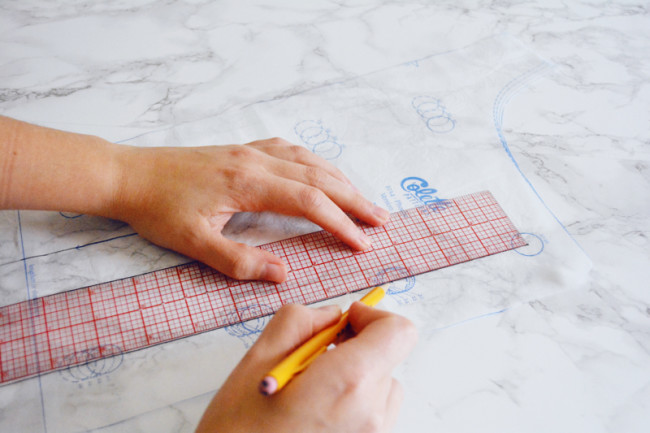
If you fall in different sizes at each measurement, it is very easy to blend sizes – simply use a ruler to draw a line from one size to another. For instance, if you are a 10 at the bust and a 12 at the waist, draw a line that blends evenly from size 10 at the fullest point of the bust to size 12 at the waist.
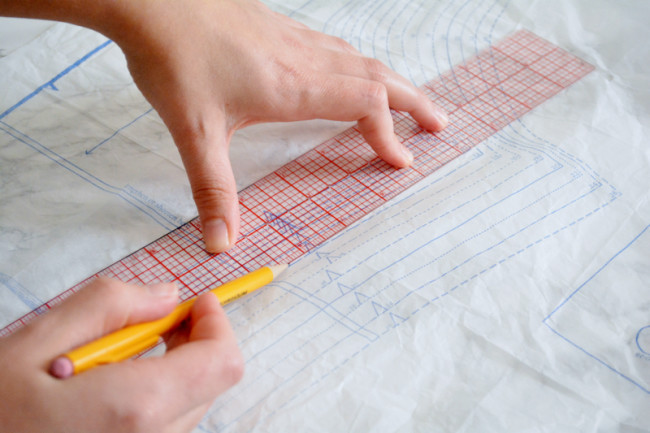
Blend your lines smoothly into the size lines so that there are no jagged angles. Also, be sure to make the adjustment everywhere – if you are cutting from one size at the bust to another at the waist, you need to do that on each side of every bodice piece (except the center front fold and the back center zipper, which are the same for all sizes).
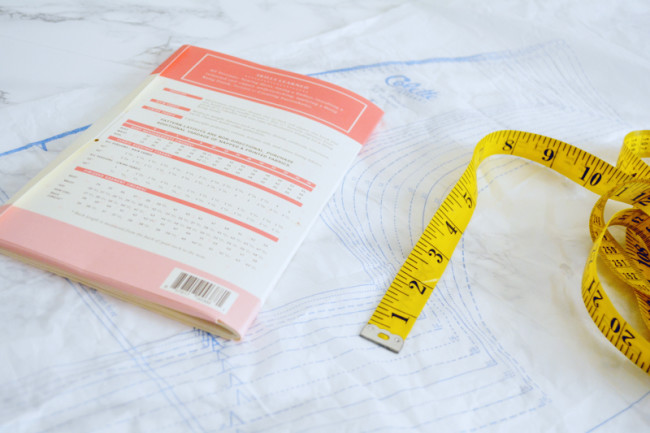
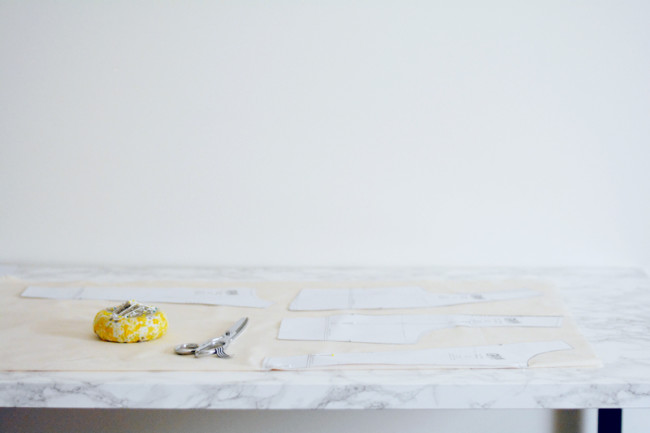
Tip: Instead of cutting out your pattern tissue, trace it off with pattern paper or tracing paper. You can draw in the size blending as you trace. That way if you ever need to start over, you won’t have mangled your pattern pieces. If you can’t find any local sewing stores that carry pattern paper (which is a thin white paper marked with a grid of dots or numbers), you can find rolls of tracing paper at your local art supply shop.
lengthening/shortening
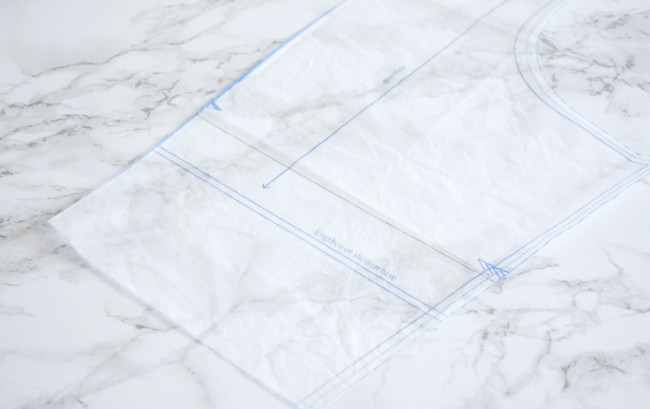
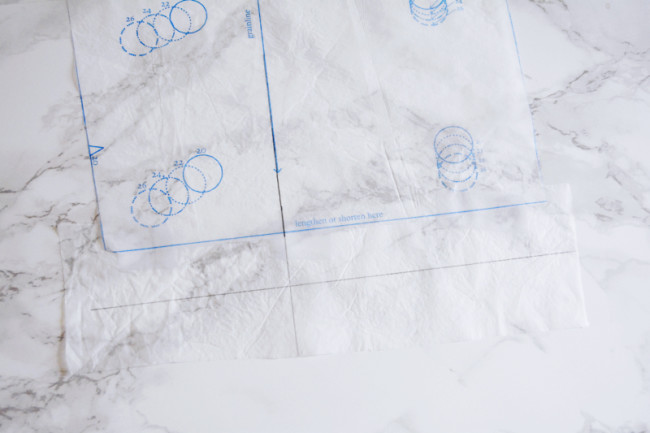
Since we are all different shapes and sizes, you may need to lengthen or shorten a pattern piece – for instance, if you are short- or long-waisted, or have shorter or longer legs than average. You don’t want to just add or subtract length from the edges, because this will change the length of those edges and the proportions of the garment.
To determine whether or not you need to lengthen or shorten, try an initial tissue-fitting – after cutting out the pattern pieces, hold them in place over your body, aligning the center front(s) with yours. See where the pattern piece waist/hip is hitting on your waist and hip, remembering to account for the 5/8” seam allowance along each edge. This can help give you a ballpark amount to lengthen/shorten for your muslin.
If you aren’t sure, it’s best not to do anything until you’ve tried your muslin on.
To shorten a pattern piece, determine how much shorter you’d like it to be. Then use a clear ruler to draw a line this amount above the upper lengthen/shorten (L/S) line.
Fold the pattern piece along the upper L/S line and bring the fold up to meet your drawn line. Tape in place and blend any jagged edges.
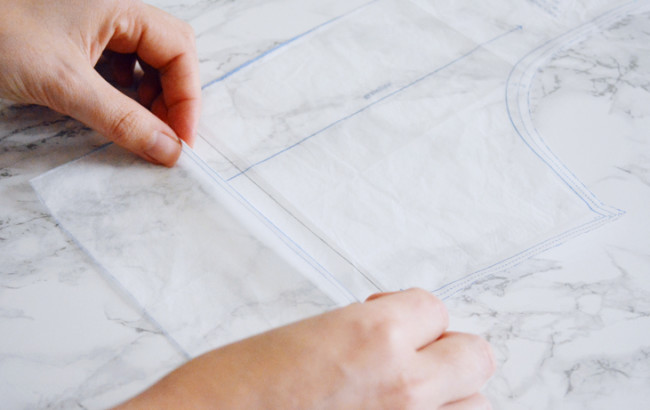
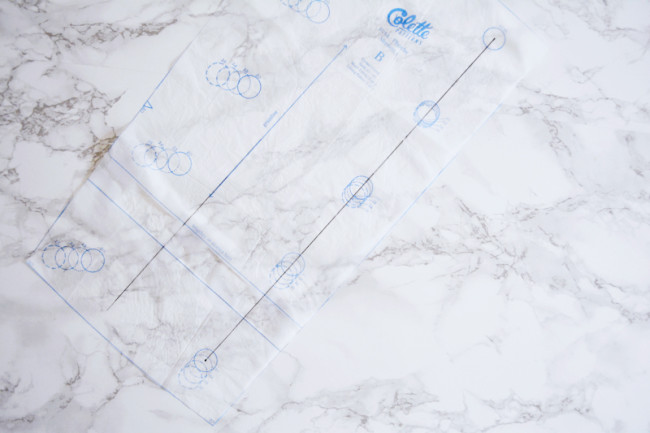
To lengthen a pattern piece, first use a ruler to extend the grainline across the L/S lines.

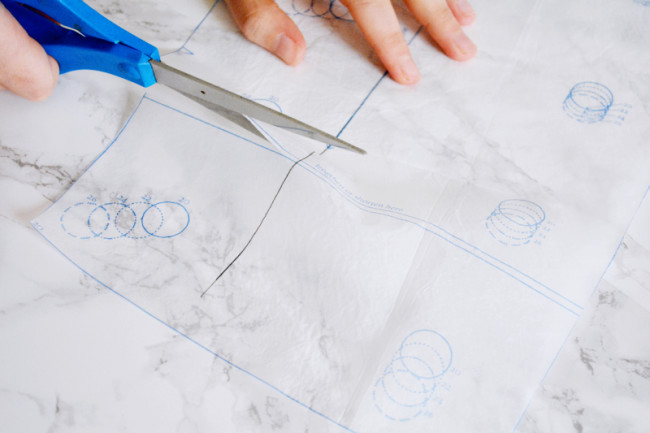
Cut the piece apart between the L/S lines.
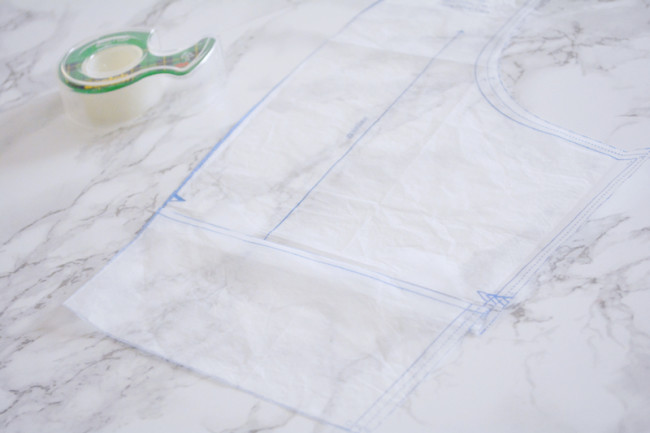
Place a strip of paper behind the upper half (you can use scraps of pattern tissue) and tape in place. Use a ruler to draw a line below and parallel to the upper L/S line. Draw another line down extending the grainline.
Tape the lower half in place, using the drawn lines as a guide. The lower L/S line should be lined up with the horizontal drawn line. Trim excess paper, blending any jagged edges.
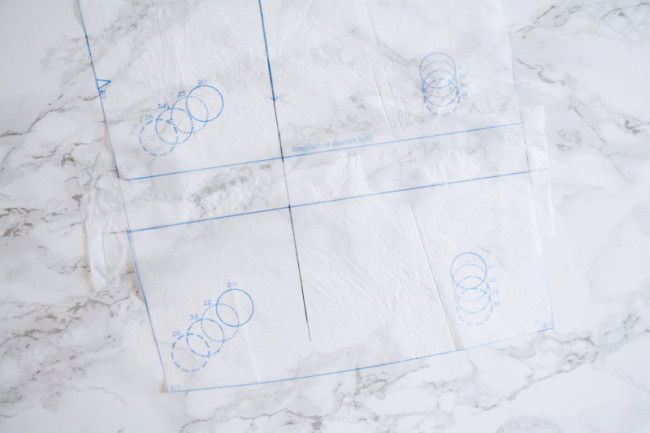
Just like size blending, if you lengthen or shorten, remember to adjust all affected pattern pieces (ex. both skirt pieces, all bodice pieces).
redrawing button placement
If you’re making Version 1 and you lengthen or shorten the bodice, the button placement marks will now be uneven. To fix this, draw a line between the center of the top and bottom button marks, going through the centers of all the other buttons.
Measure this line and divide it by 4, rounding to the nearest 1/8”. Starting at the top, mark along the line in this increment (you should end up marking three times). Draw new button placement circles around your marks.

Repeat for the second column of buttons.
Make a muslin
I know it seems like a drag, and you just want to get to the fun stuff, but making a muslin (also called a toile) is really worth it, especially on a garment with princess seams. I would highly recommend making a muslin before trying any bust alterations.
When making a muslin, there is no need to do any seam finishing or lining. You’ll still want to backstitch at the beginning and end of each seam, but use a long stitch length to make it easier to seam rip if necessary. It’s also helpful to stitch along the neckline at 5/8”. This not only helps you visualize where the finished neckline will be, it also prevents that edge from stretching out when you try it on.
If you haven’t done much to the skirt, you can get away with making a muslin of just the bodice.
Skirt or not, you should install a zipper in the back. If you use long basting stitches, it’s easy to rip out the zipper to use in your final dress.
If you’ve never done a zipper before and want to wait until that post in the sewalong to attempt one, have a friend pin you into the muslin 5/8″ in along the back edge.
Check back on Thursday when we cover bust adjustments!
Comment below with any questions!
Comments
Nobody ever seems to address those of us that have hips and bust the same but a larger size waist, due to pot belly shape. My own measurements being bust 8, waist 12, hips 8. I was planning a toile to be on the safe side. But any info would be great. Thankyou
You can follow the “blending sizes” section above to cut from an 8 at the bust to a 12 at the waist, and then from a 12 at the waist back to an 8 at the hips. And yes a toile is a good choice!
This might go down as one of the dumbest questions ever posed during a sewalong, but if I am temporarily taking a medication that makes me horribly bloated, I should just wait until after I’m off the medication to do any fitting for this project, right?
There are no dumb questions! And it sounds like, yes, you should wait until after you finish your medication. That’s what I would do!
I am very pear-shaped with a 36″ bust, 34″ waist and 44″ hips, which is size 6 bust and size 14 waist and hips.
My high bust is 35.5″ which would indicate I need to start with a size 10 and do a small bust adjustment and then blend to size 14 at the waist.
However, I also have very narrow shoulders and usually find that I need adjust for this too, so I’m wondering whether I really need to add in all this extra fabric, as I’m most likely going to need to take it out again at a later stage.
Hi Charlie! This may not sound very scientific, but I would probably split the difference on the bust and go from an 8 there to a 14 at the waist and hips. The reasoning is that it will be both a less drastic SBA and less drastic narrow shoulder adjustment that you’ll have to do, and also easier to cut from an 8 to a 14 than a 6 to 14.
Thank you. It’s not long since I started trying to understand how to make clothes that would actually fit me and I’m still finding it very confusing. I have made a few toiles for dresses (mainly just the bodices), but haven’t yet been confident enough with my adjustments to progress on to making the final dress in my ‘good’ fabric.
I have learnt enough, though, to be totally amazed that I ever manage to find ready to wear clothes to fit me (though I do usually stick to stretch and jersey fabrics).
It is all very interesting to think about, and yes it can be eye opening! I didn’t know that one of my legs was shorter than the other until a patternmaking class! The things we learn… :]
The comment above is interesting. “Sizes 18-26 are drafted for a DD cup, meaning there is a 5″ difference between high and full bust.” Is the purpose of this to eliminate the need for some FBAs? Based on this comment, I’m thinking I can do a straight 18 with no FBA for my DDs. This is the first time I’ve done a Colette pattern in the expanded sizes. :)
Yes, that’s basically the purpose! It’s reflecting the fact that different size ranges usually have different proportions, or different ratios between measurements.
Help!! I’m having some fitting issues.
My muslin (size 12) skirt front measures 17 3/4″ at the waist and 22 1/2″ at the hip. The skirt back measures 16 1/8″ at the waist and 20 3/4″ at the hips. When I pin the skirt front to the dress form – matching skirt & form side seams – it’s very loose at the waist and hip but the back fits at the waist and is tight in the hips.
The really odd thing is that my waist measures 30 1/2″ and my hips are just shy of 40″ (according to pattern – a size 10) yet when I put the size 12 muslin on me it barely fits.
What in the blazes am I doing wrong? I’m on my 3rd muslin and ready to cry.
Uh oh, no crying allowed! :]
Ok, a few questions to clarify things so we can figure out what’s up:
You said you are pinning the skirt together, to a dress form…are you also pinning it when you try it on yourself? Have you sewn one and tried it on? Did you put a zipper in it?
You are on your third muslin…have you changed anything in the skirt from muslin #1 and #2?
Did you cut the pieces out with the grainlines/folds parallel to the selvage?
Whew, sorry if that feels like a bombardment, it’s not meant as one!
Wow! “Fastest Response” award goes to Devon!!
Not sure how much detail you need so here goes… :)
My first “musin” was actually swedish tracing paper and just one side of the bodice and skirt – to get a ball-park fit. The seams were sewn & I only tried it on the form (hard to fit 1/2 a dress on myself). First glaringly necessary alternation was to lengthen the bodice. It didn’t seem to fit the form well (center front and back were off).
2nd muslin was a full dress (from actual muslin this time) in a size 12 and I lengthened the bodice 5/8″.
I basted the seams but didn’t put in a zipper. I had my husband pin the center back along the seam line. The upper bodice – shoulders to about 4″ above waist fit fine but then started to get tight from there down to about hips. Lengthening adjustment was perfect – a nice bright spot amid the gathering gloom.
It wasn’t a terrible fit so I decided to take a 1/4″ off each dart and made a corresponding adjustment in the bodice princess seams. I’m sure I made the adjustments more complicated than they needed to be but when I basted it all together again the seams matched where they were supposed to. I was certain hubby was going to be able to pin back seam this time but no… Ugh.
In frustration I cut another swedish tracing paper dress in size 14. Basted the seams and tried it on the form. It was huge!
Sigh… then I started messing around trying to give my size 12 a size 14 midriff but the more I thought and fiddled and thought some more it just didn’t make any sense. I re-measured me, the dress form and the dress itself up, down and every which way. I’ve read all the “fitting adjustment” chapters I can find in my sewing reference arsenal but I’ve only managed to confuse myself further.
If you’re still reading this you deserve the “Patience of Job” award too.
Thx.
So, your dress form…is it custom to you and your measurements, or is it a standard size? Maybe part of the problem is going back and forth between you and the form. Even if it has the exact same measurements, it still might be shaped differently – someone with a wide ribcage and an A cup could have the same bust measurement as someone with a narrow ribcage and a D cup, but those are two very different shapes.
It also sounds like maybe you are overworking things. So here is my suggestion – first take a deep breath :). Do you still have the muslin with altered skirt darts and princess seams? Try resewing those darts and princess seams as they were. Then, resew the side seams from underarm to hip, starting at your normal 5/8″ seam allowance, but then drifting to 3/8″ by the waist, then back to 5/8″ by the hip. This is basically just letting out the sides a little, which is way easier than fiddling with darts and then trying to make the princess seams match.
If you don’t have that muslin, or you want to start fresh, I would cut one out of fabric size 12 at the bust, out to 14 at the waist, and back to a 12 at the hips. You can include your 5/8″ bodice lengthening since that worked out for you. Sew it together, baste in a zipper, and then try it on yourself, not the form. See if that makes things any clearer!
Also, does anyone have a tip on tracing the cut lines of the pattern where all the size lines blur together? My method is to trace the size line as far as I am able to differentiate it from the others then just wing it. I was hoping there was a more precise procedure.
Thx!
Tracing the size lines with highlighter is usually a good way to help yourself follow the lines. When they all get too bunched together and are just one solid line, then just see if your size line is more to the inside, outside, or middle, and just follow that as a guide. They are so close together at that point that it doesn’t make too much difference.
Hello, I am starting to make measurements, cut pattern pieces and muslin today, and was wondering if I am making the Phoebe out of mid wt. wool, and plan to always wear it in the cooler weather, how should I measure myself?
Should I make measurements and pattern size/muslin with a type of top I plan to wear under it? I am mostly likely going to wear a long sleeved trim fit tee under it…. So when I take my measurements, I would have a tee on for this? Thoughts? Thanks!!
Um… I just reread the first paragraph and answer my own question! Helps to read slower! I guess I’m excited!
Yes it’s best to wear the shirt when measuring! And no worries, I’m glad you’re excited! :)