

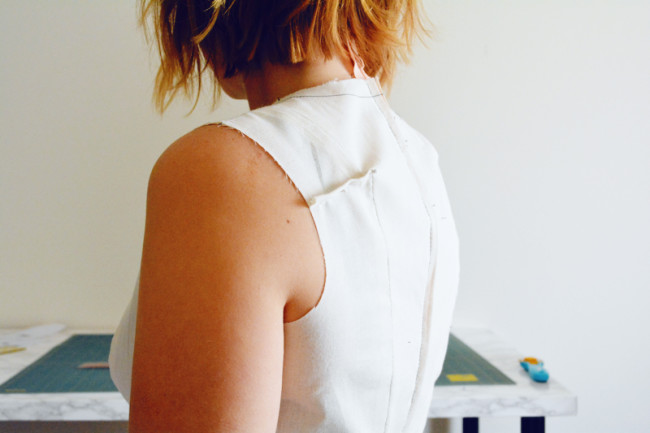
This is the final fit post before we jump into the sewing! This one describes several different adjustments you can do for fitting issues above the bust.
narrow / wide shoulders
Generally, the outside finished shoulder seam of a standard sleeved bodice should end at the point of your shoulder – the little knobby bone you can feel if you push on it. However, since Phoebe is sleeveless, there is definitely some wiggle room style-wise for where the shoulder seam sits on your body. It could land inside that point and still look totally fine.
That being said, if you feel that your shoulder seam is too far inside your shoulder, you can do a wide shoulder adjustment to add a little width to your bodice at the shoulder seam. Conversely, if the shoulders of your bodice are landing too far to the outside of your shoulder, you can do a narrow shoulder adjustment. The prep is the same for both.
First, decide how much wider/narrow you’d like the shoulder to be. Remember to account for the 5/8″ seam allowance of the arm hole.
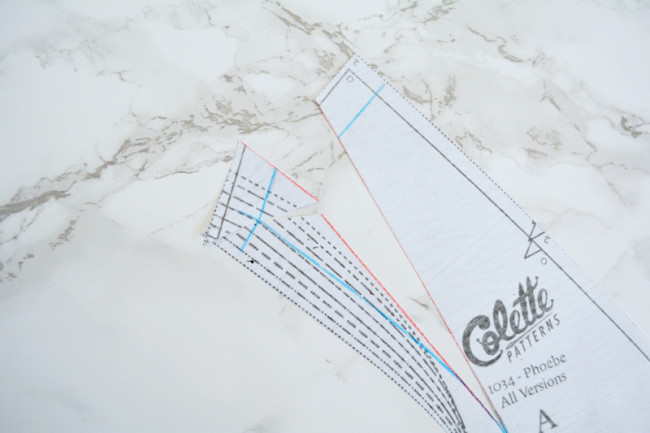
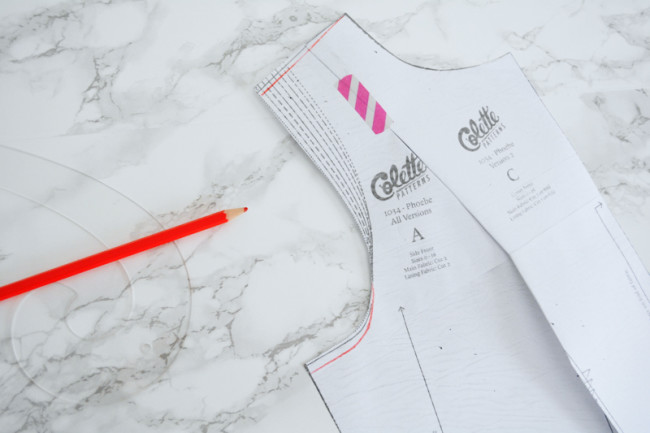
On the side front bodice, trace the stitching line of the shoulder seam. Also trace the stitching line of the armscye, down to where it starts to curve sharply.
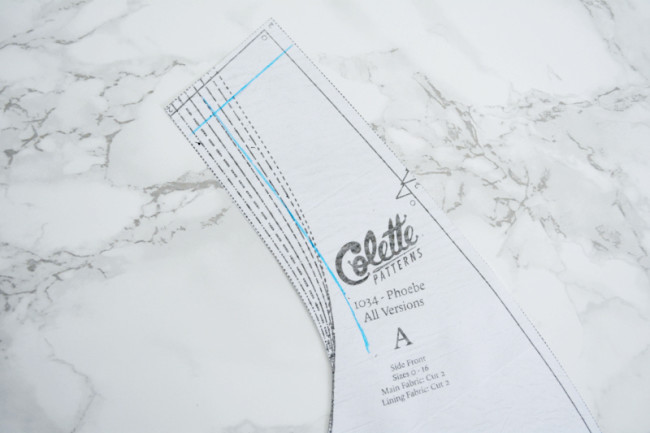
Draw a line from approximately the center of the shoulder seam down to the bottom of the armscye stitching line.
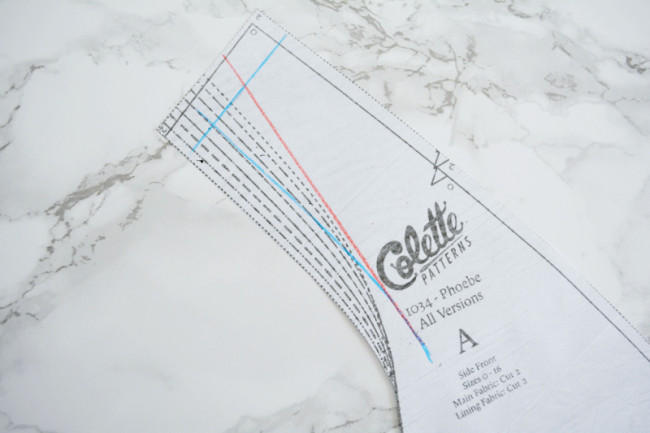
Slash along red line to but not through stitching line. Snip in from the edge of the pattern piece to but not through the same point to create a hinge.
Now, snip in from the red line to but not through the intersection of the stitching lines. Snip again from the outside corner into the same point to hinge.
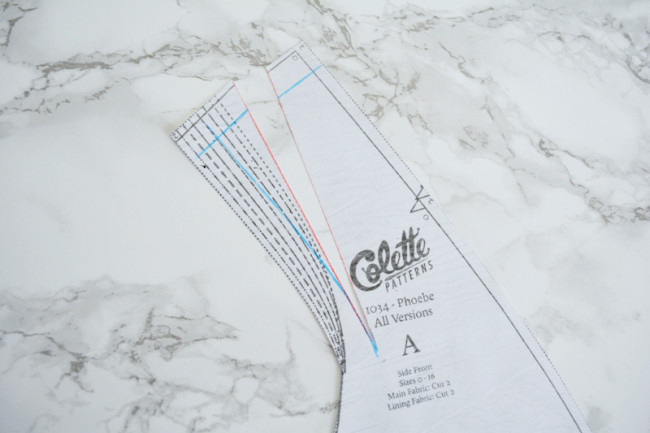
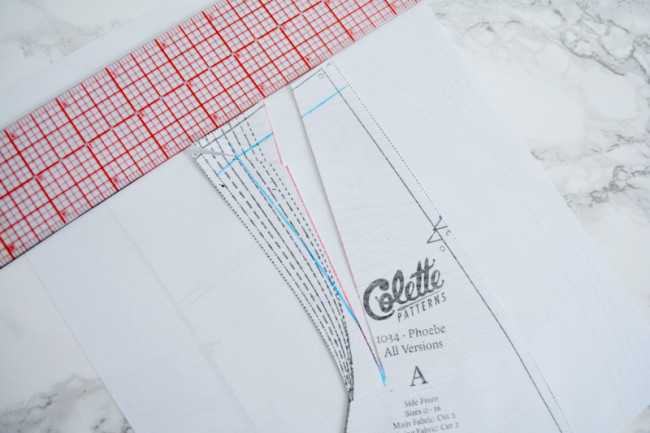
For narrow shoulders, overlap red line hinge by your adjustment amount. Tape and even up top edge.
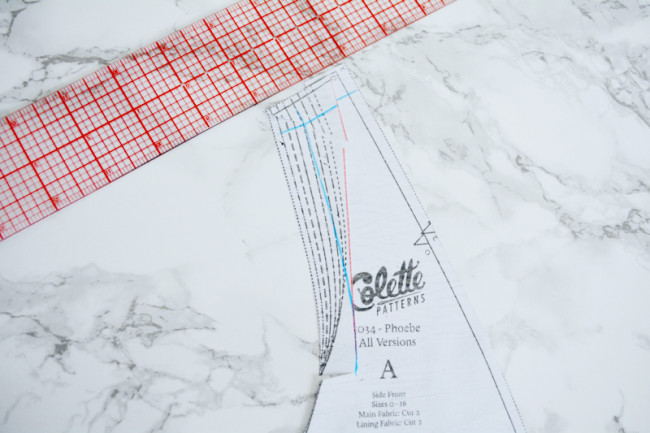
For wide shoulders, spread hinges apart by your adjustment amount and tape paper behind. Blend edges and trim.
Repeat any adjustment you do to the corresponding back bodice piece.
square / sloping shoulders
If your shoulders sit a bit higher than average, you may benefit from a square shoulder adjustment. Some symptoms might be that the bodice feels tight on the top of the shoulder; there may be vertical strain lines pointing at the shoulder; and/or the armscye at the side seam is too low (perhaps your bra is peeking out).
If your shoulders slant downward more than average, you may benefit from a sloping shoulder adjustment. Some symptoms might be that the bodice gapes at the top of the shoulder, and/or that the armscye at the side seam is too high (perhaps it is digging into your armpit).
To determine your adjustment amount, seam rip the shoulder seam and repin until it is comfortable and fitting well. Note how much you took in or let out at the outer edge.
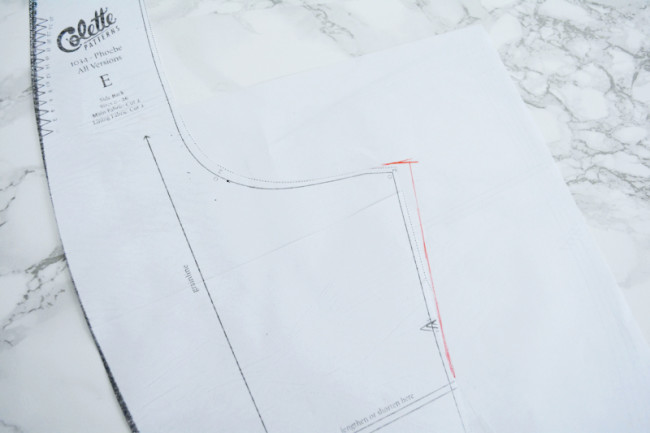
Before we do our adjustment, we’ll need to connect our pattern pieces so we can adjust them together. On the side front and center front, trace the stitching line on the princess seam edges, starting at the shoulder and going until it starts to curve. Fold the seam allowances under and tape the pattern pieces together at the shoulder.
For square shoulders, tape paper behind. Measure your adjustment up from the outer shoulder edge. Draw a new shoulder seam from this point over to the neckline edge. You can also raise the armscye if needed in the same way, blending your new line into the existing one. However, since we aren’t attaching a sleeve, you don’t have to raise the armscye if you’re already satisfied with the fit.

Trim paper and then carefully cut apart at the princess seam. You’ll need to add seam allowance to the new little bits at the top of the princess seam edges.
For sloping shoulders, measure your adjustment down from the outer shoulder edge. Draw a new shoulder seam from this point over to the neckline edge. You can also lower the armscye if needed in the same way, blending your new line into the existing one. However, since we aren’t attaching a sleeve, you don’t have to lower the armscye if you’re already satisfied with the fit.
Trim off excess.
If you do a square or sloping shoulder adjustment, remember to do the same adjustment procedure to the back bodice pieces.
broad back
Sometimes, the front fits ok, but the bodice is tight across your back, under your arms. This can often be fixed by adding a wedge at the side seam as shown.
Gaping back armhole
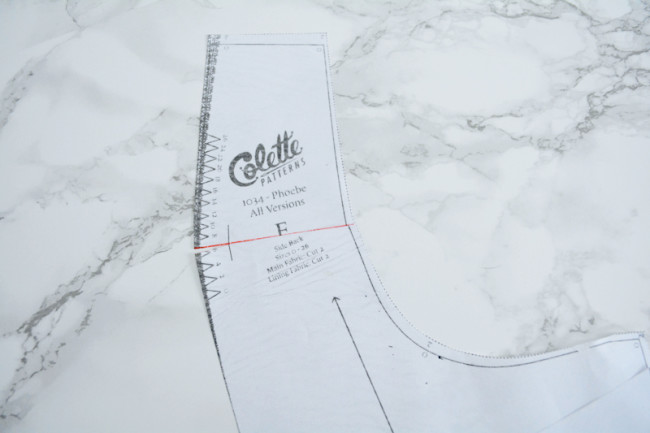
If the armhole is gaping in the back, that’s usually a sign that that edge is too long. To fix it, pinch out a dart in the side back bodice until the armhole fits.

Measure the width of the pinch at the edge and double it for two layers of fabric (so if the pinch measures 1/4″ pinched, the adjustment amount is 1/2″).
Draw a line across the side back at the point where you pinched the dart. Trace the stitching line at the princess seam edges.

Cut to but not through the stitching line from both sides to hinge. Overlap by your adjustment amount.
(Note: if your adjustment amount is more than 1/2″, split the adjustment up over 2-3 smaller pinches)
Tape down to paper and redraw edges if necessary.
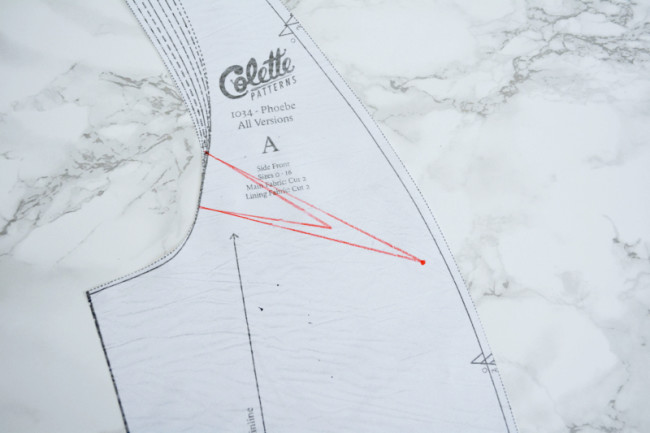
gaping front armhole
If the front of your bodice is gaping at the lower part of the armhole, this might be a sign that you need a FBA. If so, do that first (see previous two posts). If you don’t need one, you can eliminate the armhole gape by creating a dart then rotating it out.
First, pinch the gaping fabric into a dart and mark your bust apex. The dart should point at the apex. Tranfer to your pattern piece.
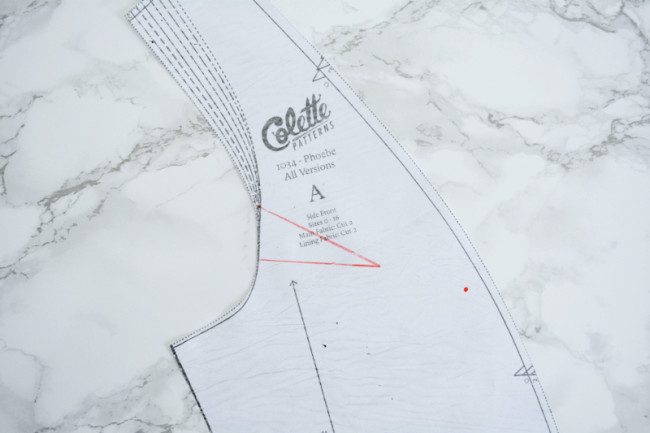
Draw lines from the ends of the dart legs to the apex.
Cut out wedge formed by new lines. Cut in to but not through apex from princess seam edge to create hinge.
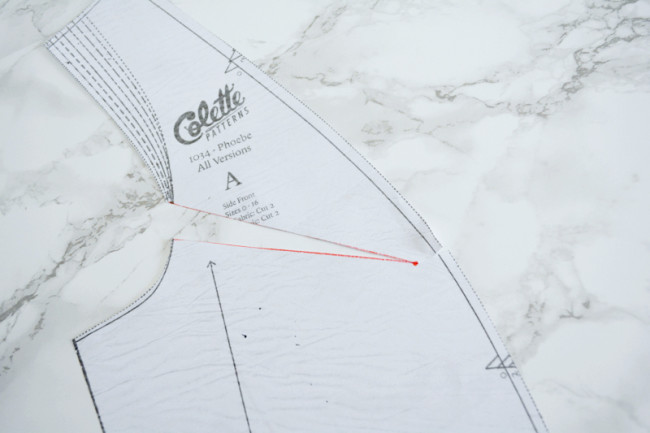
Rotate hinge to close wedge.
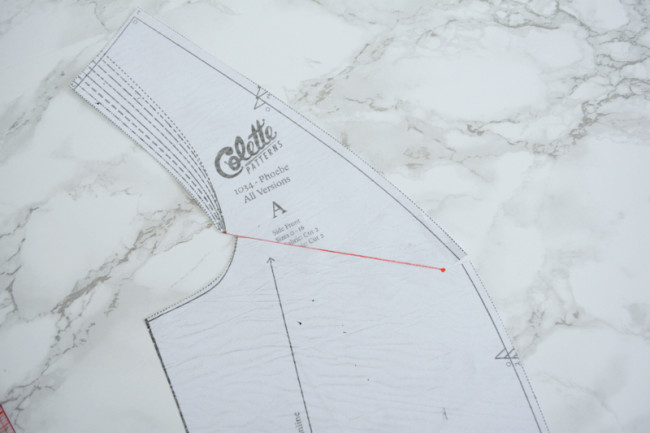
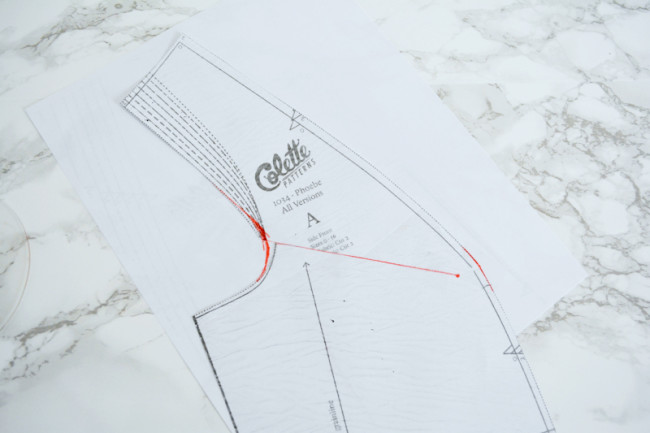
Tape paper behind and redraw armscye and princess seam, blending edges. Yes, your armscye might look a little funky now. That’s ok.
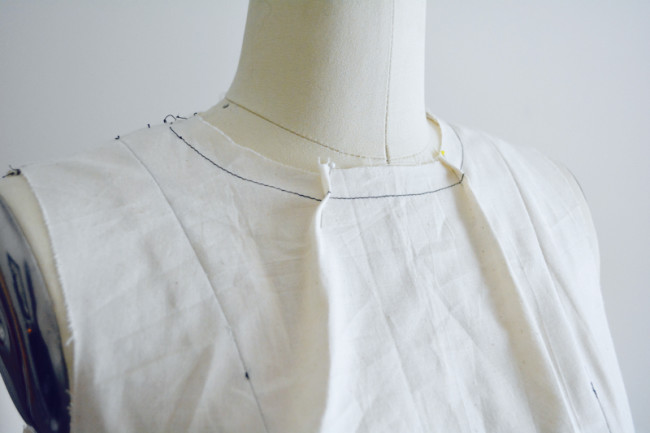
gaping neckline
If you have gaping fabric at either the front of back neckline, that means there is too much fabric there. This is may also a symptom of narrow shoulders, and sometimes this fix is all you need.
It might be tempting to pinch a wedge out at the center and just lop that off the pattern piece, but then you are shifting the grainline of that pattern piece. Instead, pinch out two smaller diagonal darts, angled at the princess seam.
Measure the width of one pinch at the neckline and double it to get your adjustment amount. Draw a line on the pattern piece in the same place as your pinch, and trace the stitching line at the princess seam.
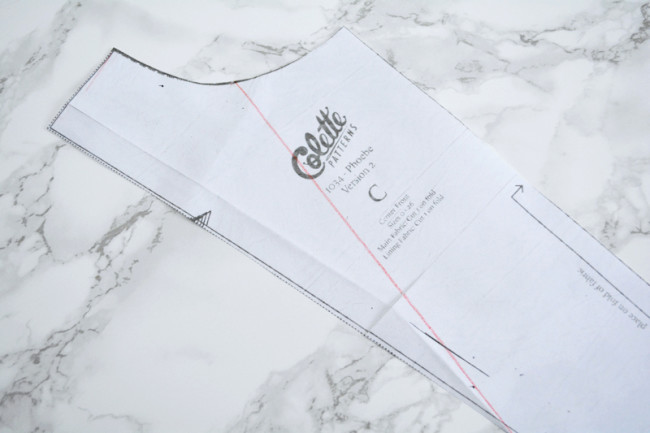
Cut too but not through stitching line from each side to hinge.

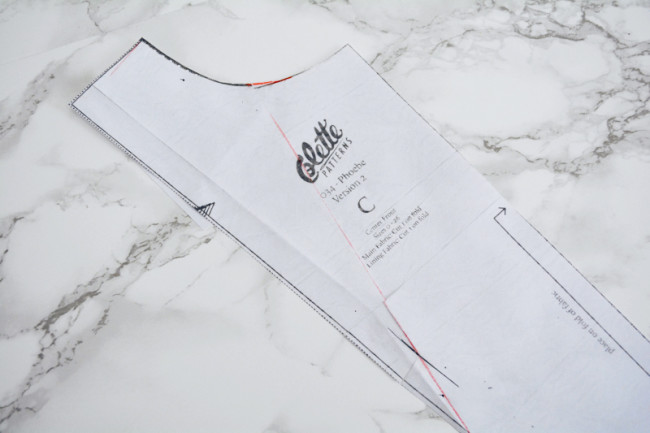
Overlap by your adjustment amount and tape. Redraw neckline if necessary.
Comment below with any questions! On Thursday we will finally be cutting into our fashion fabric…see you then!