

The only things standing between you and your finished Phoebe is hemming, a little bit of hand sewing and some buttonholes (Version 1). Let’s deal with the buttonholes first; if you’re making Version 2, you can jump past them to the hand sewing.
Buttonholes – Version 1
The first thing to learn about buttonholes is that they aren’t that scary! As with any aspect of sewing, take your time, be precise, and remember to breathe.
The most important part about making a buttonhole is to always practice first, always. It doesn’t matter if it’s your 10,000th buttonhole, you should always do at least one practice run on a scrap of your actual fashion fabric just to make sure everything is good to go. Your practice fabric scenario should be the same as your garment fabric scenario – in this case, one layer of exterior fabric and one layer of lining fabric.
The second most important thing (or maybe equally most important thing) is to read your machine manual if you’ve never done a buttonhole before. There are a lot of different types of buttonholes and buttonhole feet out there, so yours might be a little different than either one described below.
Mark the Buttonholes
The general rule of thumb is that your buttonhole length should equal the diameter of the button + height of button + 1/8″.
Your buttonholes will go on the right half of your bodice. Starting at each button mark, draw a horizontal line of your buttonhole length extending out away from the free edge of the bodice. You don’t want the buttonhole centered over the button mark; the reason is that the button will slide to the end of the buttonhole closest to the bodice edge when you wear it.
Then draw little “H” handles on each side.
If your machine has a one-step/automatic buttonhole, you actually don’t need to worry very much about buttonhole length, the machine will figure it out for you and turn around on its on. The most important marks are more like a “T” shape – the horizontal buttonhole line, and the handle right next to the button mark.
If you have a multi-step buttonhole, like a 4 or 5 step, you should be precise in your buttonhole length marking because you will be in charge of turning around when you get to one end.
One step buttonhole
An automatic buttonhole foot looks something like below. Put one of your buttons in the sliding part at the back end of the foot, and slide it until the button is snugly held.
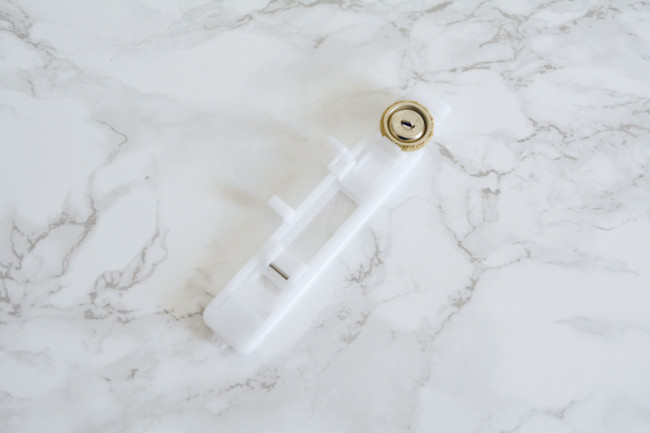
Attach the foot with most of it extending towards the back of the machine.
Select a buttonhole stitch. If your machine is computerized, the length and width should be set automatically. If it is mechanical, consult your manual for the ideal settings.
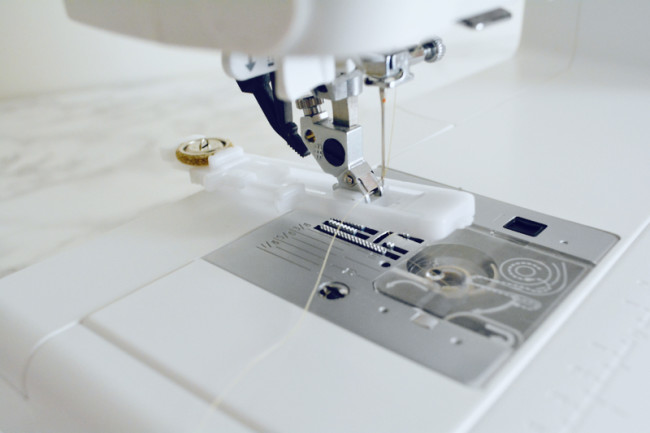
There should also be a buttonhole lever to the left of the foot that you must pull down.
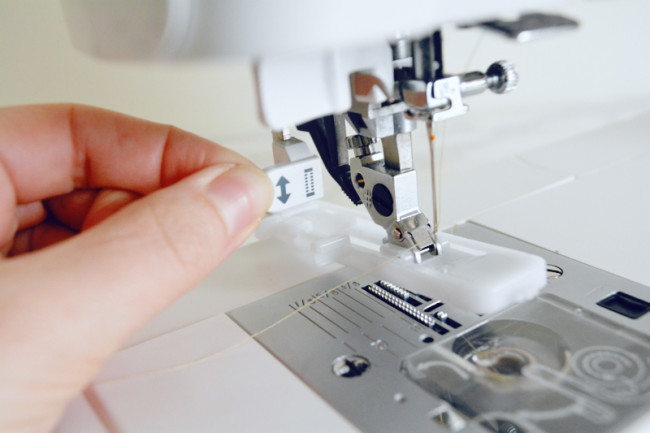
Make sure you pull it down all the way. It should be between the prongs on the side of the foot. This is the trigger that will turn the machine around when it hits the end of the buttonhole.
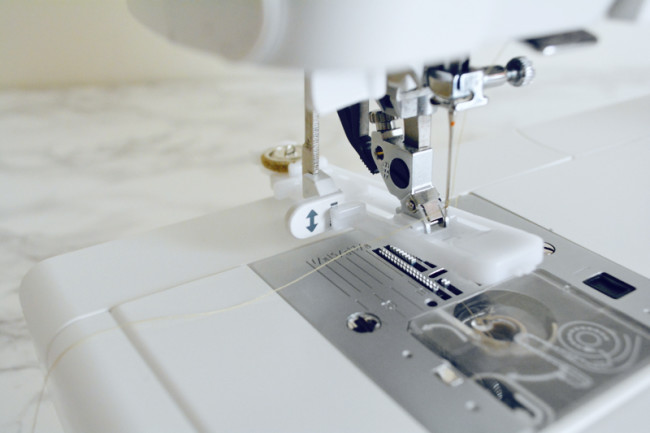
Position the fabric underneath the foot so that the buttonhole line is running vertically up the center. You should have the “H” handle mark closest to the button visible in the little window under the needle.
Some machines sew backwards first, some sew forward first. Mine sews backwards first when doing a buttonhole, which is why my buttonhole line is extending back under the foot. If you’re not sure – this is why we test.
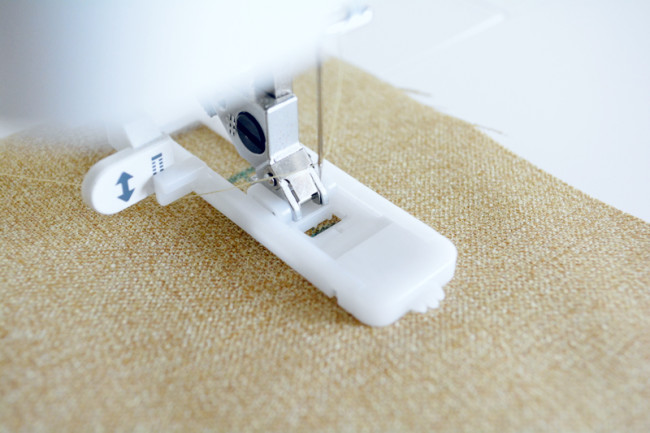
Once you’re set up, sew the buttonhole at a medium speed, gently guiding the fabric but avoiding pulling/tugging/etc. You’re mostly just letting the machine do its thing. Sew until the machine stops.
Multi Step buttonholes
Usually, a multi step buttonhole has a dial or series of buttons in a numbered sequence. It may start with a bar tack (the end of the buttonhole), or it may start with zig zagging up or down one side. It varies from machine to machine. This is why we test.
On the machine below, the buttonhole dial is the lower one. It actually has 6 steps.
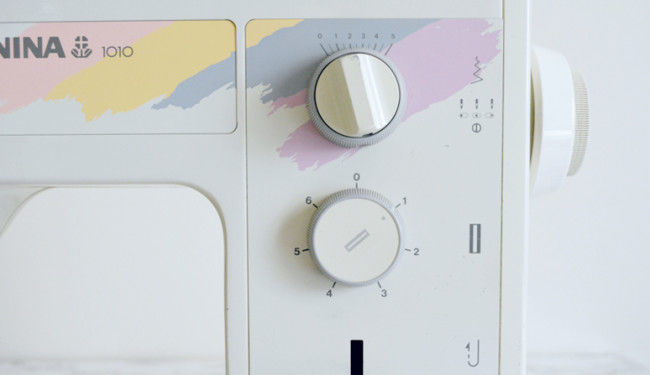
Generally, after setting your length and width according to your manual, the sequence will be:
1) Put your fabric under the machine with one of the “H” hands under the needle.
2) Select “1” in the buttonhole sequence. If it’s a bar tack, sew about 8-10 stitches. If it’s the zig zag, sew until you get to your other “H” handle.
3) Turn the hand wheel towards you until the take-up lever is back in the highest position. Advance to the next number.
4) Repeat until you cycle through all the numbers.
When you’re done, thread all thread tails to the back with a hand sewing needle and tie in a knot.
Possible buttonhole woes
One-step:
My machine never turned around, and just sewed the first side forever. Your buttonhole lever is probably not down all the way.
My machine turned around too soon, and the buttonhole is too small. Something probably bumped the buttonhole lever, like a nearby bulky seam, or your hand.
One-step and multi-step:
My machine got stuck and sewed in one place and made a huge knot. Try sewing slower. At the first sign your machine is getting hung up, gently pull the fabric to get it going. If it happens again, try bumping up your length by 0.1.
My fabrics are really thin and the buttonhole made them weird/wrinkly/puckered. Sew with tearaway stabilizer or tissue paper on the underside of the fabric behind the buttonhole area.
Opening a buttonhole
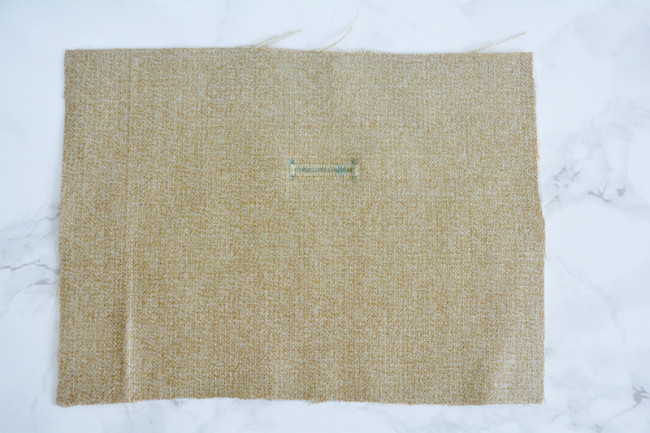
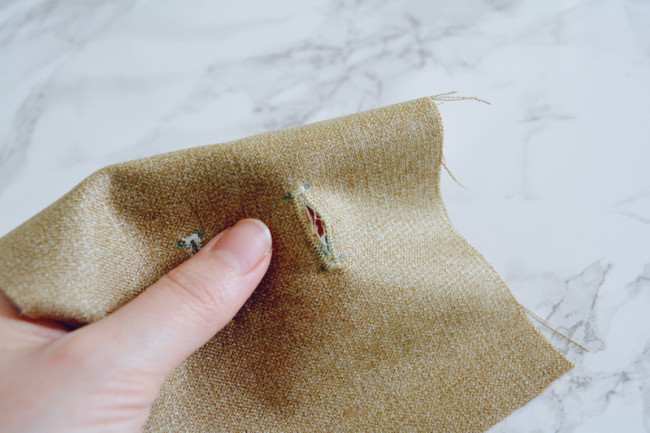
Once your buttonhole is sewn, it’s time to cut it open.
1) Pin bar tacks. Put a pin at each end of the buttonhole just inside the bar tacks. This will prevent you from accidentally slicing through the whole buttonhole, which can really be a day-ruiner.
2) Cut buttonhole. Using a seam ripper, slice the fabric between the zig zags, starting at one end and going to the middle.
Flip it around and cut from the other end to the middle.
3) Trim loose threads. Carefully trim any fabric threads in the opening, being careful not to cut buttonhole stitching.
Slide one of your buttons through to make sure the buttonhole length is ok. It should go through without having so stretch the fabric, but still be snug.
Sew the real buttonholes
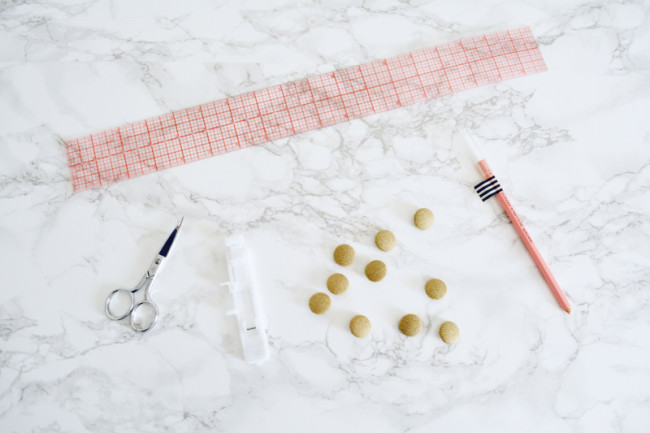
Once you’re satisfied with your testing, sew and open the ten buttonholes on your Phoebe.
Make sure the fabric is nice and smooth and not pulling on anything. Remember to take your time.
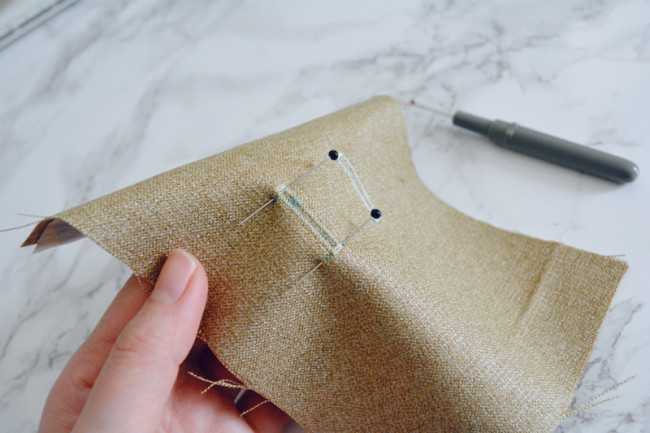
Attach the buttons – version 1
Once your buttonholes are sewn, try your dress on to see if the original button marks still work. You can always re-mark them by pinning the bodices together in the right place and then sticking a marking tool right through the left-most end of the buttonhole (the end closer to the bodice edge) to mark the left side bodice underneath.
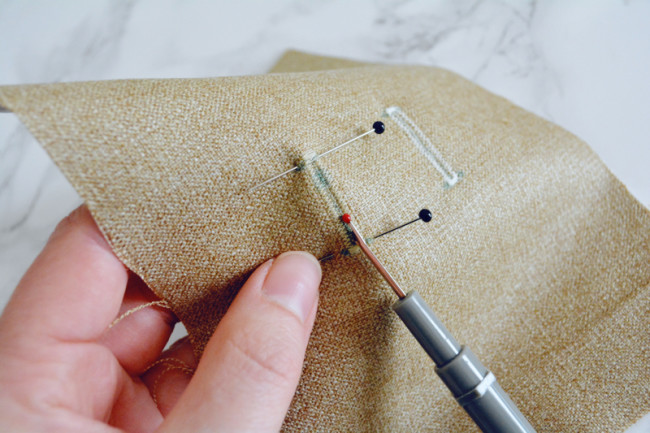
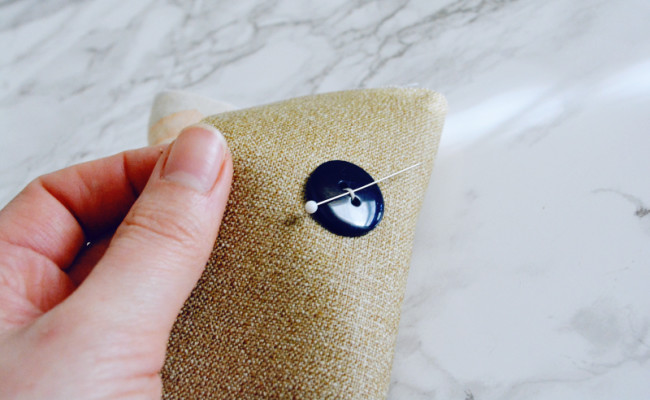
To attach a button, use doubled thread. Sew two stitches right on your mark without pulling them all the way through to form a loop.
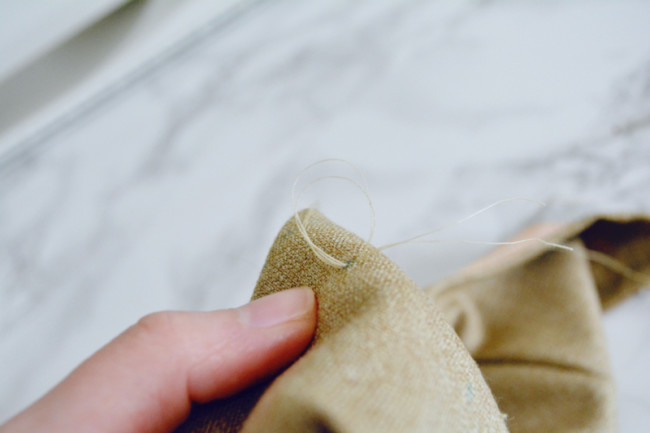
Duck the needle through the loop twice and pull to tighten knot.
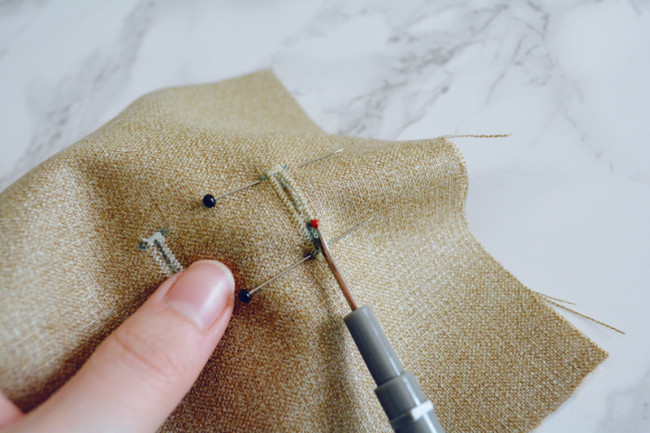
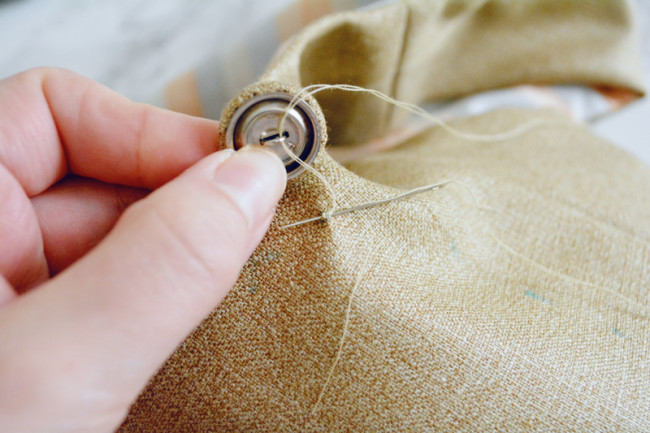
Stitch through your button and back into the fabric a few times, pulling snug.
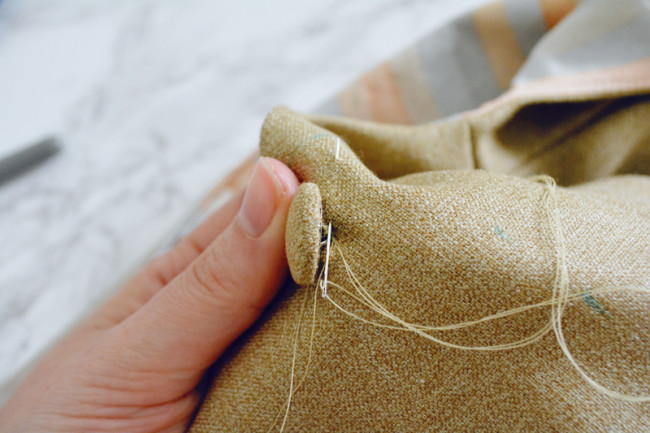
Tie a knot in the same way you started, and pass the needle between the fabric layers and out about an inch away.
Cut threads right to the fabric. The ends will disappear between the layers. You can hide the initial thread tails the same way.
The button in the above photos has a shank, which is the little metal loop that gives the button its height; if you’re sewing a button with no shank, place a pin on top of it as you sew through the holes. This will give you a little extra in the attachment thread.
Before the final pass through the holes of the button, take the pin out and wrap the thread a few times around the extra thread under the button. This will create a shank to accommodate the thickness of the fabric once buttoned.
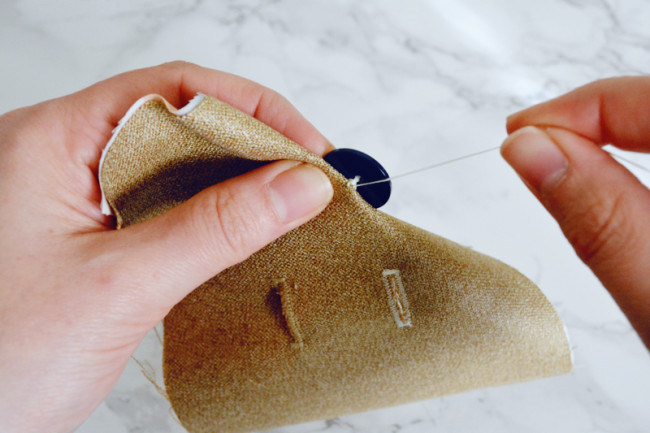
Finish in the same way as above.
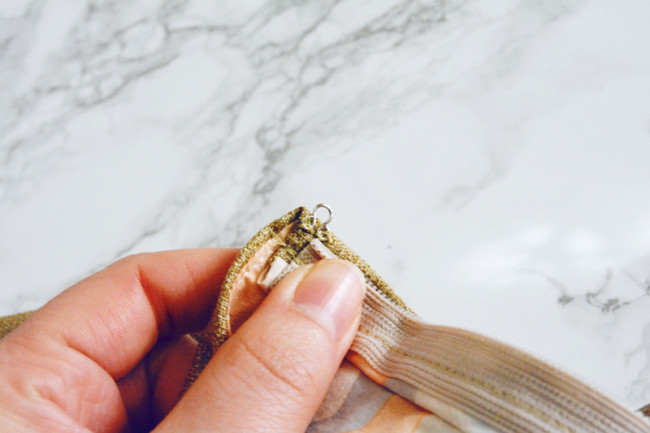
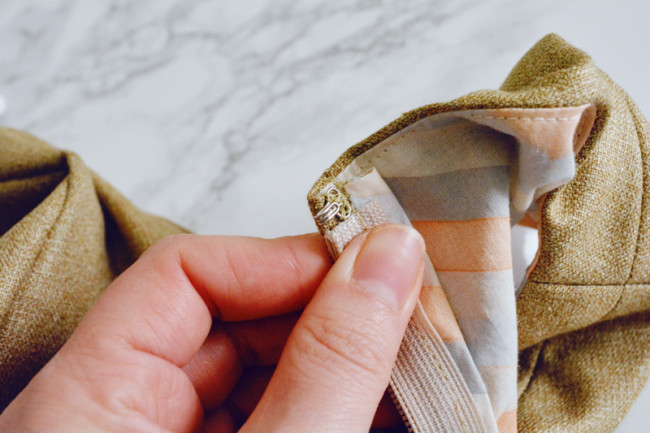
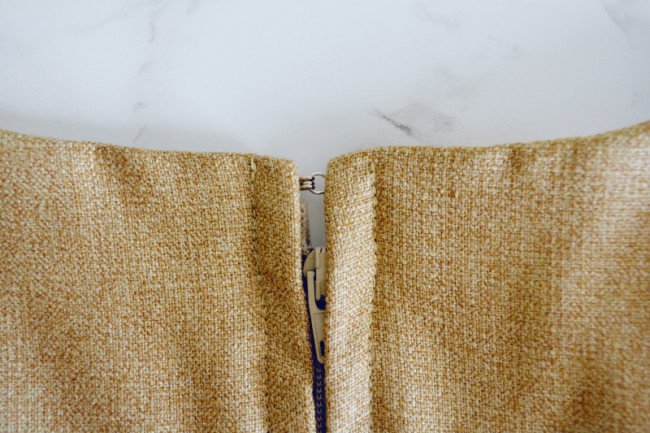
Attach hook and eye – both versions
Using the above hand sewing method, sew the eye half of the hook and eye to the inside of one side of the back seam, at the top of the fabric. Attach it so that the opening of the eye just sticks out past the edge of the fabric.
Attach the hook to the other side with the open part of the hook facing in.
Sew the hem – both versions
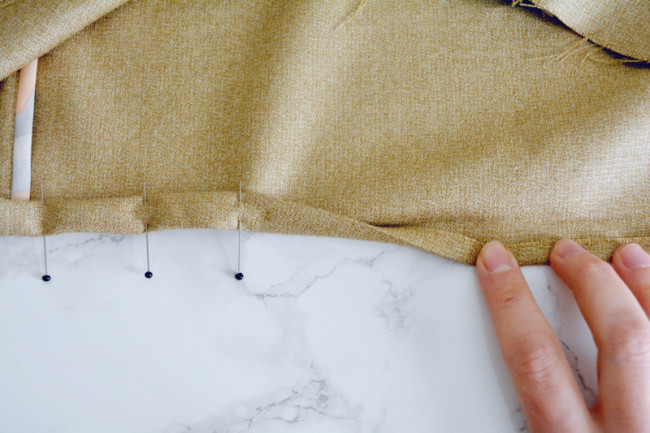
It’s a good idea to try on your Phoebe before you hem to be sure you’re ok with the length, remembering that it will be hemmed up a total of 5/8″. If you’d like to shorten it, use a ruler to draw a line evenly around the bottom edge and trim along the line.
1) Pin and press hem. Fold the bottom edge 1/4″ towards the wrong side and press. Fold again 3/8″, pin, and press again, avoiding pin heads if you’re not using glass headed pins.
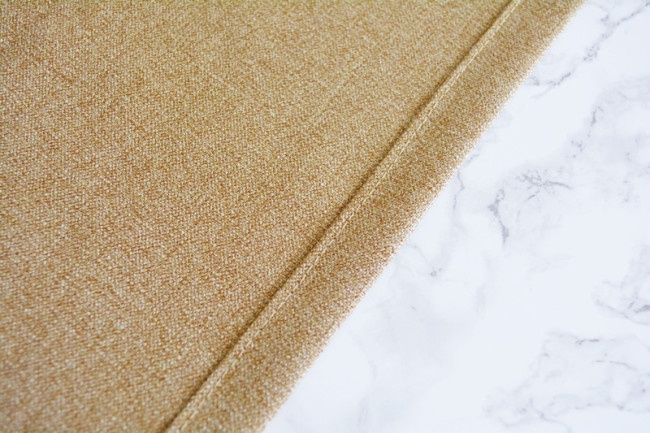
Using a straight stitch and a slightly longer length (3.0), edge stitch along upper fold all the way around.
Alternatively, you can hand sew the hem. Check out this tutorial on the Colette blog for five different ways to hand stitch the hem.
And for even more info on hems, you can get the Colette Hem Guide totally for free, which has over 100 pages of how-to with tons of photos and tutorials.
Share your Phoebes!
I hope you guys have enjoyed the Phoebe Sewalong! We would absolutely love to see what you’ve made!
Here are a few ways you can share:
- Upload your photos to Flickr, then add them to the Colette Patterns photo pool! Be sure to add the tag “phoebe,” and your photo will also show up on the gallery of the Phoebe page in our shop.
- Upload to Instagram. Mention @colettepatterns and use the hashtag #phoebedress to show off to others.
- Upload to your blog or any other service and add a link in the comments!
We’ll round up our favorites here on the site and share some of them on social media too. We can’t wait to see what you’ve made!