


If you have an inner patternmaking geek (you might not even know you have one yet), this bust adjustment post very well may unleash it. Doing a bust adjustment on the Dahlia is fun – yes fun – because the shaping is achieved through gathers. This means that we can rotate the added or reduced fullness where we want it to go without having to redraw any darts (unless you want to add a dart, of course.)
It might look like a lot at first (yikes!) but it’s only because there are individual sections depending on the adjustment you are going to do. There’s a little info graphic at the end for a quick reference for all the adjustments covered in the post.
Let’s start by talking about pattern cup size.
What is pattern cup size?
When sewing, your cup size is determined by the difference between your high bust (also called upper bust) and full bust measurements. Your high bust measurement is the distance around your chest above your bust, under your armpits. Your full bust measurement is across the fullest point of your bust. A difference of 1” is an A cup, 2” is a B cup, 3” is a C cup, etc.
For sizes 0-18, Colette Patterns are drafted for a C cup, meaning they infer a difference of 3”.
For sizes 20-26, Colette Patterns are drafted for a DD cup, meaning they infer a difference of 5”.
Keep in mind that your sewing cup size might be different than your bra cup size, so don’t use your bra size for reference.
When do I need a bust adjustment?
If your high to full bust difference is more than an inch above or below the amounts mentioned above, then you could benefit from doing a bust adjustment. For a smaller difference, you’ll do a Small Bust Adjustment (SBA). For a larger difference you’ll do a Full Bust Adjustment (FBA).
If you are a FBA candidate, then you may have noticed in the past that when you choose a pattern size based on your full bust measurement, it is too big in the shoulders/neck area. When it fits in the shoulder/neck area, it strains across the bust.
If you are a SBA candidate, then you may experience tightness in the shoulders/armpits when you choose a size based on your full bust measurement. When something fits you in the shoulders/armpits, then it often has extra baggy fabric across the bust.
How much should I adjust?
First, choose the size based on your upper bust measurement. To do this, add 3” or 5” to your upper bust measurement to get an imaginary full bust measurement [based on the sizes/cup sizes listed above] and choose that size in the bust.
Now determine the difference between the size and your actual full bust. For example, I would choose a size 12 if my upper bust is 37”. That size has a full bust measurement of 40”, but my actual full bust is 41.5”. That makes the difference +1.5”.
Lastly, divide this difference in half, since we will only be doing the adjustment to half the pattern piece, which will then be mirrored and doubled when we cut out the pattern piece. So for the above scenario, I’d be adding .75” when doing the adjustment. From this point on, this adjustment amount will be referred to as (X).
Let’s get started!
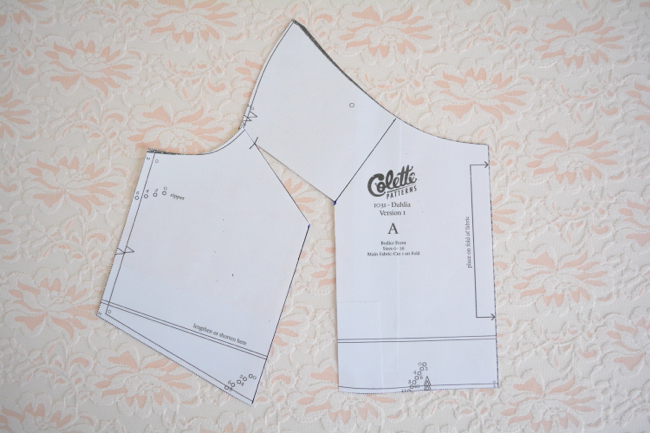
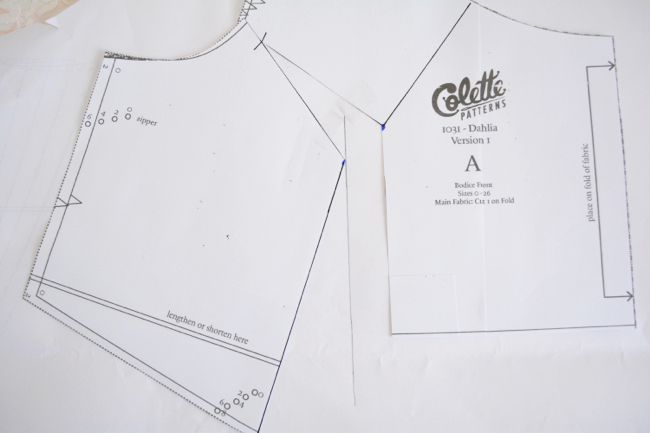
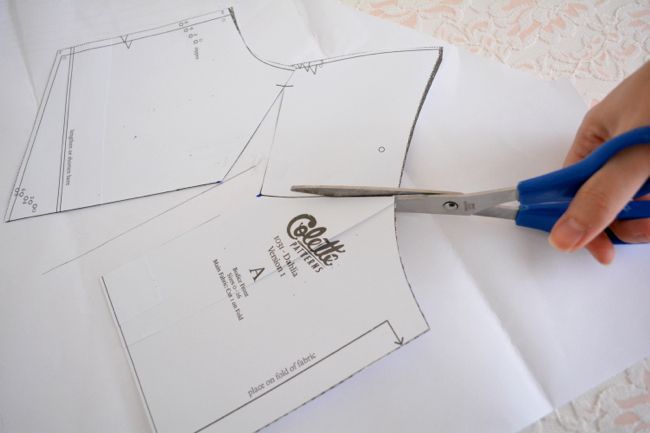
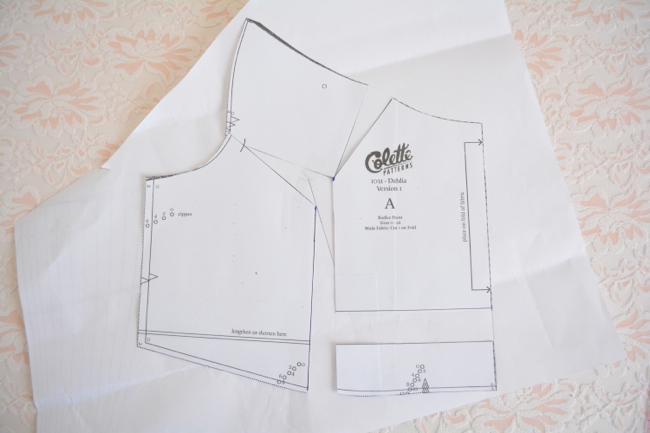
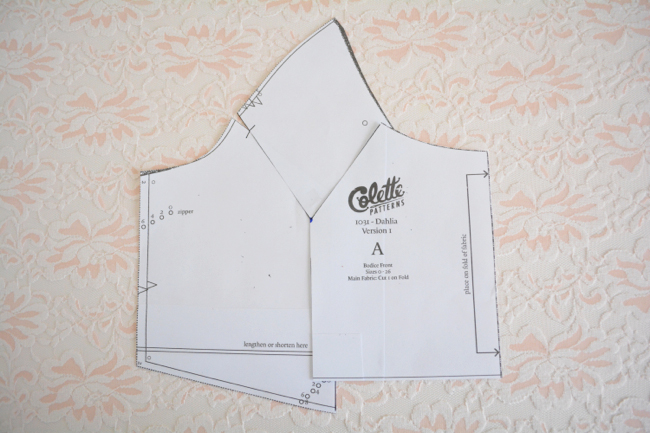
Prep for all bust adjustments
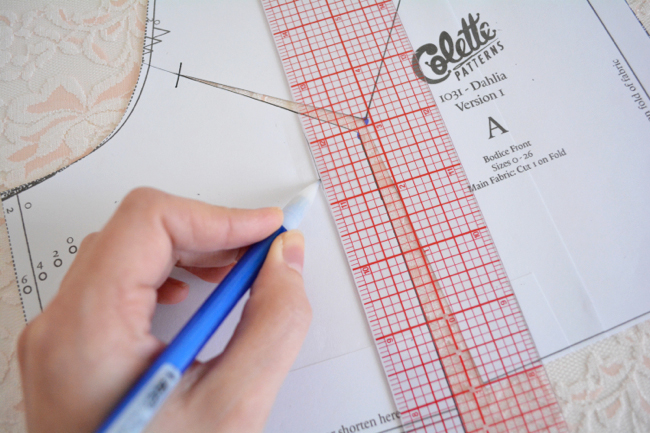
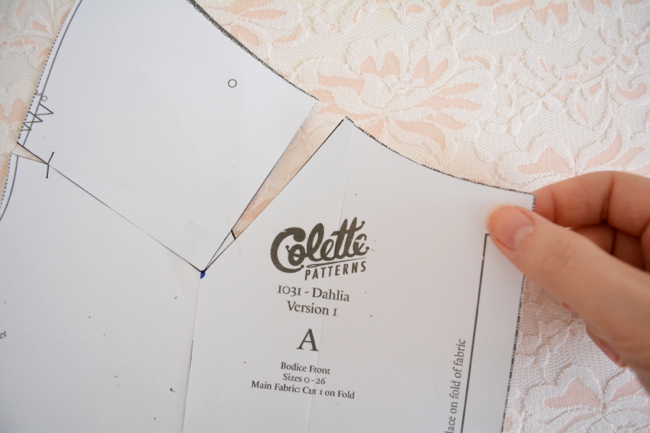
First, mark your bust point by placing the pattern piece over your body. Use the side seam as reference as the center front will be gathered.
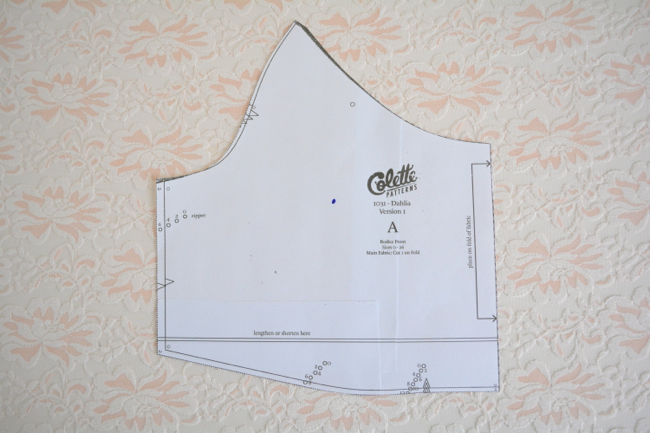
Draw a line perpendicular to center front from bust point to waist (Line A).
Draw a line angled from bust point to raglan edge just below notch (Line B).
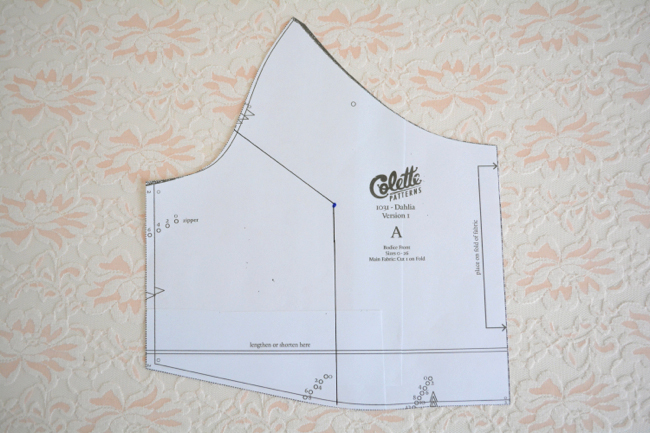
Draw a line angled from bust point to neckline below dot (Line C).

Note: You may or may not need line C, which we’ll get to soon.
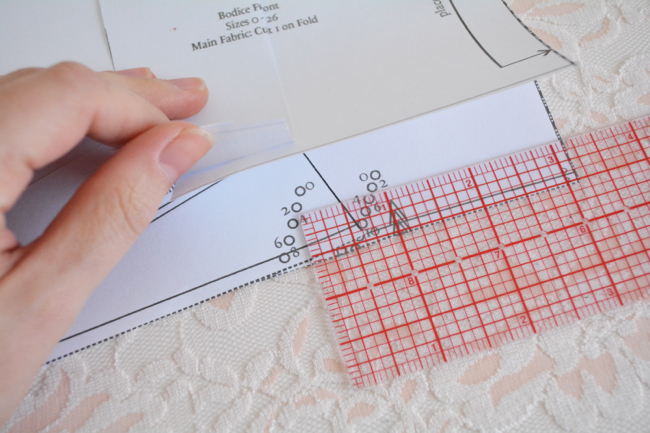
Mark stitching line on raglan seam across Line B. For Version 1, it’s 5/8” from the edge. For version 2, it’s ¼” from the edge.
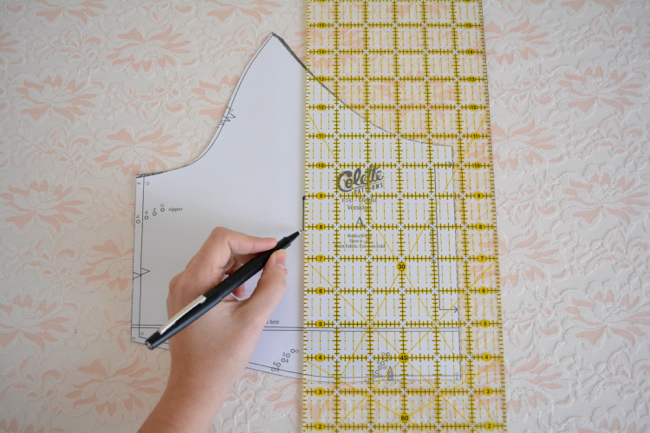
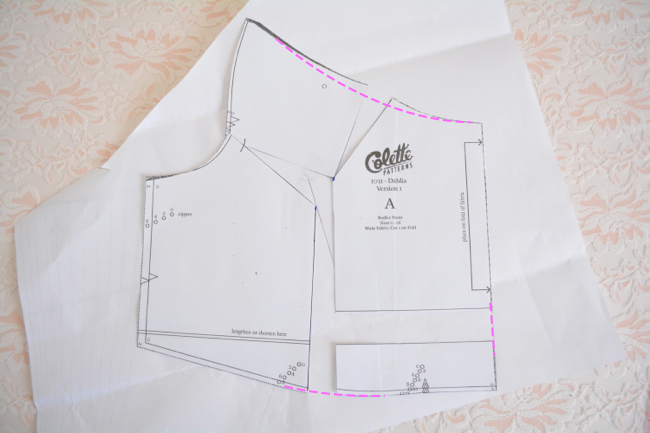
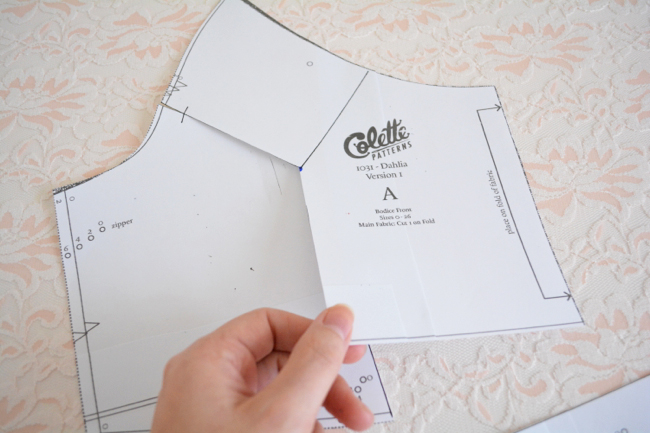
Cut along line A and onto line B, to but not through stitching line.
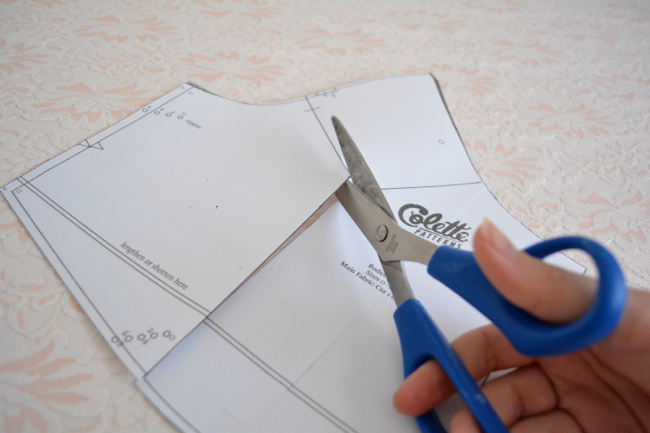
Cut Line B from edge of paper to but not through stitching line to create a hinge.
Cut along lengthen/shorten line to the right of Line A to separate lower right piece.
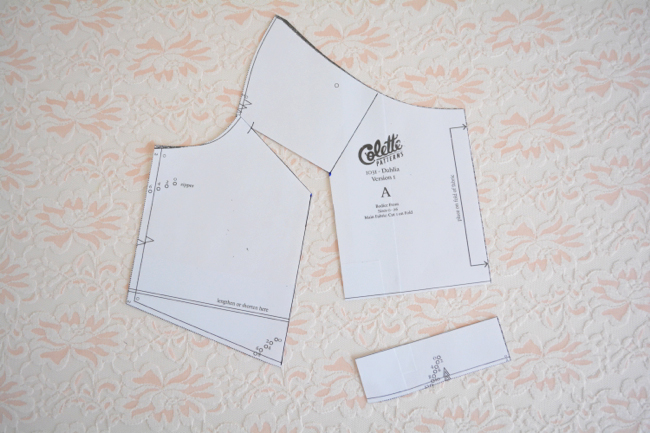
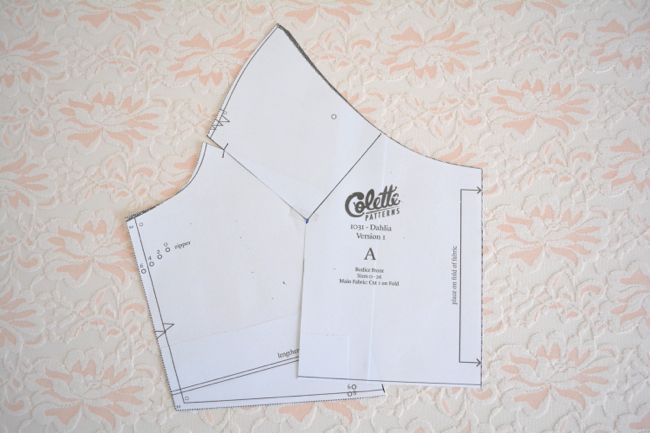
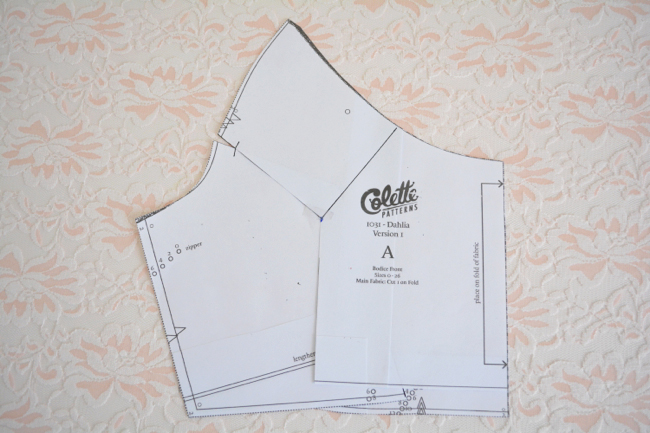
Now the FBAs and SBAs will go their separate ways. We’ll cover FBAs first.
FBA: Waist gathers only
This adjustment will add all the extra fullness to the waist gathers.
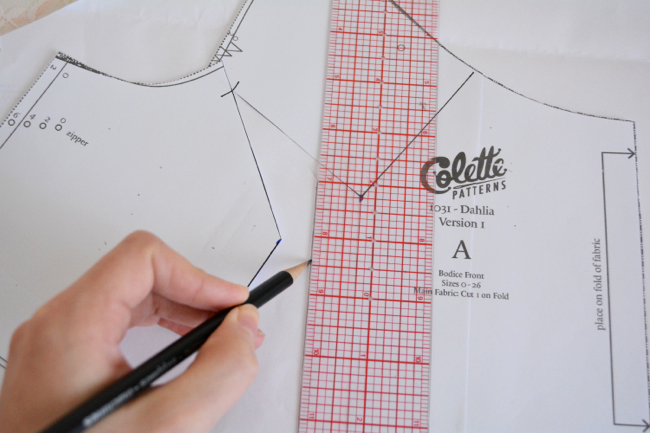
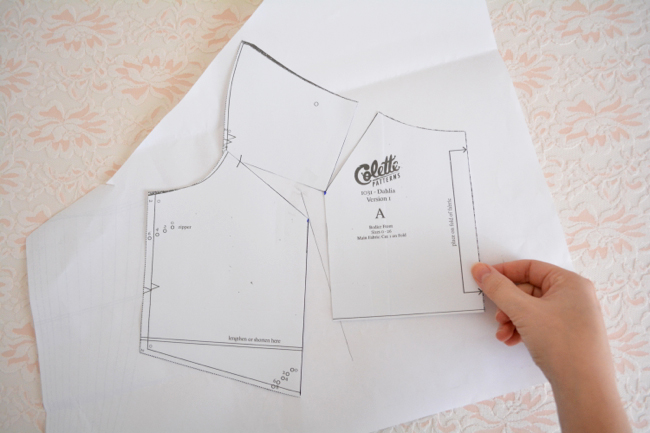
Place paper under pattern. Tape down right side of bodice along Line B above bust point only. Mark a parallel line to the left of the cut edge of Line A, (X) distance away.
Rotate hinged left piece until bust point is along the newly marked line. Tape.
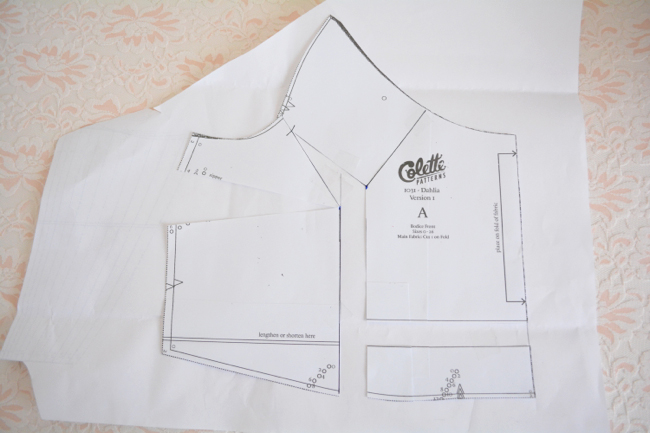
Place the separated lower right bodice piece so that the bottom edge is aligned with the new bottom edge of the hinged bodice and the right side is aligned with the fold edge. Tape.

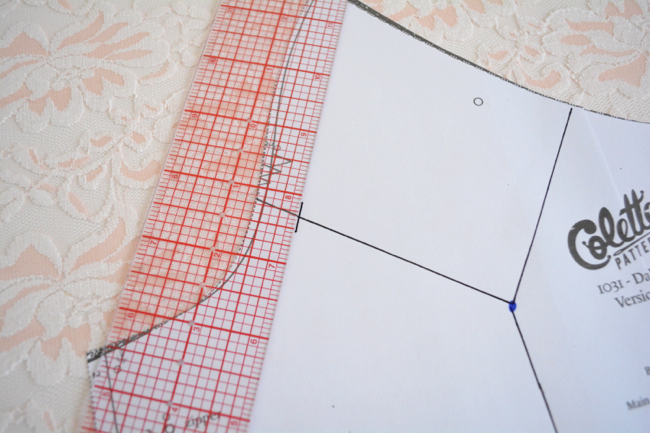
Redraw the bottom edge to connect gap, using a curved ruler to blend the edges. Trim all extra paper.
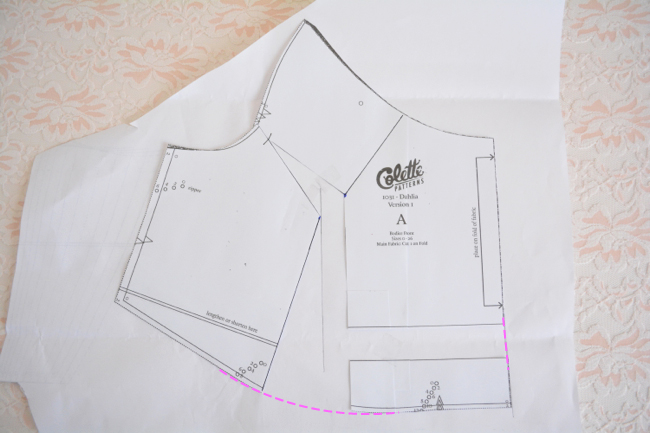
Note: The space between the dots will be gathered down to 1″ when we sew. If you find that your new gathering points now include too much fabric to gather down to 1”, sew a longer length of gathering stitches (in other words, move the dots further apart from one another) and simply gather the bodice down to fit the yoke. Alternatively, you can continue on to transfer some of the fullness to the neckline.
FBA: Waist and neckline gathers
This adjustment will split the added fullness between the waist and neckline gathers. This can be good for larger adjustments to balance things out a bit more.
Proceed with a FBA as above, but stop before you retape the lower right piece. Cut along Line C to but not through the bust apex to create a hinge.
Rotate the new hinge down until the two openings are approximately the same size. Tape down.
Place the separated lower right bodice piece so that the bottom edge is aligned with the new bottom edge of the hinged bodice and the right side is aligned with the fold edge. Tape.
With a curved ruler, redraw the neckline edge and bottom edge, blending jagged points. Cut all excess paper.
FBA: Add a dart
Instead of displacing some of the fullness to the neckline gathers, you can add a dart instead. This can be helpful if you have a larger adjustment but don’t want a fuller gathered neckline. This will look more like your regular old FBA.
Proceed with a FBA as above, but stop before you retape the lower right piece. Slash from the side seam through, but not to the bust apex to create a new hinge.
Rotate the new hinge down so that the cut edges of Line A are parallel with each other.

Place the separated lower right bodice piece so that the bottom edge is aligned with the new bottom edge of the hinged bodice and the right side is aligned with the fold edge. Tape.
Trim all excess paper, but leave some extra where the dart extension will go. At this point it’s a good idea to re-mark your bust apex so you can redraw your dart accurately. Draw your dart pointed towards the apex, in the side seam slash, with the dart point ending at least 1.5” away from the apex. Fold dart as if sewing and trim excess to create dart extension.
Note: An underarm dart will interact with the side zipper, so it’s not recommended for bulky fabrics. Placing your dart below the zipper mark will make the zipper installation easier.
Now, on to the SBAs:
SBA: Waist gathers
This SBA will remove bust fullness from the waist gathers only.
On pattern piece, draw a line to the left of Line A that is (X) distance from the cut edge.
Rotate the right hinge over the right until the apex is touching the newly marked line. Tape.
Slide the separated lower right bodice piece under the other pieces so that the bottom edge is aligned with the new bottom edge of the hinged bodice and the right side is aligned with the fold edge. Tape. Blend any jagged edges.
Note: If the distance between the waist gathering points is now less than 1”, you will need to continue below to transfer some of the adjustment to the neckline. This is because that space is meant to be 1″ when attached to the yoke.
If the distance is 1” or just a little bit more, you can eliminate the waist gathers while sewing and just ease the bodice into the yoke.
SBA: waist and neckline gathers
Proceed as above, but stop before you tape down the lower right piece. Slash along line C to but not through apex to create a hinge.
Rotate hinge upward until overlap is roughly even with waist overlap. Tape.
Note: Once you rotate so that the distance from the neckline dot to the center front is 3”, you’ve actually eliminated the neckline gathers. So keep that in mind (and now that you know, you can do it on purpose if you want.)
Slide the separated lower right bodice piece under the other pieces so that the bottom edge is aligned with the new bottom edge of the hinged bodice and the right side is aligned with the fold edge. Tape.
Blend any jagged edges.
quick reference
This is a quick reference for all the adjustments covered in the post, in case you find it helpful:

For any of these bust adjustments, there is no need to do any alterations to the sleeve piece, because by hinging at the raglan stitching line we did not affect the length of that edge, only the shape.
I hope this was clear and not too overwhelming or confusing. Again, I think it’s actually really fun to play around with all the different rotating configurations you can do. Keep in mind too that the initial measurements and numbers are not a 100% foolproof exact science because everyone carries their length, width and weight differently. It’s always a good idea to do a muslin, but especially do one if you do any drastic pattern alterations.
Other general fit and cutting info is covered in another post published today, so be sure to check that out too.
Please comment below if you have any questions!
Comments
Ahh! I’m so excited! splitting the gathers for a FBA sounds like exactly what I need! I was so worried I was going to look silly in this dress but it sounds like an excellent fit is more than achievable.
I really tried to make myself wait until I got home from work to read this post, but I couldn’t. Thanks for the detailed instructions – I am excited to finish work and go home and try! Although I am sad to learn that the waist and neckline gathers might be collateral damage to the SBA since they are such a nice feature of the dress. Oh well, what can you do…
You can always try doing slightly less than the adjustment you need to keep some of the gathers!
Okay, let me preface this by saying that I have made a Hawthorne dress and followed your excellent directions for a small bust adjustment on that dress and had good results.
But, I’m confused when I go to measure the “high bust” and “full bust.” Basically, my high bust is one inch LARGER than my full bust. Does that make any sense??? You say it should be a difference of 1 inch for an A cup (which I usually am, in bra size), but does it matter which direction that difference is? Like, should your full bust be larger than your high bust or does it matter?
I’m guessing that I get this measurement because I have a broad back from swimming so much and quite a small bust. So, how does that translate to making adjustments in my pattern? Is there a “broad back” adjustment I can make? should I still do a SBA?
Clothes tend to feel tight across my back and arms, and get tighter across my back when I move my arms forward.
I’m pretty novice when it comes to making clothing but am so excited to have these sewalongs to help me through the steps!
Yes, an A cup means the full bust is 1″ bigger.
But as your comment illustrates, everyone carries their measurements differently! So you probably don’t need as drastic as a SBA as your measurements alone indicate, since you say you have a broad back. And so it totally makes sense that this would make your high bust bigger.
I would start by doing whatever SBA you did on the Hawthorne. In fact it’s a very similar process, we’re just removing fullness from gathers instead of darts. Then you can add some width to the upper back by adding some width at the back raglan edges on both the bodice and sleeve.
This is great! Had to read it through a few times before i could visualize it, but when light dawned I was so excited. My problem has always been in the neckline shoulder area. I have a 2.5 inch difference between upper and full bust which sees too miniscule a difference to bother with, but even though the bust fit perfectly, I am still always left with gaping, loose necklines. Can’t wait to see if this adjustment solves my problem. Can I do all the adjusting in leg C and none in A-B?
Yeah I wouldn’t do anything for a 2.5″ difference, bust wise!
If you take some of the adjustment out of Line C, your neckline will still be the same finished size, because the bust adjustment just decreases the *fullness* of the gathers. So you take out some of the excess fabric, but then the area between the dots is still meant to be gathered down to 6″, giving you the same size (but less full) finished neckline.
To make the neckline smaller, you can take a wedge out of the center front, and then move the dot over the the left by the same amount. This will keep the same amount of fullness in the gathers, but it will remove length from the finished neckline. There are some visuals of this in the other post today, in the narrow shoulder section:
/dahlia/dahlia-general-fit-and-cutting
I hope that makes sense!!
Thank you Devon. This is so good, fabulously clear! I think my pattern making geekness might have been unleashed.
YAY! embrace your inner patternmaking geek! :]
Thank you so much for such a thorough and detailed explanation! I can’t wait to get started on my muslin now that I understand the best way to do an FBA on this style. Just one I don’t like the look of gathers at my bust at all and want to convert them to pleats, can you give me any suggestions to help me figure out where to place them and how deep they should be?
(Sorry, that was meant to read “Just one question: I don’t like . . . )
Hi Wendy! The easiest thing to do would be to convert the excess fabric of the gathers into pleats as you pin the bodice to the yoke. There are some pictures of this process about 3/4 of the way down in this post:
http://lladybird.com/2014/06/30/oal-attaching-the-skirt/
I think they would be flattering in the same place as the gathers! Or, you could open up the side seam as if to add the dart, but pleat there instead. When pinning you can experiment with pleating towards the center or away from the center and see which one you like best visually.
How big the pleats are and how many will depend on how much extra fabric you have. I think pleats that are 1/4″-1/2″ wide [finished width, so all the folds stacked] would look nice!
Thank you so much! That Lladybird post made it out to be much simpler than I thought it would be. I hope that stitched-down pleats will lay flatter over my chest than gathers would. (My full bust is 12″ larger than my waist, so I prefer not to have any unnecessary volume in that area.) Your answer was really helpful and I can’t wait to get to work on my muslin tomorrow!
Thank you for posting this. I always have to do a large FBA and I was glad to see that I can get by without a side dart. My question is about finding the bust point. I am not sure when I hold up the pattern piece, exactly where / how high up to hold it. I have not done a raglan sleeve before so I am used to a defined shoulder seam. How high up on the side should the armhole sit, or is there another reference point?
Hi Teresa! On the raglan edge, from about the notch down to the side seam is the same shape and placement as a normal bodice piece. So I usually use that and the side seam as reference, taking into account the seam allowance as usual.
Hi Devon! I just wanted to say thanks for the line drawings, they really help clear up the nuts & bolts of what’s going on without all the distracting extra marks and tape. I’m not sure if I’m ever going to need those adjustments myself, but your schematics will make it easy to visualize if I do!
Oh good, I’m glad they were helpful!
This is my first Colette pattern, and my first sewalong! I was thinking I’d need to do a full bust adjustment (I’m just used to the idea of having a full bust), but my upper bust is 38″ and full bust is 41.5″, so that puts me between a 12 and 14. Does it make sense to try the 14 in a muslin and just adjust the waist and neck gathers to deal with extra half inch? I have broad shoulders. Thanks!
Yes, I think that sounds like the perfect plan!
I am SO glad to finally see adjustments for raglan. Unfortunately, I purchased a raglan pattern in my full bust size and not the upper bust. So, to save $20, how do I reduce the arm seam?
Do you mean the Dahlia? All the sizes come in one envelope so you are set!
Hi,
This is so awesome. I am learning so much from the tutorials and comments : ). So, as I am rather new to pattern adjusting, I had a few possibly dumb sounding questions. But, I am just so excited to actually learn this!
First, are FBA’s just for when a pattern needs to increase in inches and SBA for when it needs to decrease? My bust measures 36.25 and my upper bust measures 34.75. I chose size 10 (38.5) and doing the math it looks like I would need to decrease by 1 1/8 on each size. This seems like a large amount but this would be a SBA, right?
Also, when I choose a size based on an upper bust measurement that is 3/4 inches larger than my own, will the neck gape? Also, I don’t feel like my bust is as small as the measurements are making out (I usually wear a B cup), could this mean that I have more inches on my upper back? Would that effect how drastic an SBA I would make?
Also, where should the bodice piece hit, the waist? (Like, how to you know it needs to be lengthened or shortened?
Finally, do all patterns assume a 3” bust difference?
Thank you SO much for enduring all of these!
Jen
No worries on the questions! Firstly, yes, a FBA would be when you need to add inches to the full bust, and an SBA would be a decrease.
It sounds like you are right in between sizes, which is probably what’s making the SBA amount seem inflated! When you are measuring, would it be comfortable enough to go down a size? Without seeing you, I would recommend trying the 8 and not doing anything to the bust, and seeing how that goes (for a muslin). Since the neckline is wider on the Dahlia, going a half size up from your measurements might make the neckline too big.
Also generally when measuring yourself, try to round to the nearest half inch, that will make things easier!
The bodice piece should hit just under your bust. On a bodice with set in sleeves, you can measure from the shoulder point down, but on a seamless raglan there isn’t really a shoulder point on the pattern piece so it’s a little trickier to figure out. You can start by just thinking about your ready-to-wear clothes – are things usually too short? Too long? By how much? If not, or you’re not sure, then I’d do a muslin without lengthening or shortening and go from there.
Most pattern companies actually draft for a B cup, which is a 2″ difference. But you should always check to be sure. It usually says on the website.
Hope that helps!
That helps tremendously. Thank you : ). So when I use the measuring tape to take in the upper bust measurement to 34″ it is quite tight. I will go ahead and do the size 8, but do you think I will need to take it out?
You can always just baste your muslin together (so just use a really long stitch length) so that you can undo it really quickly if you want to try letting out a seam! Since you’re right between sizes it’s a little hard to know how exactly it will fit you until you make one up.
Ok, so muslin bodice is complete. The first thing I notice is the shoulders falling off, but pinning the “hollow” area you mentioned seemed to help. But the fabric on top of my shoulders still puckers up. Making small darts seemed to help. Do you recommend this? The back seems perfect and when I tried to pin the raglan sleeve and bodice area it seemed to pull the dress strangely.
Also, I am not sure if the bust should be taken in. There seems to be a fabric canyon between my breasts. Does that call for an SBA or is that just part of the dress? Or could I just gather a wider portion.
Thank you so very much!
So sorry for not commenting sooner, I somehow missed your reply!! Feel free to add a shoulder dart on the top of the shoulder if that helps mold it to you shape a bit better, and if the rest of the bodice is fitting you and you don’t want to mess with it.
The fabric canyon is probably just the gathers. So yes, you can gather a longer stretch of the bottom edge if you’d like your gathers to be more spread out. But gathered tops in general have a way of fitting close to the body right at the center. Unless there is a lot of baggy extra fabric across the full part of your bust, you probably don’t need a SBA.
Hope that helps!
Hi! It is my first time of using Colette patterns. My bust measures 35.5 inch and upper bust 32 Inch. Difference is 3.5 inch. Hips are 39 Inch and waist 28 Inch. I am almost the perfect for size 6. May I chose the size 6, i think it will fit in the hip area? I think I should not do any bust adjustments. That would be right?
Yep, that sounds great! You should be fine in the hips with 39″.
Hi Devon,
I’m doing my muslin with the hope of wearing it, and then making 2 more if I like the pattern, and whilst I’m hoping to make one of the others in variation A, since ALL my material is actually in light cotton or cotton-linen, I was thinking of doing the bodice/sleeves from Variation A but the skirt from Variation B, but wanted shorter sleeves. Someone mentioned this raglan sleeve variation (http://www.oneaviandaemon.com/how-to-make-raglan-cap-sleeves/) but I wanted slightly more of a sleeve. Could I simply cut the sleeves shorter, or does the pattern not suit that?
Cheers :)
Sure, you can just cut them shorter! Just figure out how long you want them – it’s easiest to measure based off the sleeve seam, so the underside of your arm – and draw a line straight across. Remember to account for seam allowance at the top. If you’ll be finishing them with bias tape as the pattern has you do, you don’t need to add any allowance to the bottom edge. If you’d rather hem them, remember to add that to your measurement.
Yay, excellent! I think I’ll bind them, that way I can gather the outer edge of the sleeve a little if it suits :)
Devon, how short could I theoretically take it with the sleeve before it starts not fitting right? Could I take it as far up as the underarm hole, for just a little capped sleeve? Would I then be binding around the edge, and under the arm of the bodice? Would that work!??!
I think it’s probably better if you either have a little bit of an underarm seam, or do a partial cap sleeve like in the tutorial above and bind in the round. To have the raw edges of the sleeve meet right at the underarm could make a weird binding situation.
If you *did* want the edge of the sleeve to meet right at the underarm seam, it might be better to fully attach and topstitch the bias tape at the end of the sleeve first, then sew the side seam. Then they could meet at more of a point than a round opening. Like on this dress:
http://1.bp.blogspot.com/-6BibZahoh6c/USPrNVmOzOI/AAAAAAAAJKs/Rg7G-rilPII/s1600/Jaime-Amelia-dress-green-bee2.jpg
That’s the length I’m thinking of, but I might leave a little edge to join to the bodice and see what it looks like. I was thinking about doing a small cap like the tutorial, but I think I’d like a *little* more sleeve. Thanks so much for the advice Devon – you’ve been amazing :)
You’re welcome! Can’t wait to see! :]
I have question about the SBA. I have a similar situation to Katherine’s comment above (with the upper bust as one inch larger than the full bust), but I do not have a broad back. If, as your directions suggest, I should choose a dress size based on my upper bust, I would choose a size 4 (32″ upper bust plus 3″). However, all of my other measurements match a size 0 dress. Should I choose the size 4 for the bodice and simply grade the other pattern pieces to fit my waist? I made the size 0 in the Hawthorne without the SBA and definitely had problems with a baggy bust area and tightness in the front of the shoulders (but not across my back). Thanks! Looking forward to making my Dahlia in a beautiful purple wool crepe.
Yes, it sounds like that’s exactly what you should do! Especially since you already made a Colette pattern and had tightness in the front of the shoulders. But I’d definitely do a muslin before you cut into your pretty purple wool crepe. :]
Hello Devon.
I am trying to do a SBA for the first time, but I am having problems with the waist. I actually need to go from a size 14 to a size 16 waist, with my adjustment to my bust being 1″. When I take this away, my waist is then too small. How do I get my waist back out to the right length. It seems to be counter intuitive to take something away and the put it back in?
thanks
steff
The waist edge has gathers, so you are not changing the finished length of the waist edge, you are only taking away some fullness from the gathers. The distance between the dots will end up being gathered down to 1″. So you would cut from a 14 out to a 16, and then do the SBA. As long as the distance between the dots is not less than 1,” you haven’t actually changed the finished length of that edge, you’ll just end up with less full gathers.
Hi! This is my first dress! My upper-bust and full-bust are both 35″. Does that mean I should make a size 10 bust minus 1.75″?
Also, I have a 29″ waist and 39″ inch waist, so I imagine I’ll do the rest in size 8, correct?
Thank you!!
Yes, that sounds right.
Hi!
These are definitely useful to know. I am about to attempt this dress but know I will have to amend the bodice.
My issue comes that while I fit into size 12 measurements, I have a large bust. I don’t find FBA’s work as it isn’t the extra room I need, it is the length that is the problem. Being a G cup (UK sizing), i often find I have to add 2/3 inches to the length of the bodice and then add a dart. Do you have any suggestions how best for me to do this?
Thank you for your help!
Hi Emma!
Doing a FBA actually does add length as part of the adjustment, since a larger bust means that more length is needed as well as width. So it sounds that by lengthening and adding a dart you’re sort of doing your own version of a FBA.
If you don’t want to do a FBA as detailed above, the best way to make changes is to muslin the yoke and bodice and go from there. If you find that you almost always lengthen a bodice by 2-3″, then it’s probably a safe bet you’ll be doing that to your Dahlia, so you might as well do that pattern change before you start the muslin.
So I’m not sure if this is the right post to ask this, but I figure it’s close enough. I made my first Dahlia, and it fit pretty much out of the box, except for a BIG gaping back neckline–we’re talking a good 1.5 inches. I could just gather it like the front, but I’d prefer not to. Would it be okay to take out .75″ from the neckline and blend that line down to the bottom of the bodice (making a new center back) or would that screw up the grainline? I like the simplicity of the bodice lines, and would prefer not to make it too complicated since the fabric for my Dahlia 2.0 is going to be the star (a delicious b&w houndstooth that drapes like a *dream*).
My first today: I got into the bodice with a SBA adjustment, and it was so tight I couldn’t get out! Ha! I had to rip the front bodice and cut myself out of the rest to save to use with the next muslin. My measurements indicate I’m a B cup at most (which is consistent with my bra size), but I’ve come to realize my bigger issue with Colette Patterns is that they are drafted so wide at the shoulder–what I really need is a narrow shoulder adjustment, particularly narrow back. I see above something about adding space at the raglan sleeve for a broad back, so I shall do the reverse for a narrow.
Hi there! I don’t know if the sewalong closes to comments, but I thought I would ask anyway. It has taken me this long to get over the disappointment. Darn high expectations I have for myself!
I made the dahlia with an sba and a length adjustment to the top. The front turned out pretty well, though I think I should have tried harder with the gathers.
My main problem was that the back was positively hanging off of me. I really wanted to wear my dress and the morning that I did, I sat down at the machine and just added (badly placed) side-back darts that took out another two inches from the back of the dress.
What happened?
More specifics:
I cut the sz 8 top with raglan sleeves (the shoulder mods came out smashingly, I’m happy to say). I did an sba and took 1 inch out (so 2 inches total – should be more I guess). (34 upper and 34 full bust measurements)
I cut an 10 yoke and skirt (my waist is 30.5 and hips 40)
Like I said, I ended up taking another 2 inches out with darts in the back – The darts were 4 1/4 in long above the yoke, through it, and on down another 4.25 in.
So, I guess I should have cut a smaller yoke and skirt. But why did I still have to take so much out of the top?
I followed seam allowances more carefully than ever!
Please help :-)
Any recommendation for what to do when your high and full bust measurements are the same? Not sure how to work with the “How much do I adjust” information above but I do find that a pattern that fits across the bust there is excess in the high bust area (like I could add a diagonal dart from the mid shoulder heading down to the bust). Clear as mud? Thanks!