

This post covers finishing the sleeves and neckline for Version 1. We’re almost there!
Before we get started, a quick note: The pattern calls for 1/4″ double fold bias tape, meaning the finished width is 1/4″. Since my fabric is on the thick side and I have a lining, I wanted to make sure my binding had enough width to go around all the layers, so I made 3/8″ double fold bias tape, meaning I cut my original bias strips 1.5″. Feel free to do that if you’d like a wider binding, although you probably don’t want to go much wider than that because it won’t lay flat around the sharper curves.
So that’s why the bias tape in the photos might look wider than yours, in case you are wondering!
Finish the sleeves
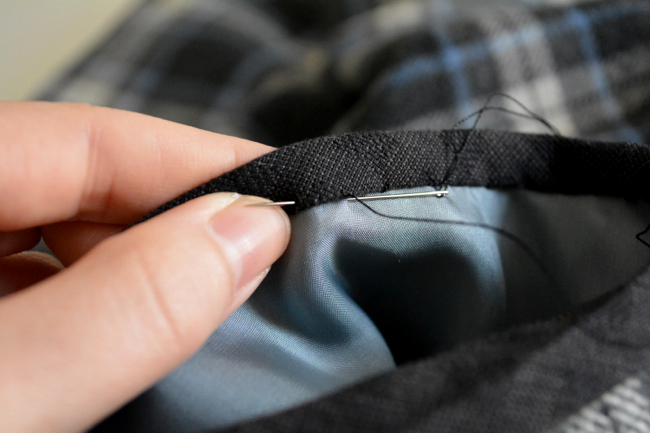
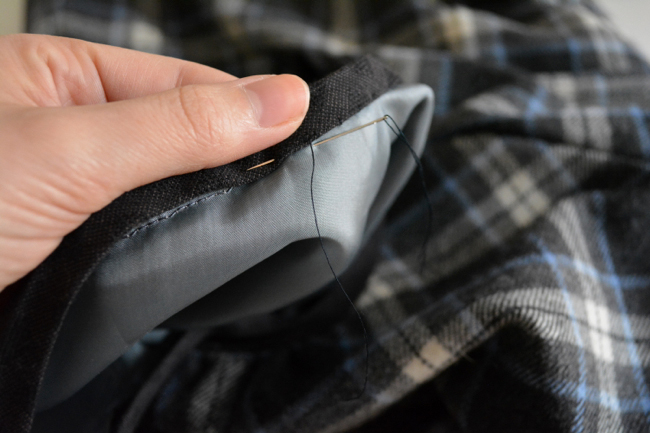
1) Stitch bias binding. Fold the bias tape along its creases so that it is enveloping the edge of the fabric and just covering the stitching line on the inside. Hand stitch it down to secure. If you don’t have a lining, use a slip stitch, meaning you’re taking up just an alternating small amount of the fabric and binding with each stitch and hiding most of the thread on the inside.
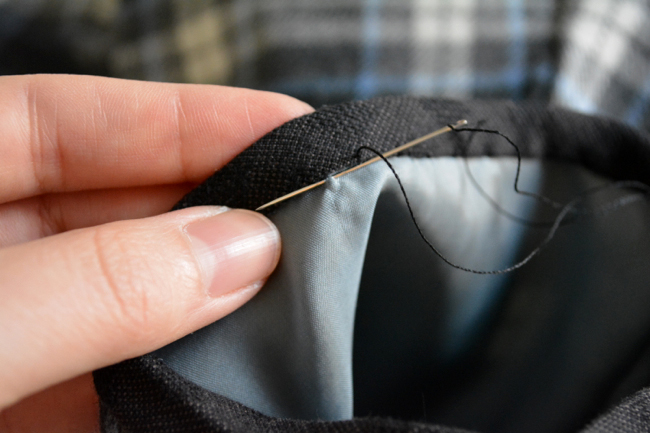
If you have a lining, you can use a fell stitch, meaning that you hide most of the stitch between the lining and shell and take up a bit of the binding with each stitch.
For more in depth photos of hand stitching, check out this post on The Coletterie.
Repeat with other sleeve.
Attach Neckline binding
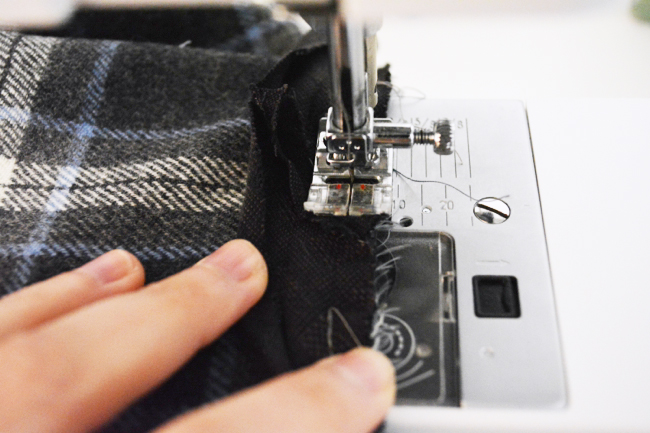
1) Sew basting stitches. On the front neckline, sew two rows of basting stitches at 1/8″ and 3/8″ between marks. Don’t backstitch and leave tails long.
2) Gather neckline. Pull basting stitches until distance between marks measures 6″. Wrap threads around pins in figure 8’s to secure.
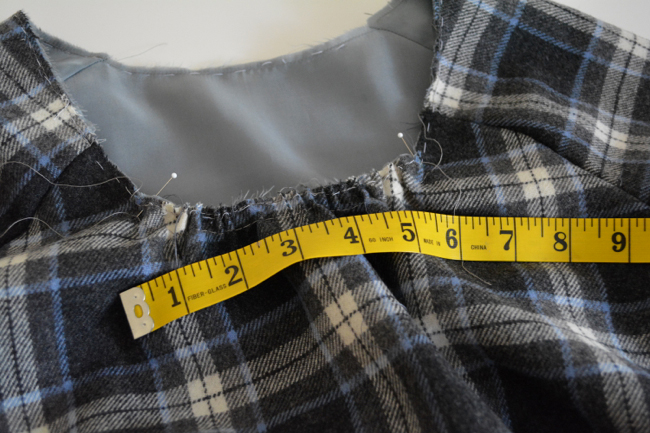
3) Pin bias tape. Cut a piece of bias tape that is 10″ longer than your neckline. Find the center. Open the bias tape and pin the center to the center front bodice, right sides together.
Tip: Mark a 6″ distance on your bias tape so that you can be sure your gathers aren’t moving around and changing size while you’re pinning.
Pin all the way around the neckline, leaving a gap of several inches in the center back and letting the tails remain long and free.
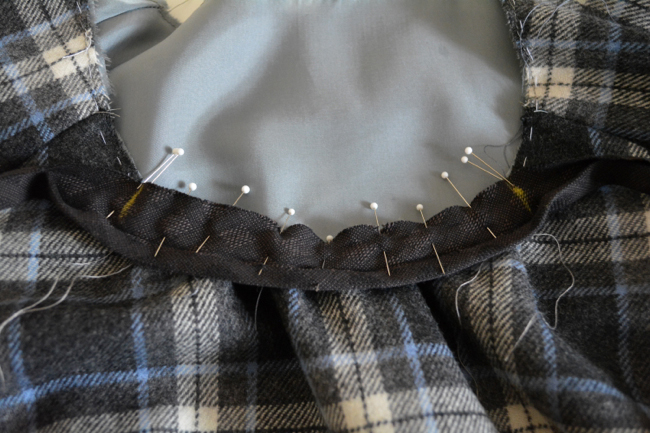
4) Attach bias tape. Stitch bias tape to neckline, sewing in the fold closest to the edge. Be sure to leave the gap in the back.
Remove visible basting stitches.
Join binding
One option to join the bias tape is to simply sew straight across the binding at the center back. When you refold the bias tape, however, this will pile all of the seam allowance in one place, and it will be very bulky. To prevent this, you can do a diagonal join instead.
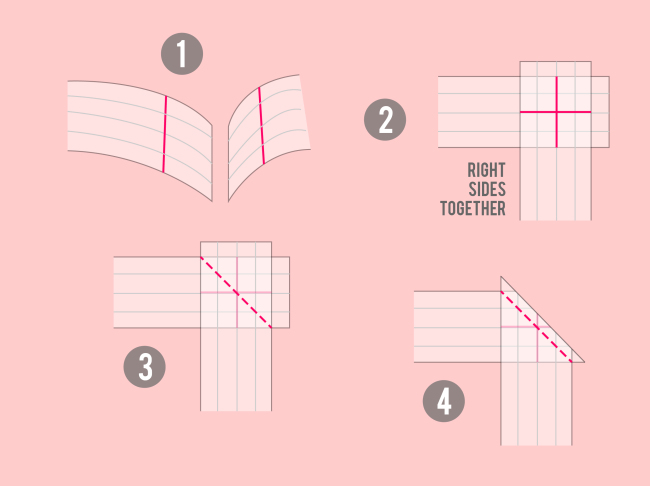
Due to the nature of this process, it’s a bit hard to see what’s going on in the pictures (unless you have x-ray vision!), so at the end of this section is an illustration of all the steps.
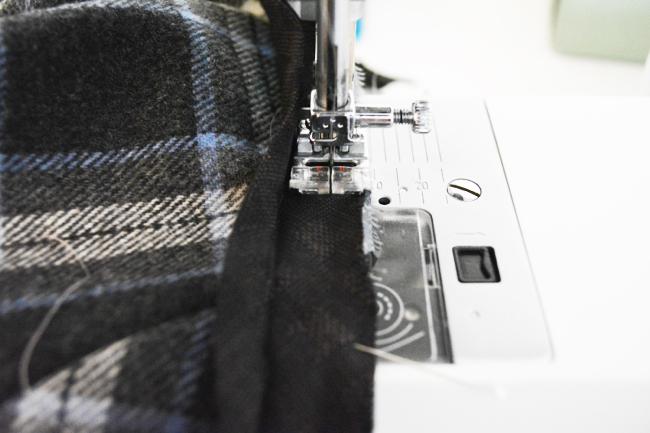
1) Mark binding. On each free bias tape tail, mark its position at the center back. Draw a straight line across the bias tape at this point.

2) Pin binding. Open bias tape all the way and bring them right sides together, being careful not to twist. Rotate them so that they are at a 90 degree angle and the two straight lines intersect in an even “X”. Again, refer to the graphic at the end to see a transparent view of this step.
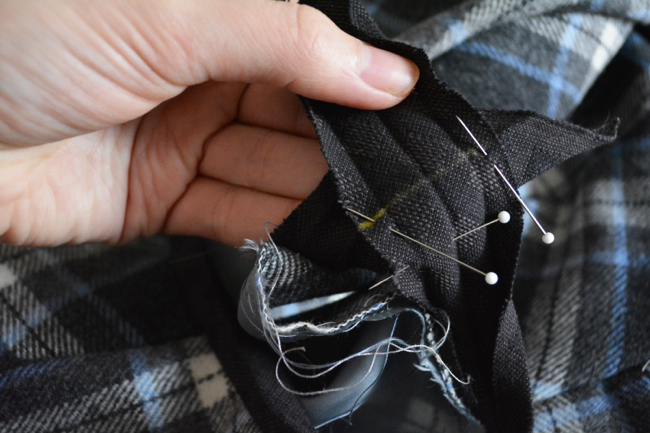
3) Stitch binding. Draw a diagonal line across the binding from corner to corner as shown. Stitch along line to join tails.
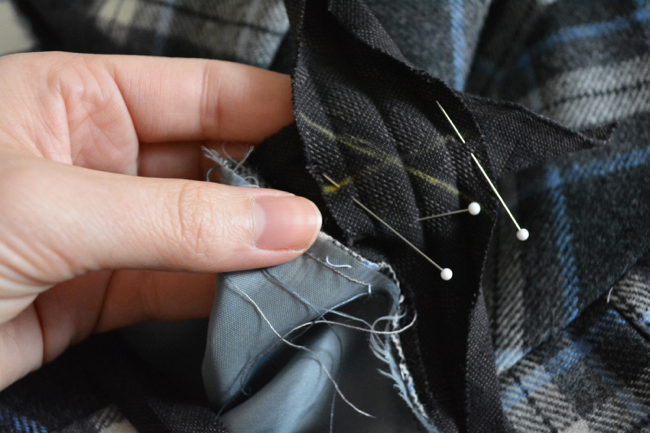
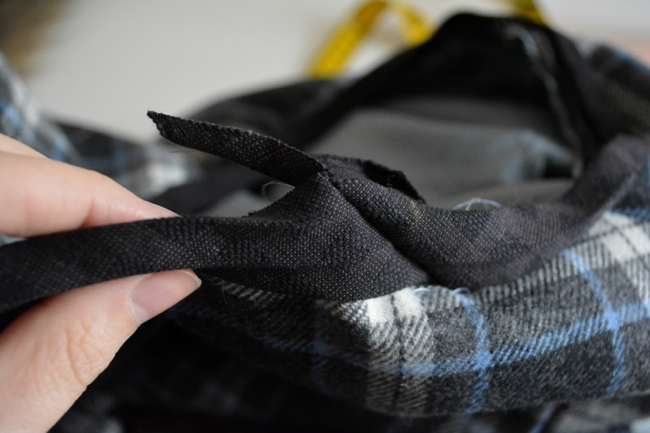
4) Trim binding. Before you trim, check and make sure that you’ve joined the tails properly and without any twists. Once you’ve checked, trim the seam allowances down to 1/4″ and press open.
Here are all the steps:
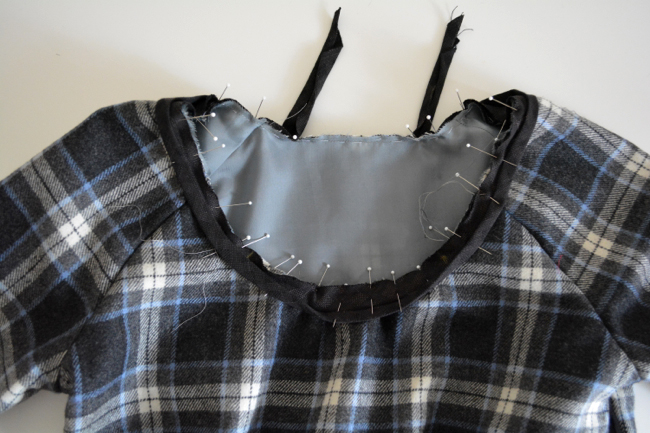
5) Finish attaching bias tape. Stitch the remaining free portion of the bias tape to the neckline between your starting and stopping points, again stitching in the fold closest to the edge and backstitching at the beginning and end.
Remember, if you find the diagonal join to be too tricky, you can always just sew straight across your bias tape.
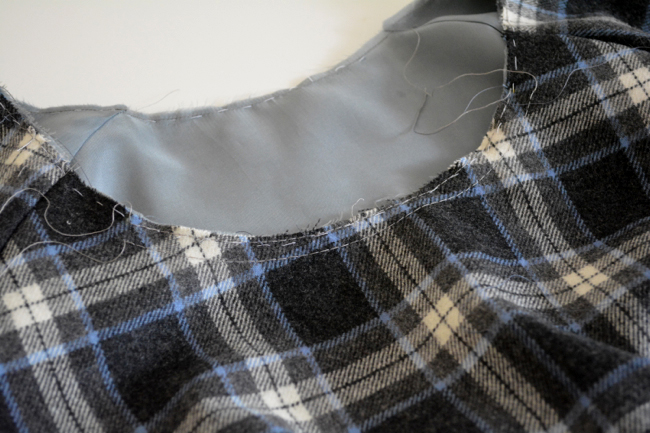
Finish neckline
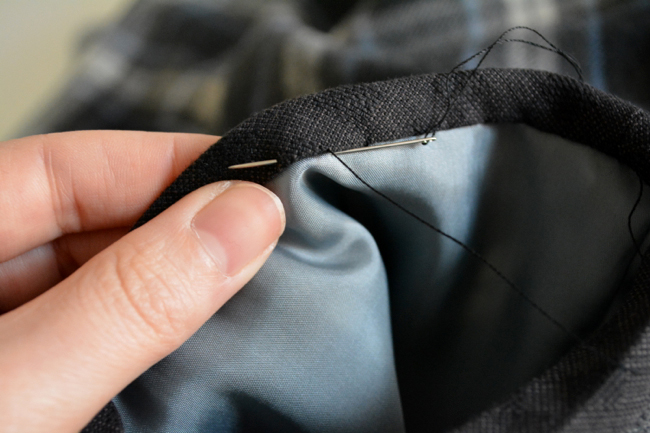
1) Hand stitch binding. Using the same stitching method you used on the sleeves, fold the binding around the neckline and hand stitch in place.
Almost there! We’ll be taking the rest of the week off for Thanksgiving here in the U.S., so see you back on Monday to finish everything up!
Comments
Thanks for the tip on joining the bias tape. It was a bit tricky, but once I figured it out, it worked and was totally worth it!
Oh good, glad it helped!
Hi Devon,
I’m finishing my Dahlia up today and the back is a bit gapey. For my muslin I’ve just popped in two vertical darts (a shallow “D” shape) right above the dart placement in the waist and just gathered in a pinch above the D-shape darts in the neckline, which has improved it greatly, but how would I do this short of adjustment in the raglan sleeve? Is it a “narrow shoulder” adjustment I should be looking at? it’s just in the back, the front is fine. (although instead of gathering, I’ve given it a square neckline with two small gathers around the points where the gather stitches are supposed to start.) (apparently I can’t help fiddling with the shape!!)
(you also helped with with an idea of what sizes to cut in the bodice, the yoke & the skirt, and they’ve all worked, right down to the point that the yoke is slightly “snug” which is exactly what we agreed would happen! So thanks so much for that!)
Perhaps take in the raglan seam on the back only? This would be the same as trimming some off of both the sleeve and back bodice at the neckline, then blending to nothing.
You also might want to remove a small wedge from the center back.
I’m glad the other stuff was helpful!! And your neckline sounds cute!
Hi Devon,
I’ve been thinking it over and I think you’re right: taking the raglan sleeve on the back might be the way to go. I tried pinning the edge where the sleeve joins the back bodice in a bit, but that didn’t really help BUT I think that the curve of the raglan in the back might be a bit too pronounced for me, and taking it in will help. A small wedge from the centre back, as in across my back? Will that make the back bodice shorter than the front and will the yoke still sew on right?? I thought about shortening the back a bit, but was afraid that if I did that the yoke wouldn’t sew on right because the back & front pieces would be different lengths.
My neck line is super cute :) I’m hoping to put up a shot on the Flickr group before you share it today/tomorrow (I’m in Australia, so today, but for you probably tomorrow my time!)!!
No, you’ll want a vertical wedge. So pinch out the back center neckline at an amount that makes it lay flat, then measure the width of the pinch, then subtract that from your back bodice neckline at center back and redraw the fold line slanted back to the original bottom.
Oh, that makes a LOT more sense. Right, that will totally take away the need to tuck in the back neckline. Thanks Devon :)