

It’s finally time to finish up our Dahlias!
Blind HEM
1) Press first fold. Fold the bottom edge of the skirt 1/4″ to the wrong side and press.
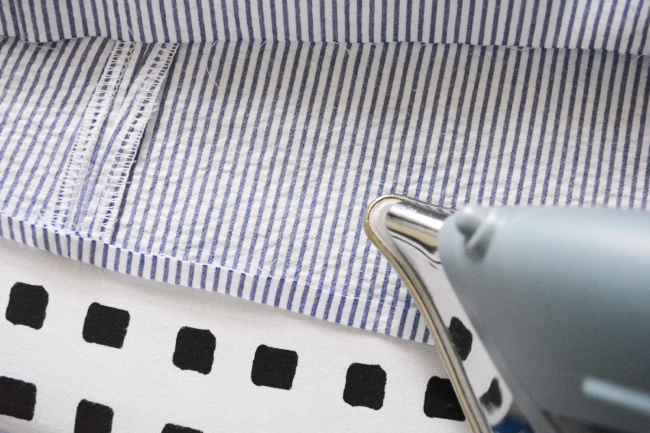
2) Press second fold. Fold the bottom edge 3/4″ to the wrong side again and press.
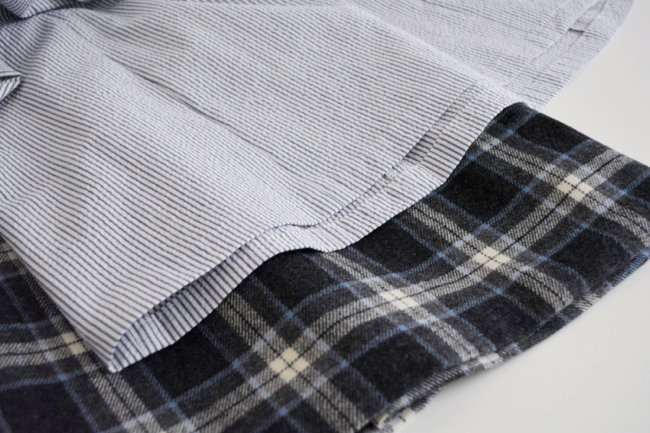
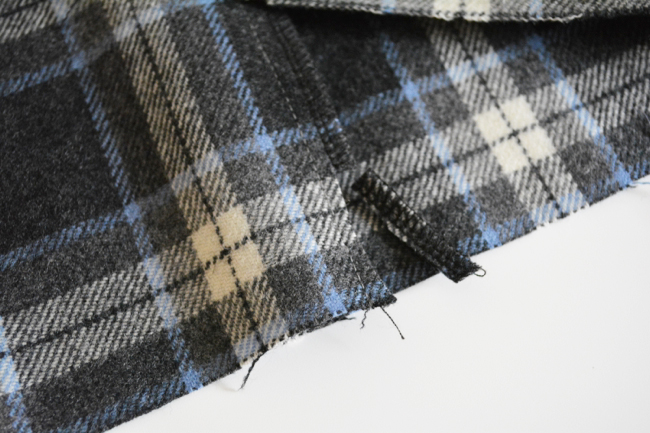
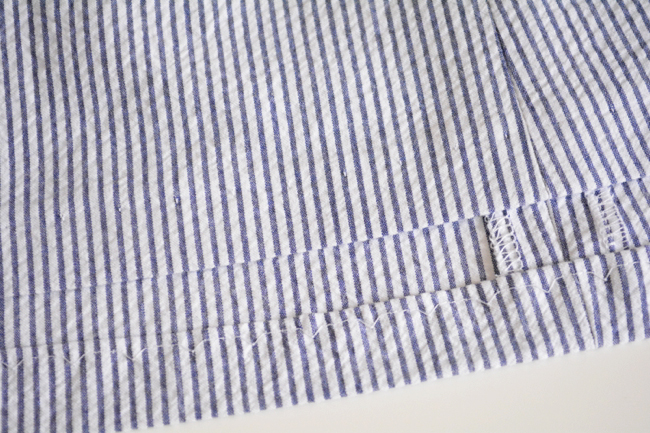
3) Version 1 specifics. If you’re doing version 1, open the kick pleat flat along the bottom edge when you’re folding and pressing the hem.
You may find it helpful to trim 1.25″ off the kick pleat seam allowance to help reduce bulk.
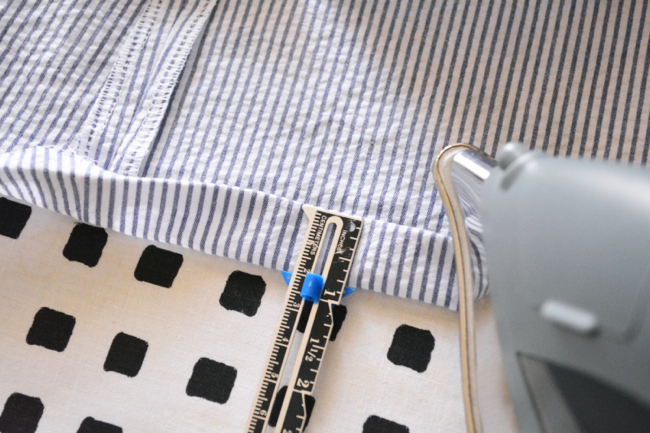
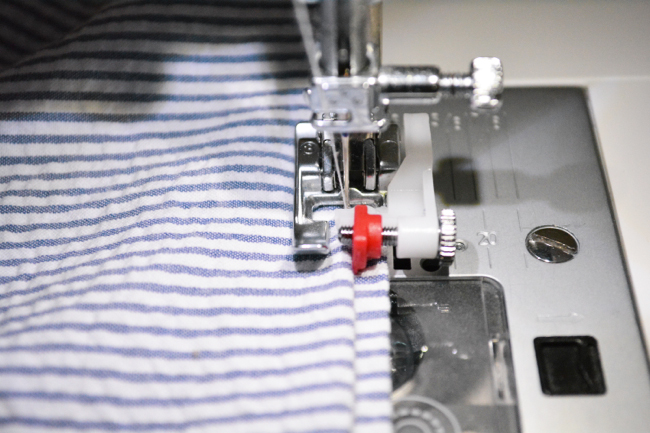
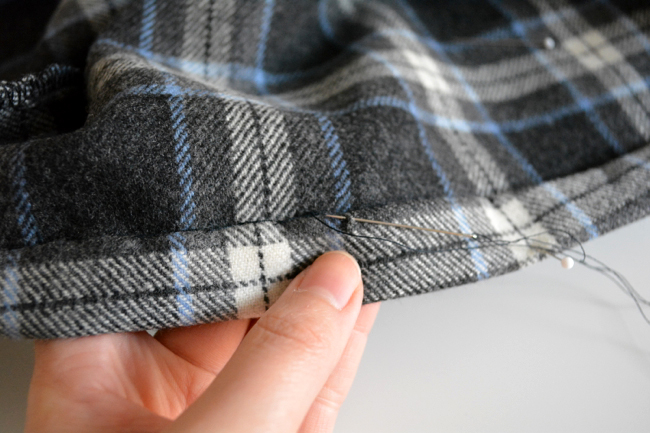
4) Fold hem. To get ready to machine stitch a blind hem, fold the pressed hem towards the right side of the skirt so that a scant 1/4″ is extending beyond the edge.

5) Stitch hem. Put the blind hem foot on your machine and select a blind hem stitch, which looks like large zigzags separated by several smaller zigzags or straight stitches. On the foot, you’ll notice that if you turn the screw, it moves a plastic piece back and forth (it’s red in the photo below). The fold of the fabric should run right along this plastic piece. The goal is to play around with the width setting and the screw position until the larger zig zags take just a tiny ‘bite’ out of the fold and the other stitches land in the 1/4″ sticking out beyond the edge.
If you’re not sure, definitely sew a test piece first.
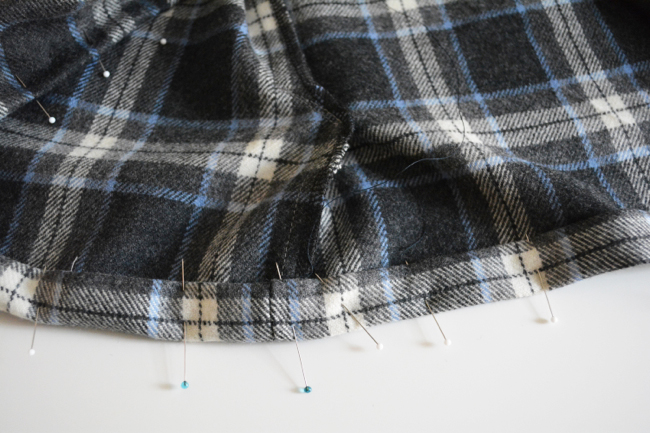
Stitch all the way around, folding the hem as you go.
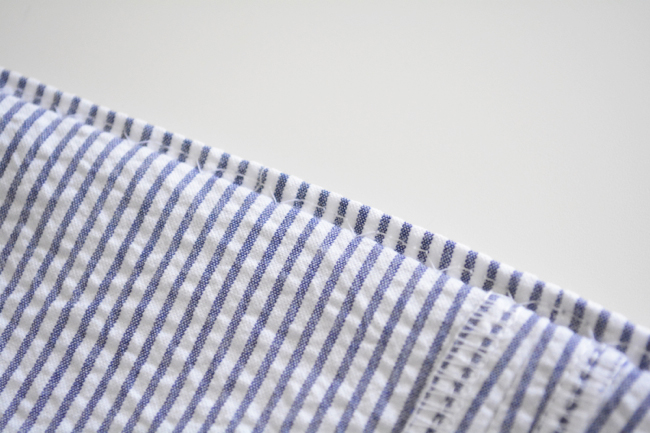
Once finished, unfold and press. On the outside, you should just see the tiny ‘bites’ as very small stitches.
Alternatively, hand stitch a blind hem. Below is a catch stitch. For more detailed photos of various hand stitches, check out this post on the Coletterie.
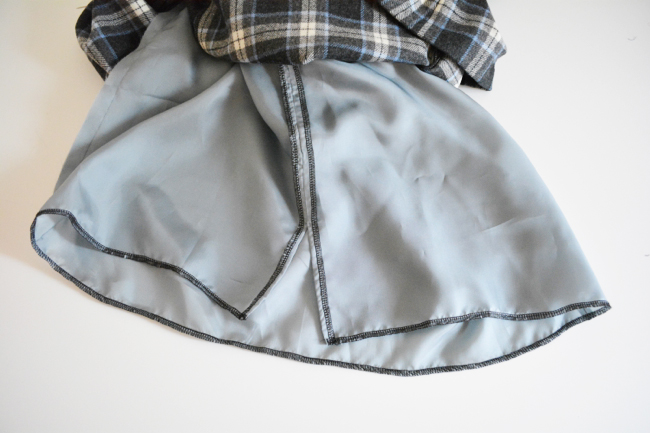
Lining
If your dress is fully lined, trim 1″ off the lining and hem it up 1″ so that the finished length is 1″ shorter than the shell. Since it’s on the inside and won’t be visible, there’s not really a need to do a blind hem; you can sew a machine stitched double fold hem.
Alternatively, just serge 2″ off the bottom edge.
FINISH
Remove any visible basting stitches and clip any remaining threads. Carefully press your dress, using a press cloth to protect your fabric.
Congratulations, you made a Dahlia! Pat yourself on the back and wear it with pride. If you finish your dresses within the next week, be sure to upload a photo to the Colette Patterns Flickr Pool. In a week we’ll publish a parade post of some of your beautiful finished work. Please comment below with any final questions!
Comments
I’m still revisiting my muslin to fine tune it before I can actually cut into my fashion fabric. I want to have a clean finished edge, no gathers at the bottom of the yoke where the yoke attaches to the waist of the skirt (tummy issues.) I’ve tried pin fitting and easing it in, but there still seems to be too much fabric in some places where it lies flat and it also does gather in others. Would I be wiser to make the waist narrower? If so, how? Any suggestions would be helpful and much appreciated. I’d like to wear my dress to an upcoming holiday party, Yikes, I know my time is limited! I feel I’ve sewn this dress at least five times. Can you help?
Hi Melanie!
So I think I’m understanding that you don’t want the gathers at the waistline? You could either pinch out the gathers and sew a dart there instead, or you could rotate the gathers into an underarm dart. Here is a tutorial for rotating a dart, except that you would slash in different places – first cut a wedge out at the gathers, then slash in from the side seam and rotate the gathers closed up open up the bust dart.
http://rustybobbin.com/blog/?p=355
Hope that helps!
Oh man. I just tried the blind hem and you just blew my mind! It looks awesome and is so much faster than hand sewing. I didn’t even realize I had a blind hem foot, so this is rocking my world!
Thank you for hosting this sewalong. I learned a lot!
Yay! Isn’t it great? I’m so glad you found the sewalong helpful!
Do you have any tips for keeping the blind hem straight and flat? Not sure if it’s a fabric issue (using worsted wool) or I need to press the hem even more flat before hemming, but in some places the hem is wavy and doesn’t lay flat. Thanks for any tips you can provide! I learned so much from this sew along and especially liked the clear instructions for the invisible zipper!
Glad you enjoyed the sewalong! If your hem is wavy, it sounds like perhaps your stitching is pulled too tight, or your hem isn’t folded evenly all the way around.
Also, sometimes wool can be stubborn to crease. Use a damp cloth when you press to help set the fabric. Another thing you can to crease wool is to mix a solution of vinegar and water and spritz that very lightly on the hem before pressing. I have to say, though, I’ve never tried that myself, only read about it, so definitely spot test it on some scraps first!
Also, when you fold your hem, make sure you are measuring everywhere to ensure your fold is a consistent size.
Thanks for the great sewalong. I learned a lot. My dress had a 6 bodice and 8 skirt which resulted in a pretty good fit except the neckline is looser and more scooped than I would like (bra straps show at the shoulder). Is the narrow shoulder adjustment what I need to do to fix that the next time ?
I also had to alter the neckline by following the instructions for narrow shoulder and then taking some width out of the top of the sleeve pattern.
Hi Leslie!
As Debbie said, you’ll probably want to do the narrow shoulder adjustment, but you could also try pinching some excess out at the top of the sleeve. Then trim that amount off the raglan edges of the sleeve piece, blending to nothing.
For the dress you already finished, you could add a small dart at the top of the sleeve, or see if taking in the raglan sleeves helps.