


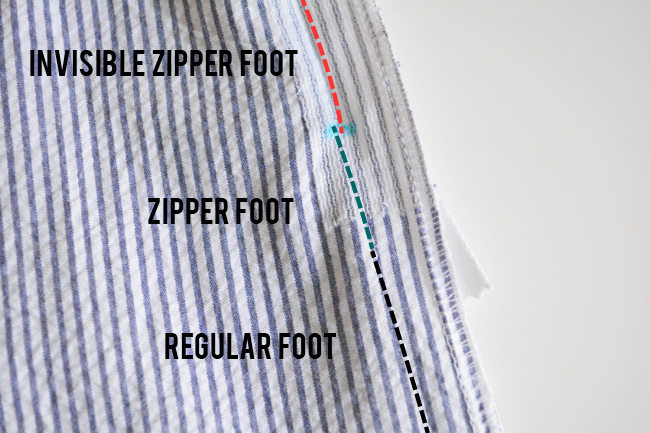
Today we are going to install an invisible zipper in the side seam of our Dahlias. Before you begin, you’ll want to find your invisible zipper foot, your regular zipper foot and your standard foot.
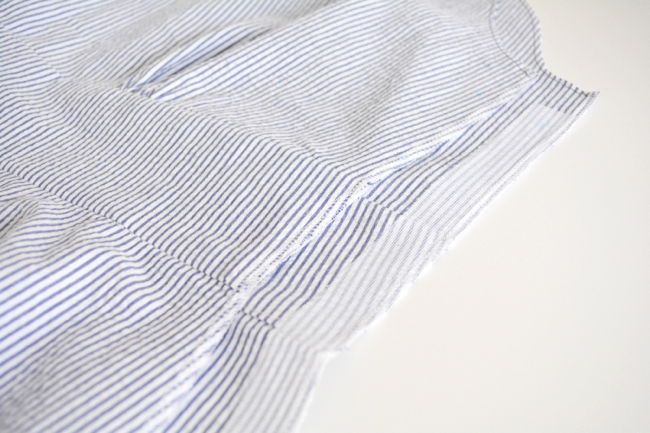
The first thing should do is finish the raw edges of the open left side seam. This is much easier to do now as opposed to after the zipper is installed. Make sure you don’t trim anything off as you are finishing, because we still need the edge intact to reference a 5/8″ seam allowance.
If your fabric is on the thin side, it can be helpful to fuse a 1″ wide strip of lightweight interfacing along the wrong side edge between the zipper placement marks. Knit interfacing works really well for this.
side seam – version 1
1) Sew side seam above zipper. Align the edges of the left side seam with right sides together. Open the bias tape and pin from bias tape down to zipper mark, aligning underarm seam. Stitch from edge to zipper mark, backstitching at beginning and end.
side seam – version 2
1) Sew side seam above zipper. Align the raw edges of the left side seam. Pin and stitch from top edge down to zipper mark, backstitching at beginning and end.
install zipper – both versions
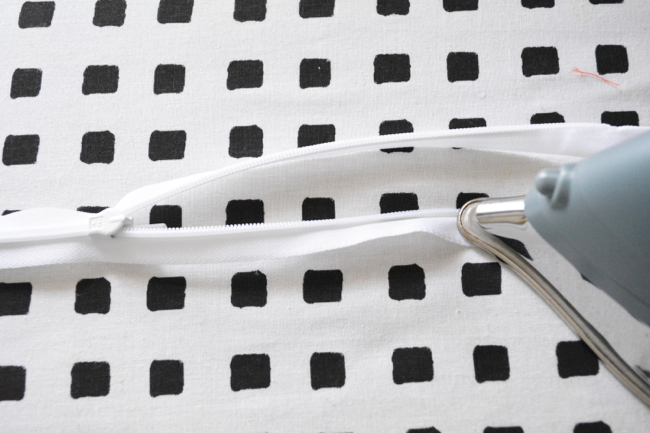
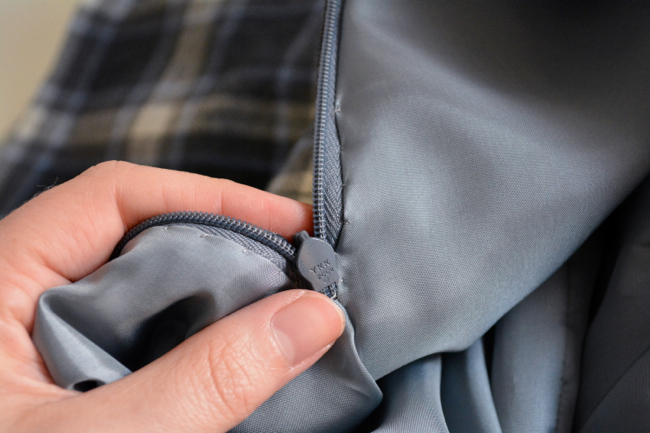
1) Prep zipper. Unzip zipper. Using a low heat setting, unroll the zipper teeth and press. This will help the invisible zipper foot unroll the zipper as you sew.
2) Pin left side of zipper. When looking directly at the zipper, find the left side. Unzip zipper. Place the left side of the zipper right sides together along the front side seam of the dress. (In other words, the zipper pull should be facing the fabric.) I’ve left the zipper partially zipped in this photo to give you a better reference for what’s going on, but you’ll want to unzip yours all the way.
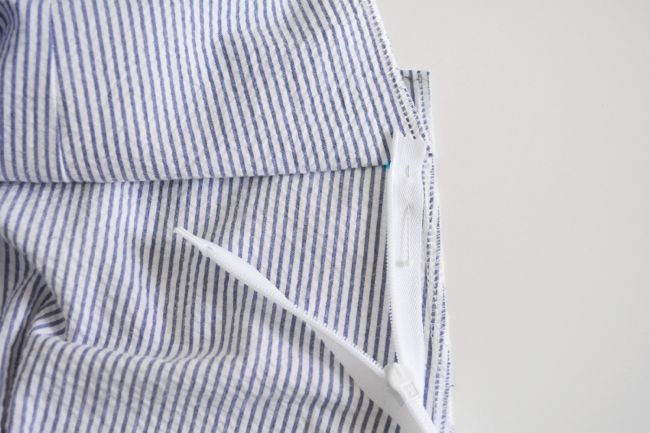
Place the top zipper stop right at the zipper placement mark. The edge of the zipper tape should be in from the edge of the fabric by about 1/4″. Pin into place with the pin head facing down as shown.
Pin the entire left side of zipper.
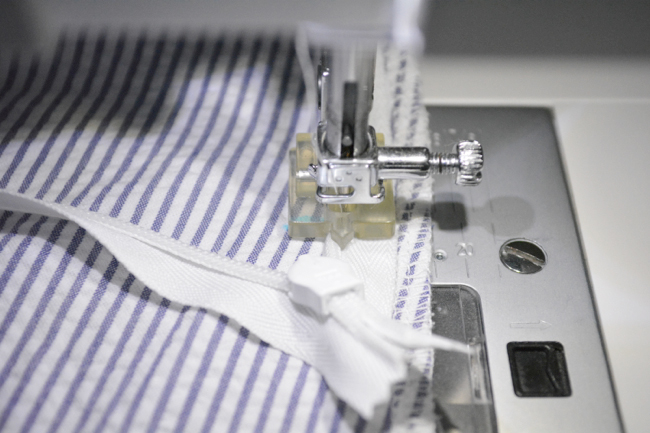
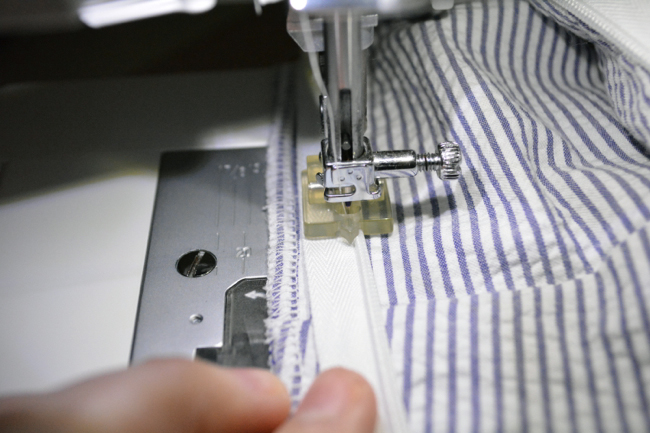
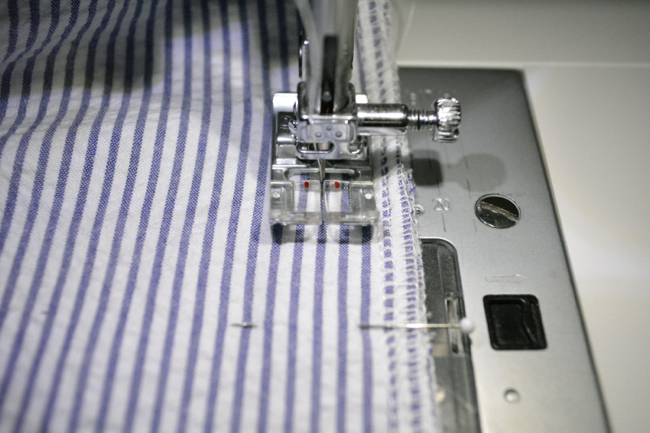
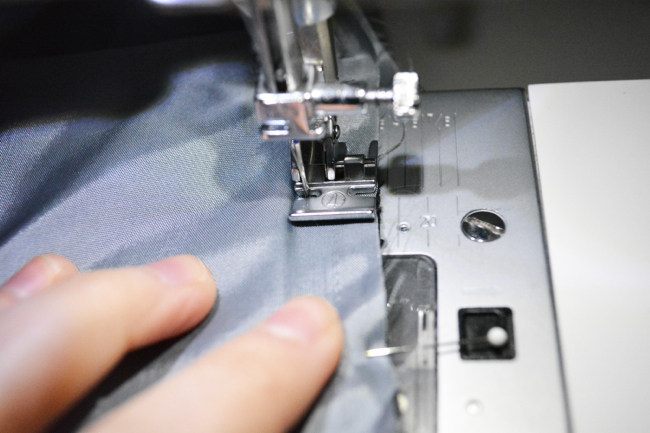
3) Sew left side of zipper. Put the invisible zipper foot on your machine. Make sure that you are set on straight stitch and your needle is centered, otherwise you could break your needle. Place the zipper under your foot with the zipper teeth unrolled and lined up with left groove in the bottom of the foot. Align the right edge of the fabric with the 5/8″ seam allowance mark.
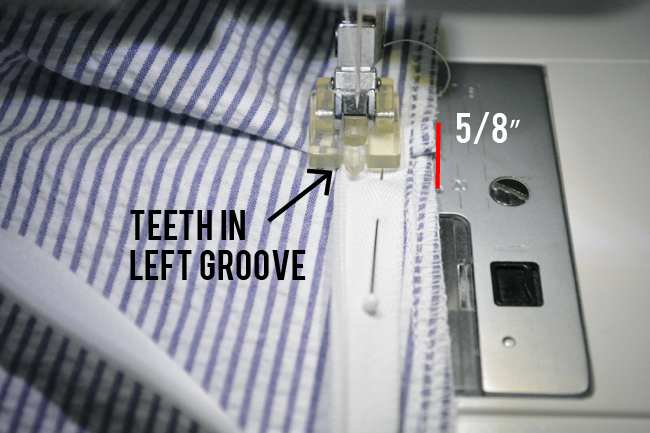
Note that the other side of the dress is folded backwards and out of the way. It may take a bit of fussing to get everything in position, but take time to get everything set before you sew.
Start your seam with a backstitch at the zipper placement mark. Continue sewing, keeping the zipper teeth in the left groove and the right edge of the fabric lined up with the 5/8″ line.
When you get to the bottom zipper mark, backstitch.
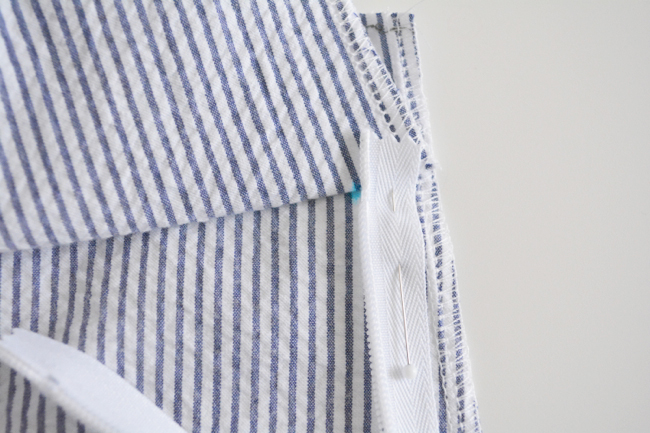
4) Pin right side of zipper. Zip up zipper. This is both to make sure the zipper will zip up properly, and also to avoid putting any twists in it when you attach it to the other side. Position it against the side seam with right sides together and pin the right side of the zipper to the side seam back edge. Don’t worry too much about placement at this point.
Unzip zipper. Position the top in the same way you did the other side – with the stop at the mark.
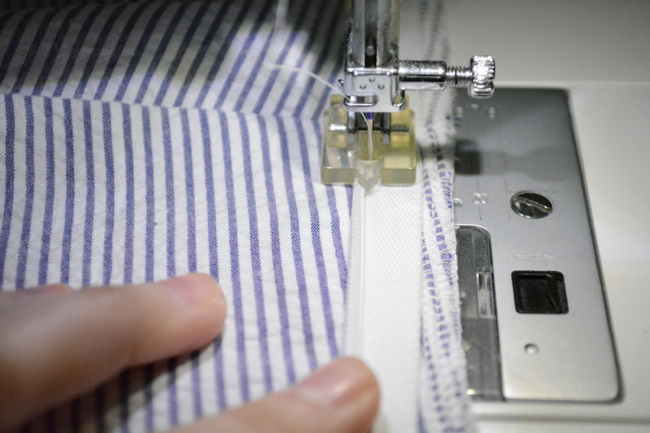
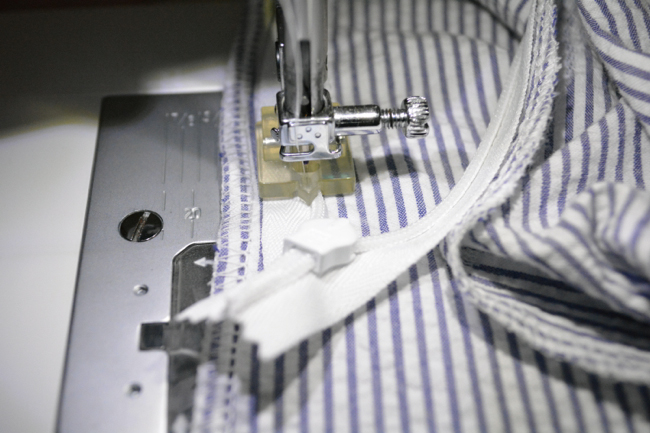
5) Sew right side of zipper. This side will feel a bit more awkward, but the idea is the same. First, find the 5/8″ seam allowance marking to the left of your presser foot. If you don’t have one, use a ruler to mark one with a piece of tape. Position the fabric so that the edge is lined up with this 5/8″ mark and the zipper teeth are in the right groove of the presser foot.
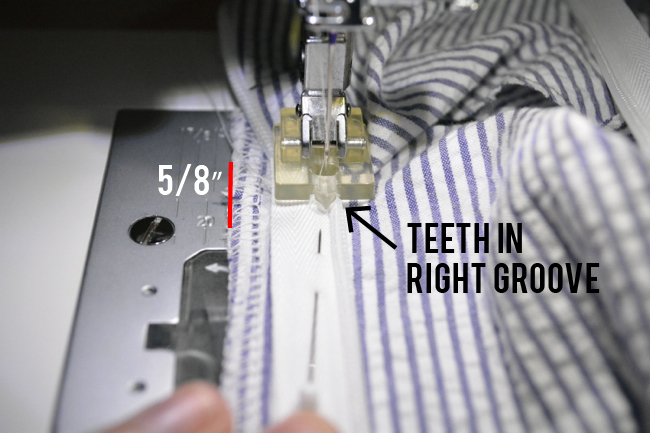
Again, the other side of the dress should be folded backwards and out of the way. You’ll need to put the dress in the throat of the machine, which will feel strange. Start at the zipper mark with a backstitch and sew along the edge, keeping the edge of the fabric along the left 5/8″ mark and the zipper teeth in the right groove.
This will feel a little weird because it’s unusual to use the seam allowance markings on this side of the foot, but just go nice and slow. When you get to the bottom zipper mark, backstitch.
Phew! Take a deep breath.
Sew rest of side seam – both versions
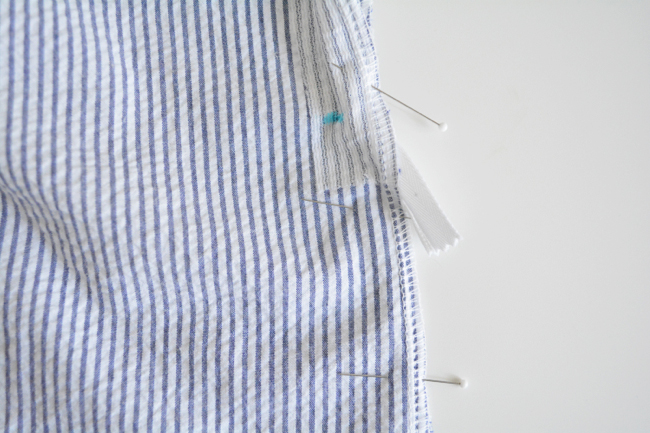
1) Pin side seam. Zip the zipper up. Pin the skirt edges together at the zipper mark down to the bottom edge, right sides together. Putting a pin through the seam allowances above the zipper mark will help hold everything stable.
2) Sew with zipper foot. Put the regular zipper foot on your machine on the right set of prongs. Position the skirt under the foot so that the needle is as close to the mark as you can get, and about one or two stitch lengths above it. I like to move the needle all the way over the right so I can get nice and close. It’s ok if you can’t get all the way even with the stitching, just get as close as you can.
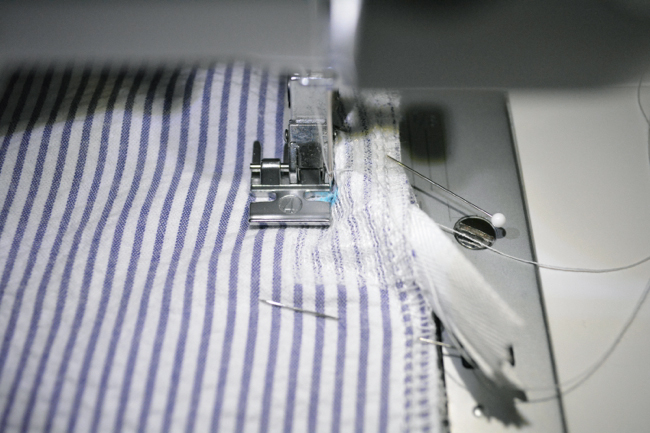
Note: Be very careful when you start moving your needle with the zipper foot on, because if you move it in the wrong direction it might hit the presser foot and break. Always check by hand cranking first.
Start with a backstitch and sew for about 1-2″.
3) Sew with regular foot. Put the regular presser foot back on your machine. Reset your needle position if you’ve changed it. Starting at the end of your zipper foot stitching, backstitch over the ends of the thread and sew the remainder of the seam at 5/8″.
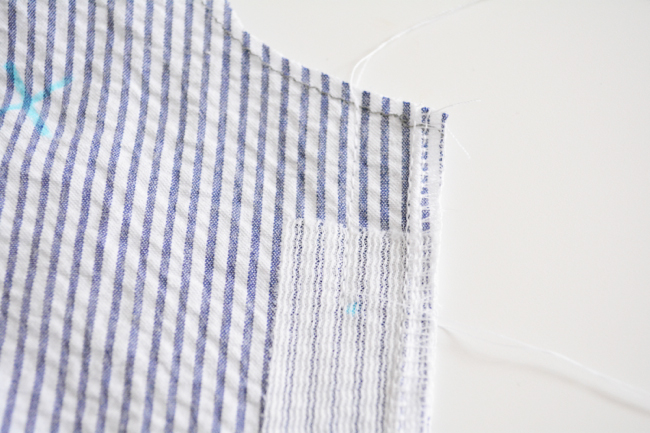
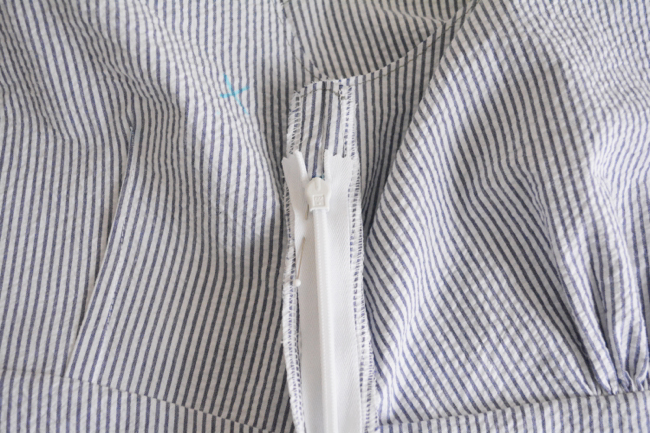
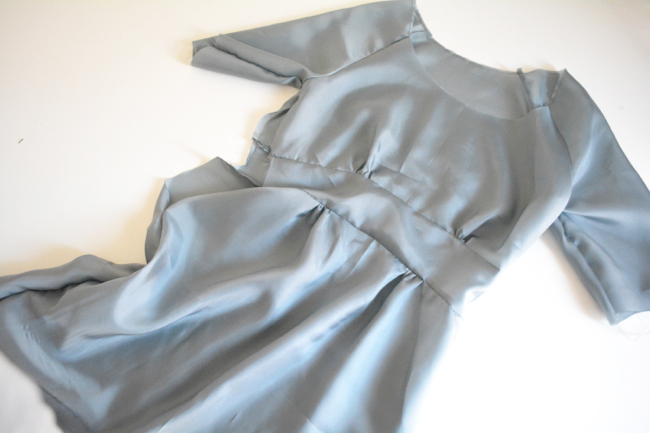
Here is what you should have when done:
It is possible to sew the entire lower part of the seam with the zipper foot, but I’ve found that the seam never looks as good, so I think it’s worth it to change to your regular presser foot.
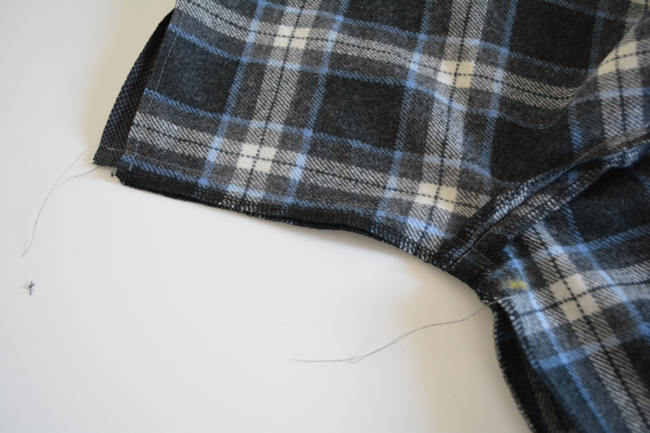
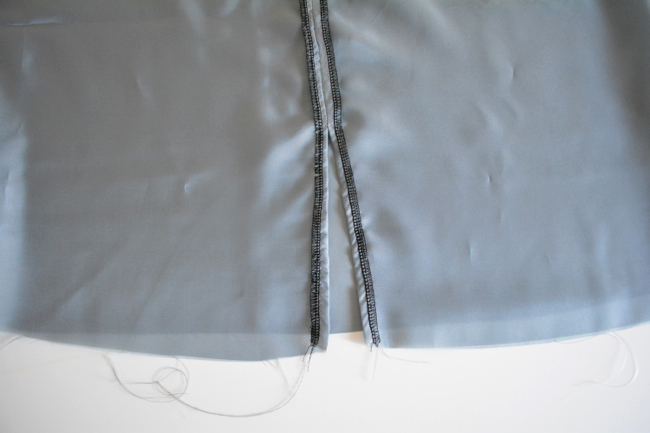
4) Finishing. Press seam open. If you’d like, hand tack the top ends of the zipper tape to each seam allowance to prevent them from coming out to the right side of the dress.
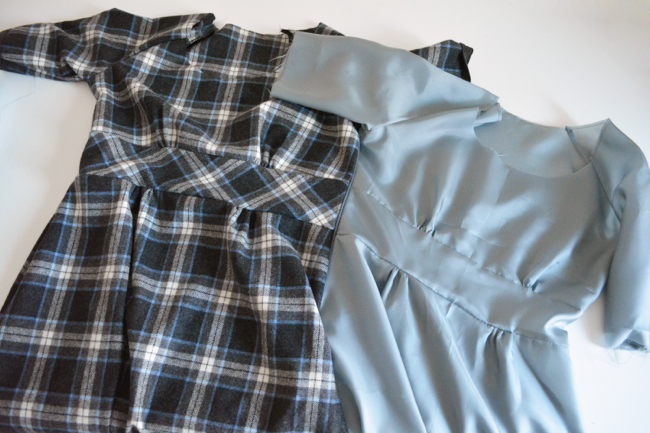
Lining
If you are lining your dress, this is the point where you can attach it.
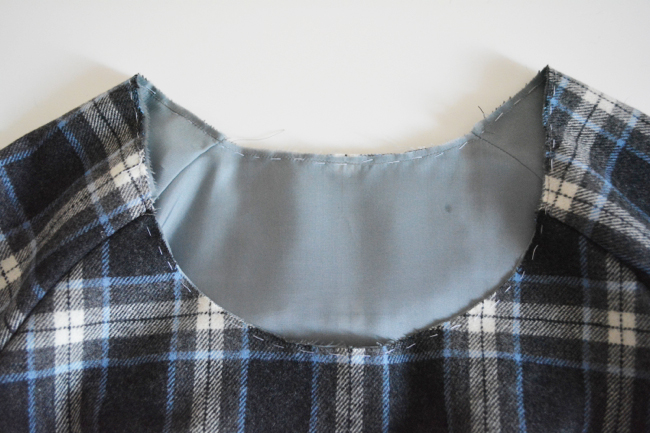
1) Sew lining. First, sew a second dress out of your lining fabric in the same way you sewed the shell, except leave the opposite side seam open. Sew above and below the zipper marks so that the only open part is where the zipper will be.
You don’t need the kick pleat in the lining, you only need the ease it provides. So you can cut it off and just sew that seam to the top pivot mark. Finish the seam allowances all the way down and press them open, then topstitch around the slit.
If you are lining only the bodice, then use your bodice, sleeve and yoke pieces for the lining, and press the lower edge of the yoke 5/8″ towards the wrong side.
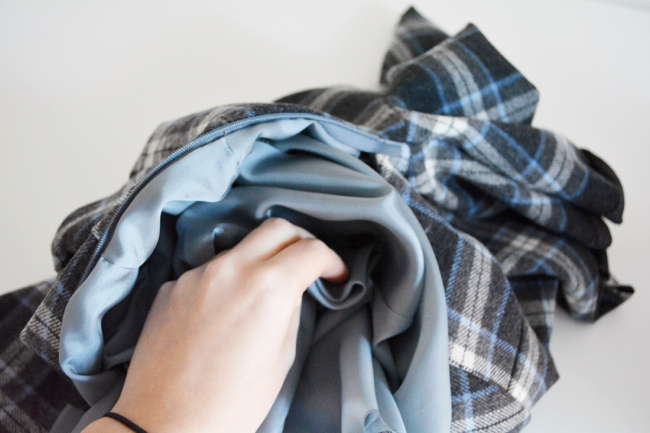
2) Pin lining. Turn the lining wrong side out. Stuff the shell inside the lining so that they are right sides together. Starting at the yoke, pin the raw edges of the lining’s zipper opening to the shell fabric edge. The zipper should be sandwiches between the layers. Pin up and down from there as far as you can go. You won’t be able to get all the way to the top and bottom of the zipper, but that’s ok.

3) Attach lining. Using a zipper foot, stitch the lining to the shell along the zipper on both sides. Again, you won’t be able to get all the way to the top and bottom of the zipper; just go as far as you can. If you are lining the bodice only, make sure the lower edge of the yoke stays folded as you attach it.
4) Turn lining. Turn lining right side out around opening.
Stuff lining inside dress so that wrong sides are together.
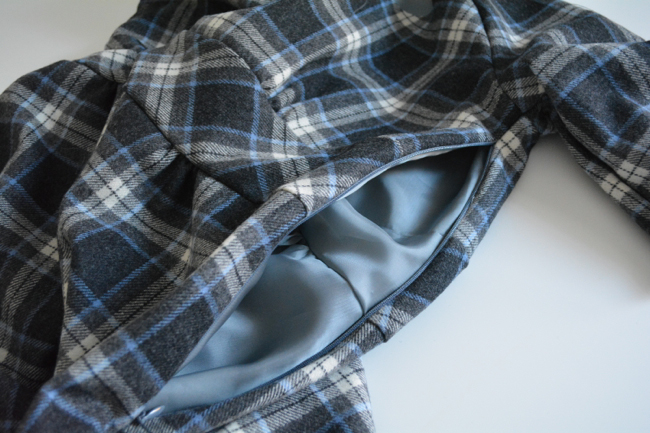
5) Hand tack around zipper. From the inside, hand stitch the loose edges of the lining around the top and bottom of the zipper with the seam allowances folded neatly under.
6) Baste lining. Align raw edges of lining and shell at neckline and sleeve ends and baste together. Since the seam allowance will only be 1/4″ at these edges, take extra care that the lining and shell are aligned. If your lining is slippery I’d recommend hand basting for accuracy.
You’ll now treat those edges as one layer.
If you’re lining the bodice only, hand stitch the lower edge of the lining yoke to the skirt seam on the inside of the dress.
Please comment below with any zipper questions!
Comments
This is lovely and clear, just in time for me. I put the zip in yesterday, just about to sew the lining together, but hadn’t thought of gathering them together rather than separately, so that makes sense! Had also cut a larger bit to sort of line the kick pleat, but had wondered if something like that would make more sense!
Is there room under the zipper to add a pocket (to the v. 1 skirt, specifically)? It looks like there probably is, but I haven’t cut mine out yet, so I’m not sure.
Do you mean below the zipper? It might be a little low.
Would it be advisable to shorten the zipper? I much prefer side zips to back zips (no awkward gymnastics to zip myself up!) but pockets are everything.
You can put a pocket in on the same side as the invisible zipper, but so far I’m not finding a tutorial to point you to…you’d want to attach the pocket bags to the front skirt only. then when you install the zipper, when you get to the pocket portion continue attaching it to the back pocket only, keeping the front skirt and pocket out of the way.
Or, just do a pocket on one side. You probably don’t want the zipper much shorter or it might make it too hard to get in and out of the dress.
Thank you for these great instructions! I didn’t line my dress this time, but I think I will for a wool flannel version.
Thank you so much for your clear instructions Devon. I’m loving the sewalong and my dress is looking fabulous!
You’re welcome! Can’t wait to see!
Thanks for such helpful instructions. Is it possible to line Version 2? I’m not certain that I want to, but I think I might and I was just wondering if you do the same thing: make another version of the whole dress? If so, do you handstitch the two bodices tops together in the same way? Would it work?
Sure, it would be the same idea! Just attach it to the zipper and then baste the layers together around the top edge.
Hi Devon, Thanks so much for this sew-along. I finally got my muslin done after 3 tries, but it fits. I made two 3/4″ darts at the top of the sleeve to bring in the neckline as everything else fit ok. (Pictures on Facebook Sew-Along site). Anyways. I’m making my first actual version out of a soft plaid flannel. I’m wondering if maybe I should use interfacing for the zipper on this type of fabric? It’s an inexpensive flannel from Joann’s. Not the baby stuff, a little thicker. Thanks.
Hi Carol! It wouldn’t hurt to use a little interfacing to stabilize the edge. Just make sure it’s nice and lightweight!
This may be a silly question, but if I have a longer invisible zipper, can I use that instead and just trim to the appropriate length? Thanks so much for your clear instructions, this sew along has been a pleasure to participate in!
Yes you can! With the zipper zipped up, stitch back and forth across the zipper tape a few times at the point where you want the new bottom to be, then trim off the excess (not with your fabric scissors though). I’m glad you’re enjoying the sewalong!
hi Devon, first of all, thanks very much for this sew-along – it is excellent! i have finished to install the zipper on my Dahlia, however it makes a small “bump” at the side where it ends, where there is still about 1 inch of zipper tail (being the zipper much stiffer than my fabric….). is this normal? How can I get rid of this? would you suggest cutting the zipper tail shorter? thanks for your help!
Try folding the zipper towards itself and steaming it to make it curve inwards. You can also try hand tacking it to the seam allowance, or even hand tacking it folded over if that doesn’t show through as a bigger bump.
If that doesn’t work, then yes you can cut it shorter, just make sure to stitch over the tape a few times before you trim it to give yourself a new bottom stop.
Next time, if your fabric is drapey, then using a longer zipper might actually be better – the weight of the longer zipper tape will be greater, and that will help it hand down straighter.