

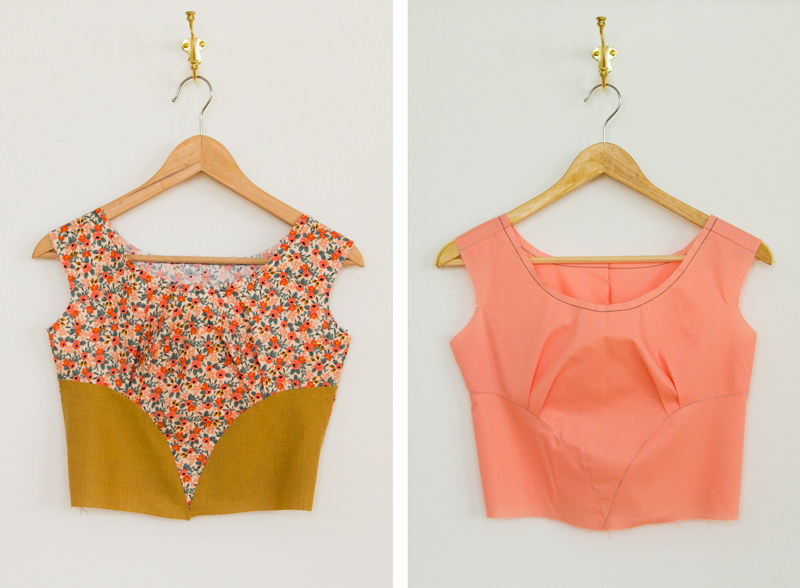
Now it’s time to start constructing our Rues! In this post, we will sew tucks, attach the side bodice, sew darts, shoulder seams, and side seams. By the end of this tutorial, you’ll start to see your Rue taking shape.
Sew tucks
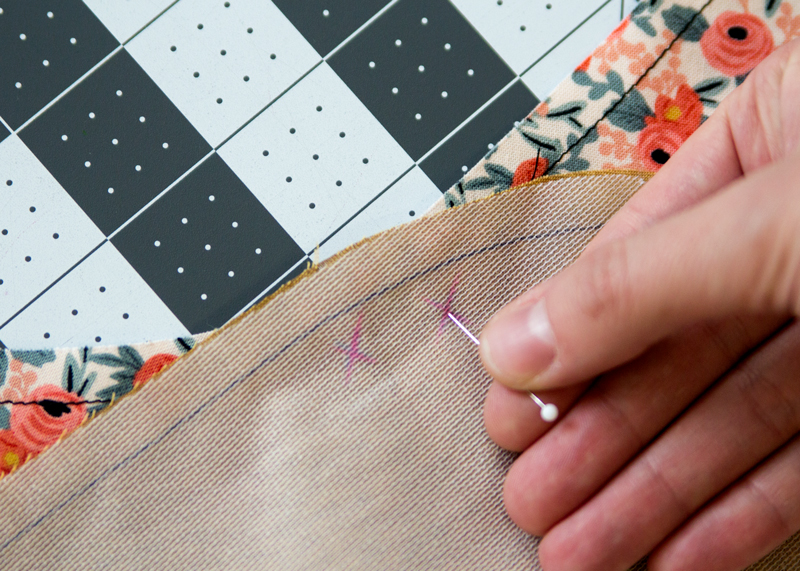
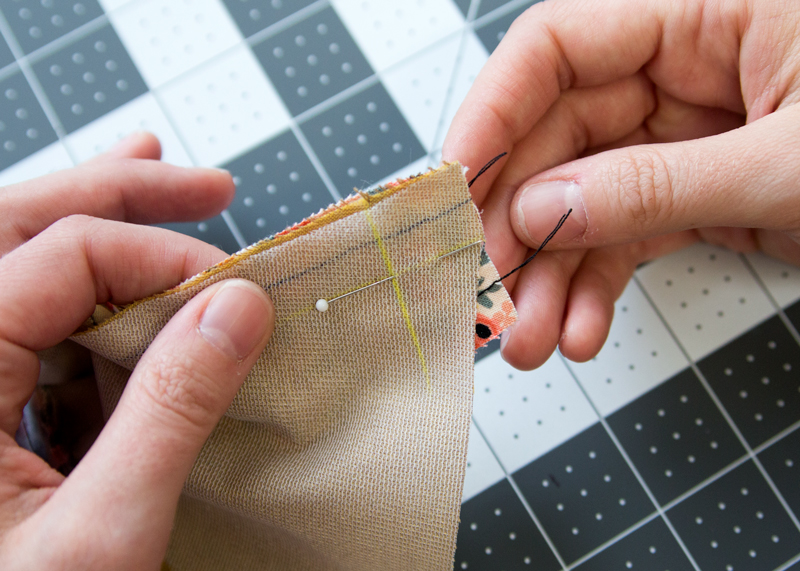
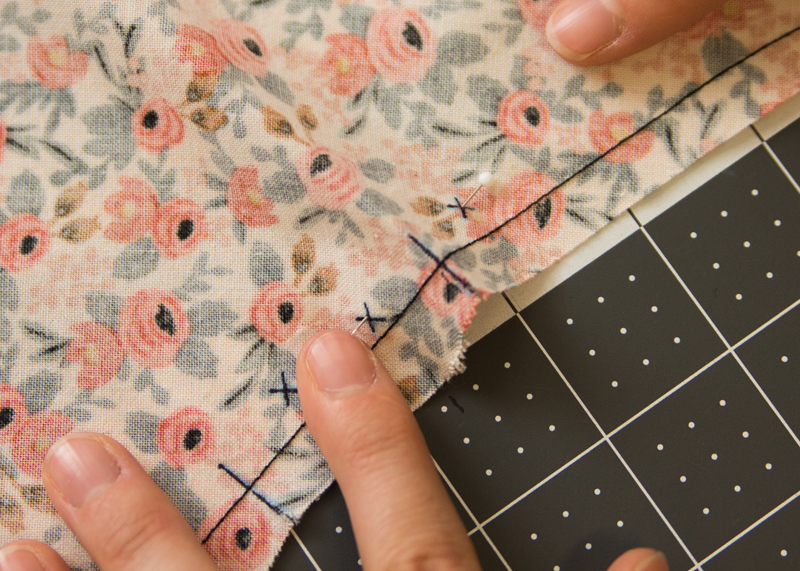 1. Working on the wrong side of the center front bodice, prick a pin through the X nearest to Center Front. Bring the end of the pin through the next X, along the style line.
 2. Pinch at the tuck line and pin upwards, towards the neckline.
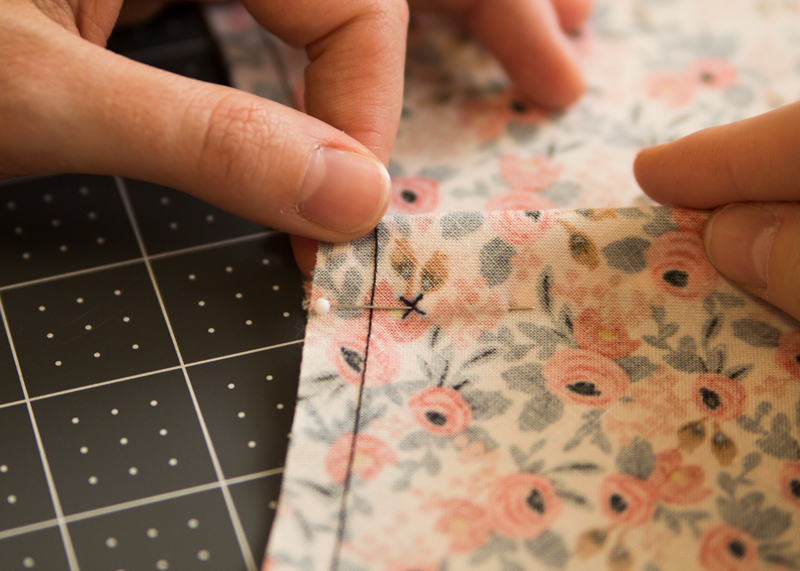
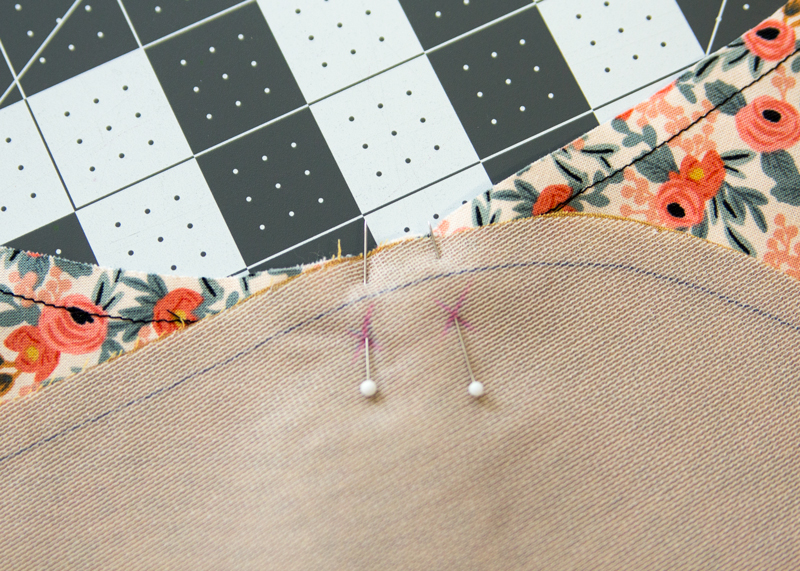
 3. Lay the tucks towards the side seam and add another pin, to keep the tuck in place.
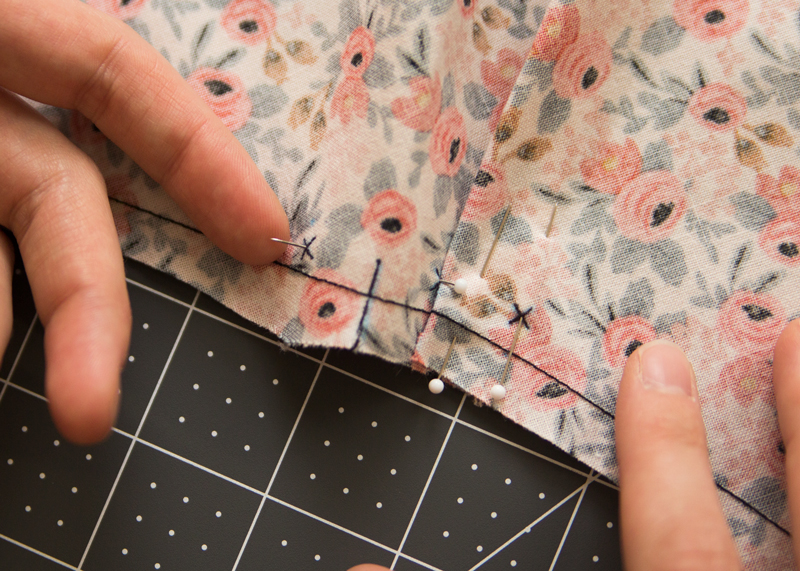
 4. Repeat this step for the second tuck.
 5. Baste the tucks in place at 5/8″ SA and steam them in place, do not press.
Attach Side Bodice
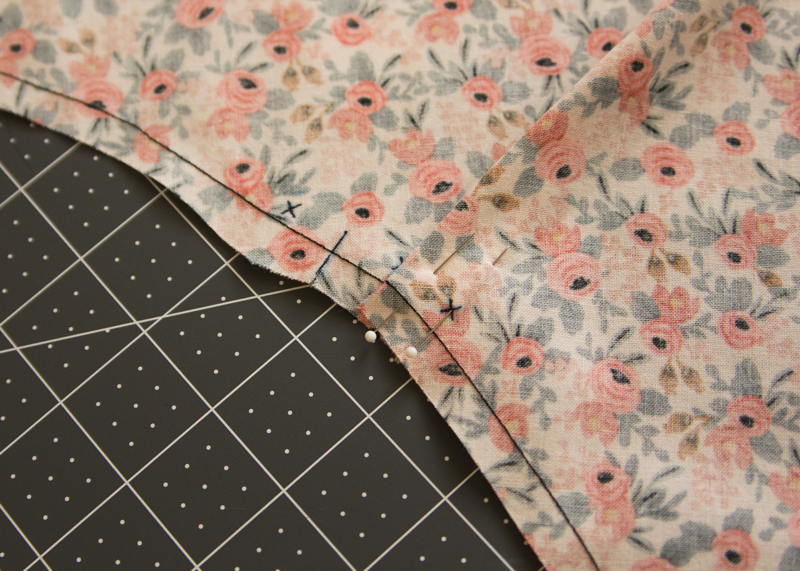
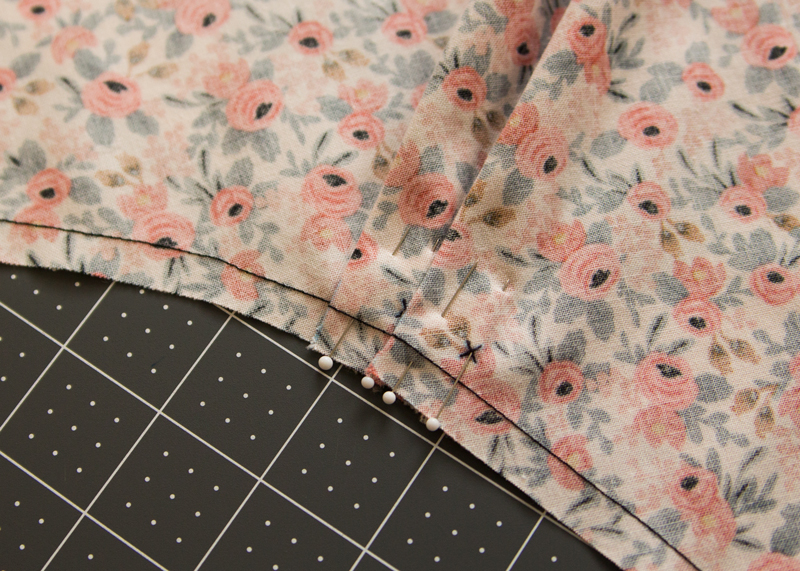
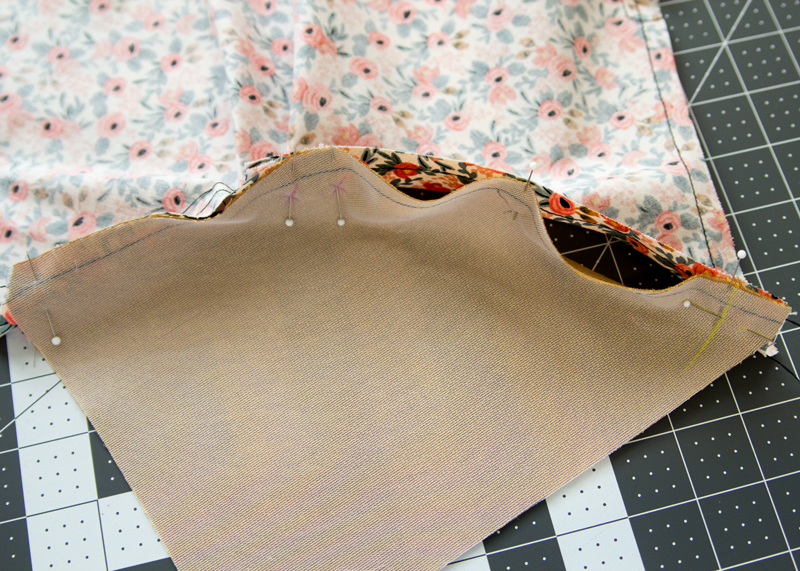
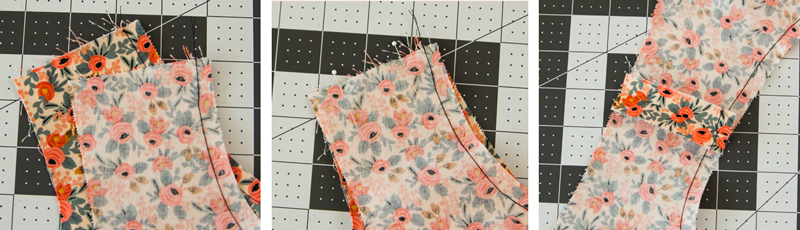
- With right sides together, match the tuck placement X’s on the side front bodice to the folds created by the tucks on the center front bodice.
 2. The side front bodice needs to be eased into the center front bodice, therefore it’s best to pin the important places such as the sides and the tucks before easing. Once the tucks are pinned, pin the style line near the side seam.
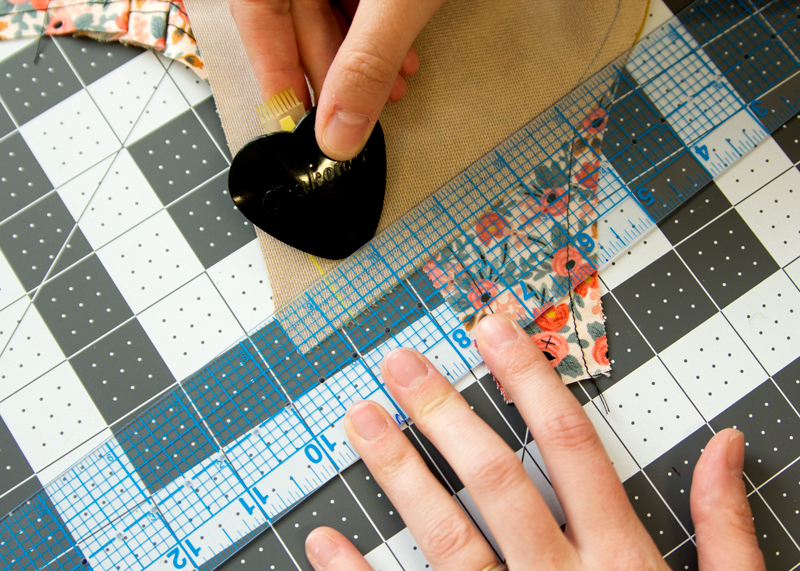
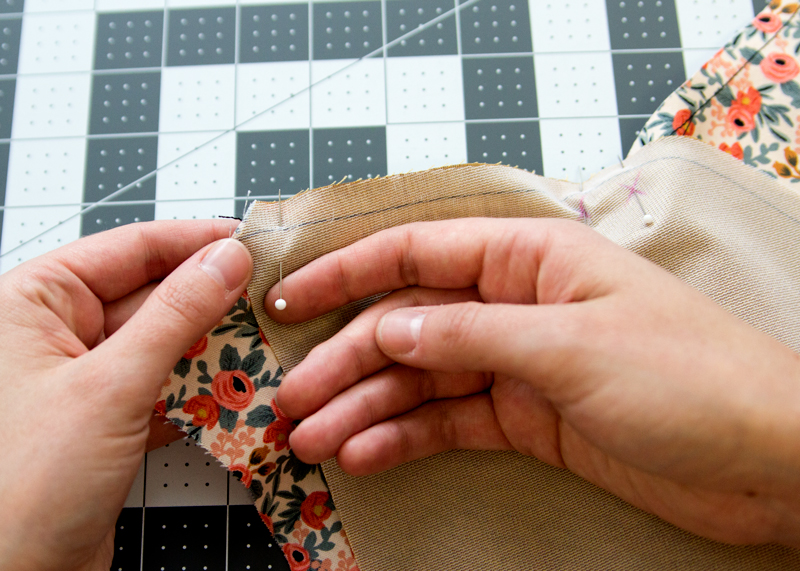
 3. To make sure that you end up with a perfect V at the center front of your bodice, mark the seam allowance on the style line and waist edge near center front on the side front bodice.
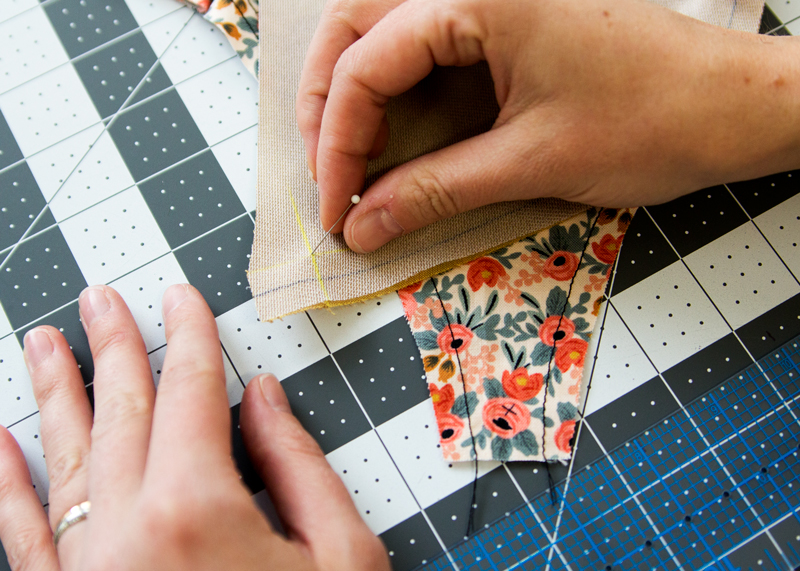
 4. Prick a pin through the intersection of the waistline and style line on side front bodice, bring that pin to the X on the center front bodice and pin in place.
 5. Pin the remainder of the side front bodice by eased it into the center front bodice.
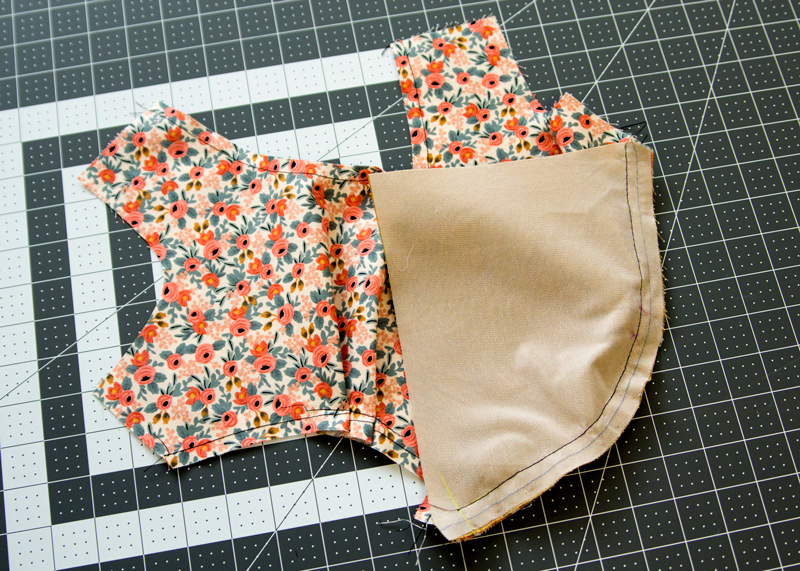
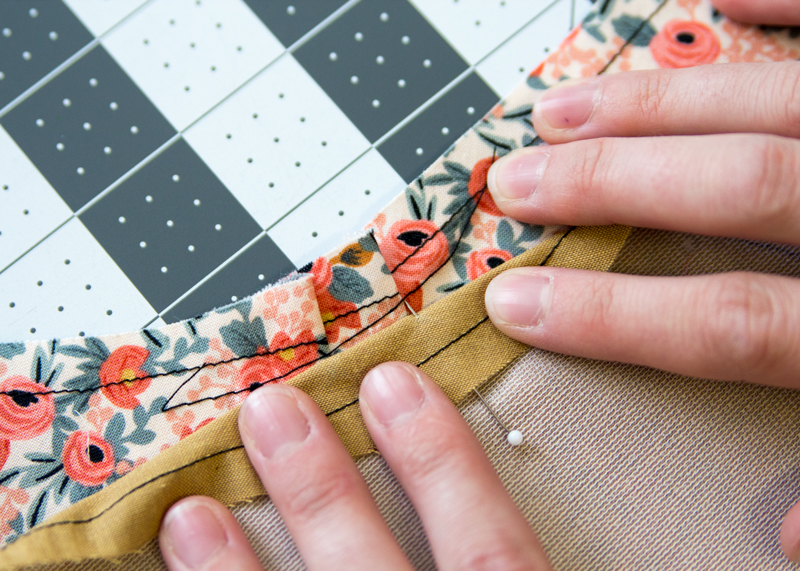
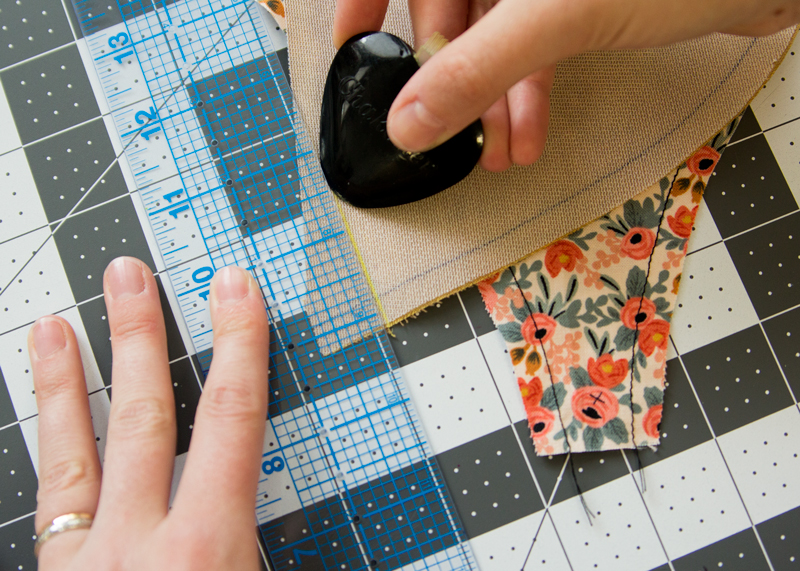
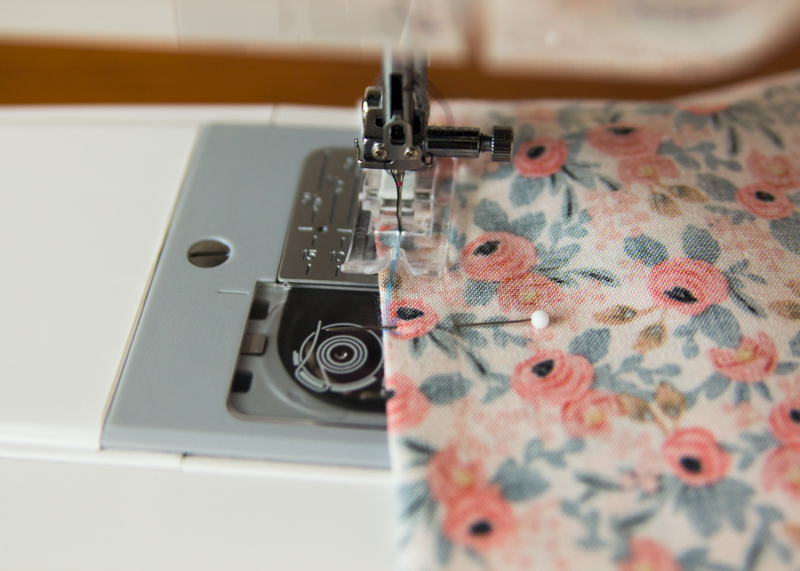
 6. Stitch along the curved line to the X’s at center front at a 5/8″ seam allowance, backstitching several times.
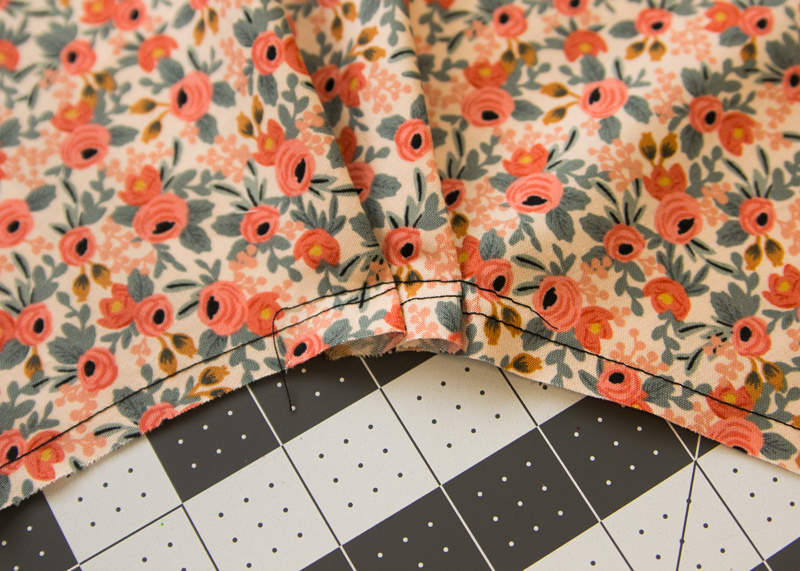
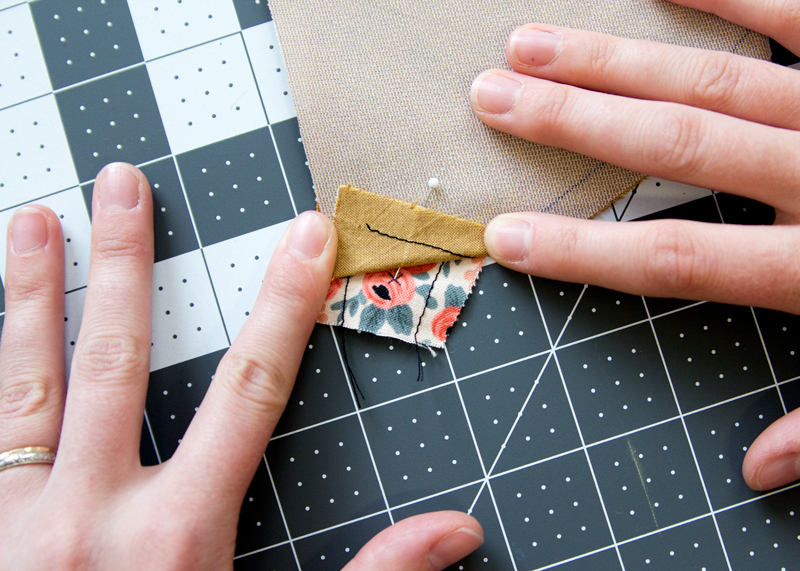
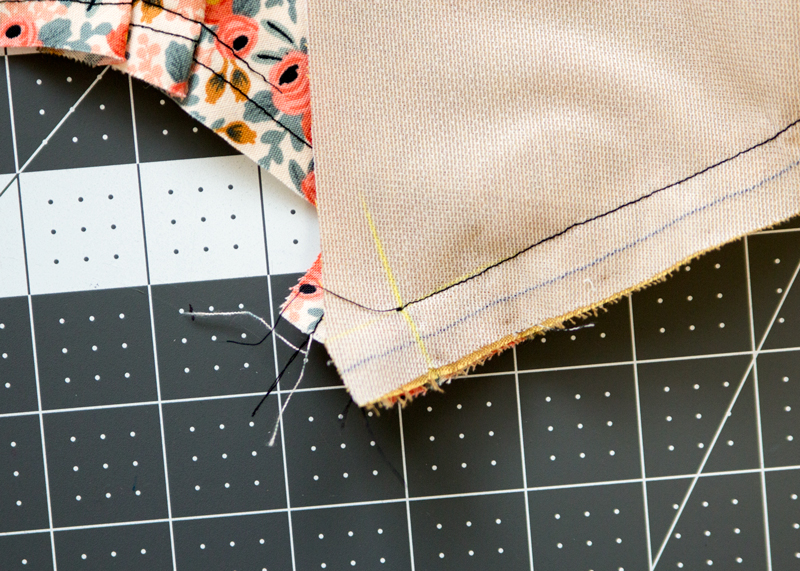
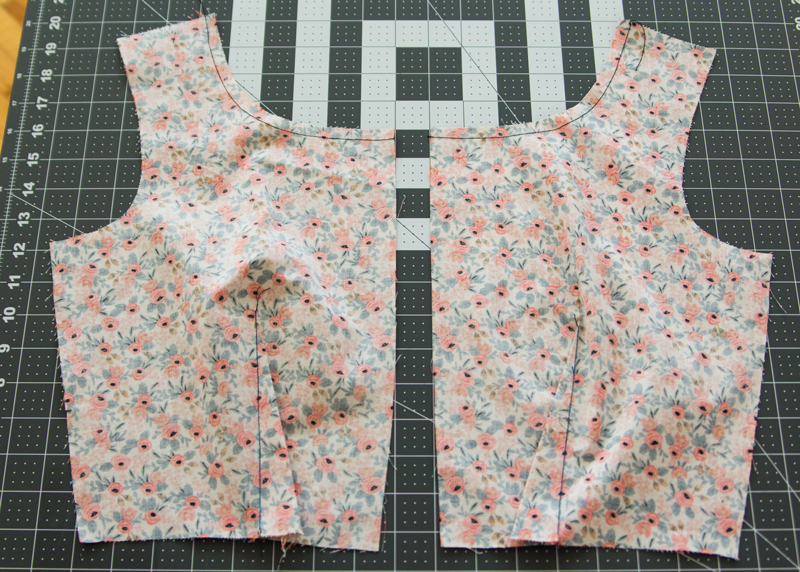
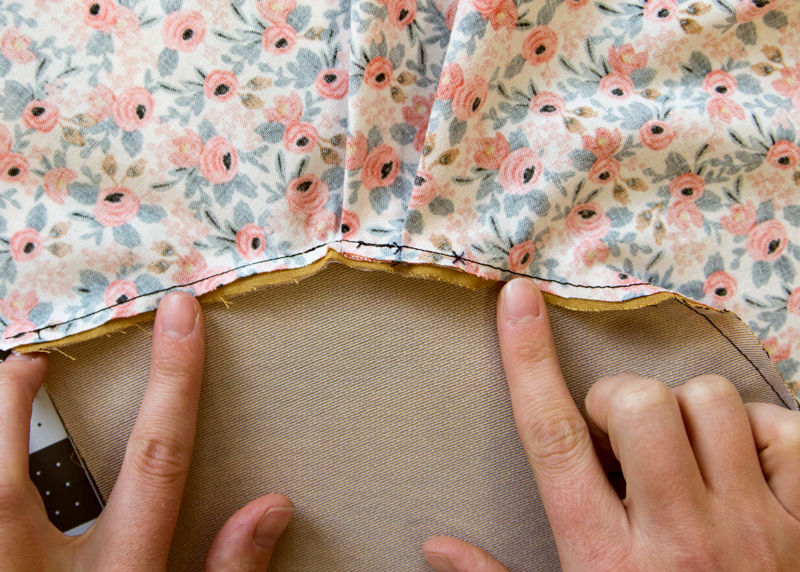 7. Trim and grade the seam allowances. I prefer to grade at difference widths. I was taught that the seam allwance closest to the body, after being pressed, should be graded at a thinner width in order for the seam to lay flatter.
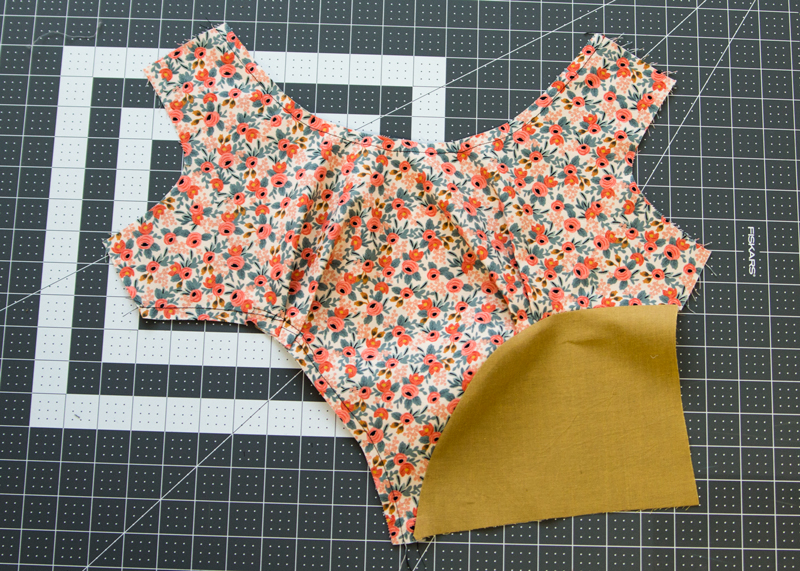 Continue the same process for the other side of the center front bodice.
If you would like to add piping to the style line, take a look at Meg’s Piping tutorial on the Harts Fabrics blog.
Sew Back Darts
When sewing darts, I over do it with the pins but I’ve never been sorry about it. This technique is fail-proof and creates consistently good-looking darts.
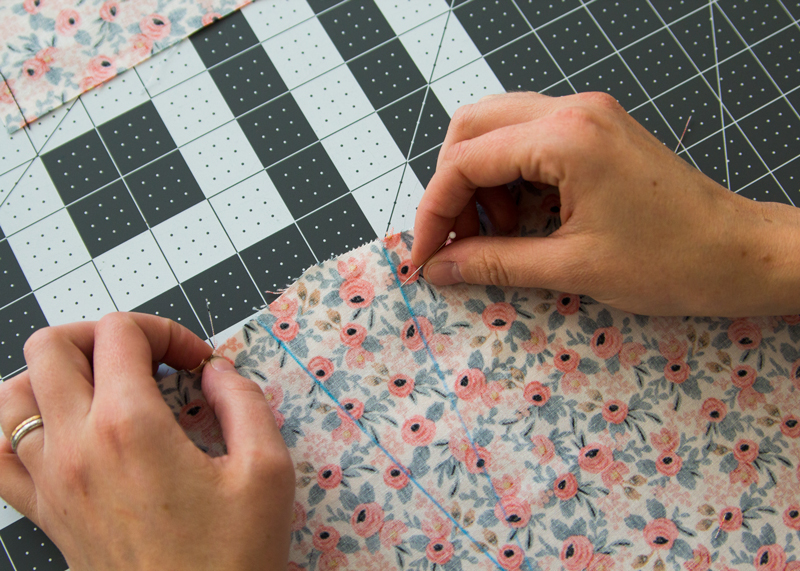
 1. Prick the end of your pin into one leg of the dart. Bring the end of the pin to the other leg, at the same distance away from the cut edge.
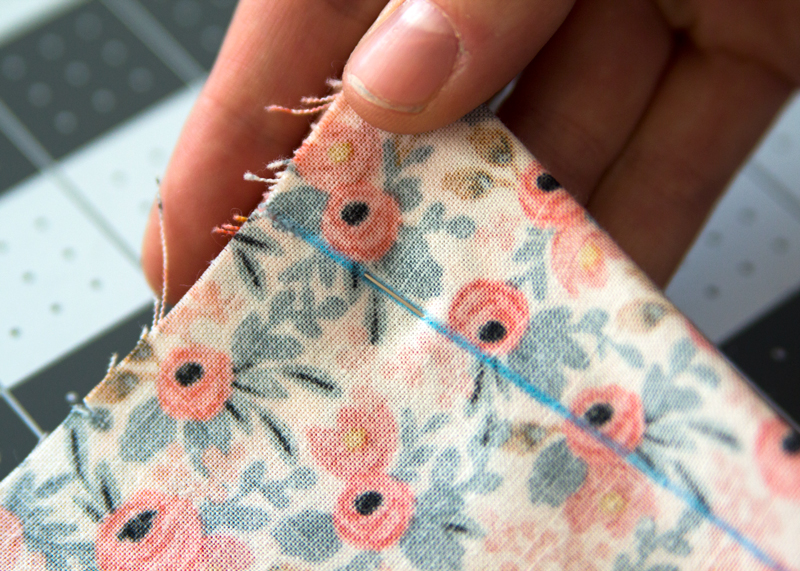
 2. Follow the line of the dart leg and bring the pin through to the other side. Your pin should be at the same exact angle as the dart line.
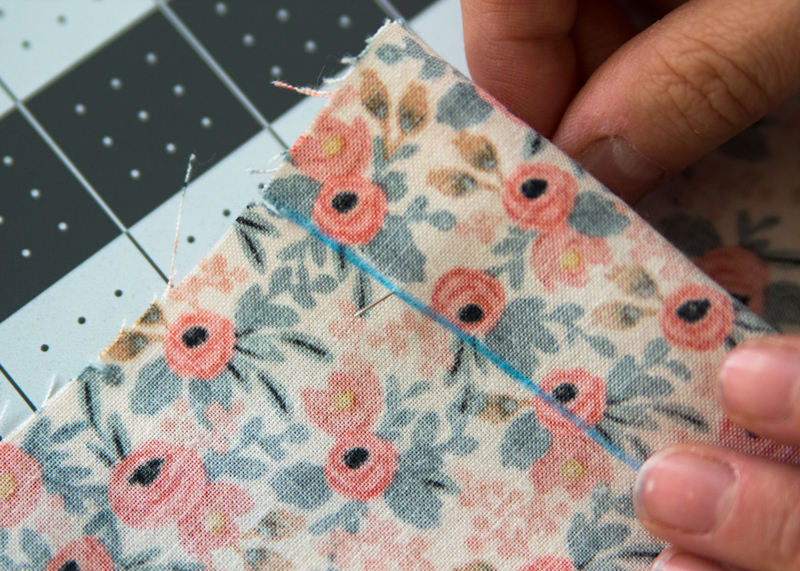
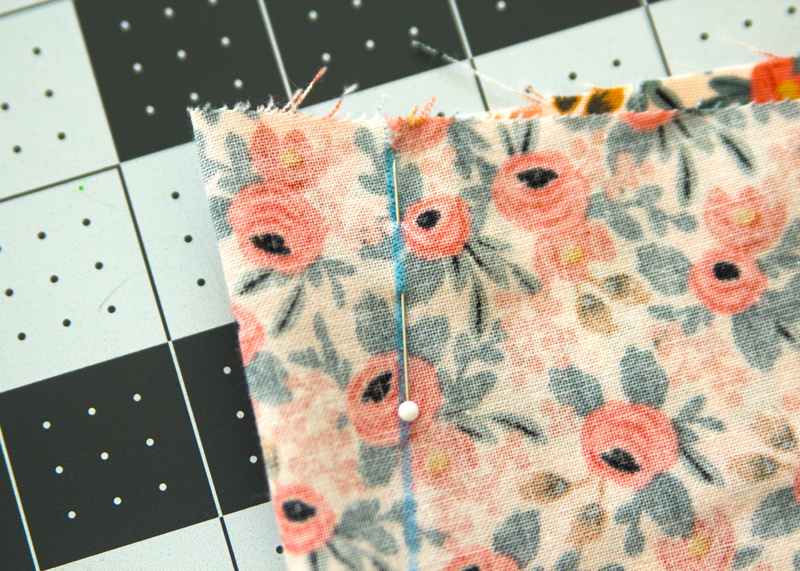
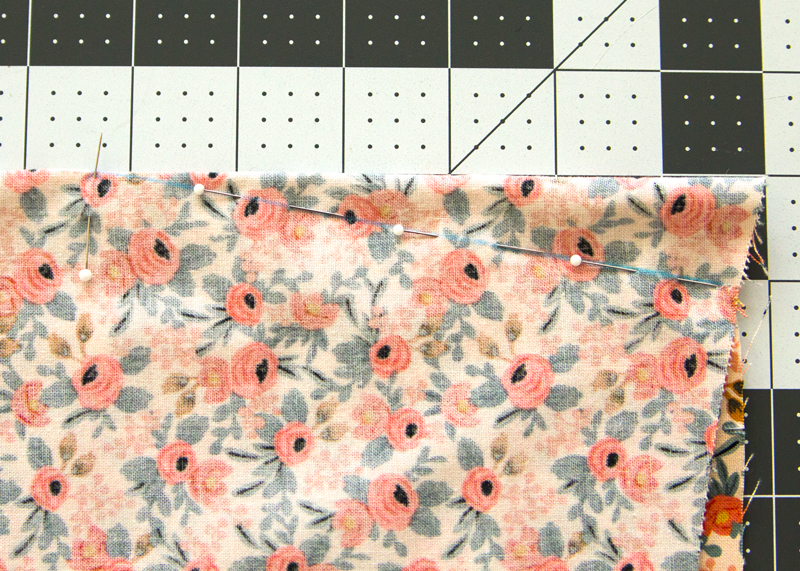 3. Continue to pin in this same way down the legs of the dart. Make sure to have the point of the pin towards the raw edge, it will come in handy when sewing. You’ll notice that I added a horizontal pin at the end of the dart. I always add that little “marker” to help me see exactly when the dart ends.
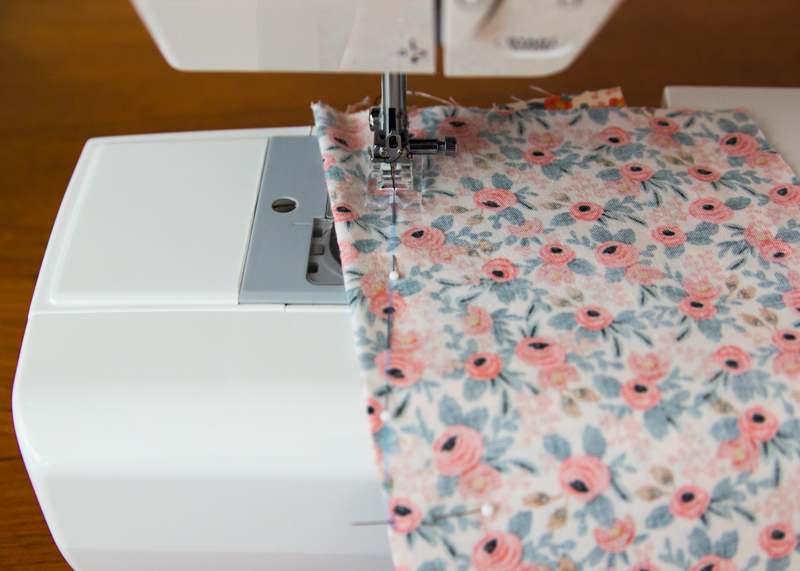
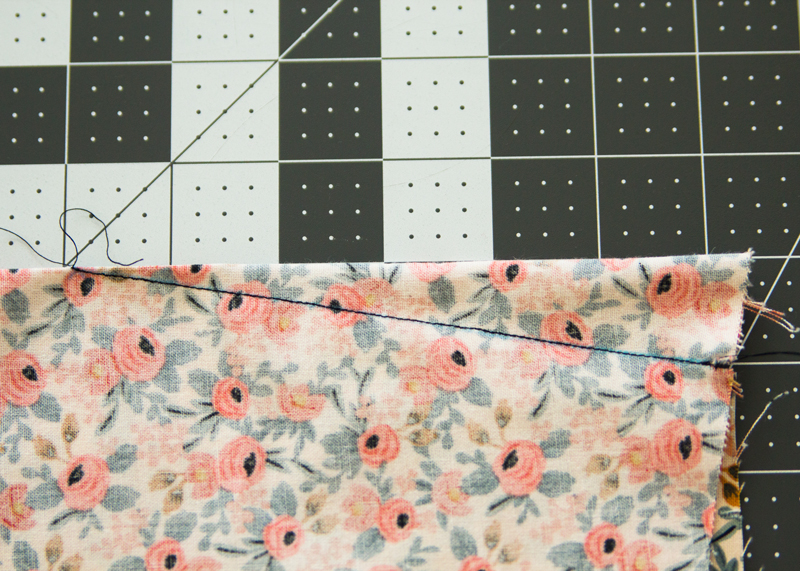 4. Stitch down the dart line, from the waistline to the dart tip. When approaching the tip of the dart, stop, and lower your stitch length to 1. The smaller stitches will add extra stability to your dart tip. Do not backstitch, instead “sew off” of the fabric. The combination of the small stitch length and sewing off will twist the threads creating a knot.
(If you sew darts differently, by all means sew them up the way you like to.)
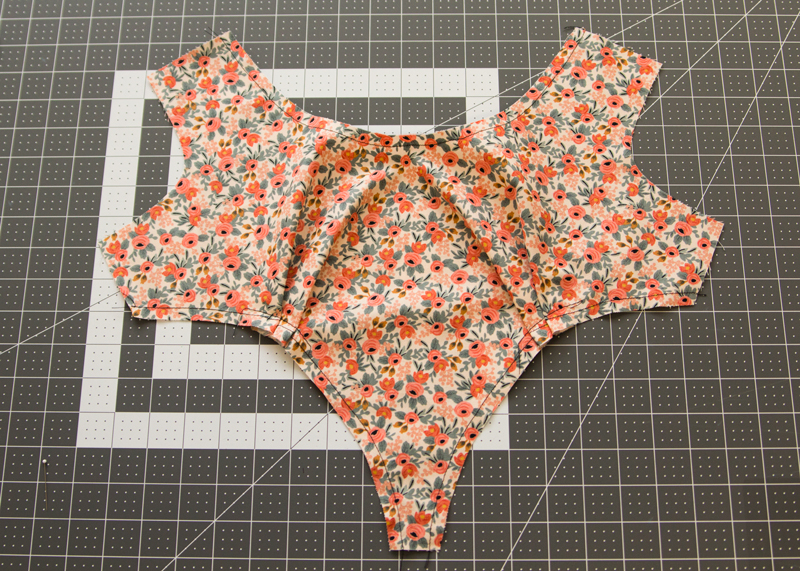
Sew Shoulder Seams
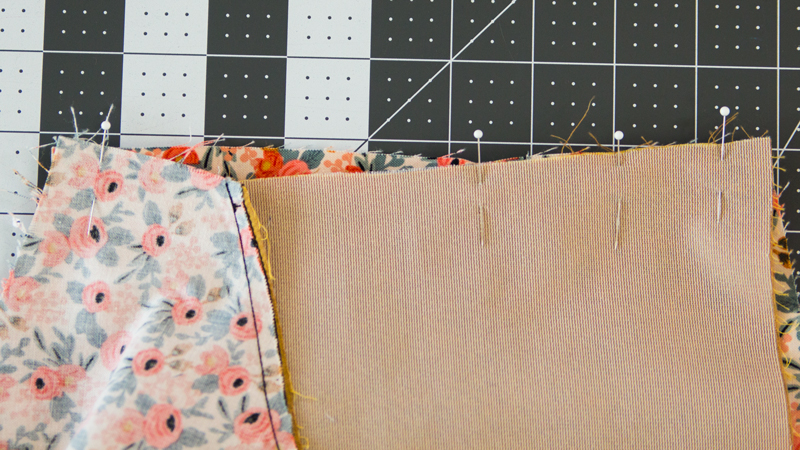
 1. With right sides together, match the center front bodice to one back bodice at the shoulder. Pin and stitch at a 5/8″ seam allowance. Press the seam open. Repeat this step for the second shoulder seam.
Sew Bodice Side Seams
 1. With right sides together, match the front bodice to the back bodice at the side seam. Begin pinning at each end and at the notches. The shape of the bodice back side seam is different than the front bodice. Simply slide the edges together at the edge and pin in place.
 2. Press the seam allwances open and repeat steps for other side seam.
Assemble Bodice Lining
Repeat all of these steps to sew up the bodice lining, using pieces side front bodice lining, center front bodice lining, and back bodice lining.
Next week, we will assemble the skirt and lining. If you have any questions, feel free to ask away!