

This is it! By the end of this post, you’ll have a finished Rue!
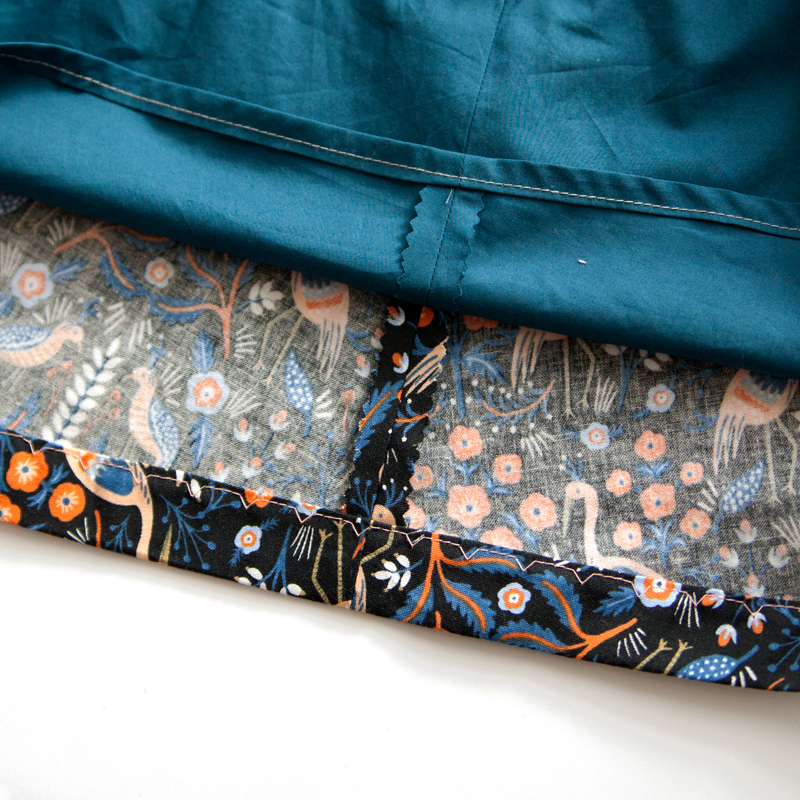
Hem Lining
Begin by folding the hem of the lining to the wrong side 1/4″. Press.
Fold the hem of the lining the wrong side once more at 3/8″. Press.
Edgestitch along the fold line. Press.
Hem Shell
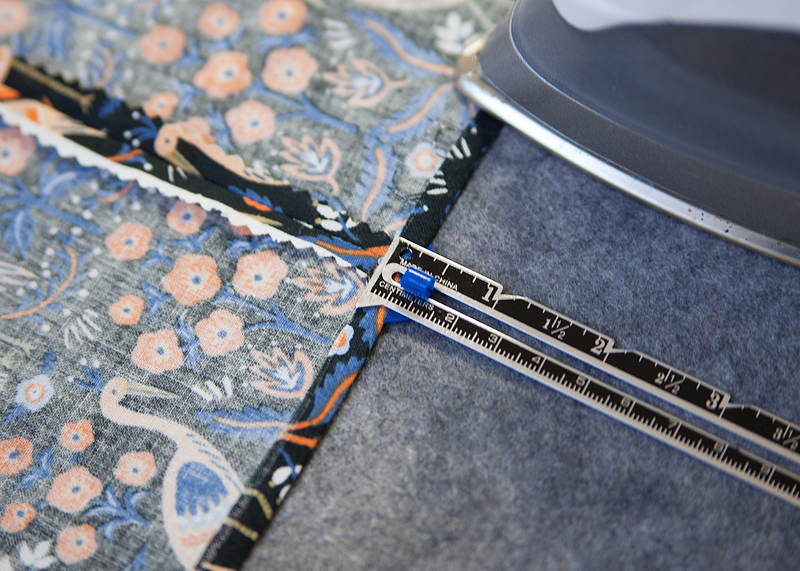
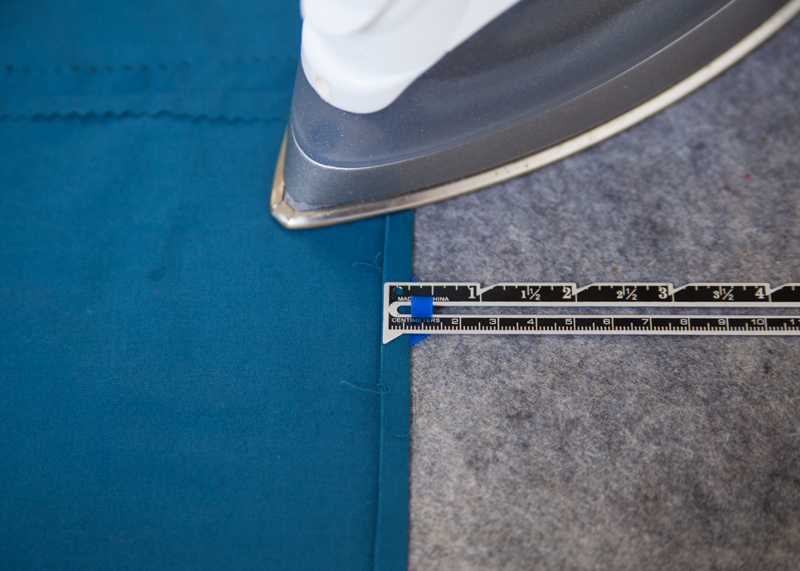
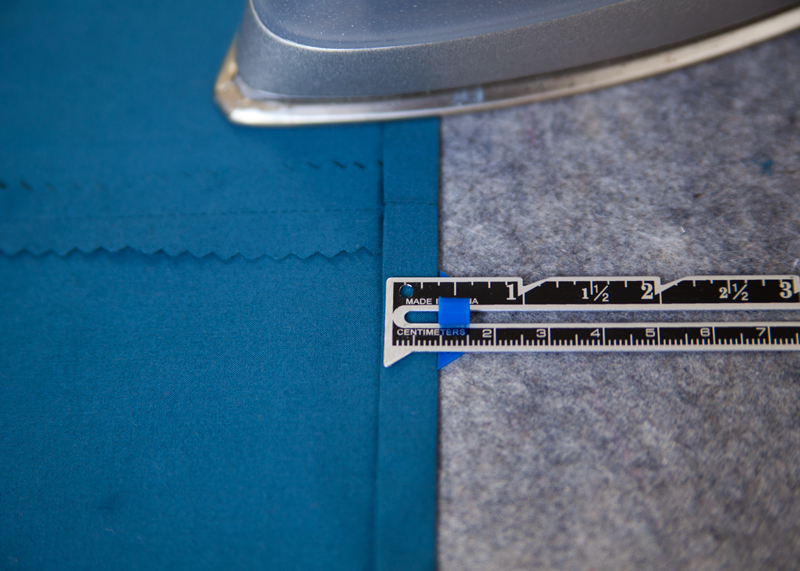
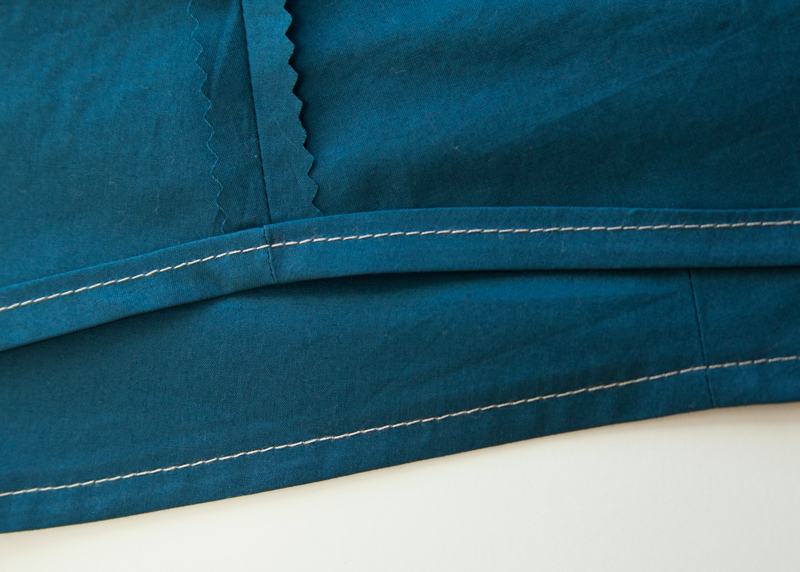
Fold the hem of the shell to the wrong side 1/4″. Press.
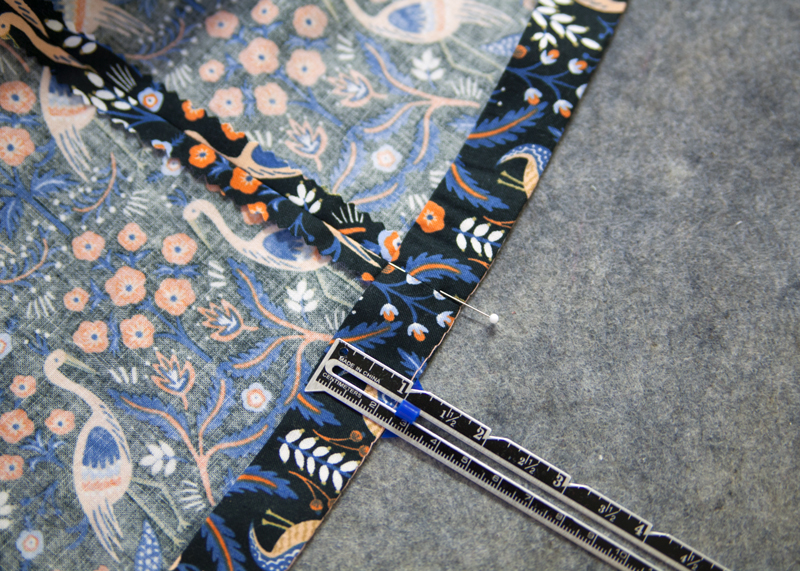
Fold the hem of the shell to the wrong side once more at 1″. Press and pin in place.
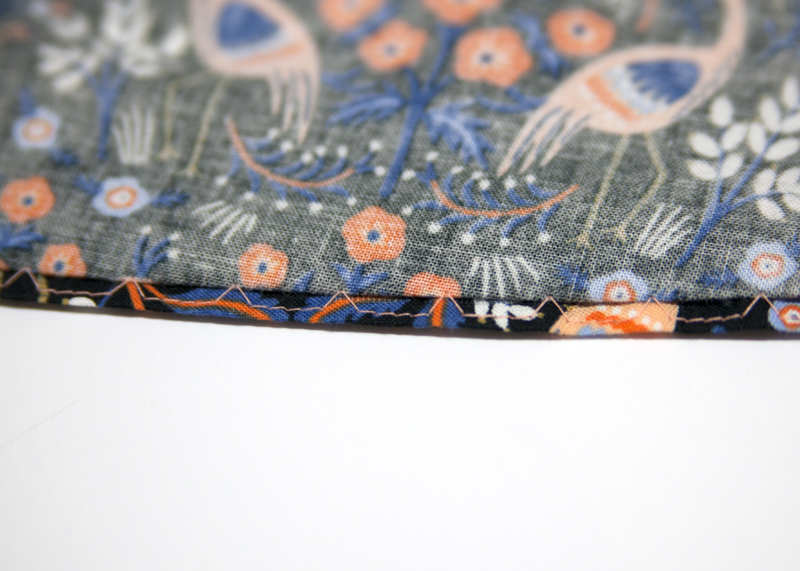
Using the same technique used for blind stitching the sleeve hem, blind stitch the hem in place.
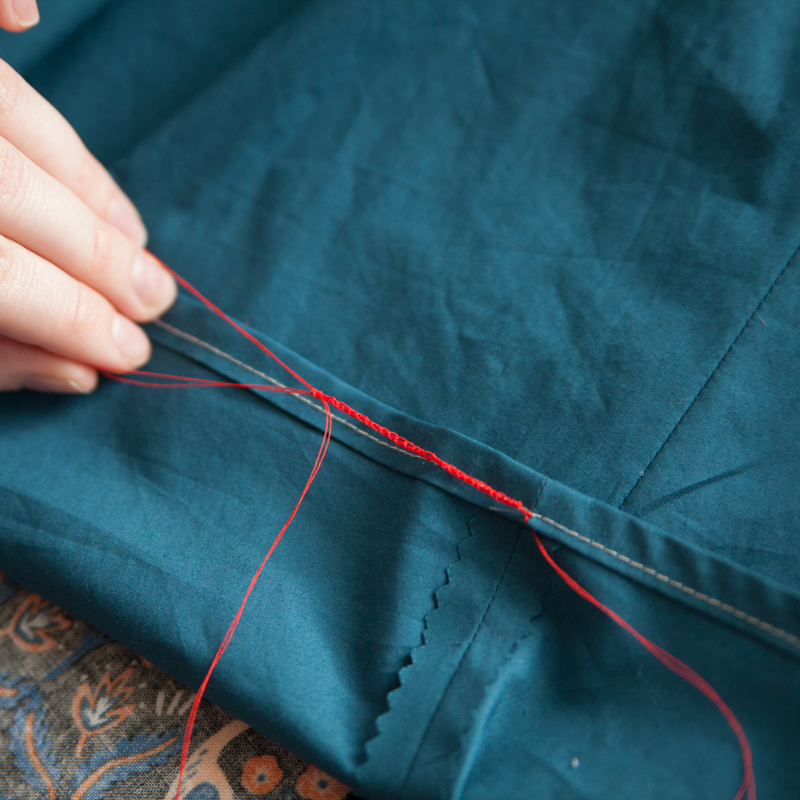
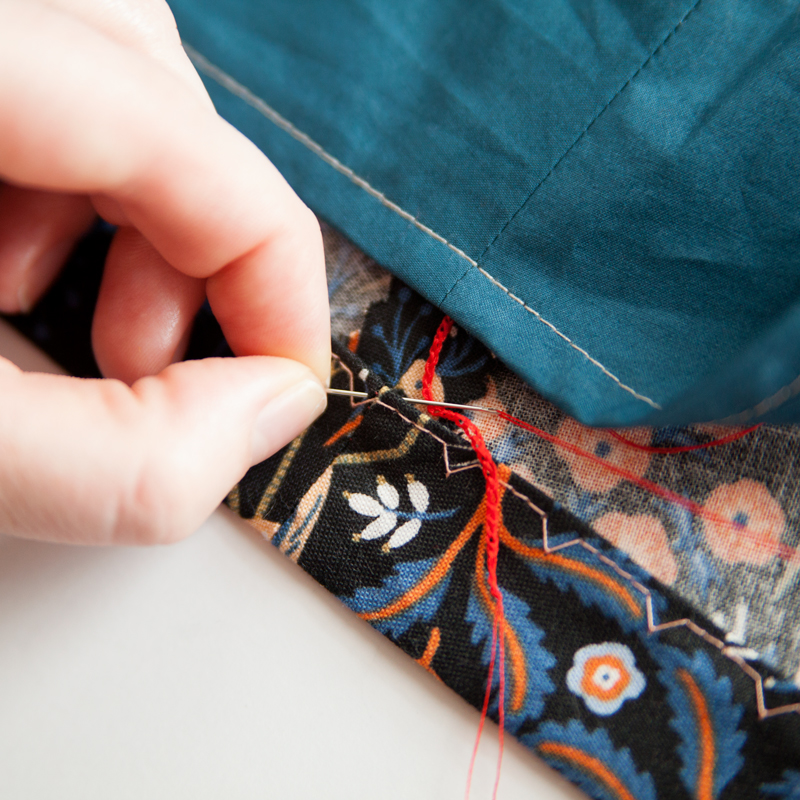
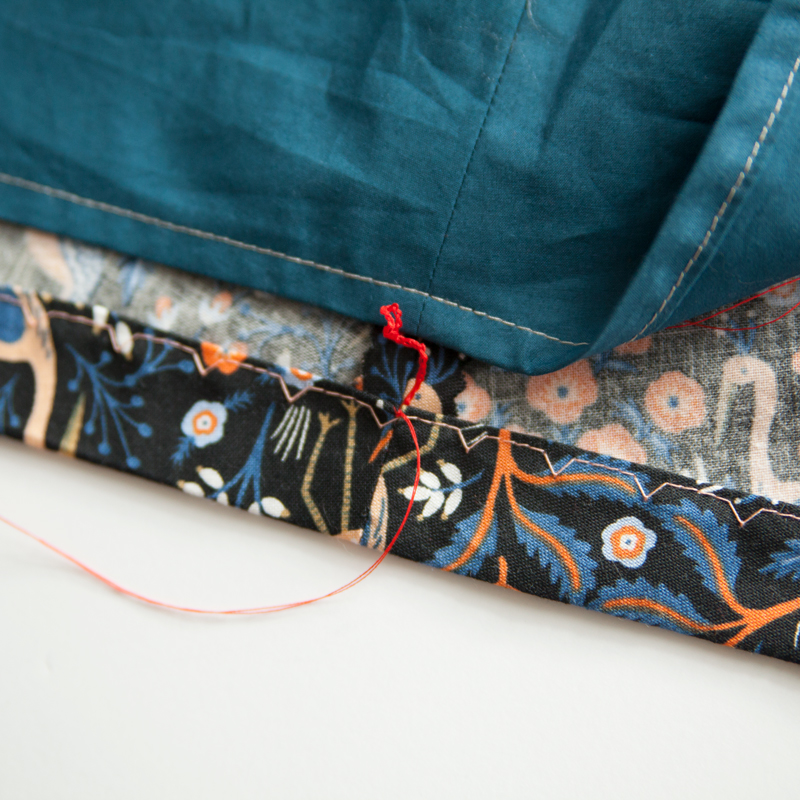
Create and Install Thread Chain
A thread chain is used to anchor the lining to the shell and will keep the lining from shifting and bunching while the dress is being worn. For Rue, we will install a thread chain at each side seam.
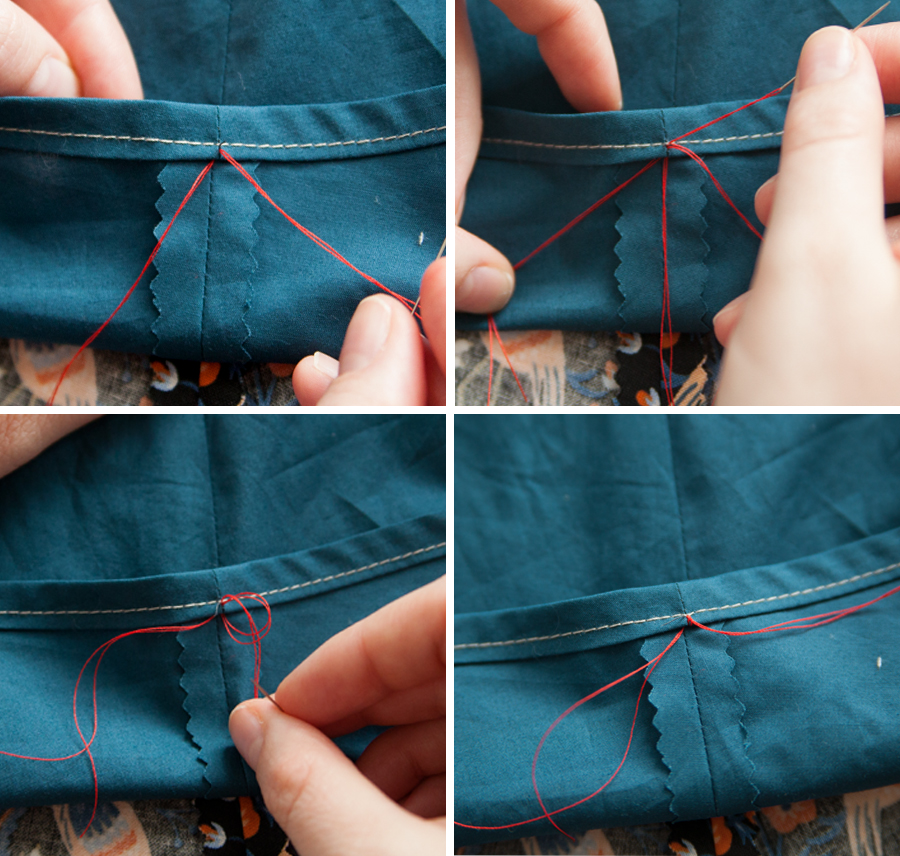
Using a hand-sewing needle and thread, make a small backstitch through the wrong side of one lining side seam. Do this at the intersection of the hem fold and side seam. Also, I recommend doubling up your thread, to add a bit more strength to the thread chain.
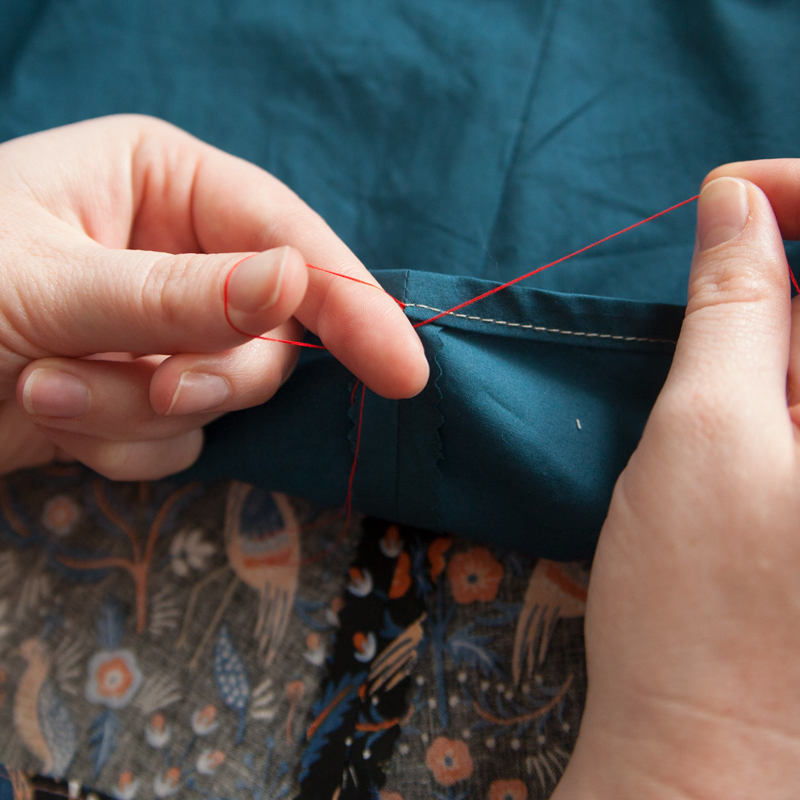
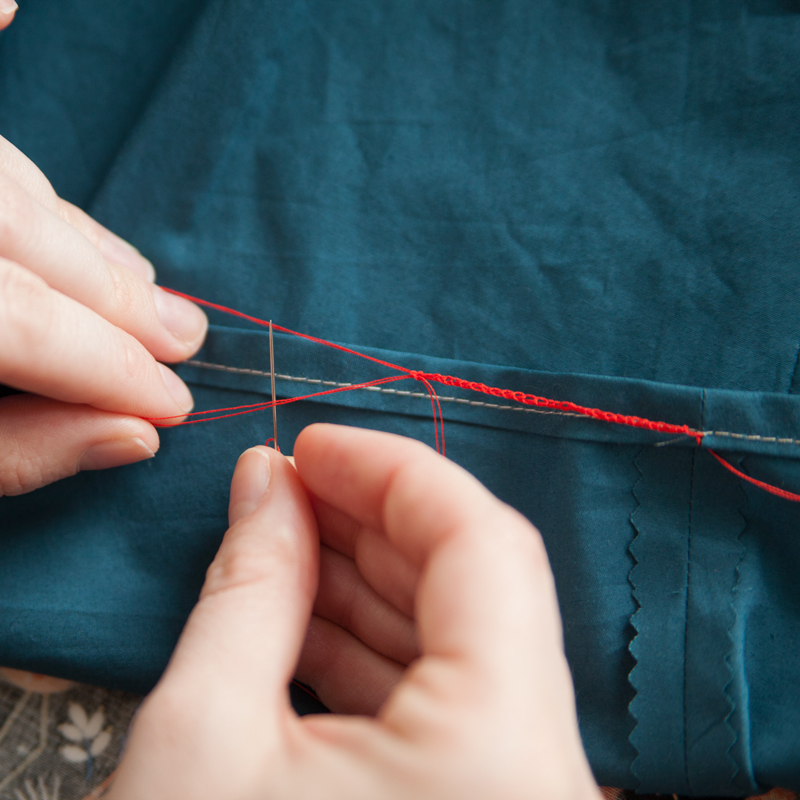
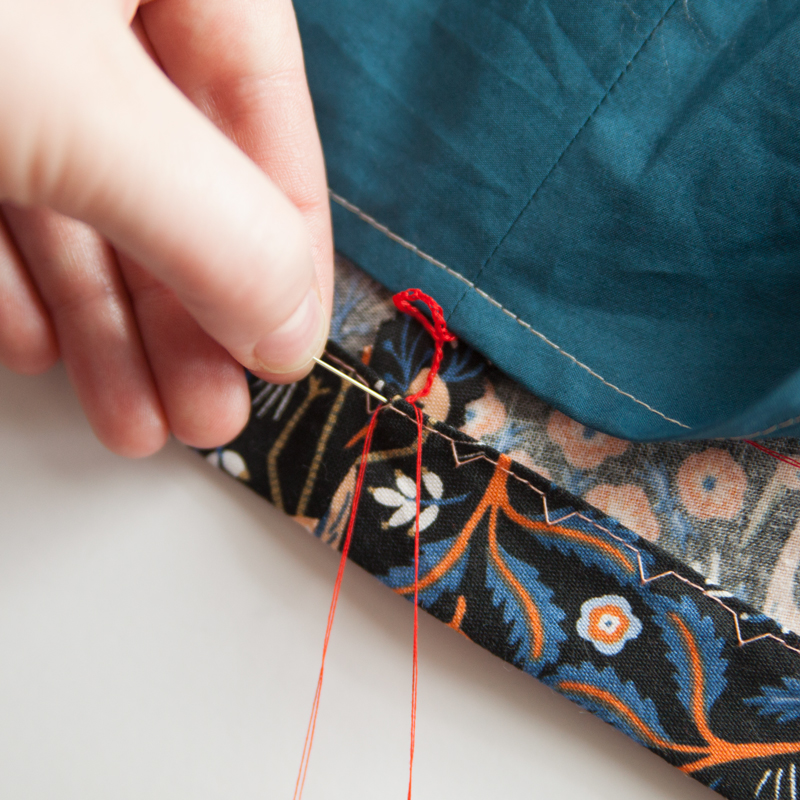
Hold the open loop with your index finger and thumb, and hold the thread in the needle taut with your other index finger and thumb.
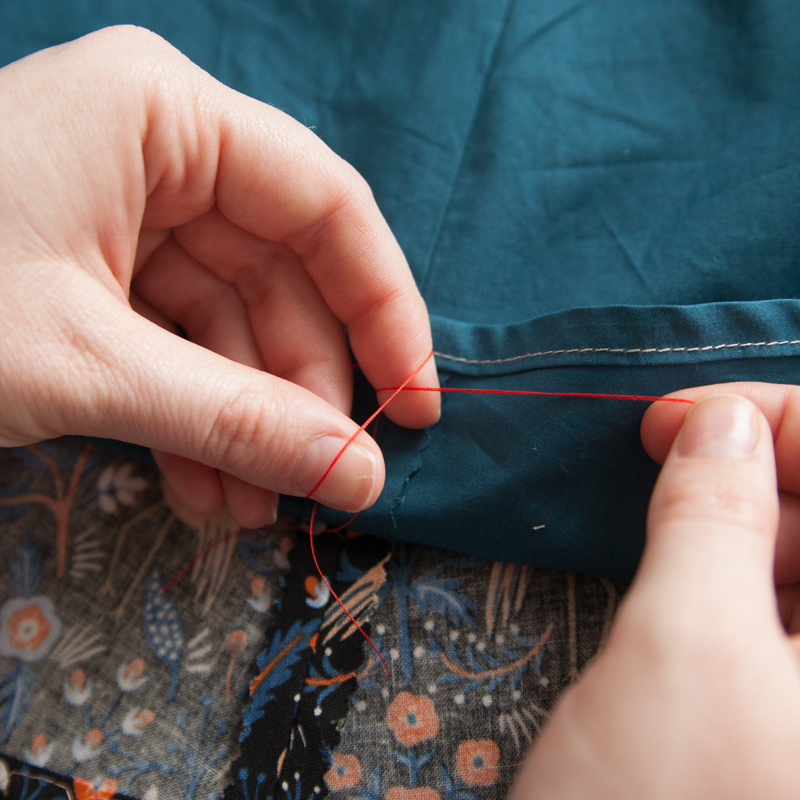
Using your middle finger, pull the thread in the needle through the backstitch loop, creating another small loop.
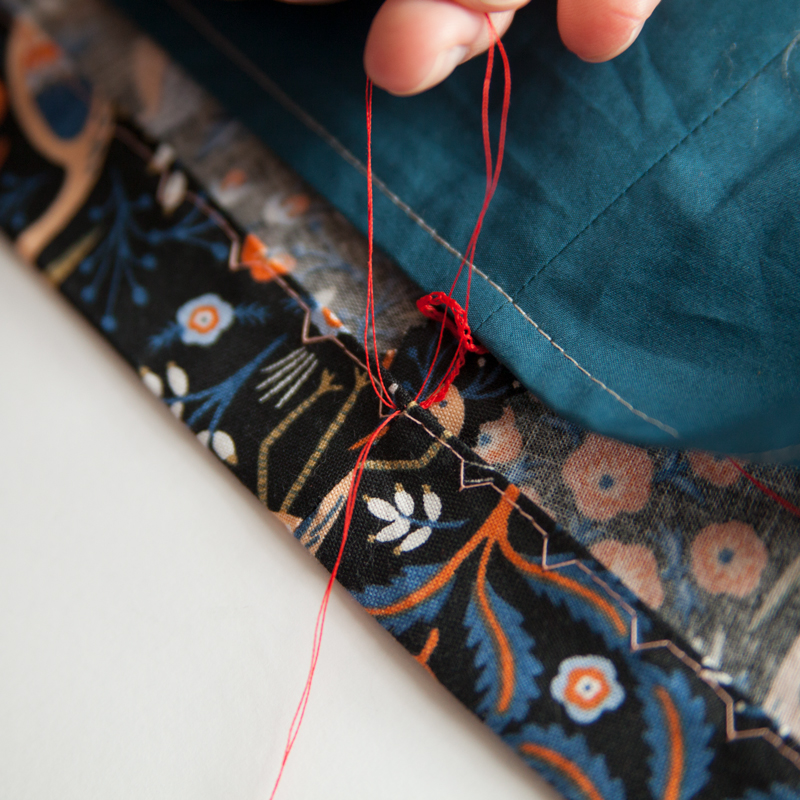
Continue this same looping and knotting technique until your thread chain is about two inches long. (If you crochet, this will have just become very familiar.)
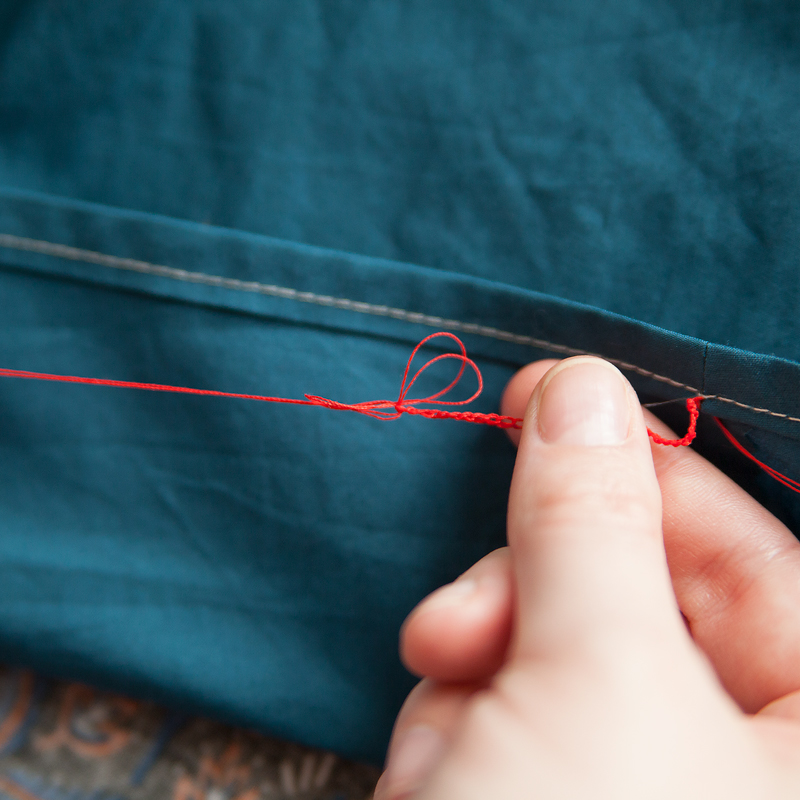
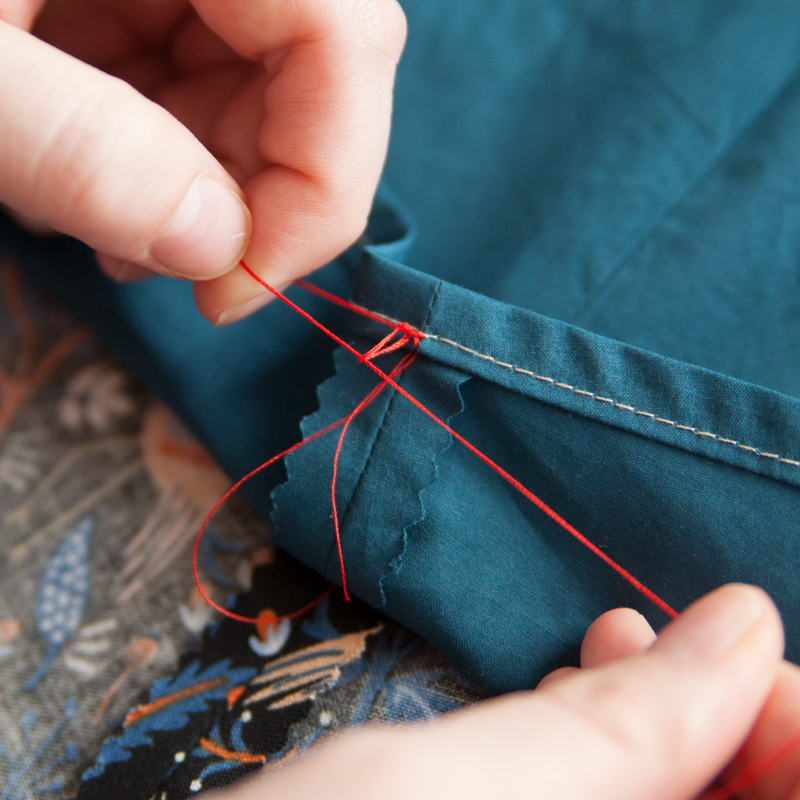
Finish the thread chain by threading the needle through the last loop and pulling tight.
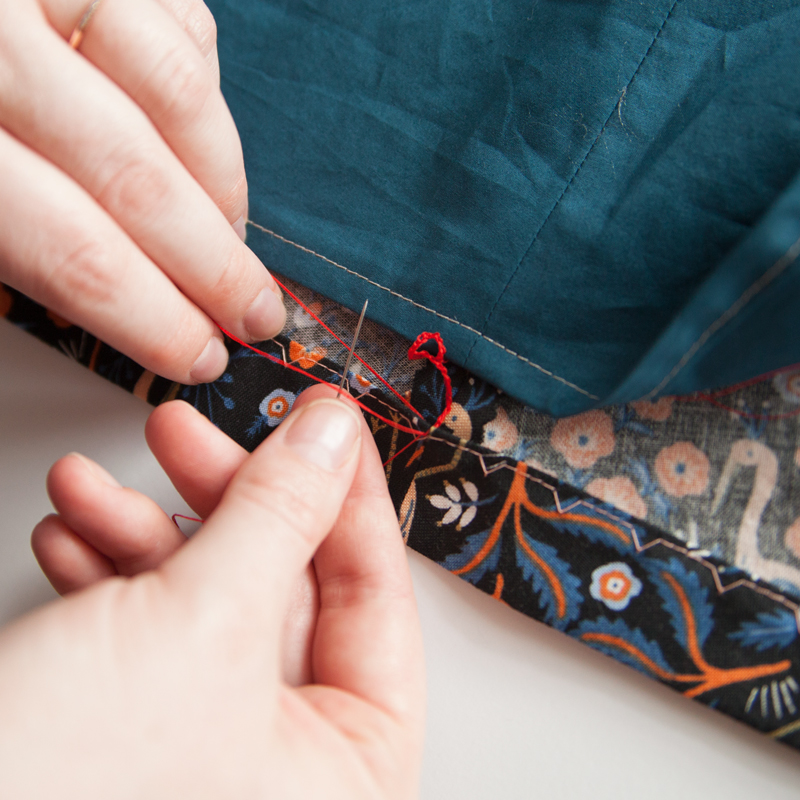
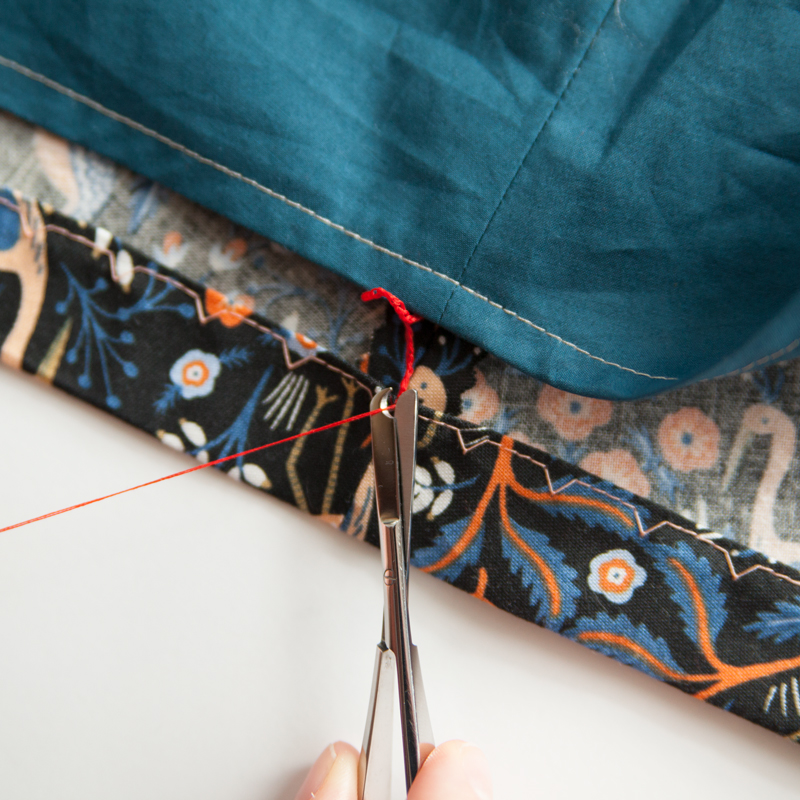
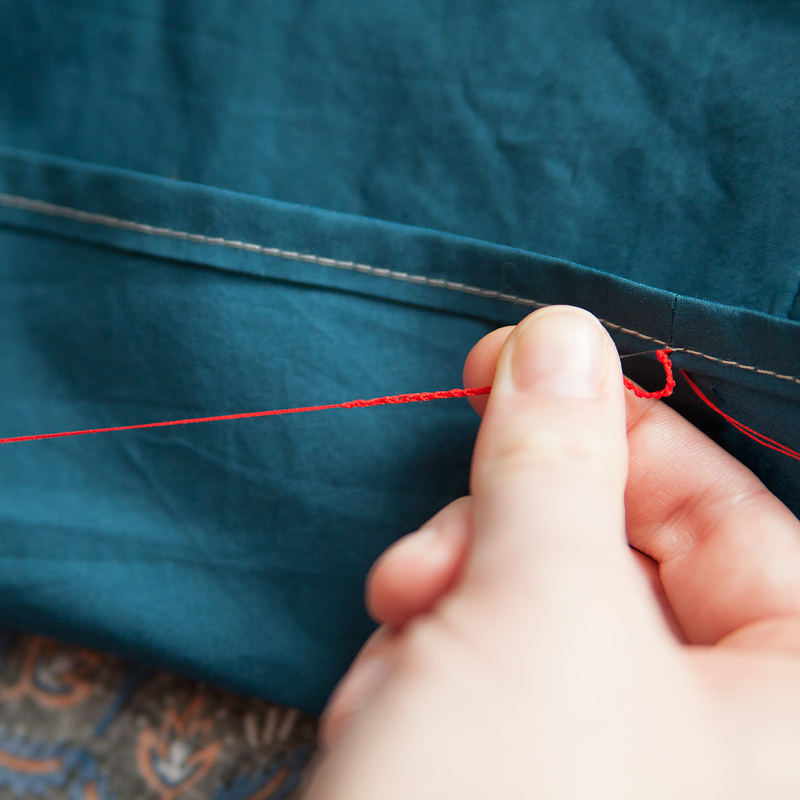
Sew the end of the thread chain to the wrong side of the outer piece, near where you began the thread chain on your inner piece. This will keep the pieces in place while allowing for some wiggle room.
To learn a technique for creating thread chains by machine take a peek at Haley’s Thread Chains Two Ways post on the Colette Blog.
Share your Rue!
I hope you have enjoyed the Rue Sewalong! We would absolutely love to see what you’ve made!
Here are a few ways you can share:
- Upload to Instagram. Mention @colettepatterns and use the hashtag #coletterue
- Upload to your blog or any other service and add a link in the comments!
- Send us an email at service@colettepatterns.com
I’ll round up my favorites in the final parade post on Tuesday. I can’t wait to see what you’ve made!
Comments
I finished my Rue last week, but I can’t show it yet because it’s my wedding dress!! Ahhh! I used the original pattern with adjustments, but I would totally make it again with the new changes.
Oh do share!
That is so exciting, congratulations! Once this big day comes, we’d all love to see photos!
Done! Finally. I’ll get some photos tomorrow and post them to IG and my blog on Monday. :) Thanks for all the help Katie!
Yay!!! What is your Instagram handle? I want to make sure that I see it ;)
@antoinettemcnulty – hopefully you saw it. I was trapped st work all day and just saw this. :)
I just emailed 2 pictures of my finished Rue to service@colettepatterns. I finished it a few weeks ago, since I ended up making the original bodice, and have had a few great comments on it each time. My favorite parts of how my dress turned out are the piping (which matched up perfectly everywhere and even at the zipper, of course with some basting effort) and the raspberry pink ambiance lining that complements the teal and dark green colors of the dress and feels great to wear! My fashion fabric is Brush Dance Dot in ‘Teal’, a Susan Rooney Design of Benartex. It was well worth making 4 muslins of the bodice as it’s a perfect amount of ease throughout. Thanks for offering the sewalong!