

Happy Boobie Day on the Rue sewalong! This post is all about adjusting Rue for a small bust. The full bust adjustment can be found here. Remember—bust height adjustments should be made before small or full adjustments. You can learn all about adjusting bust height here.
DO I NEED A BUST ADJUSTMENT?
Most pattern companies draft patterns based on a B cup, but we draft for a C cup for sized 0-18, and a DD for sizes 20-26.
If you’re making size 0-18 and are an A or B, you will need a small bust adjustment or SBA. If you are a D or larger you will need a full bust adjustment or FBA.
For sizes 20-26, if you are a D or smaller you will need an SBA, and if you are a DDD or larger you will need an FBA.
DETERMINE ADJUSTMENT AMOUNT
The amount to add or subtract from your bust is relative to the amount of ease you like to have in your garments. Below are my recommended bust ease amounts for different sizes in a semi-fitted dress in a medium-lightweight woven.
Sizes 0-8: 1 1/2″ ease
Sizes 10-26: 2 1/2″ ease
To determine how much to add to your bust, simply follow this equasion.
Your Bust Measurement + Preferred Ease Amount – Finished Measurement = Adjustment Amount
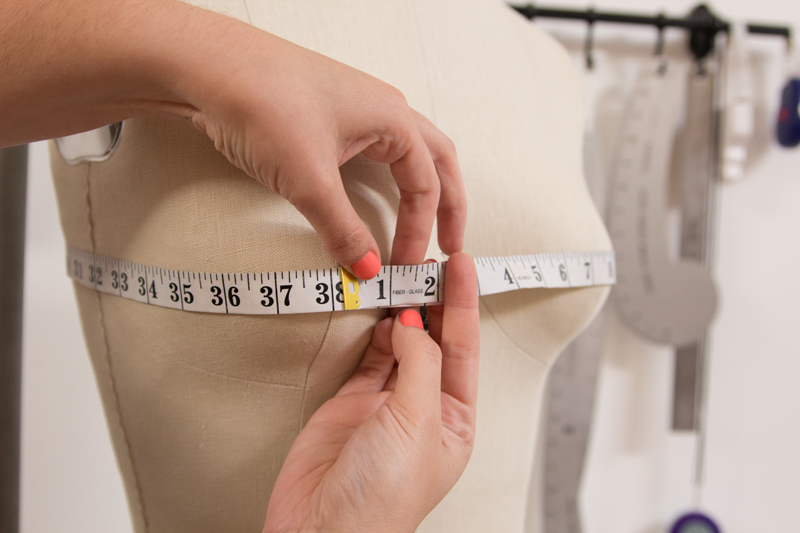
Let’s take a look at my measurement chart, as an example.
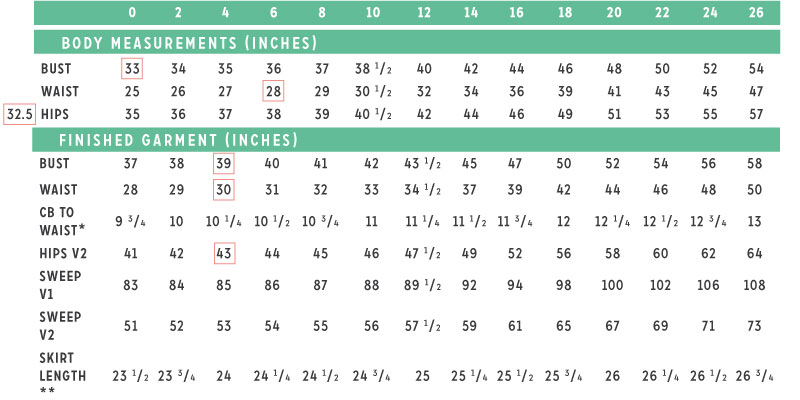
My bust measurement: 33″
The size 4 finished measurement: 39″
Recommended ease in size 4: 1 1/2″
33″+ 1.5″= 34.5″
34.5″- 39″= -4.5″ SBA
We will be adding extra room for the bust in two places on pieces that are cut twice. Therefore, we need to divide this FBA amount into 4 to evenly distribute the fullness.
-4.5″ SBA ÷ 4 = -1.125″
I rounded down to -1″ for each tuck, just for my sanity’s sake.
You’ll need:
- Your Rue pattern
- A clear ruler (I use a 2” x 18”)
- Pencil
- Pattern paper
- Paper shears
- Tape
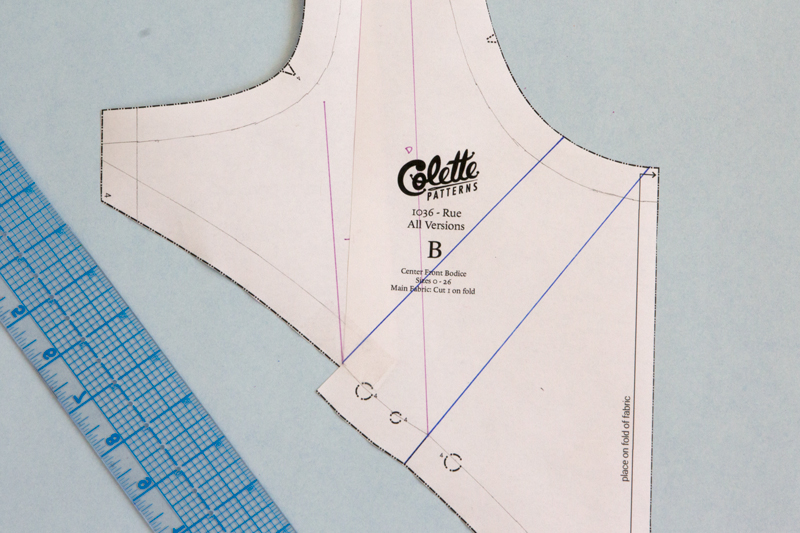
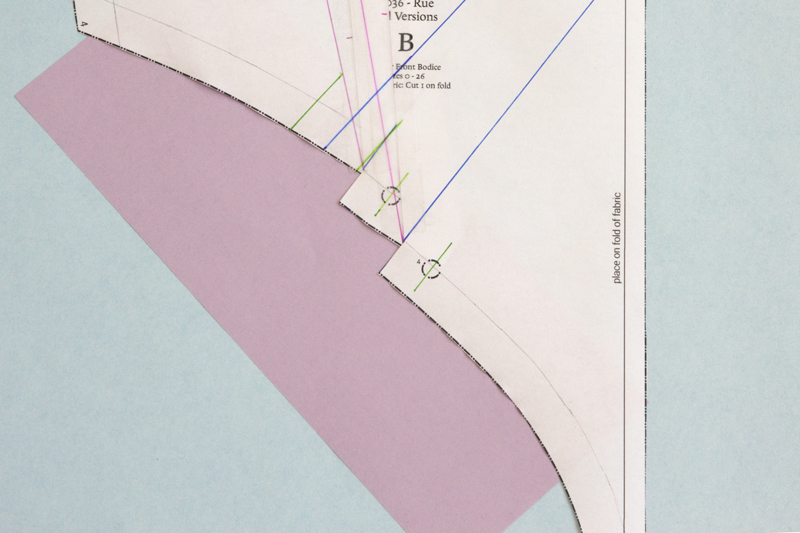
Preparing Center Front Bodice Piece
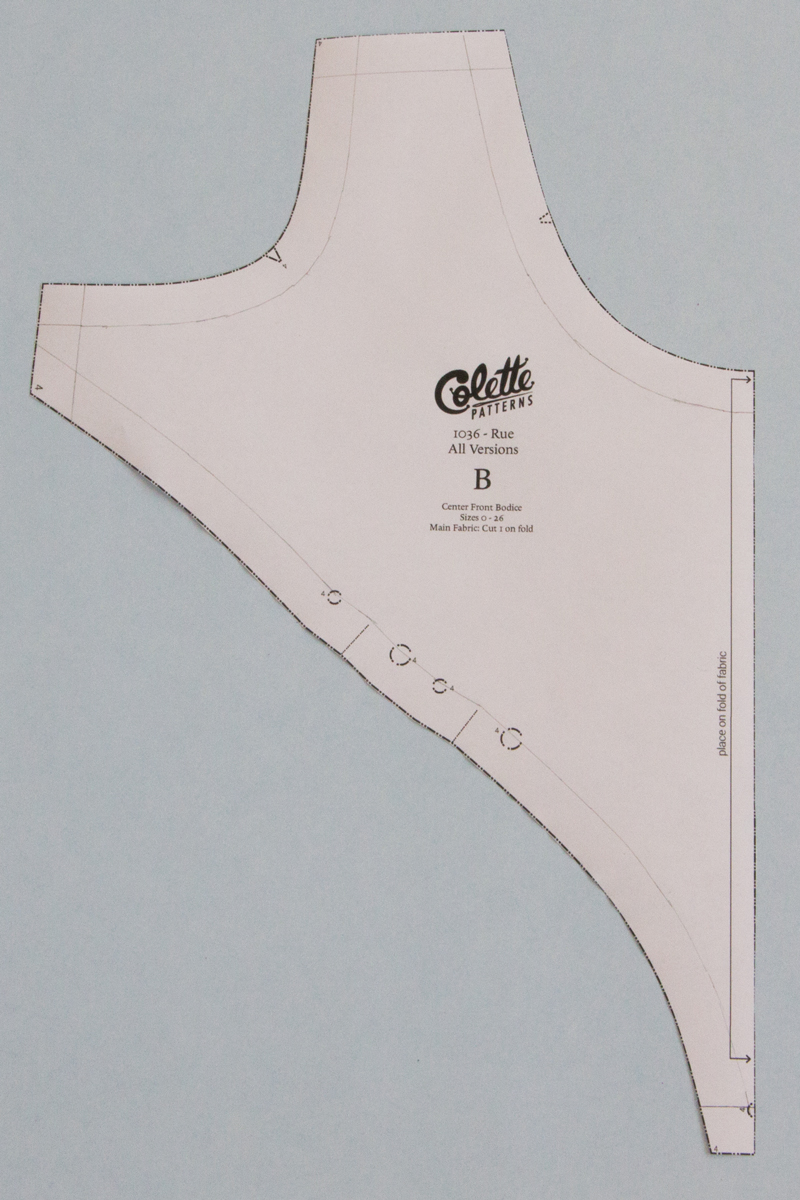 1. Draw in all seam allowances on center front bodice.
 2. With a ruler, extend center tuck lines to neckline.
 3. On the shoulder seam, measure in 1/2″ from the sleeve seam line and mark, this will be mark A. Measure in 1/2″ from the seam line on the necklines and mark, this is Mark B.
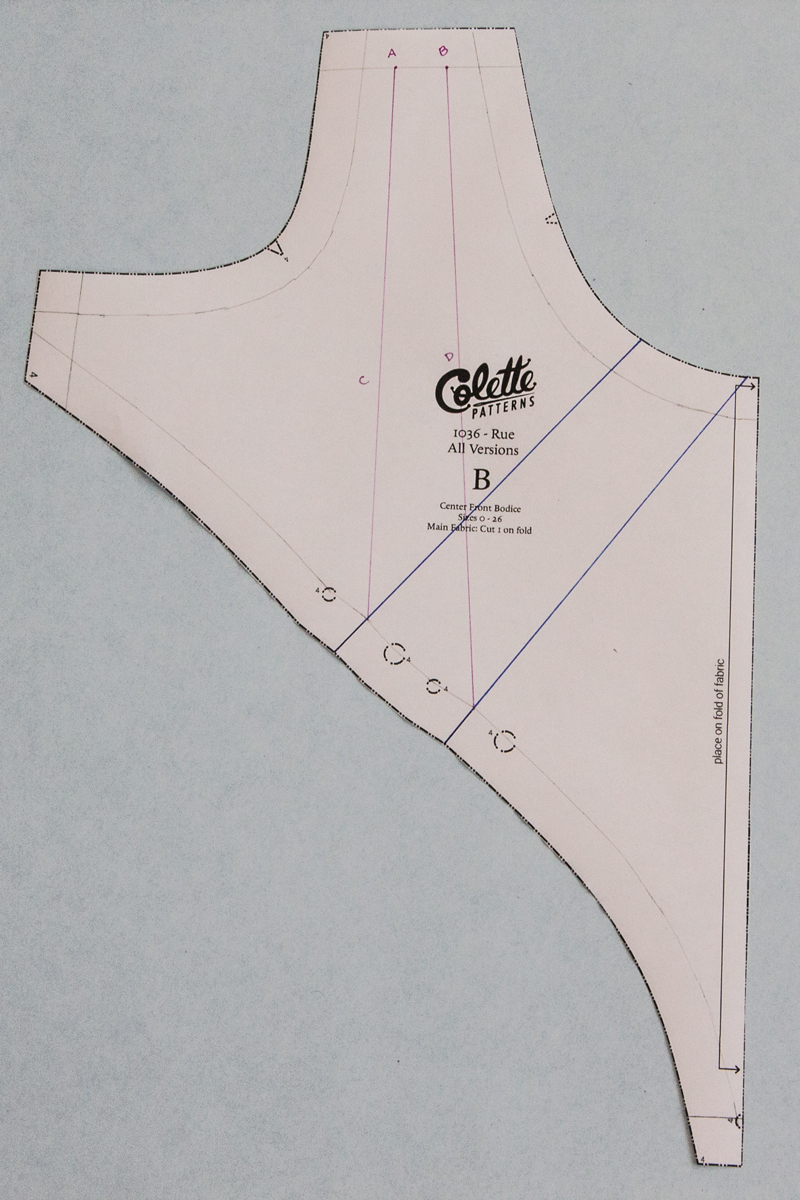 4. Draw a line from mark A to the point in which the seam line and left tuck line intersect. This is line C.
Draw a line from mark B to the point in which the seam line and the right tuck line intersect. This is line D.
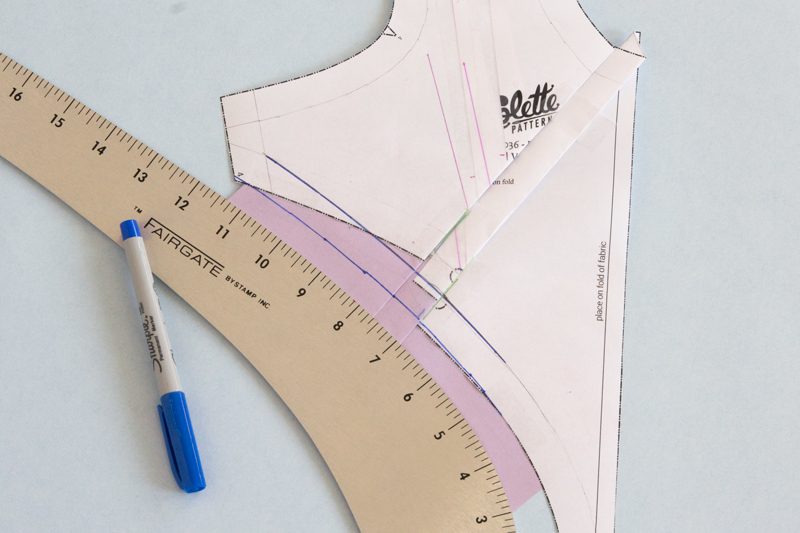
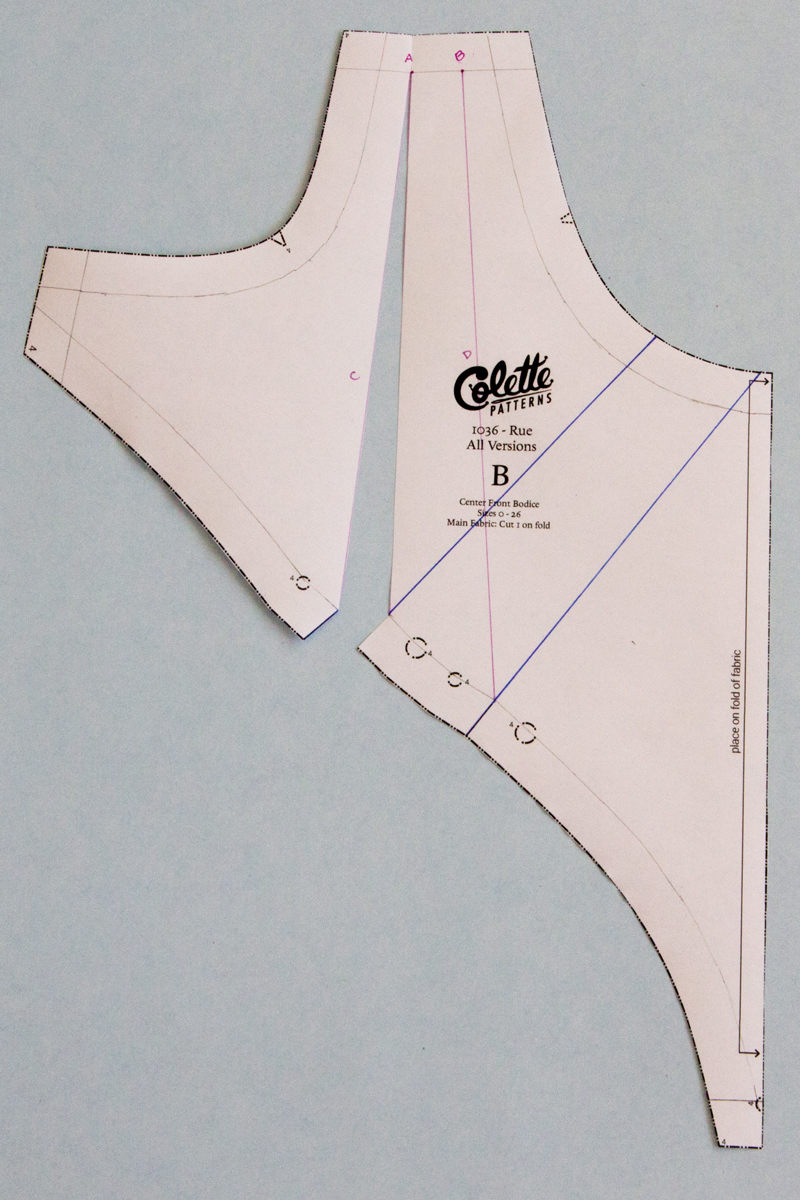 5. Cut through the left tuck line to the intersection with line C and continue cutting through line C to the seam line at the shoulder.
 6. “Hop over” the seam line and continue cutting to the seam allowance, creating a hinge.
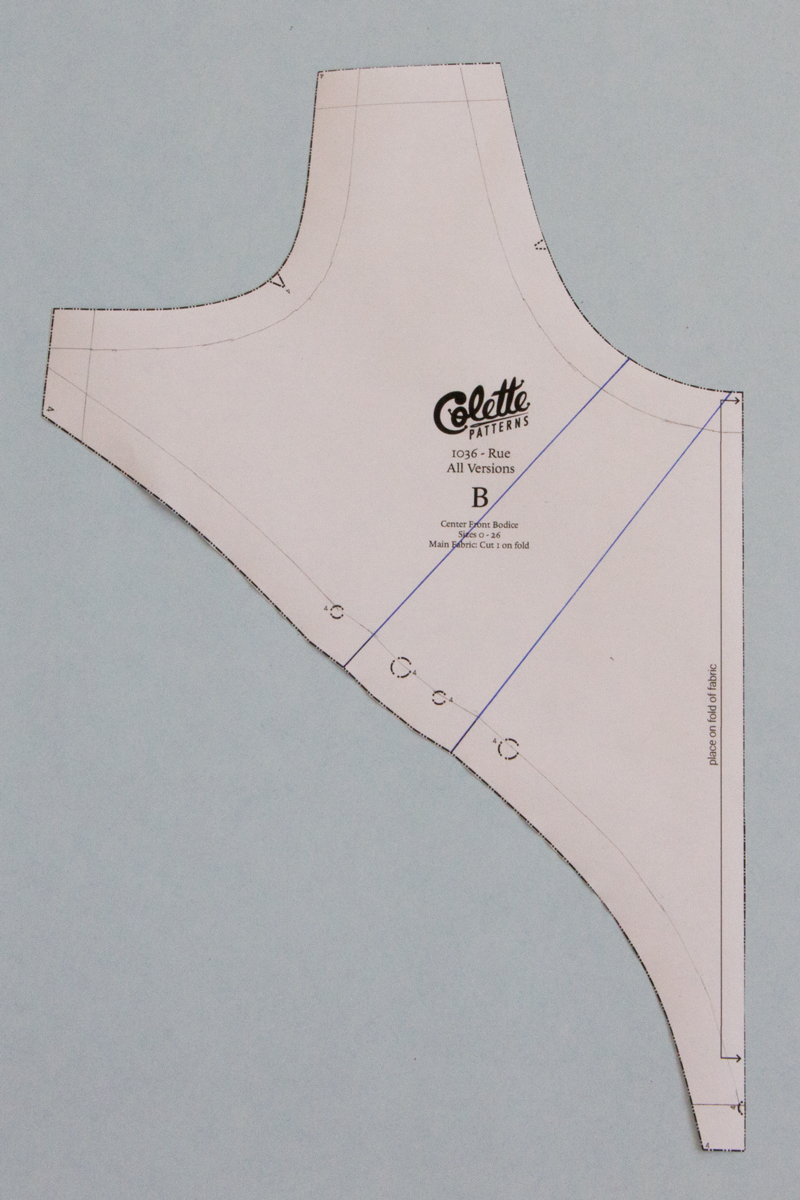
Small Bust Adjustment: Center Front Bodice
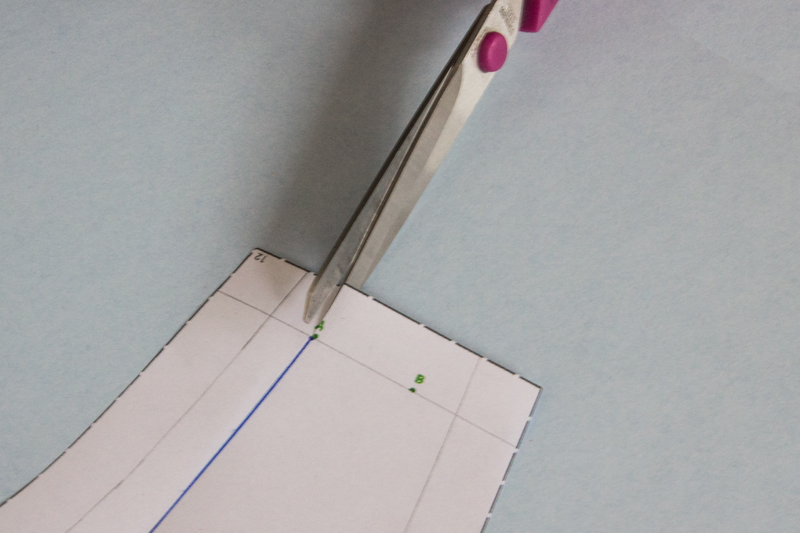
 1. Measure the amount needed to be taken from each tuck to the left of line C and draw a parallel line at this measurement, this is line E.
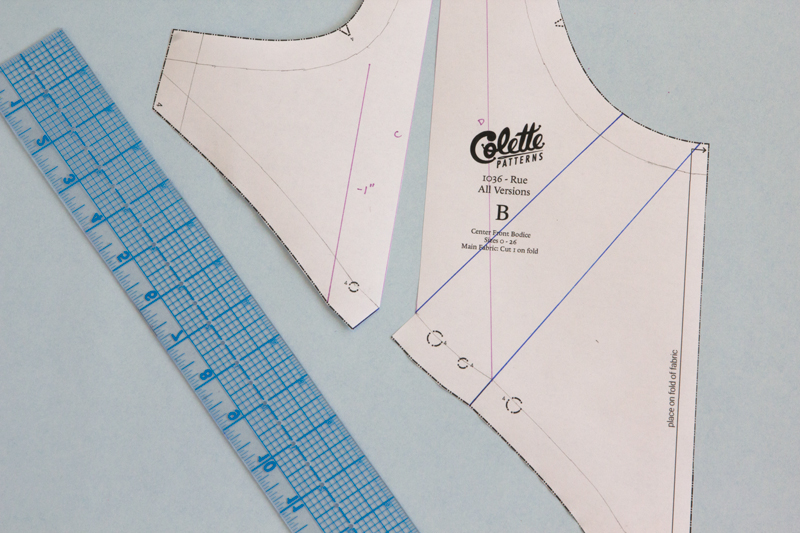
 2. Rotate the left portion of the Center Front Bodice, under line C until line E meets the seam line and line C intersection.
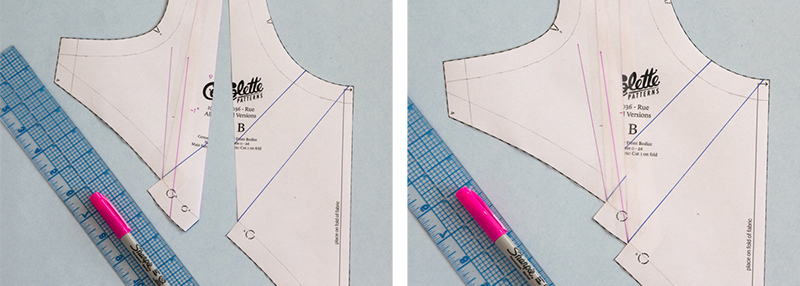 3. Repeat this same process for the right tuck. AS you can see, this adjustment “breaks” the tuck line on the left. Before moving forward, extend the bottom of the left tuck line back down to the style line.
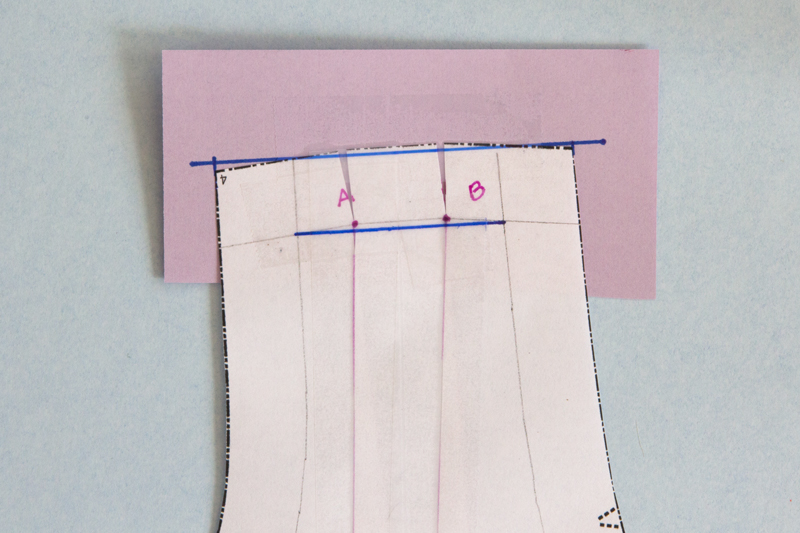 4. Insert a piece of scrap paper behind the shoulder seam and tape in place. With a ruler blend and redraw the seam line and seam allowance of the shoulder seam.
Truing Lines and Redrawing Tuck Marks: Center Front Bodice
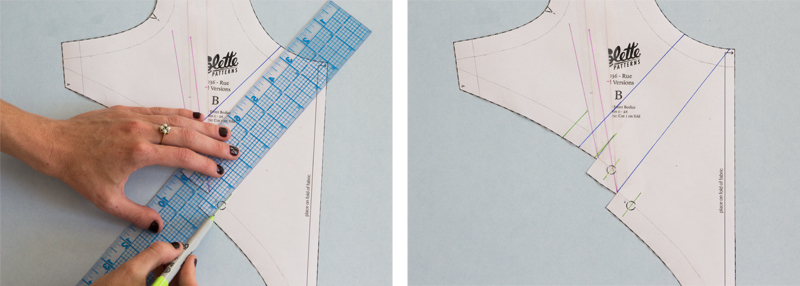 1. Start by drawing a short line, 3/4″ away from and parallel to the tuck right line (blue). Continuing up the style line, draw a set of 5 lines, all 3/4″ away from eachother, parallel to the right tuck line.
 2. Tape a piece of scrap paper under the style line.
3. Fold the tucks. Redraw the seamline, blending from the original line towards the top and bottom. Add seam allowance. Cut away extra paper.

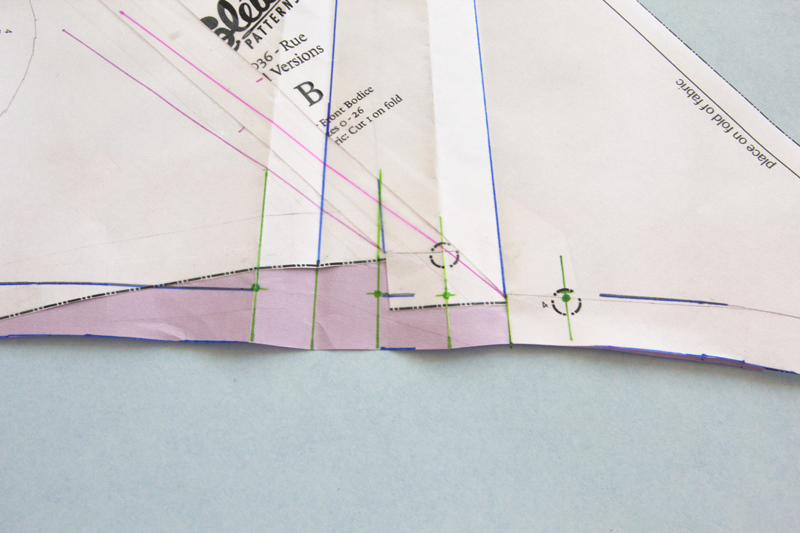
4. Remove tape keeping tucks in place. With the pattern flat, measure 5/8″ from the cut edge up each of the tuck placement lines and mark with a dot. These lines and dots are now your new tuck marks.
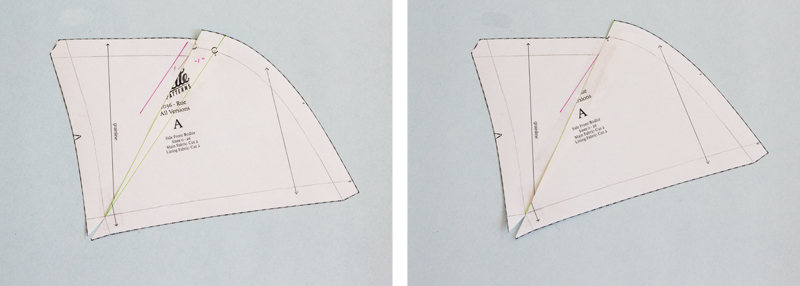
Preparing Side Front Bodice Piece
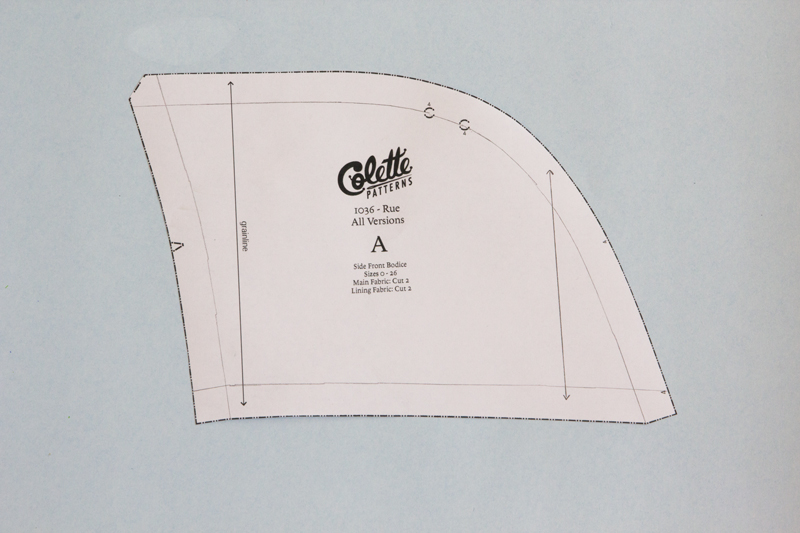
1. Draw in all seam lines on Side Front Bodice piece. Draw an additional grainline marking towards center front.
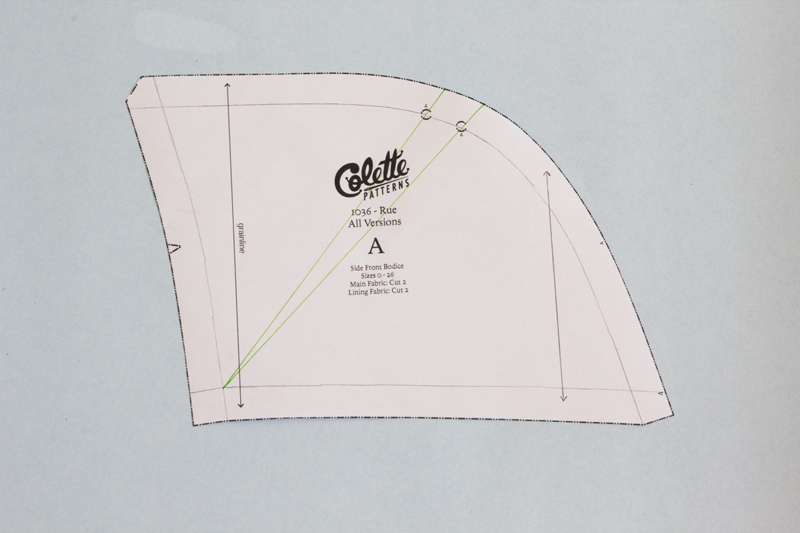
2. Draw one line from the intersection of the side and waist seam to the lower tuck placement dot, this is line A.
Draw an additional line from the intersection of the side and waist seam to the upper tuck placement dot, this is line B.
3. Cut through line B, from the style line to the seam line, “hop” over the seam line and snip into the seam allowance.
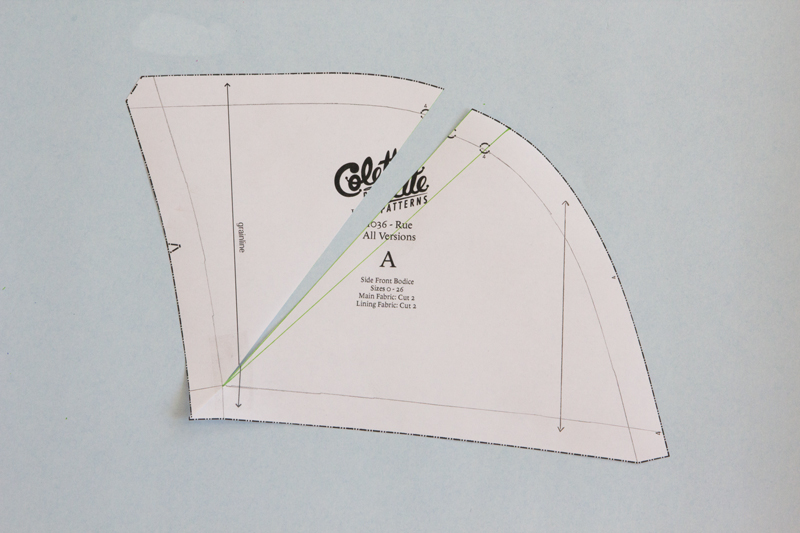
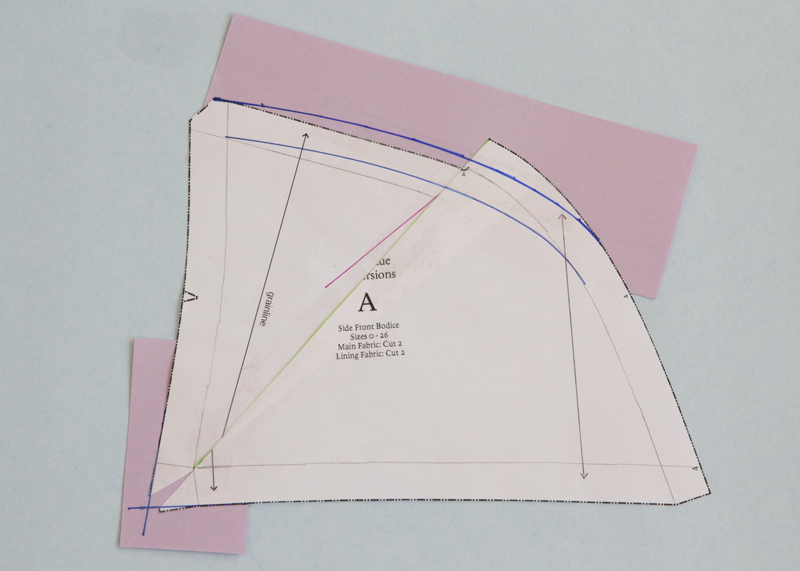
Small Bust Adjustment: Side Front Bodice
1. Measure the amount needed to be taken from each tuck to the left of line B and draw a parallel line at this measurement, this is line C.
2. Rotate the top portion of the Side Front Bodice, over line B until it meets with line C, at the seam line. Tape in place.
3. Repeat this step for the second tuck mark.
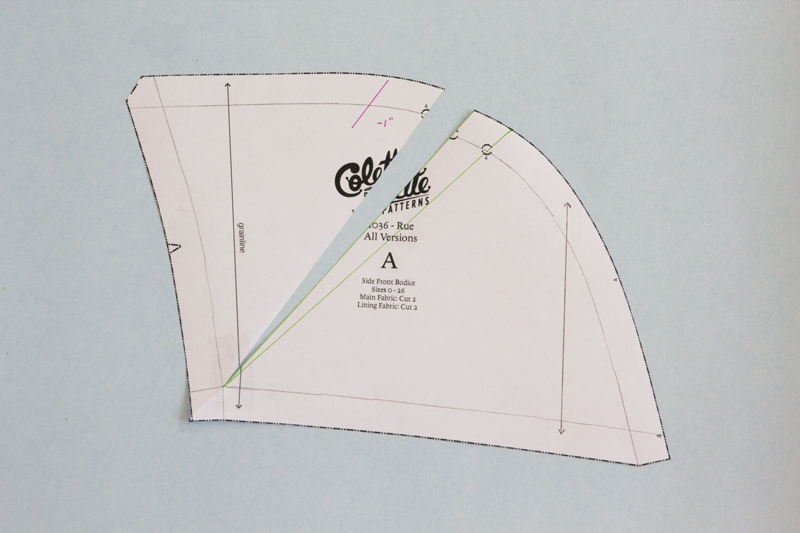
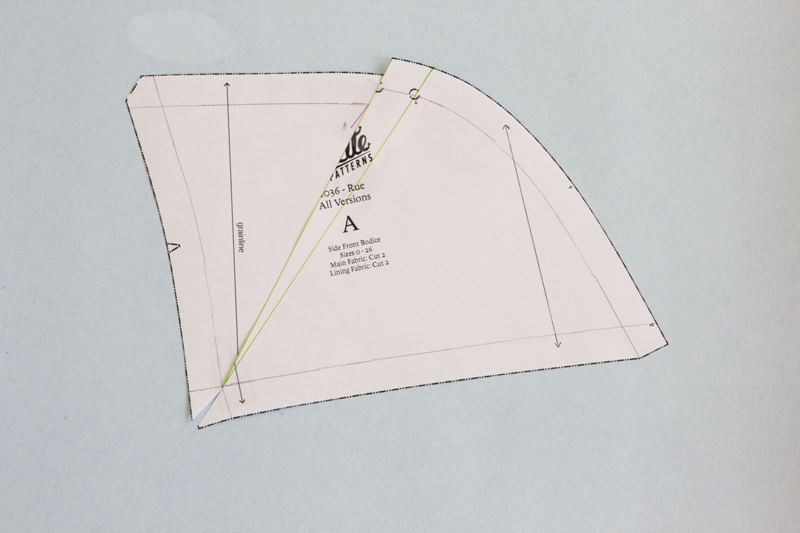
Truing Lines and Redrawing Tuck Marks: Side Front Bodice
 1. Add a bit of paper behind the curved edge of the side front bodice. Using a french curve or curved ruler, re-draw the seam line, making sure to keep it as close to original shape. After re-drawing the seam line, add seam allowance.
- Re-draw the seam allowance at the waist and side seam intersection. You may need to add a scrap of paper here as well.
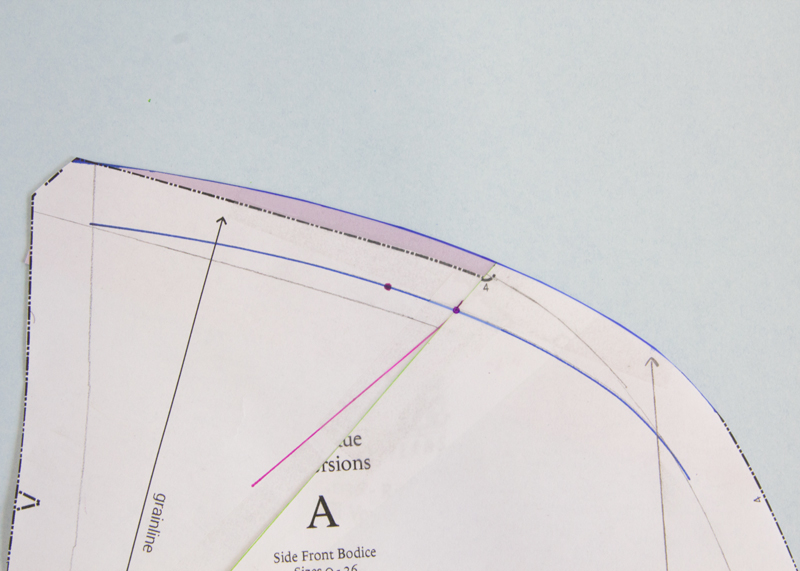 3. Re-mark the left tuck placement mark by measuring up 3/4″ from the farthest right tuck mark. See photo for reference.
Lining Pieces
Rue is a fully lined dress, which is awesome but, I ain’t got time to do all these alterations on the lining pieces! Here’s a little insider tip—the lining pieces for the center front bodice, side front bodice, and back bodice are exactly the same as the main fabric pieces except that they are 1/8″ shorter in the neckline.
To save yourself some time, trace the altered pattern pieces and reduce the neckline by 1/8″.
And you’re done! Bonus Tip: If you’re altering a tissue pattern that you wish to fold up and store to use in the future, you may want to use medical tape for your pattern alterations. This allows you to gently iron the fold lines out because medical tape doesn’t melt like other tapes.
Tune in Thursday for a tutorial on how to adjust Rue for narrow or broad shoulders! This is very useful for those of you who struggle with “falling shoulders” on wide necklines.
Comments
I think the “Truing Lines and Redrawing Tuck Marks: Side Front Bodice” section here is meant for the FBA? How does one true lines for a SBA when there’s significant overlap?
Hey Meghan! Thank you for pointing that out. It’s all fixed.
Woo, thanks! I really appreciate the quick responses to comments here.
My oh my, I have a lot of work to do…. Thank you for a very easy to follow intense tutorial.
This is so fantastic. I may or may not have to use the SBA but it was fascinating either way :)
I see a weekend project in my future! I have to subtract 1.375 inches x 4. Should I round down to 1.5?
Hi Michelle! What amount of ease have you given yourself in the bust?
1.5 inches. I went with 1 3/8 inch adjustment on each tuck. Will make a muslin with those changes & see how it fits.
Hello, I have a question, I am from Germany,perhaps I make a lot of mistakes in my writing, but I hope my english is good enough for you to understand. You write that you recommend an ease of 1,5 Inch in your size. But in the sizes 0-8 there is allways a difference between body measurements and finished garments of 4 inches concerning the bust. I reason that this 4 inches are the ease of this pattern, much more than you recommend.