

Fit is a very important part of sewing, and while it’s tempting to hurry through this part to get to the more exciting stuff, it’s really worth it to spend a little bit of time on fit to make sure you’re happy at the end of the process.
Choosing your size
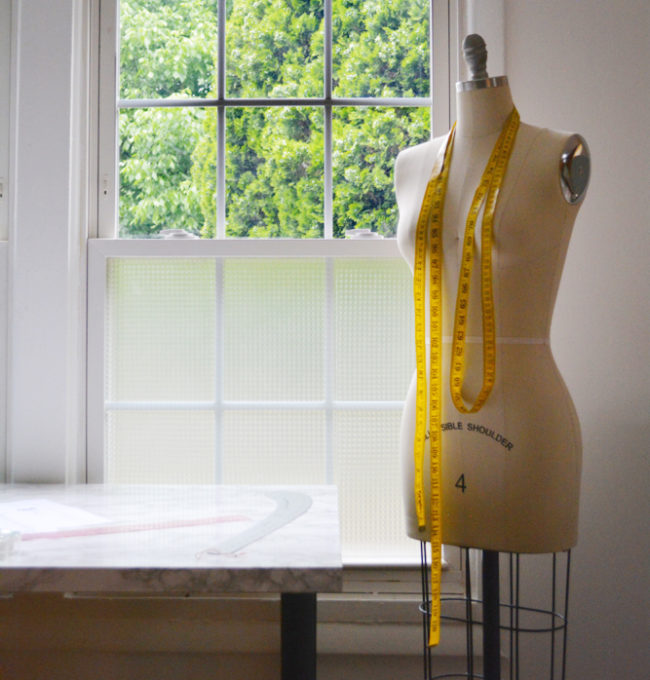
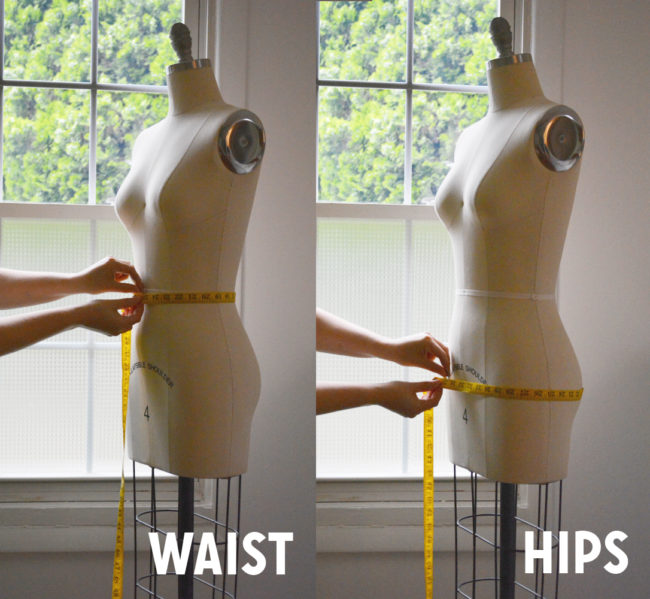
Using a tape measure and wearing undergarments or non-bulky clothing, take your waist and hip measurements. Your waist is the narrowest part of you, usually when you crease when you bend to the side. Your hips are the widest part of you below the waist, generally about 8-10″ below the waist. Make sure the tape measure is parallel to the floor and snug but not digging in.
Make a note of your measurements and see where you fall on the size chart. It’s ok if you are in different sizes for your waist and hips – in a moment we’ll go over how to blend sizes. If you are in between sizes, it’s better to go to the next size up, because Selene is fitted, and you can always take it in if it’s a little too big.
If you are in the same size at the waist and hip, you can go ahead and either cut out or trace your pattern pieces. Tracing takes extra time, but it can be good to have an unaltered original in case you end up making any pattern adjustments that don’t work out and you want to start over.
Blending sizes
If you are in different sizes at the waist and hip, it’s easy to blend between sizes to give your Selene a custom fit.
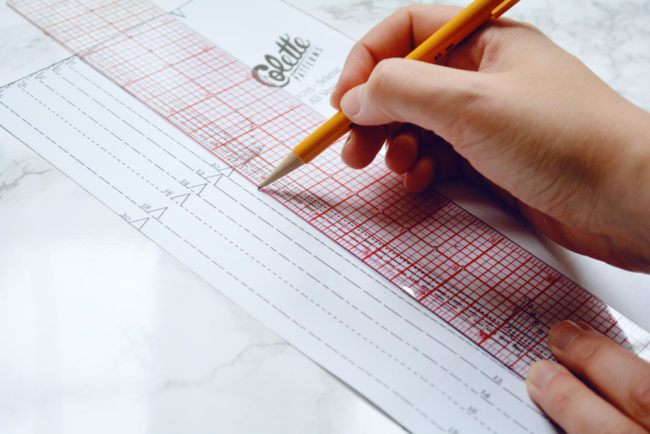
The general idea is to use a ruler to draw a line from one size at one landmark (your waist) to a different size line at the second landmark (your hips). You want the line to blend smoothly at the top and bottom so that there are no pointy bits in your seams.
You want to be sure to adjust all pieces involved in the waist and hips when blending sizes. Because there are multiple versions of Selene with different pieces, I’ve broken everything down into a little checklist so that you make sure you are getting all the pattern pieces for your version.
First, for all versions, cut or trace the waistband pieces (A, B and C) in your waist size.
For Version 1, blend from waist to hip on nested side edges of the following pieces:
D Back
E Side Front
F Center Front
M Left Back Lining
N Right Back Lining
O Side Front Lining
P Center Front Lining
For Version 2, blend from waist to hip on nested side edges of the following pieces:
D Back
E Side Front
F Center Front
M Left Back Lining
N Right Back Lining
O Side Front Lining
P Center Front Lining
Roughly cut out J, K and L outside size lines and set aside. We will be discussing how to adjust them to reflect the size blending in the next post.
For Version 3, blend from waist to hip on nested side edges of the following pieces:
D Back
F Center Front
M Left Back Lining
N Right Back Lining
O Side Front Lining
P Center Front Lining
Roughly cut out G, H and I outside size lines and set aside. We will be discussing how to adjust them to reflect the size blending in the next post.
Lengthening and Shortening
Since we are all different shapes and sizes, you may need to lengthen or shorten a pattern piece – for instance, if you are short- or long-waisted, or have shorter or longer legs than average. You don’t want to just add or subtract length from the edges, because this will change the length of those edges and the proportions of the garment. It will also interfere with the skirt vent in the back.
First, to determine whether or not you need to lengthen or shorten, look on the fabric yardage chart to see the finished back length. This is the measurement of the length of the skirt at center back. Take a tape measure and pinch it at that measurement number. Hold this to your waist at center back and let the ‘0’ end of the tape measure dangle down. Look in a full length mirror – where the end of the tape measure is is where the bottom of the skirt will be.
If you aren’t sure, it’s best not to do anything until you’ve made and tried on your muslin.
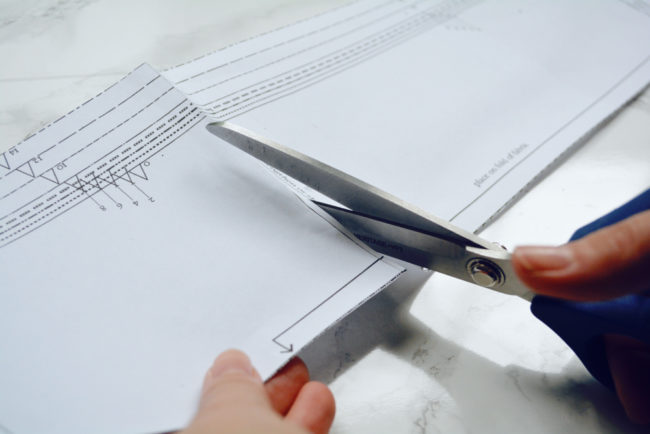
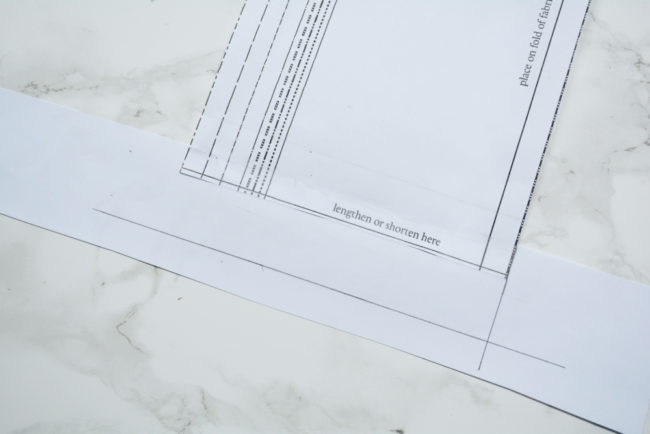
To shorten a pattern piece, determine how much shorter you’d like it to be. Then use a clear ruler to draw a line this amount above either lengthen/shorten (L/S) line.

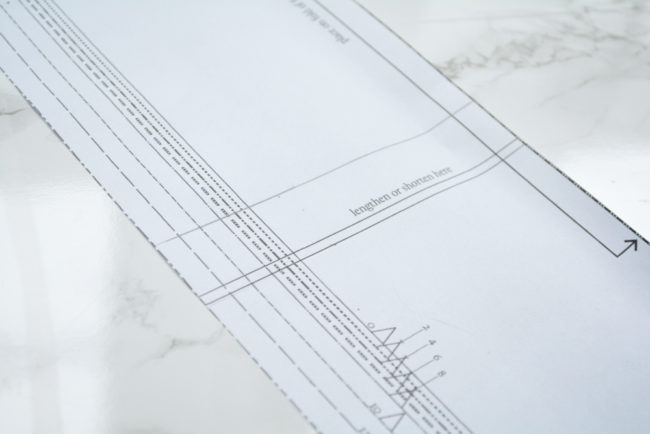
Fold the pattern piece along the same L/S line and bring the fold up to meet your drawn line. Tape in place and trim any jagged edges.
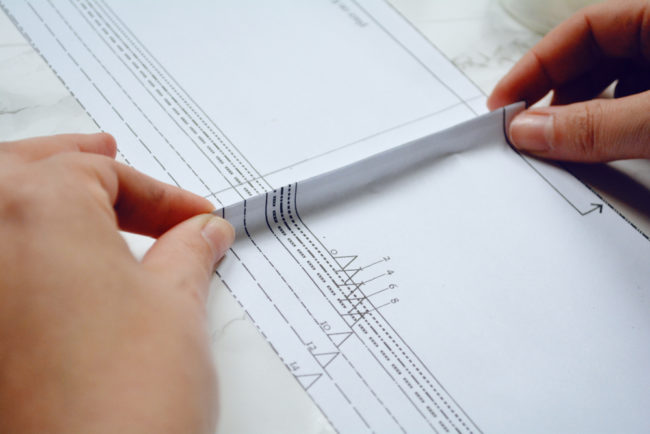
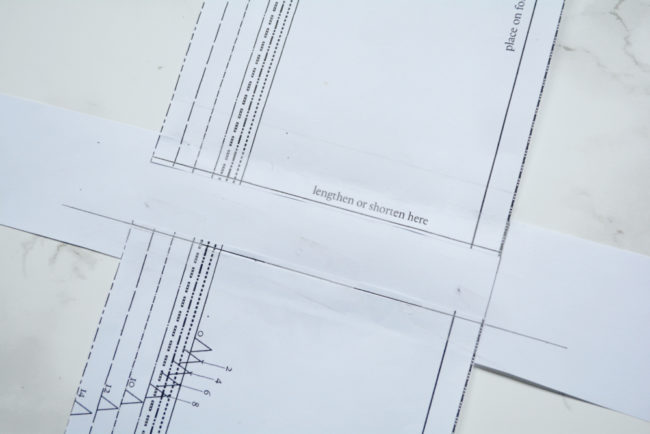
To lengthen a pattern piece, cut the piece apart between the L/S lines.
Place a strip of paper behind the upper half (you can use scraps of pattern tissue) and tape in place. Use a ruler to draw a line below and parallel to the upper L/S line.
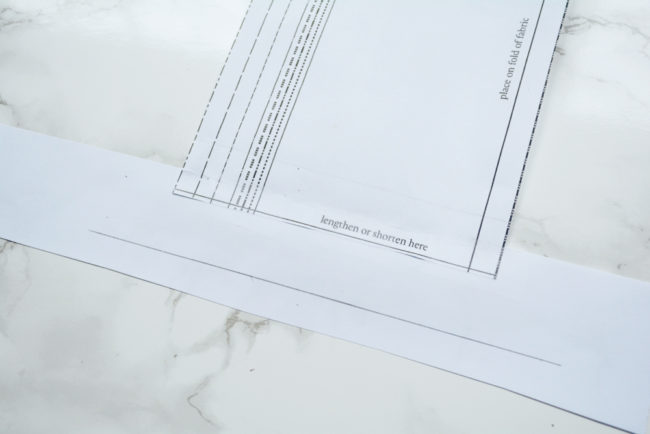
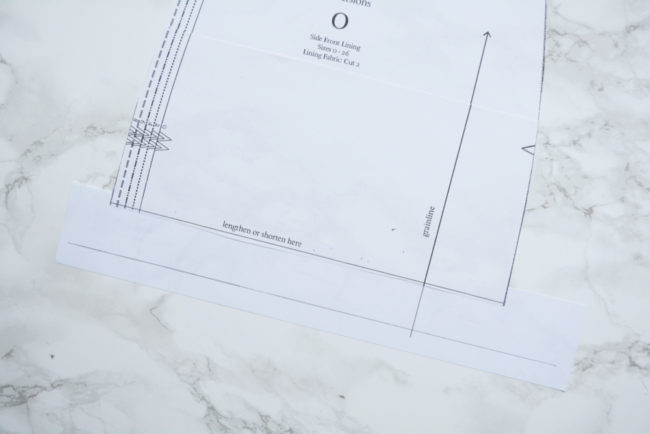
If you’re lengthening a piece cut on the fold, use a ruler to extend the fold edge downward.
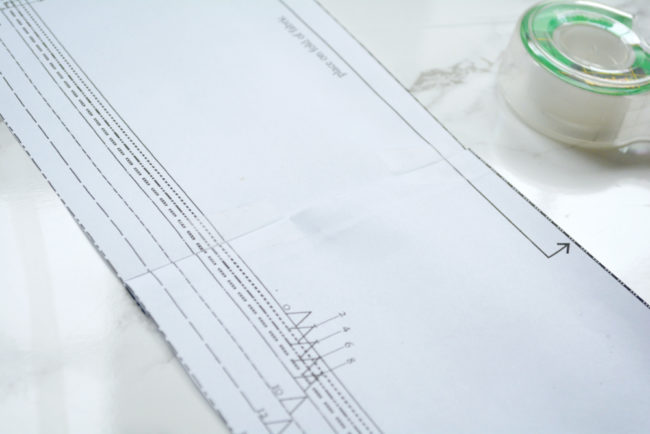
Tape the lower half in place, using the drawn lines as guides. The lower L/S line should be lined up with the horizontal drawn line. Trim excess paper, blending any jagged edges.
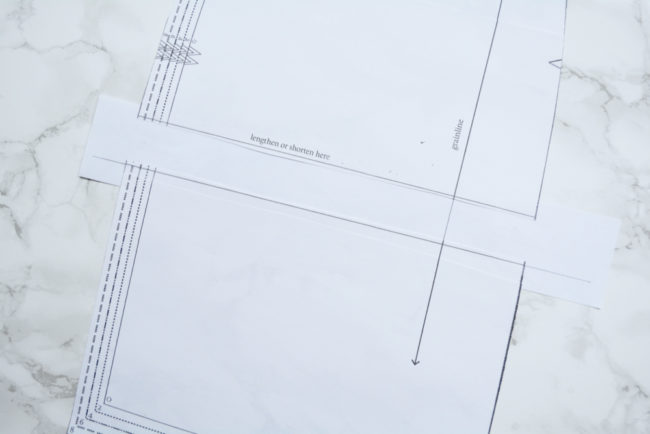
If you’re lengthening a piece not cut on the fold, after drawing the lower lengthing line, use a ruler to extend the grainline across the lengthened space.
Tape the lower half in place, using the drawn lines as a guide and making sure to line up the grainlines. The lower L/S line should be lined up with the horizontal drawn line. Trim excess paper, blending any jagged edges.
If you lengthen or shorten, make sure you do the same adjustment to all pieces for your version that have a L/S line.
Making a muslin
I know it seems like a drag, and you just want to get to the fun stuff, but making a muslin (also called a toile) is really worth it.
When making a muslin, there is no need to do any seam finishing or lining. You’ll still want to backstitch at the beginning and end of each seam, but use a long stitch length to make it easier to seam rip if necessary. If you are doing Version 2, you can totally skip the welt pockets on the muslin.
If you are making Version 3 with the inset pockets, you have a couple choices. You can wait until the next post where we go over pocket adjustments and make your muslin with the inset pockets. Alternatively, you can just use pattern piece E in place of the G/H/I side front unit for your muslin. Once you’re happy with the fit, you can simply transfer any changes from pattern piece E to pattern pieces G/H/I. We’ll go over this in more detail in the next post.
If you’re making Version 2 or 3, be sure to stay tuned for the next post where we go over pocket adjustments!
Comments
What does nested side mean?
Nested means the edge of the pattern with all of the size lines (as opposed to the edges of the pattern pieces that are just one solid line). Then are nested, meaning that the smallest size is on the inside and the biggest on the outside, making it easy to cut between sizes.
Im a little confused because I need to blend my waist (size 10) with my hips (size 8). But we’re not dealing with the waist band in this post. Will that be blended to or do we go with the size closest to our measurements? In my case a size 10.
The waistband doesn’t need to be blended, because it sits at your waist. So that will just be cut at your straight waist size. The skirt goes from waistband to hips, so that’s why those are the pieces that need to be blended.
I’m a little behind because I am a beginner. Today I made my muslin. Good thing. I thought that I needed a size 12 maybe 14. Turns out–not so. I’m still working out the details but it looks like I will end up having a size 10 center front panel, two size eight front side panels with a little extra intake at the waist, a size 10 set of back panels with 1/4 inch more added to each dart and I think that should do it. I’ve also decided that my knobby knees need extra length so I’m adding in 4 inches. Needless to say I don’t trust myself so I’m going to recut my muslin and see where we are. Once I have a pattern that I can trust I have fabric enough to make two, one in gray/brown linen and one in a deep blue linen-ish piece I bought at our local fabric thrift store. Any thing else I should consider?
Hi Ruth! It sounds like you have pretty much everything taken care of! I would do one more muslin and take things from there.