

If you’re making Version 3, it’s time to create the angled inset pockets on the front sides of your Selene! After that, we’ll be assembling the front of the skirt.
assemble side front
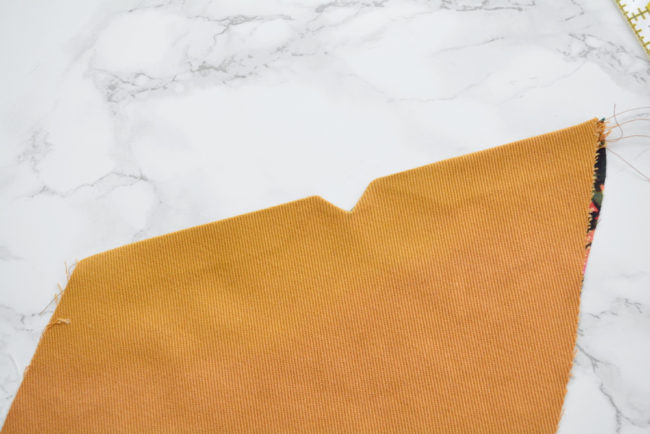
1. Staystitch. Staystitch along the upper edge of the bottom side front, pivoting around the notch detail as shown. (As a reminder, staystitching is sewing along an edge at 1/2″ to prevent stretching.)
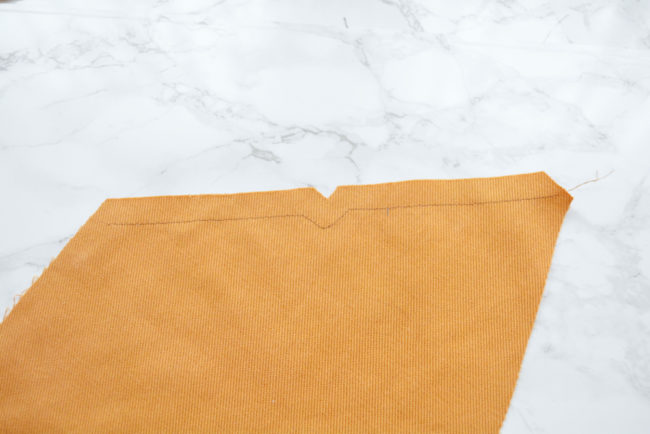
2. Pin and mark pocket edge. Pin pocket lining to bottom side front along the angled notched edge, right sides together. Mark the stitching line around the notch detail. Since the seam allowance is 5/8″, this means draw a line 5/8″ in from all the edges. These will help you know where to pivot as you sew around the cutout.
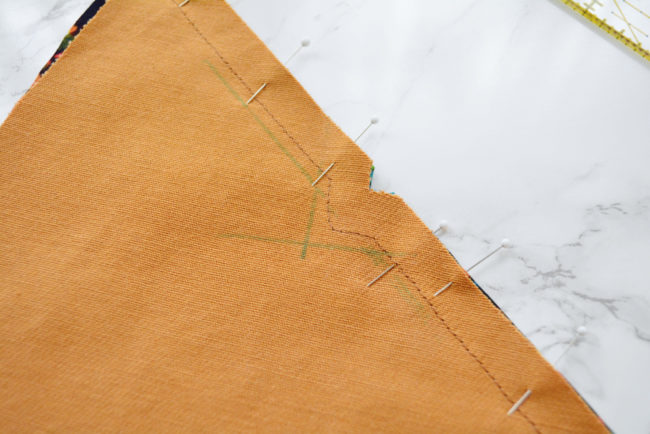
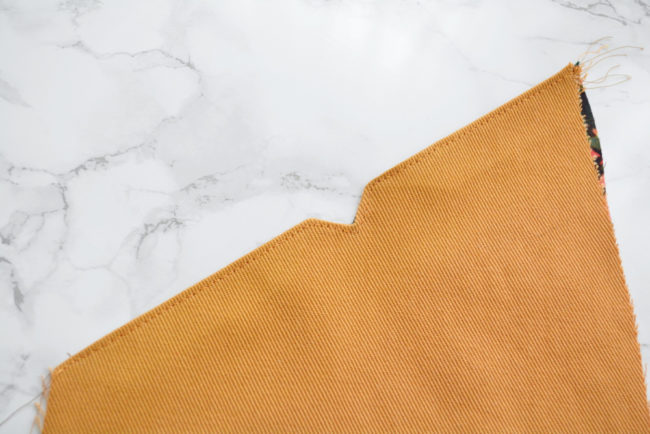
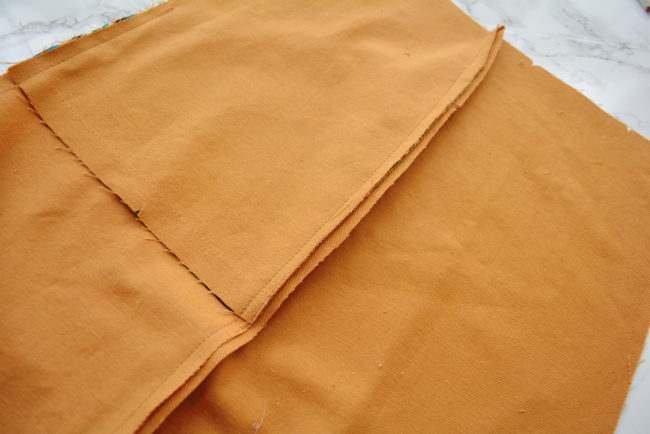
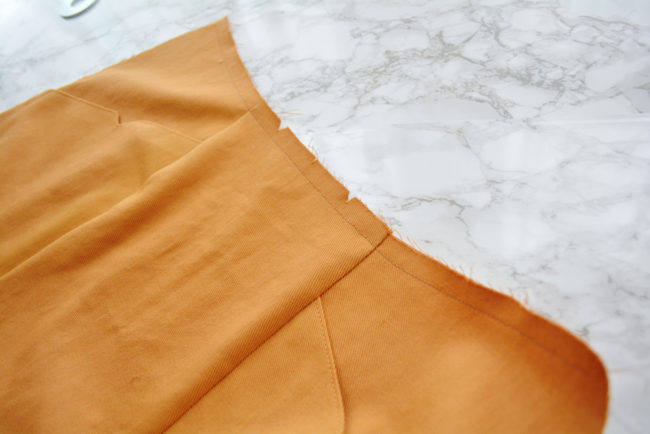
3. Sew lining. Stitch along the angled edge. When you pivot around the bottom of the cutout detail, instead of pivoting fully in one step, pivot halfway, sew a single stitch with the hand wheel that is parallel to the top edge of the fabric, and then pivot again to return to your stitching line. This will help create a flat inverted point when you turn the fabric right side out.
In the photo above, you’ll see this step as the single horizontal stitch at the bottom of the seam stitching line (which is the lower of the two lines of stitching).
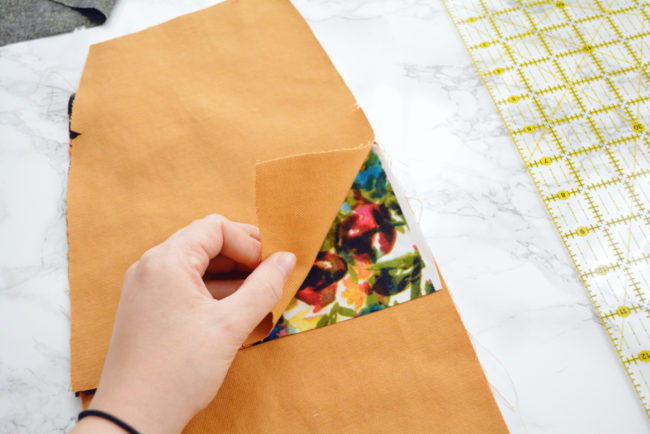
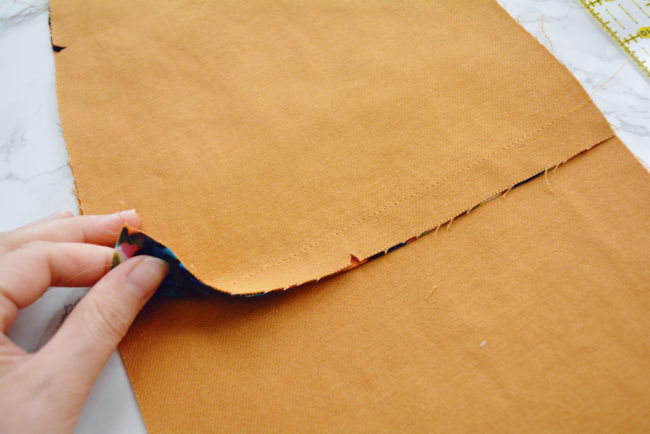
4. Trim seam allowance. Carefully cut a notch down to the bottom of the cutout stitching without cutting through the stitching. Then trim the seam allowance from both cutout corners.
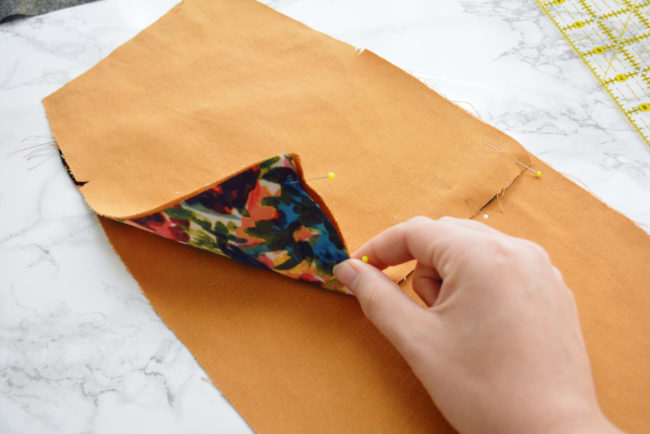
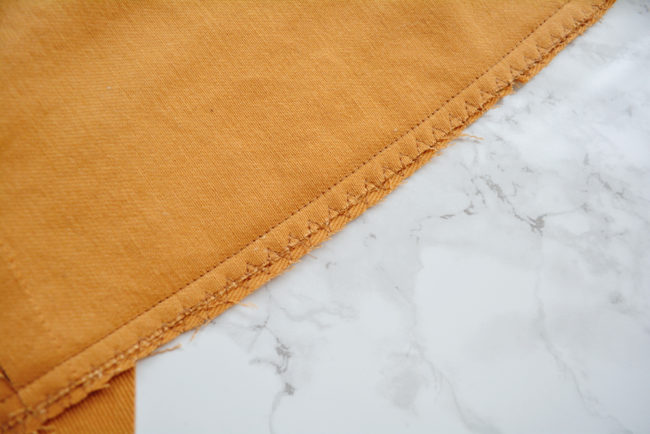
5. Turn and press. Turn the lining to the other side so that it is wrong side towards the skirt. Use a point turner to push out the corners of the cutout detail. Press carefully along the edge, trying to roll the lining slightly towards the lining side so that you don’t see it from the outside of the skirt.
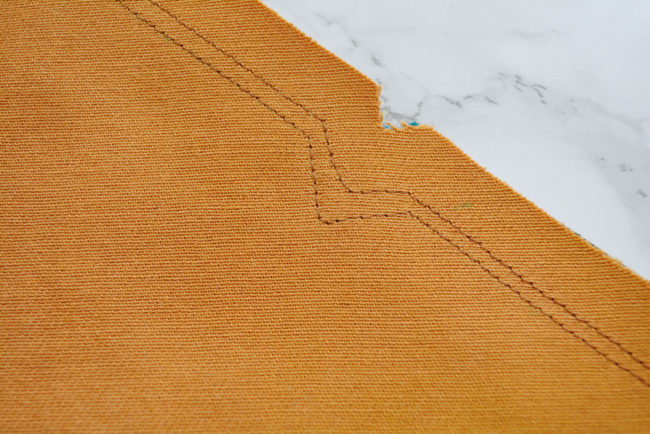
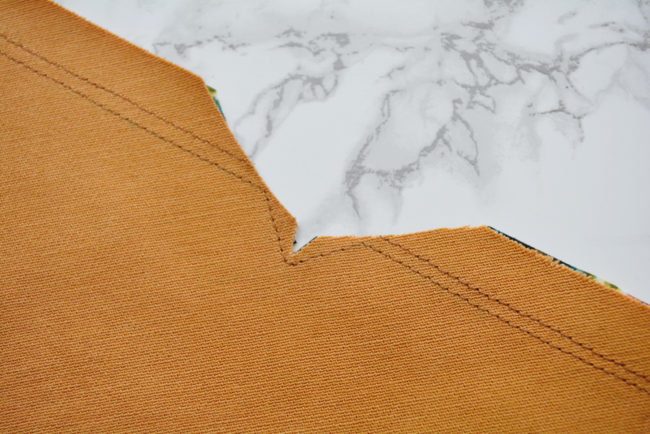
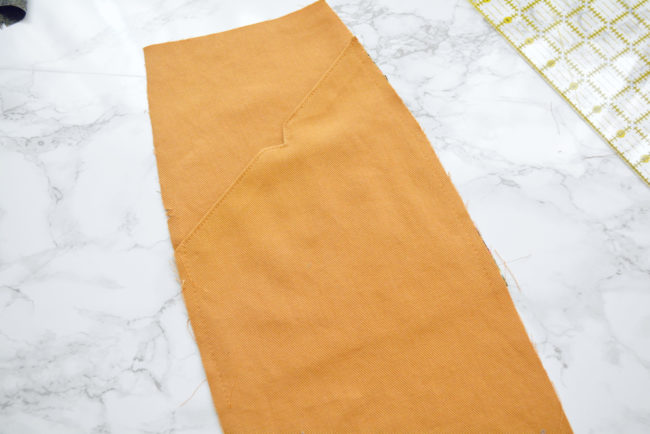
6. Topstitch. Lengthen your stitch to 3.0. Topstitch 1/8″ in from sewn edge, pivoting to go around cutout detail.
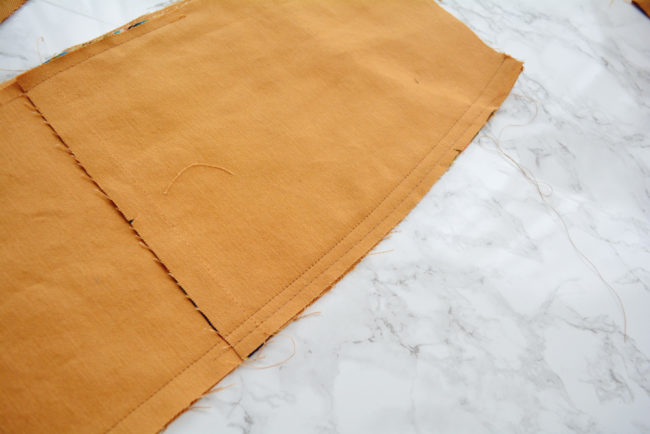
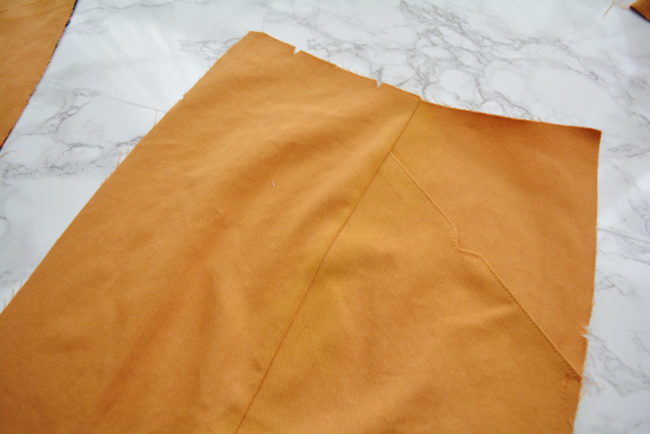
7. Pin top side front. Turn pocket unit over so that the right side of the lining is up. Place the top side front over pocket with right side against lining, aligning the bottom edges. (Note: Make sure you grabbed the correct top skirt, make sure the notches along all the edges match up with the notches on the lining/bottom skirt.)
Pin these layers together. Pin only the top skirt and lining, leaving the bottom skirt free.
8. Sew top side front. Return stitch length to 2.5 and stitch along pinned edge, again leaving bottom skirt free. Finish seam allowance as desired.
9. Baste layers together. Flip skirt unit over. Be sure that all the layers are laying flat and raw edges are aligned. Pin. Lengthen stitch length all the way and baste along each side of pocket at 3/8″ seam allowance.
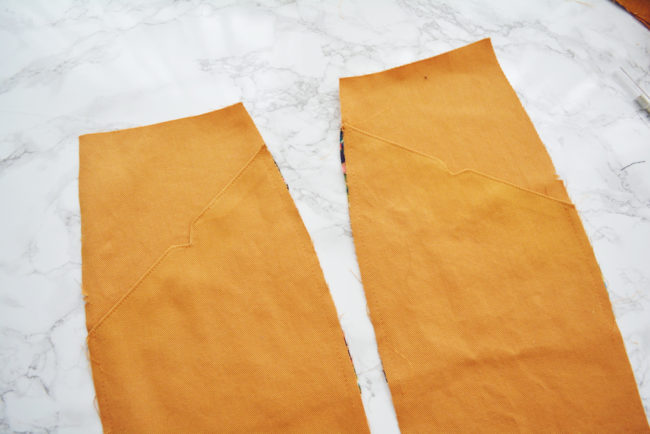
10. Repeat. Repeat all prior steps with the other side of the skirt.
assemble skirt front
1. Pin. Bring one side front over center front, right sides together and aligning notched edge. Pin.

2. Sew. Stitch along pinned edge.
3. Grade seam allowance. Trim just the side front portion of the seam allowance in half to grade the seam allowance. This will reduce bulk in the seam and prevent it from forming a ridge on the outside of the garment.
4. Finish seam and press. Finish seam as desired. I chose a 3 step zig zag instead of serging, since it would add less bulk to the already-thick seam.
Press towards center front.
5. Repeat. Repeat to attach the other side front skirt to the center front skirt.
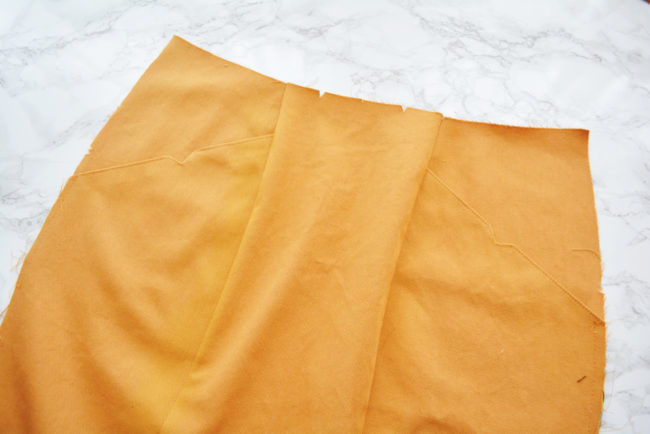
6. Staystitch. Staystitch along the whole top edge of the front skirt unit, making sure the seam allowances stay pressed in the correct direction.
Skirt front with inset pockets, complete! We’ll be back on Tuesday with all versions together sewing the lining and starting to work on the back skirt vent.
Comments
Hello,
thank you for the sewalong. It is very useful!
I have a question regarding the finishing of the pocket (the lower part, the one that is not sewn with the rest of the skirt). As far as I see you haven’t done it. Isn’t it necessary? When should it be done? May be before assembling the skirt front?
Thanks!
Hello! Since the lining will end up covering this seam, it’s not absolutely necessary to finish it, but it will extend the life of the garment if you do. Also, if you are using a loosely woven fabric like tweed, it’s a good idea to finish the seam to prevent it from fraying. You’re right that I didn’t do it in the pictures. If you were to do it, you should do it right after sewing that seam (so when it’s mentioned in the instructions above). Once the side edges are basted you won’t be able to access that seam allowance any more to finish it. Hope that helps!
Thank you for the answer. It is clear now.
I am making my Selene with denim, so I was thinking not to line it. Do you see any advantage of lining a skirt made with a thick cloth like denim?
Thanks!