

Problem: Smaller Arms
Having too much volume in your sleeves can make your entire garment appear much larger than it actually is. Be aware that using bulkier fabric and adding a lining will take up some of the extra ease you see in your muslin. Also, if you plan to wear heavier clothing like sweaters beneath your jacket or coat, be sure to leave enough room for that by trying your muslin over similar clothing.
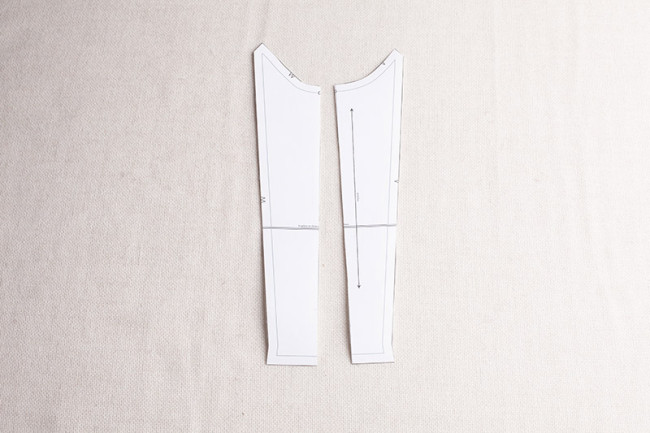
1. Draw a lengthwise line down the center of lower sleeve (M). Slash the piece in half along this line.
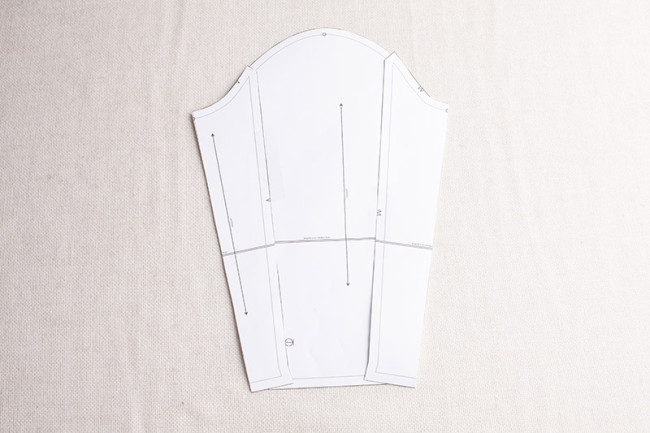
2. Tape each half of lower sleeve (M) to upper sleeve (N) along the seam lines. Check the notches to make sure you are taping the back to the back and the front to the front. Your two piece sleeve should now look more like a typical one piece sleeve.
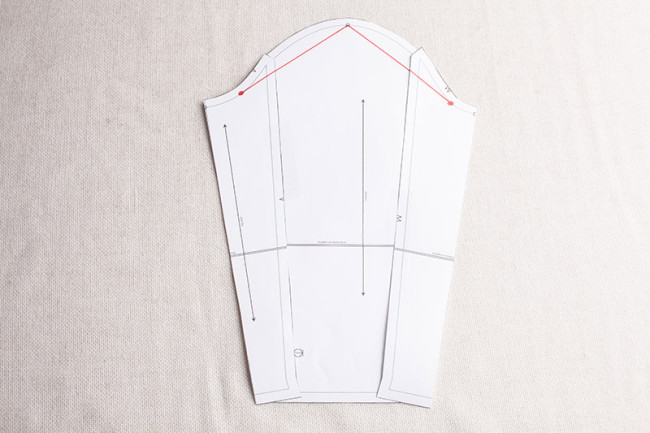
3. Draw a pivot point at the armhole curve of lower sleeve (N) on each side, as shown. Draw a line from these points toward the circle marking the top of the sleeve cap (red line).
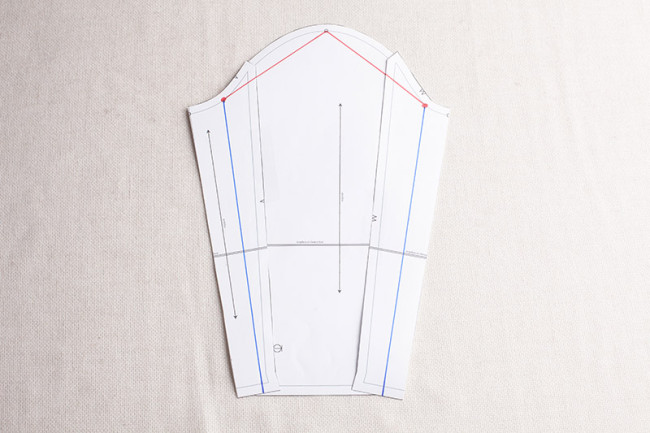
4. Draw a line from the red circle down to the cuff of the sleeve on each side (blue line).
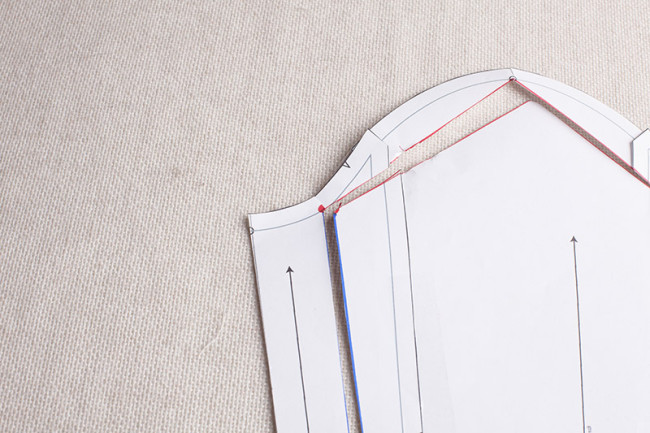
5. Slash the blue line up to the red circle. Turn and slash up to the circle at the top of the sleeve cap. Turn and slash toward the second red circle. Turn once more and slash down the second blue line through the hem. Clip the seam allowance at each red circle and at the circle at the top of the sleeve cap.
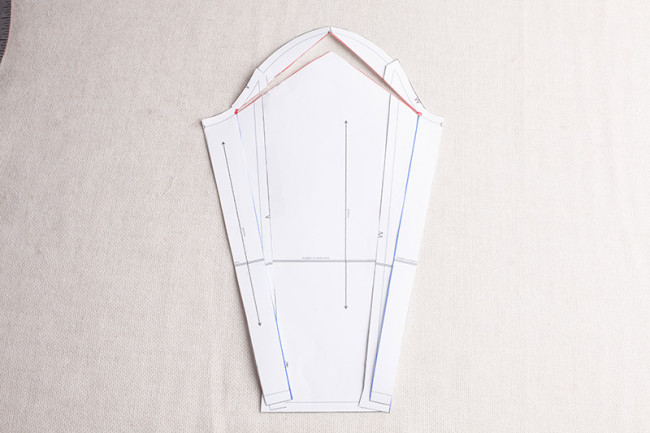
6. Pivot the pattern to raise the height of the sleeve cap, bringing the two red circles closer together. Pivot the sides to maintain their angle with the rest of the sleeve. Your sleeve will now be narrower, with a higher sleeve cap. You do not need to change the armhole.
When You’ve finished
Now that you’ve altered your fit and pattern, you may feel like creating another test version. This is entirely up to you and how severe the changes you’ve made are. For minor changes, you may feel confident moving on to cut your real fabric. For big changes, you may want to give it another test.
Comments
Thanks so much for this alteration! After you’ve made the alteration, do you have any tips for how to transfer those changes onto the pattern pieces to maintain the two-piece sleeve? Thanks!
What I would do is tape some paper under the gaps to keep the altered piece more stable. Then, I’d probably just cut it apart along the seam lines of the two piece sleeve.
Then retrace your upper sleeve piece, adding the seam allowance back in at the sleeves.
Tape the lower sleeve piece back together (so it’s the same as before you cut it in half). Retrace the piece, adding the seam allowance back in on each side.
I have had a lot of problems in the past with the sleeves being too tight. Could I use this adjustment and add in between the slashes rather than subtract? Would it work for normal shirt sleeves? Thank you so much for these adjustments!!!
Yes, you can basically do the same but in reverse.
If the actual armhole is too small for you also, you probably want to try a different adjustment though. This one won’t affect the shape of the armhole.
Yes, The armholes are always too small and often the arm as well. Usually I add a half inch to the arm width and then cut off a half inch to lower the armpit. What other adjustments could I do?