

Version 1
Drawstring Hood

If you live in a particularly windy part of the world, keeping a hood firmly on your head during those blustery days can be a challenge. Follow this simple tutorial to install a drawstring into the hem of your hood, and it will be guaranteed to stay in place.
Supplies
1 yard of cotton cording
2 adjustable drawstring closures
1 small safety pin
Marking pen or chalk
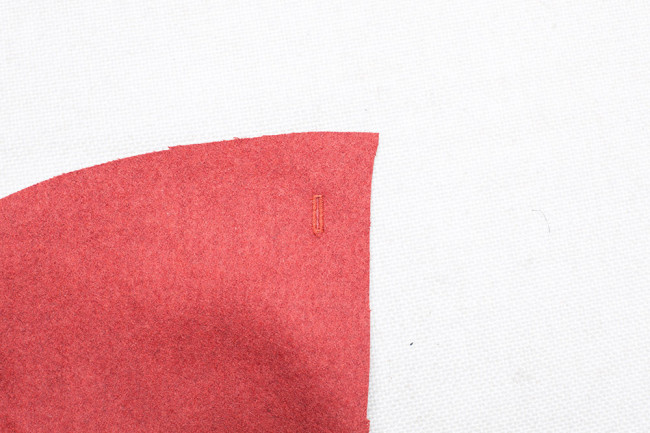
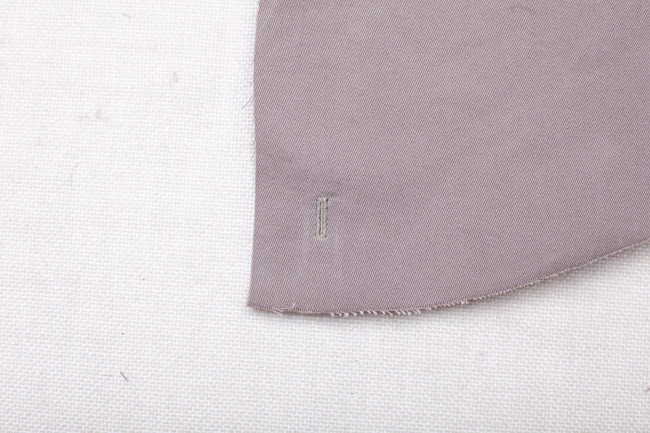
1. On the hood side panel, measure 1” in from the hem and 1 1/4” up from the neckline and mark a point. Draw a 1/2” line up from this point. This will be your buttonhole placement.
2. Repeat for the other hood side panel.
3. Make a 1/2” buttonhole at each mark.
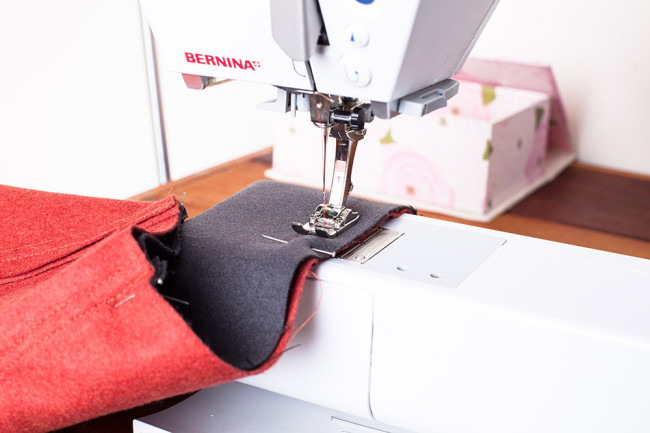
4. Sew the hood and install the hood lining according to the pattern directions.
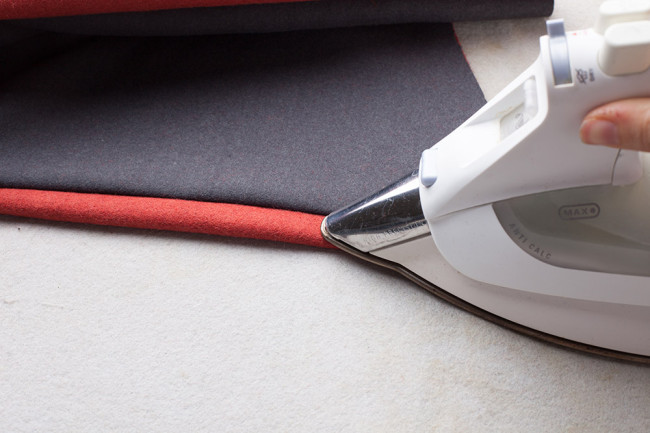
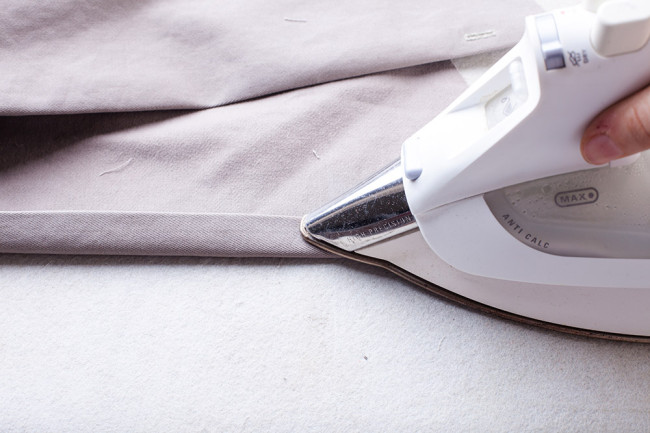
5. Press. Since you trimmed the lining a 5/8” hem should form.
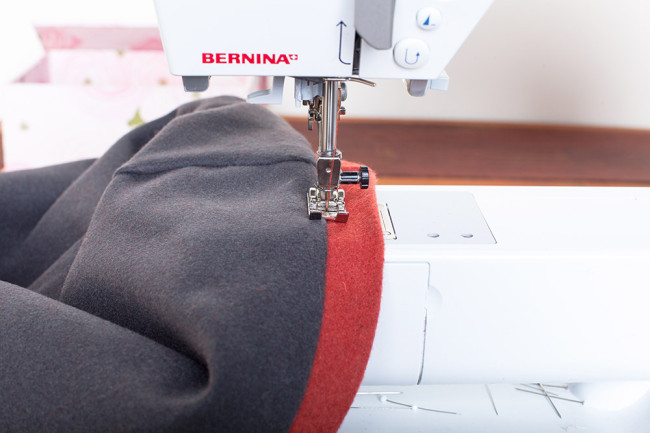
6. Stitch in the ditch along the hem of the hood.
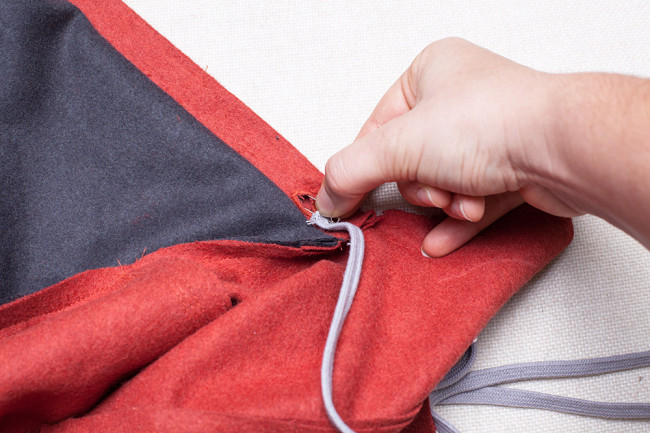
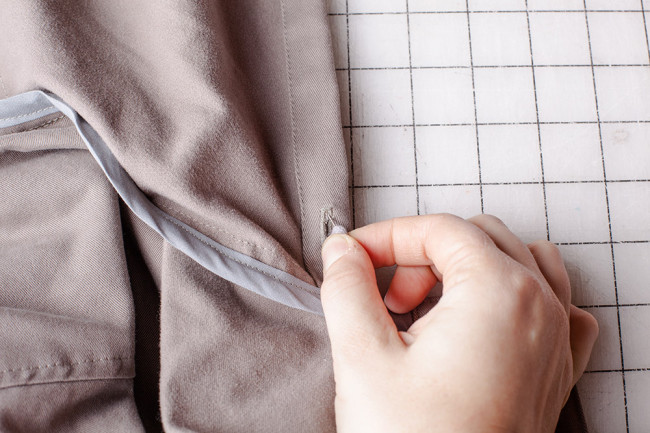
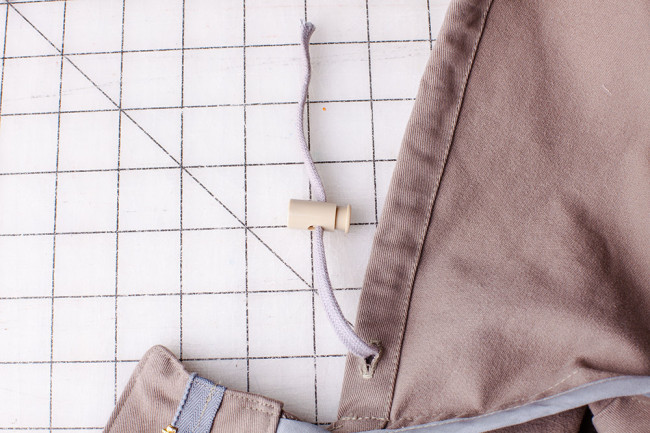
7. Pin a small safety pin to one end of the cotton cording. Insert the safety pin into the buttonhole and work the safety pin and cording through the drawstring casing.
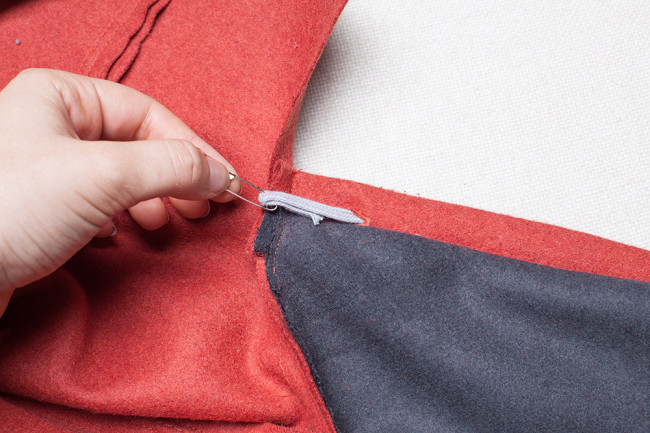
8. Pull the safety pin and a few inches of the cording out through the opposite buttonhole.
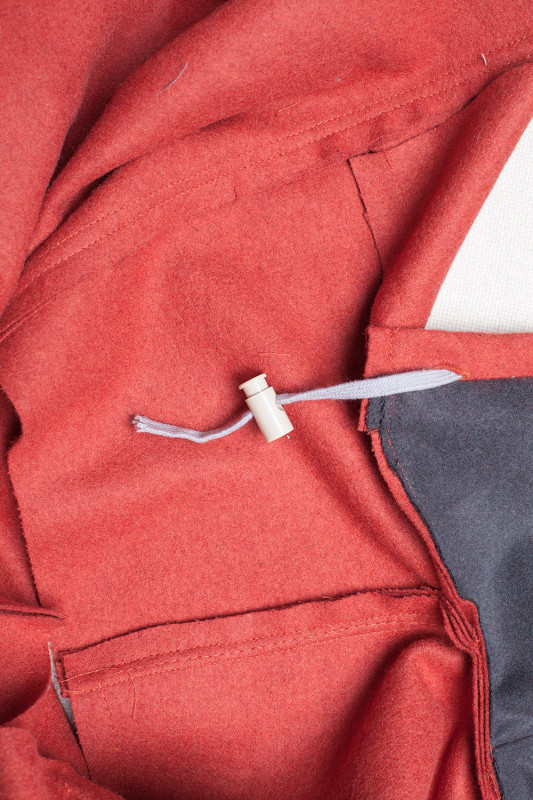
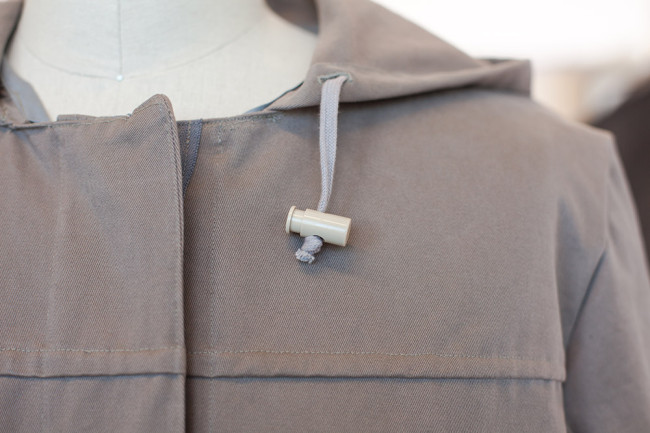
9. Slip a drawstring closure on each end of the cording.
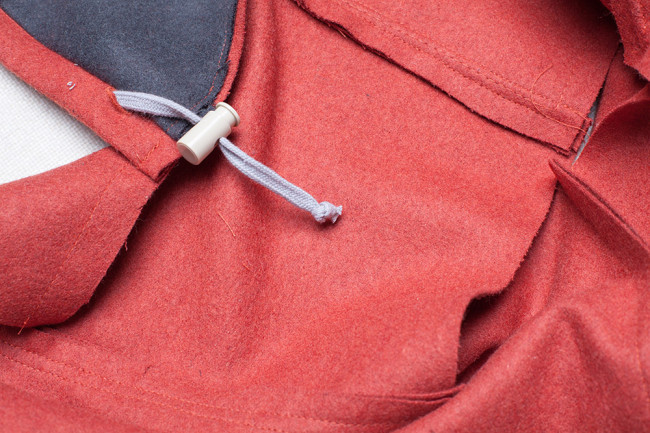
10. Tie a knot at each end of the cording. trim any excess from the tail.
Version 2
: Drawstring Hood
Supplies
1 yard of cotton cording
2 adjustable drawstring closures
1 small safety pin
Marking pen or chalk

1. On the hood side panel, measure 1” in from the hem and 1 1/4” up from the neckline and mark a point. Draw a 1/2” line up from this point. This will be your buttonhole placement. Repeat for the other hood side panel.
2. Make a 1/2” buttonhole at each mark.
3. Sew the hood according to the pattern instructions.
4. Press the hood under 5/8”, turn the hem and press under 3/4”.

5. Edgestitch along the hem of the hood.
6. Pin a small safety pin to one end of the cotton cording. Insert the safety pin into the buttonhole and work the safety pin and cording through the drawstring casing.
7. Pull the safety pin and a few inches of the cording out through the opposite buttonhole. Slip a drawstring closure on each end of the cording.
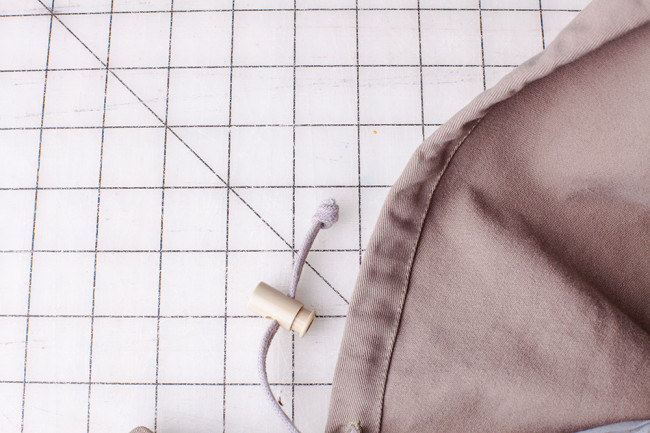
8. Tie a knot at each end of the cording. Trim any excess from the tail.
Comments
Had a quick question regarding version 1, step 5. It says: “Since you trimmed the lining a 5/8” hem should form”….
I don’t recall seeing anything telling me I had to trim the lining. Did I miss something?
Thanks!
Hi Matt. If you take a look at the pattern pieces for the hood, there’s a line that says something like “Cut here for Version 1 lining”. So when you cut the lining pieces out, you are meant to cut along that line. If you haven’t done that yet, it’s no problem, you can trim it at this point as well.